Overlanding
Conversion/Up Fitting
4wd Drivetrain
Hard Top and Roof Additions
24-Inch Hard Top
Roof Rack
Exterior Roof Lights
Pull-up Bar
Original Vehicle Specs
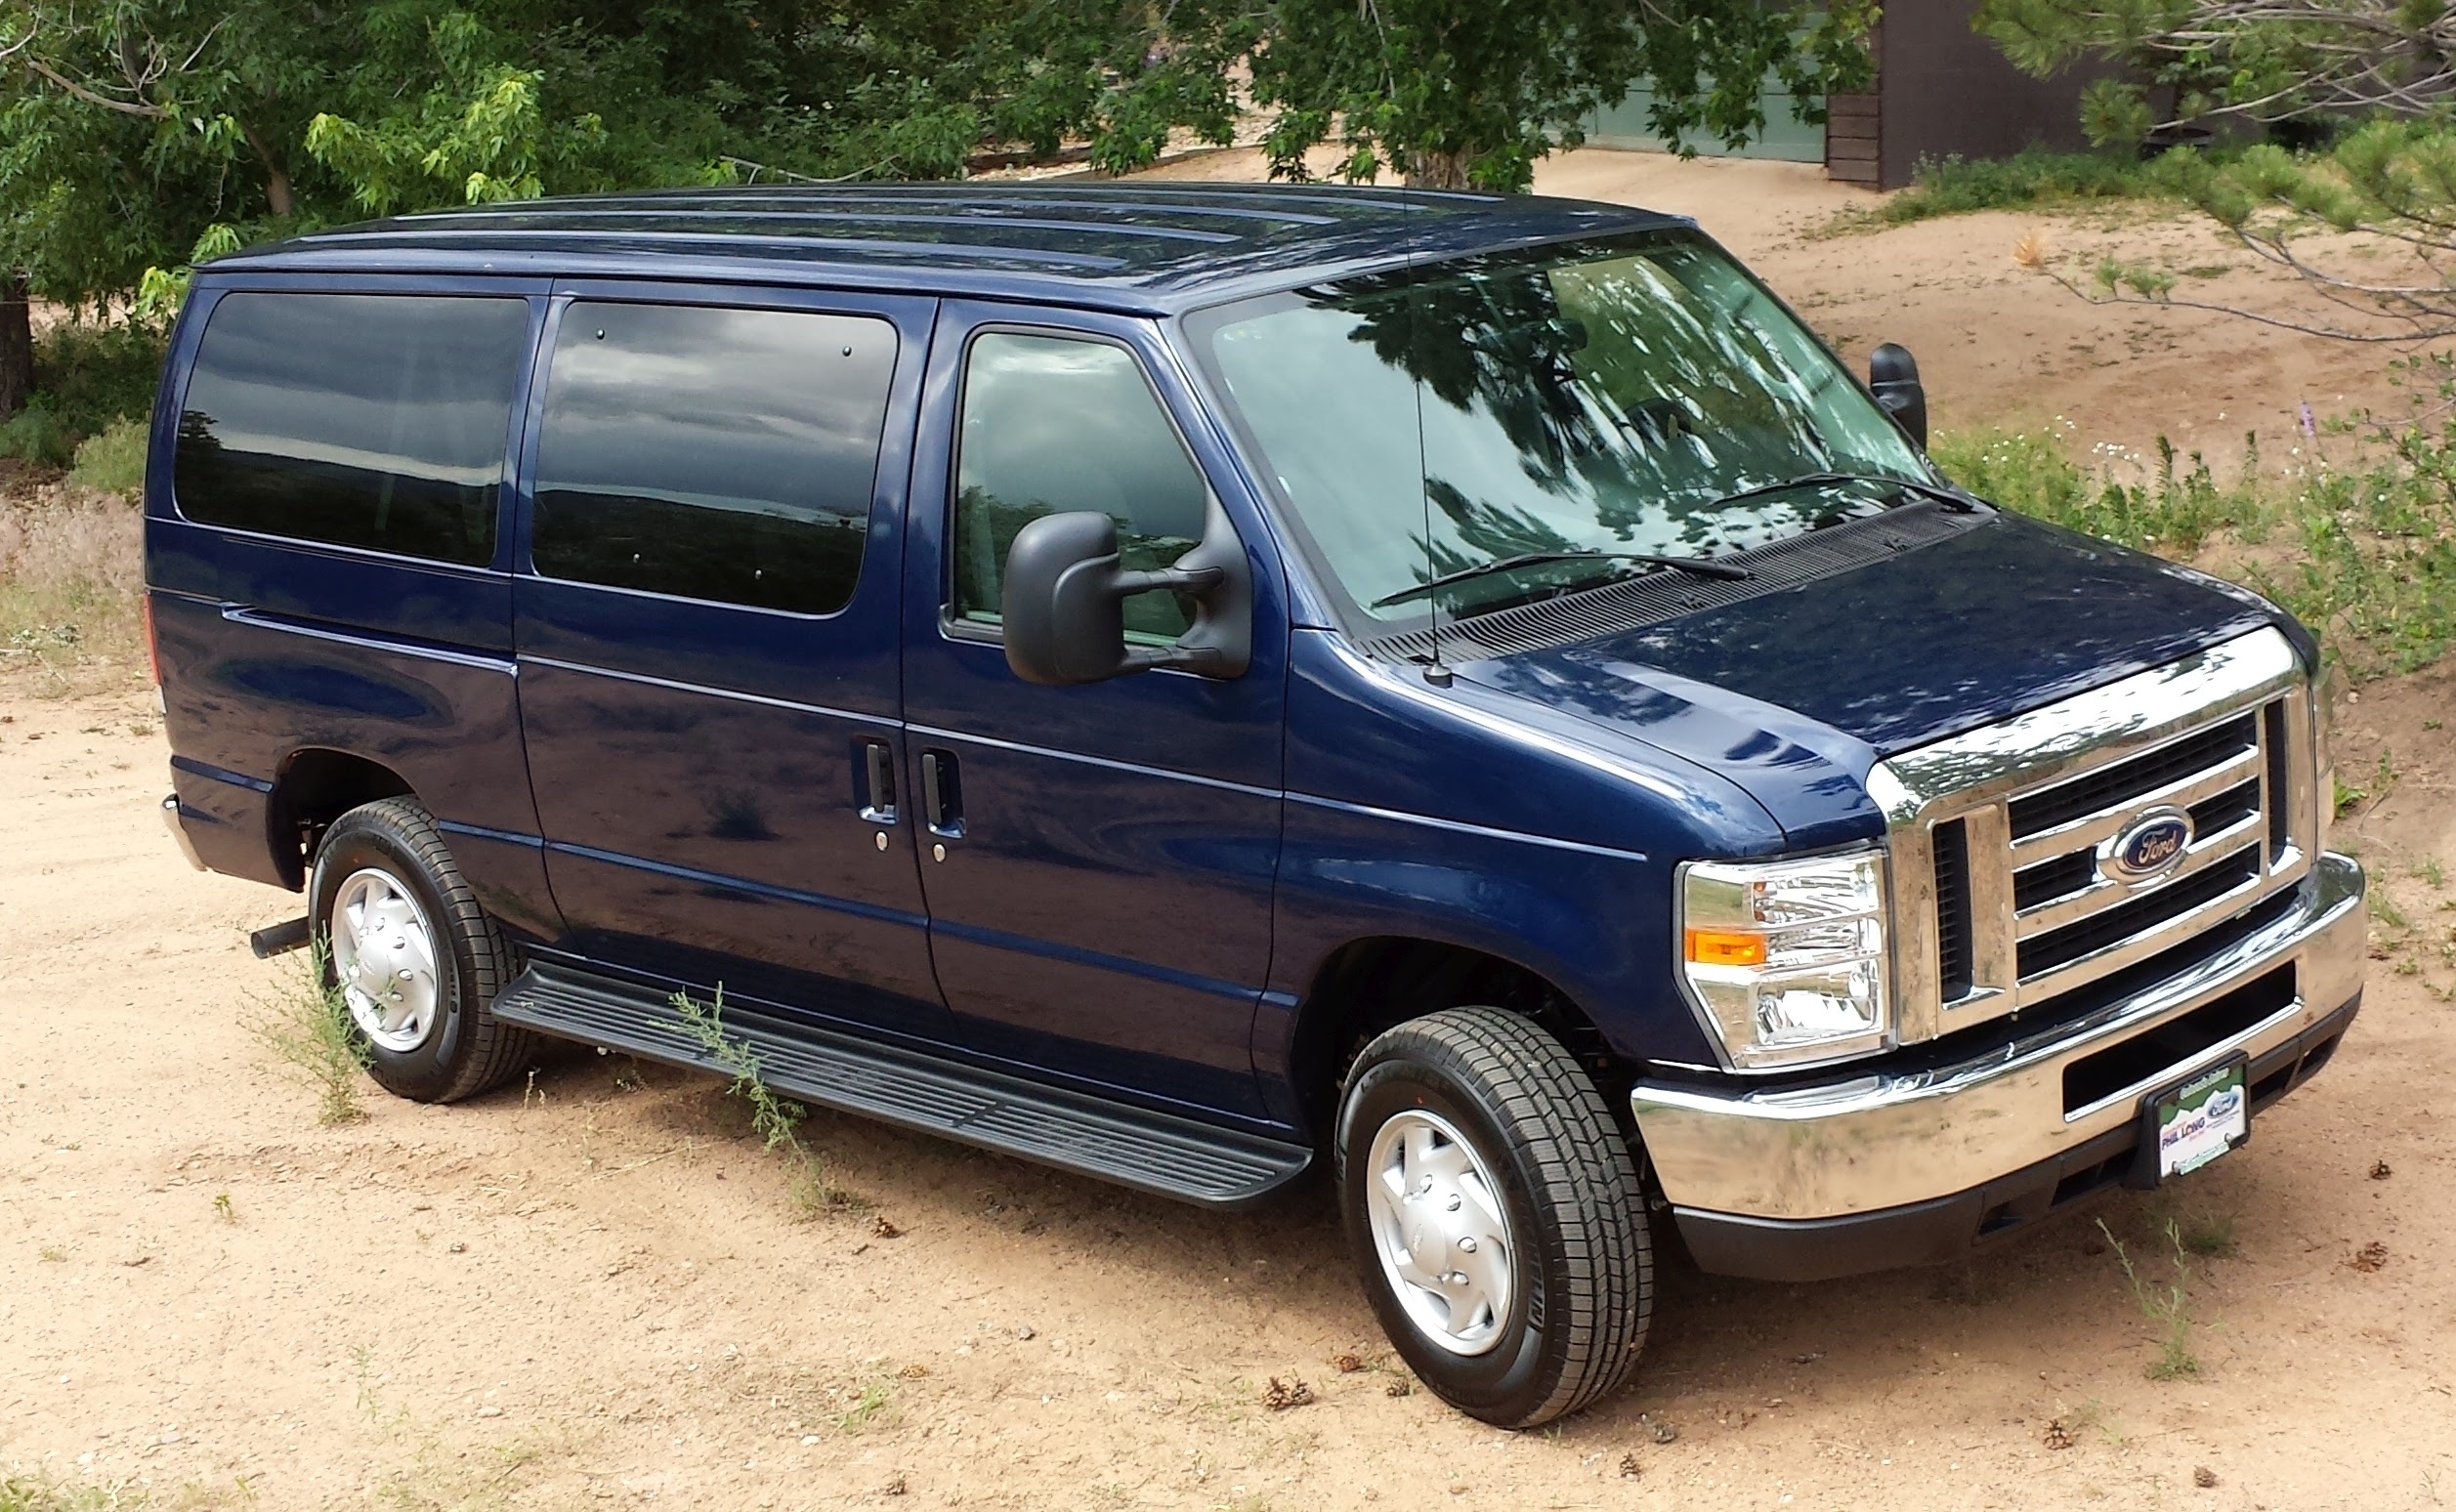
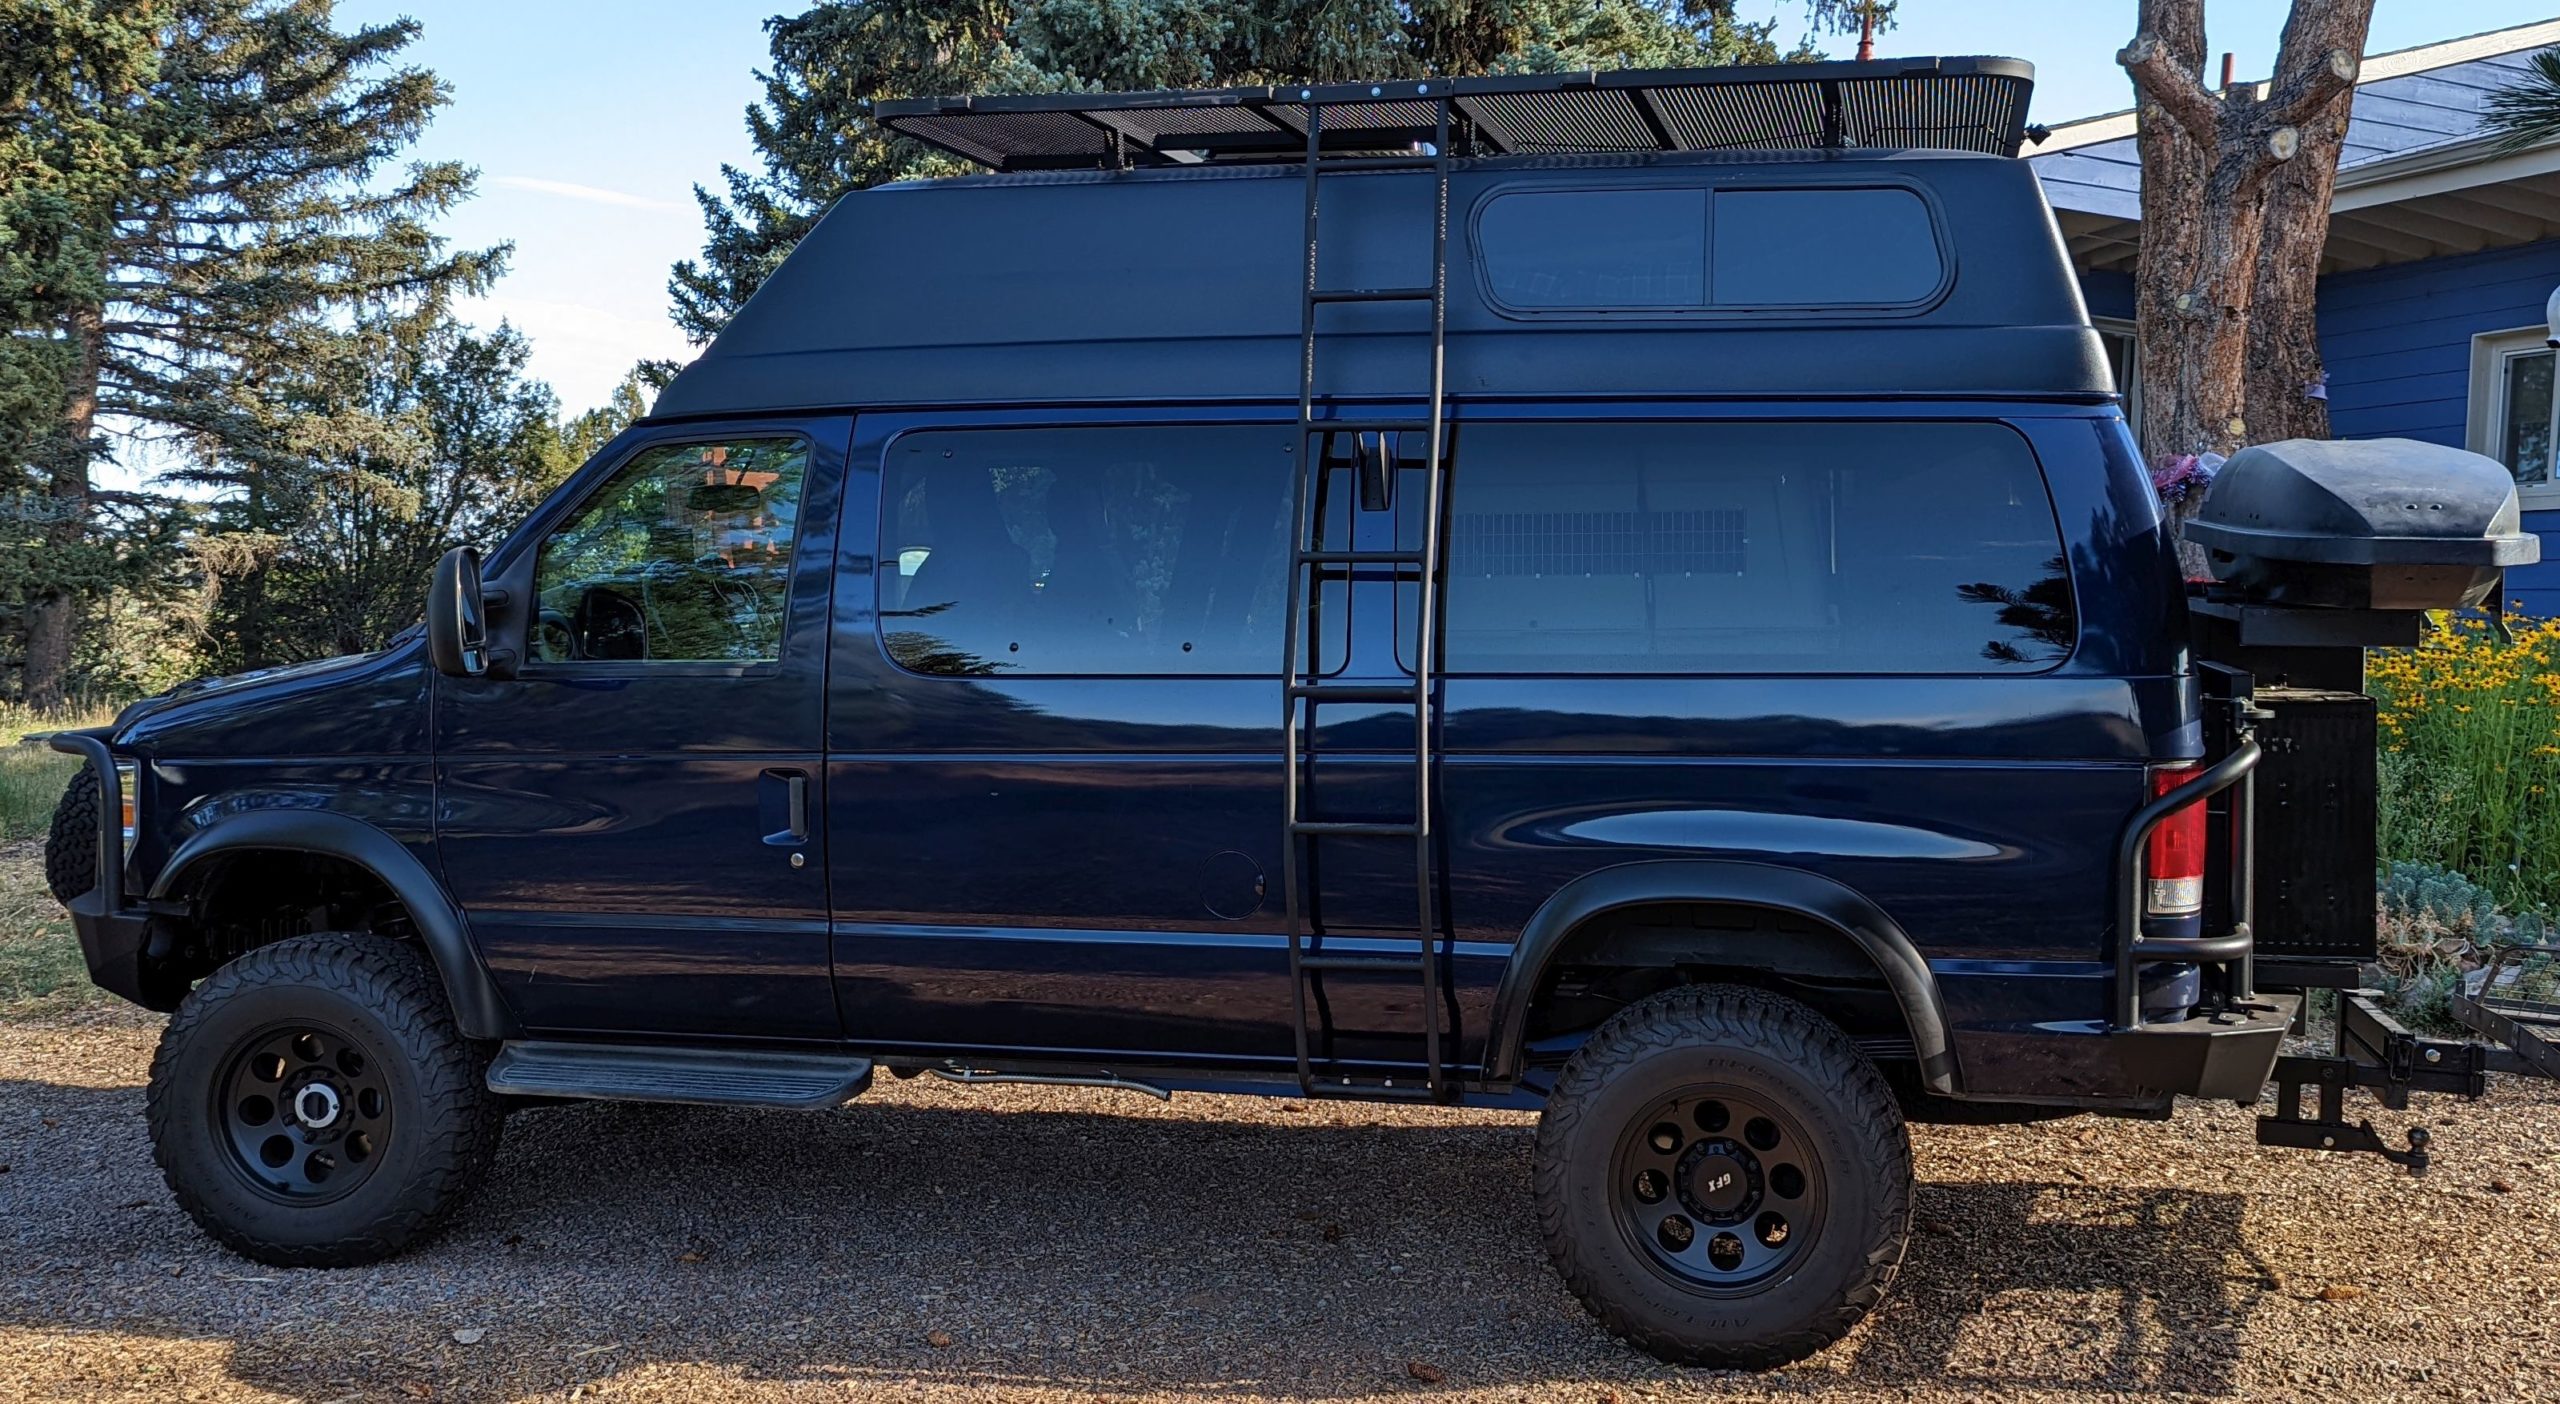
A 2014 Ford E150 XL Van purchased new with a 5.4 liter gas engine, standard size cab. Since the conversion would automatically convert the drivetrain, axels and springs to a 350 model, we paid less going with the 150 model.
We purchased at end of 2014, the last model year for the Econoline van models. This was a good thing because it is easy to convert and upfit these models versus the newer transit models, and we wanted the big standard 8 cylinder engine that are no longer available on Ford vans.
The van is a standard size, not extended. We wanted something that is a swiss army knife for all-around use, allowing for up to a few nights of overnight use but still small so that it is easy to drive, easy to park and serves us well for regular running around town.
Pre-build General Requirements
4wd capable, but not overboard with wheel size and clearance capabilities, so that it was easy to drive at highway speeds but offer robust 4wd and off road capabilities.
Replace gearing with 4.1 for better performance in mountain driving.
Maximize the internal floor space for basic everyday use, such as picking up lumber and supplies for use on our farm and hauling dogs and crates. Filling the floor space with permament beds, a kitchen and other builds would negate use as a multi-function vehicle:
We sacrificed having a shower and bathroom (we use a small port-a-potty and a portable shower we MacGyver’d)
Bed space in the ceiling, which can be easily disassembled if the space is needed for other purposes
No kitchen built-in as we will mostly pre-cook what we need and use the freezer/fridge, but we can setup a full kitchen if needed while on the road.
High ceiling so we can stand in it.
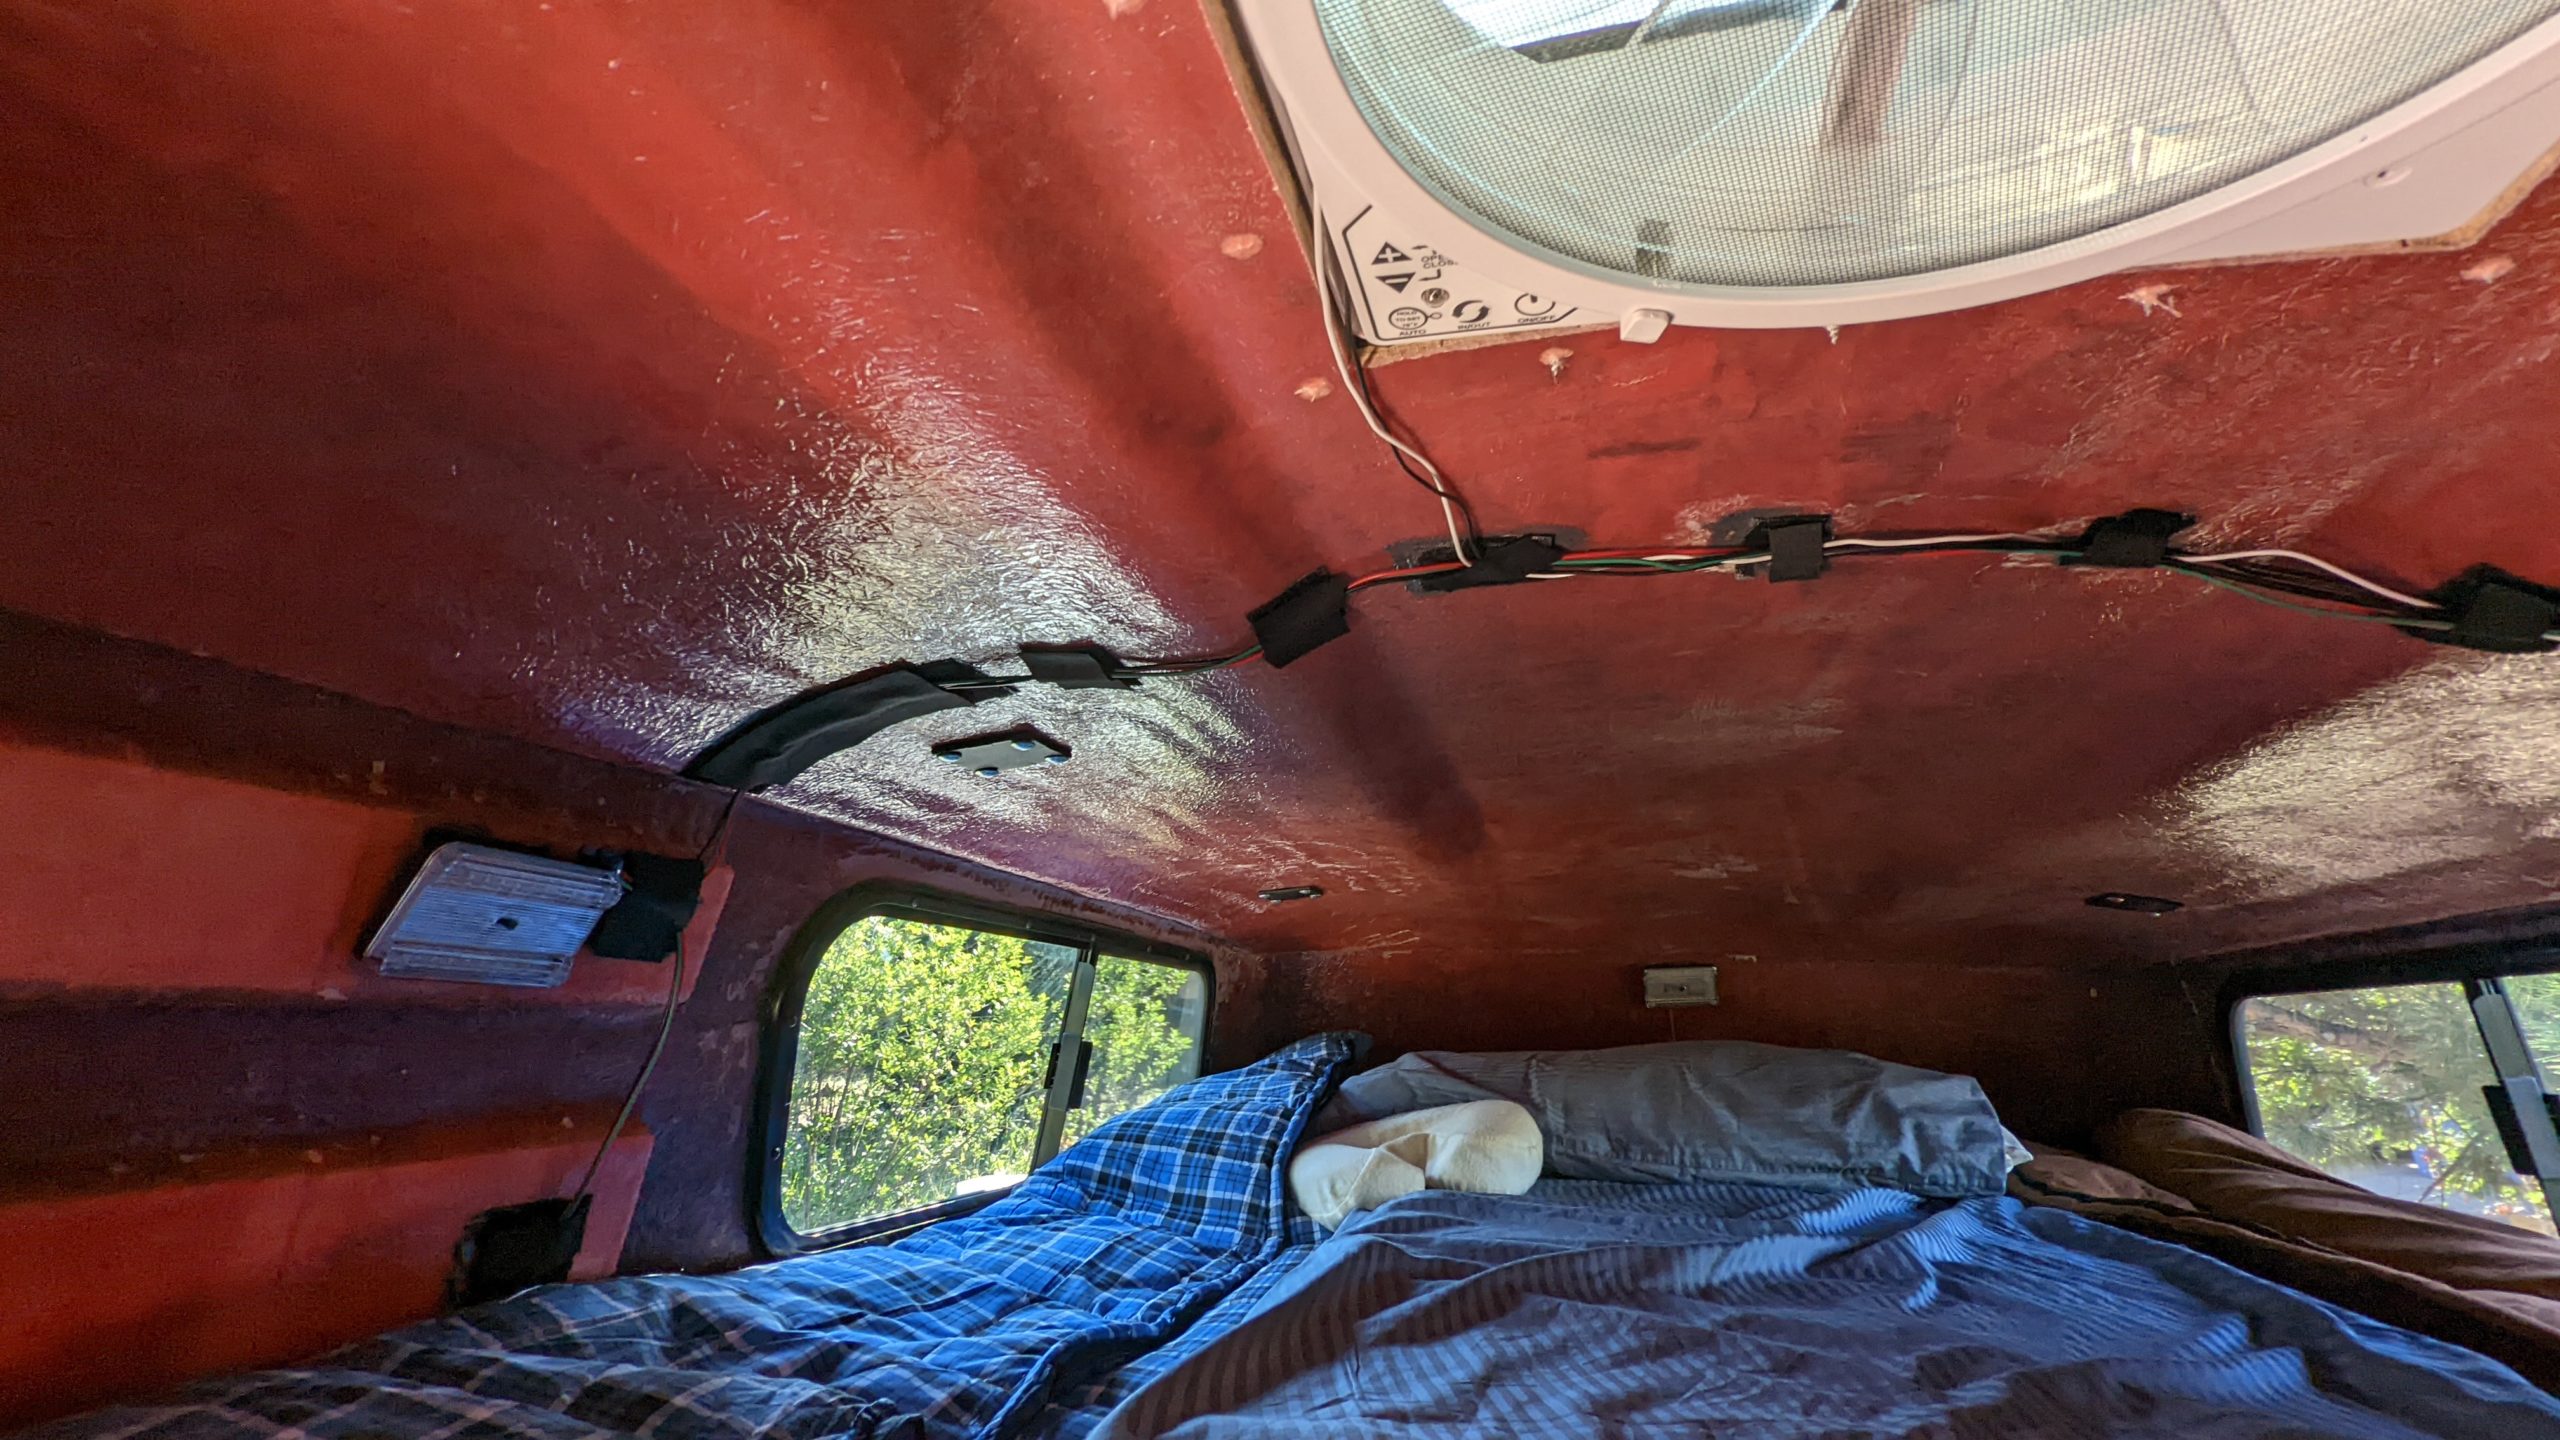
Better ventilation with windows on the side of the pop top ceiling and an overhead fan that can remain on to keep the interior heat down and well-ventilated.
Reliable – nothing fancy or complex that would reduce reliability or make it hard for any standard auto repair shop to work on.
Use a specialty conversion shop that only works on vans with ample experience to do the work. Fortunately, we have one in Colorado already.
Conversion/Up Fitting
4wd Drivetrain
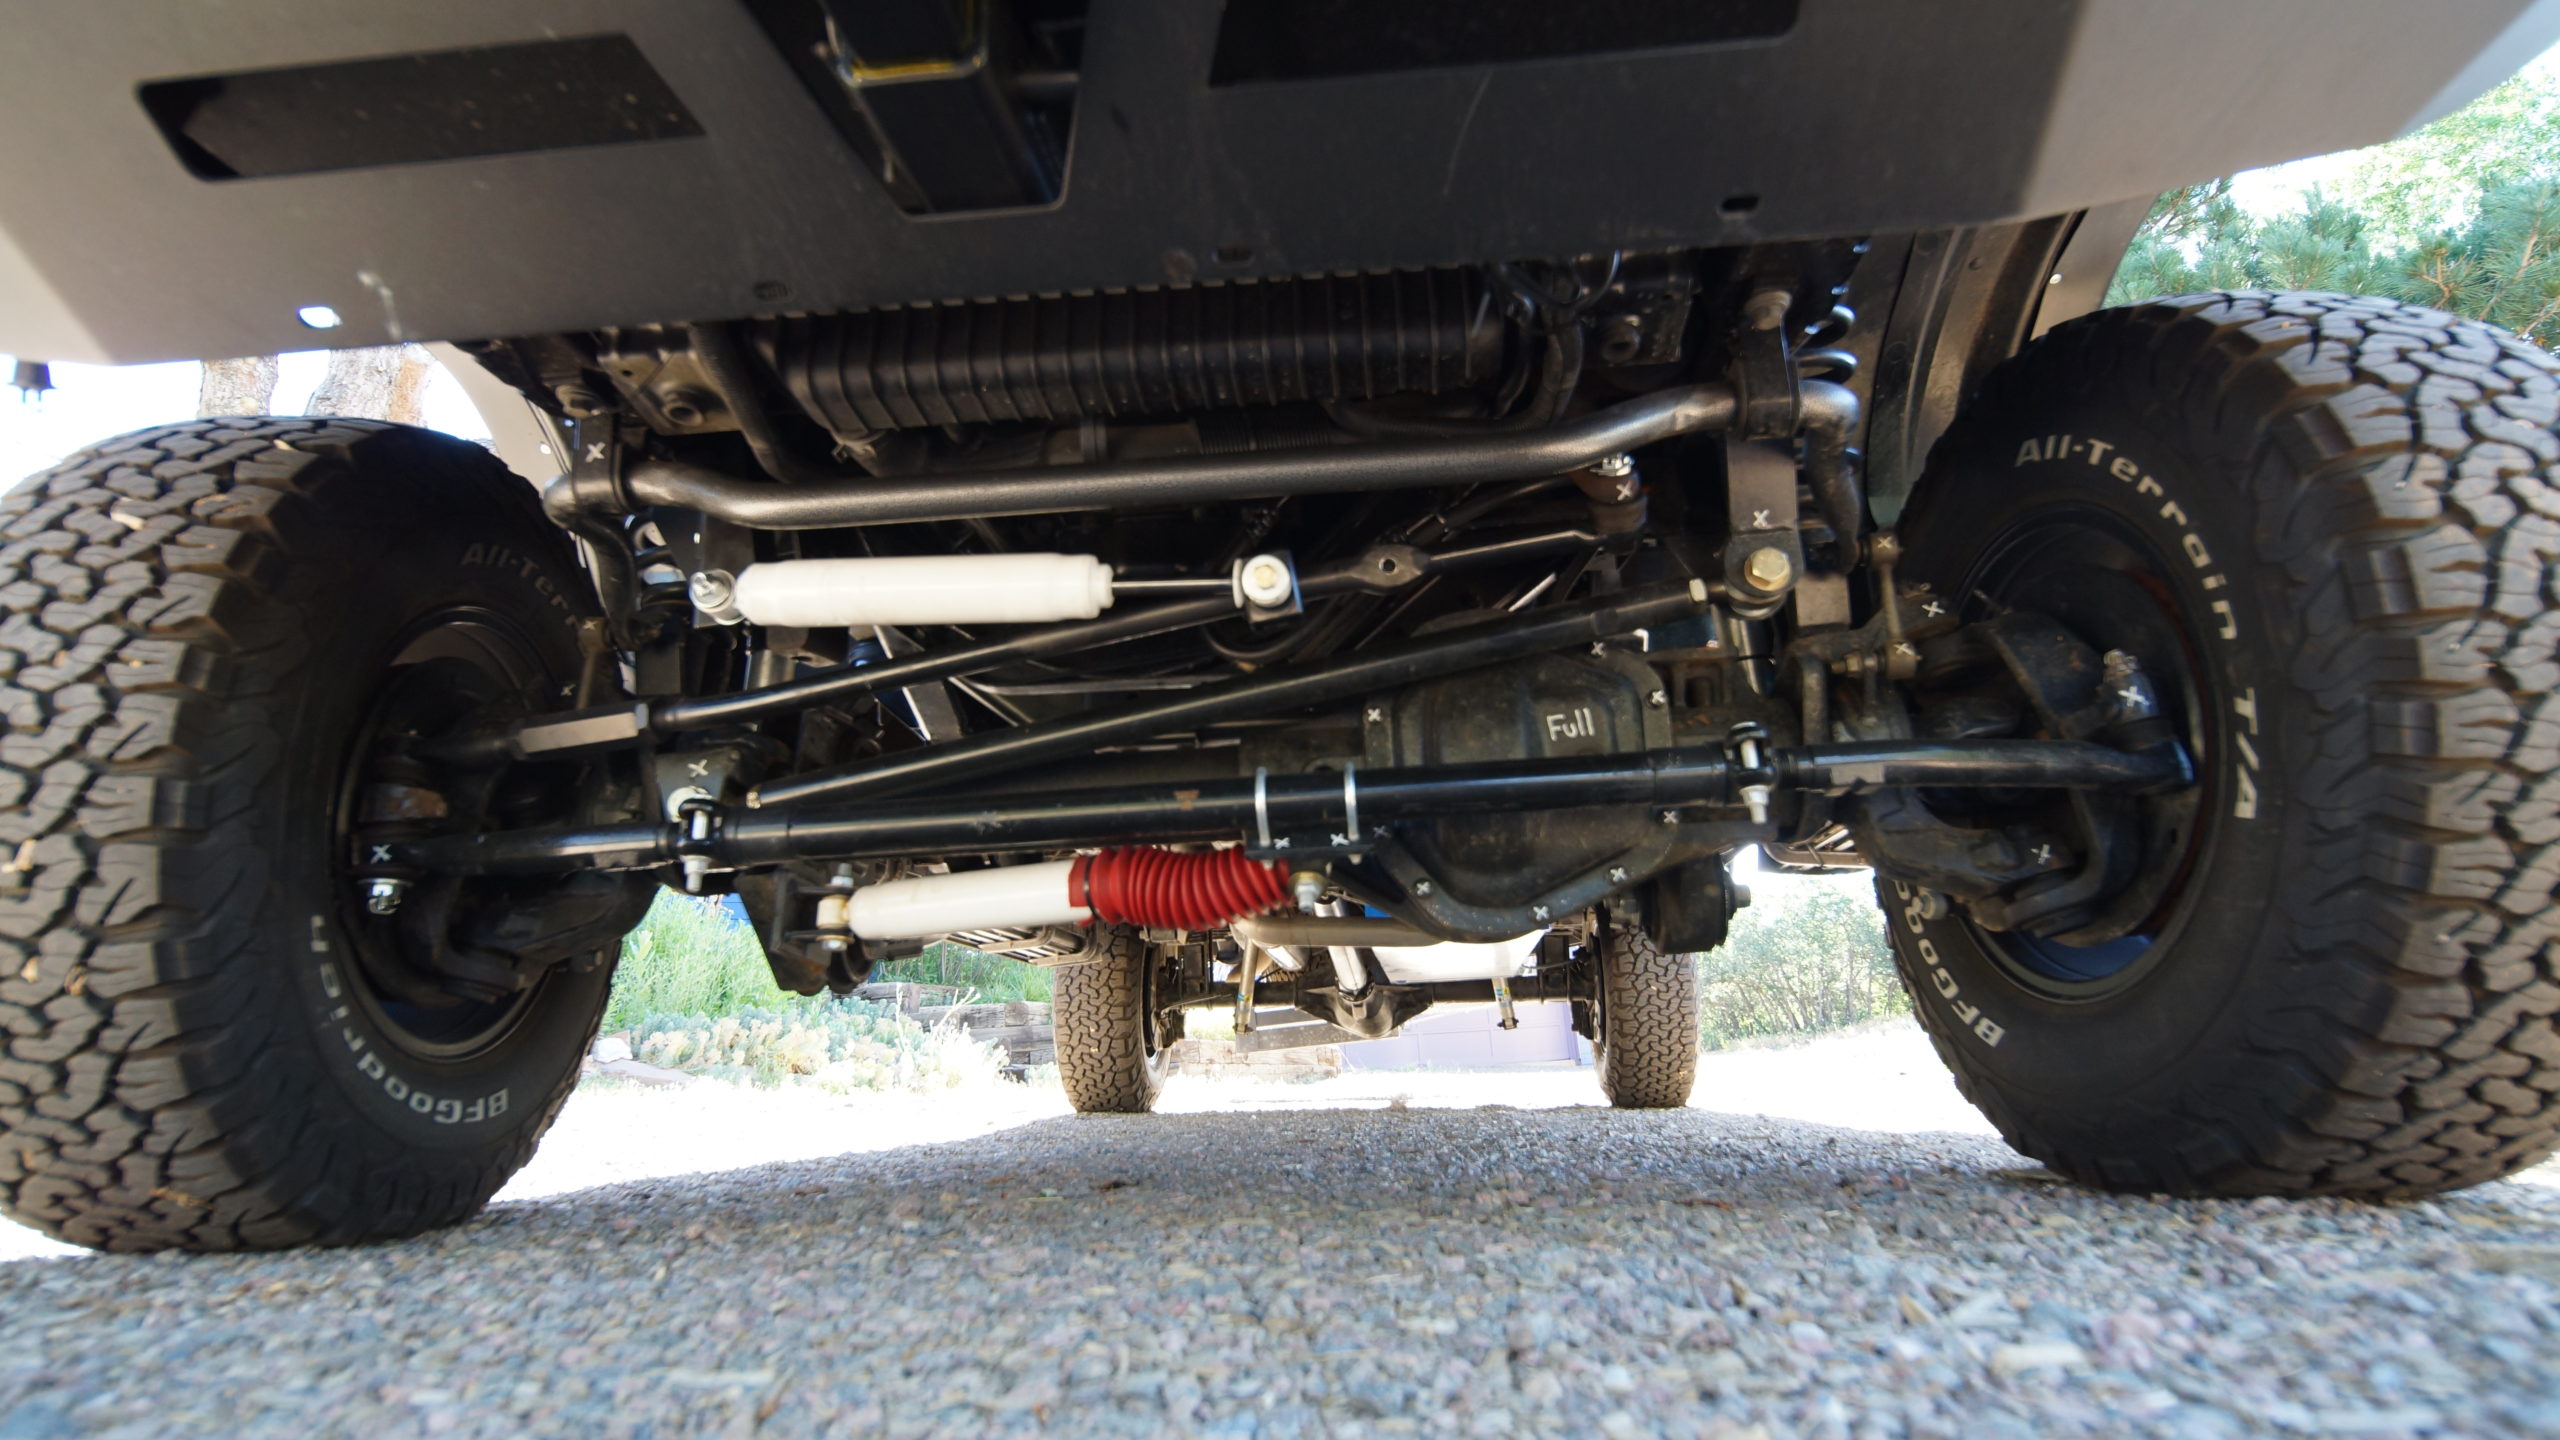
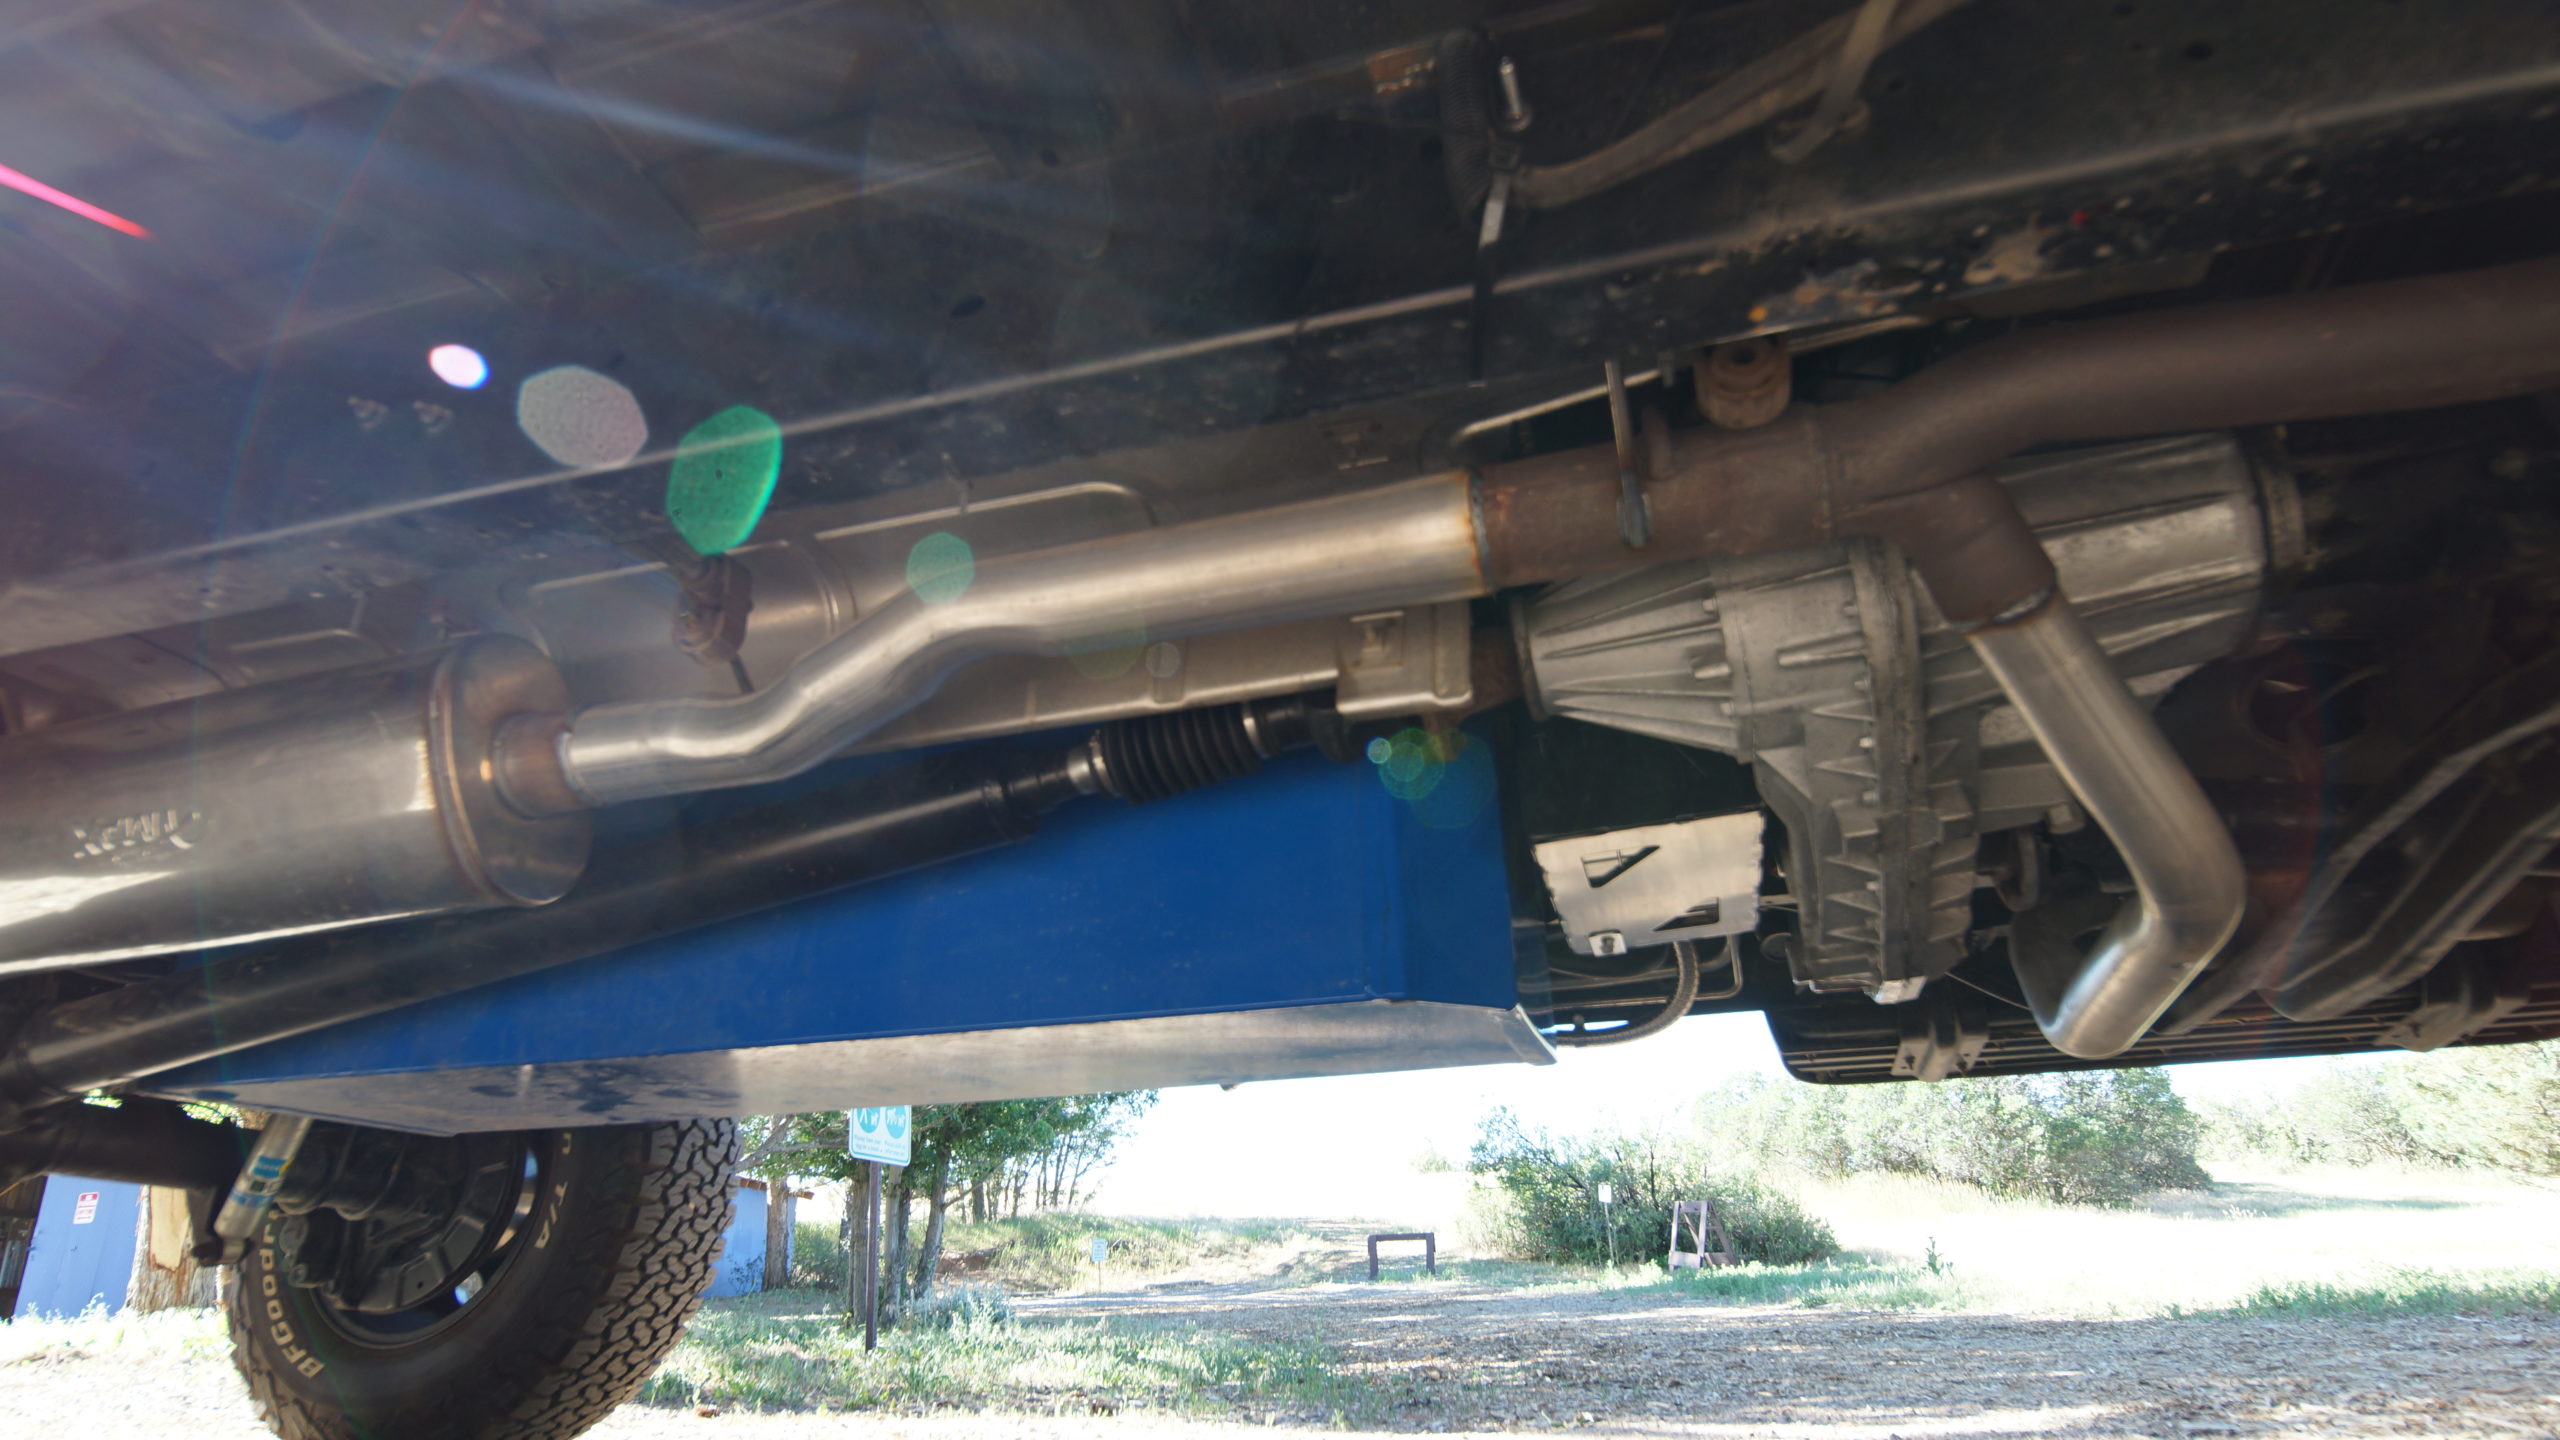
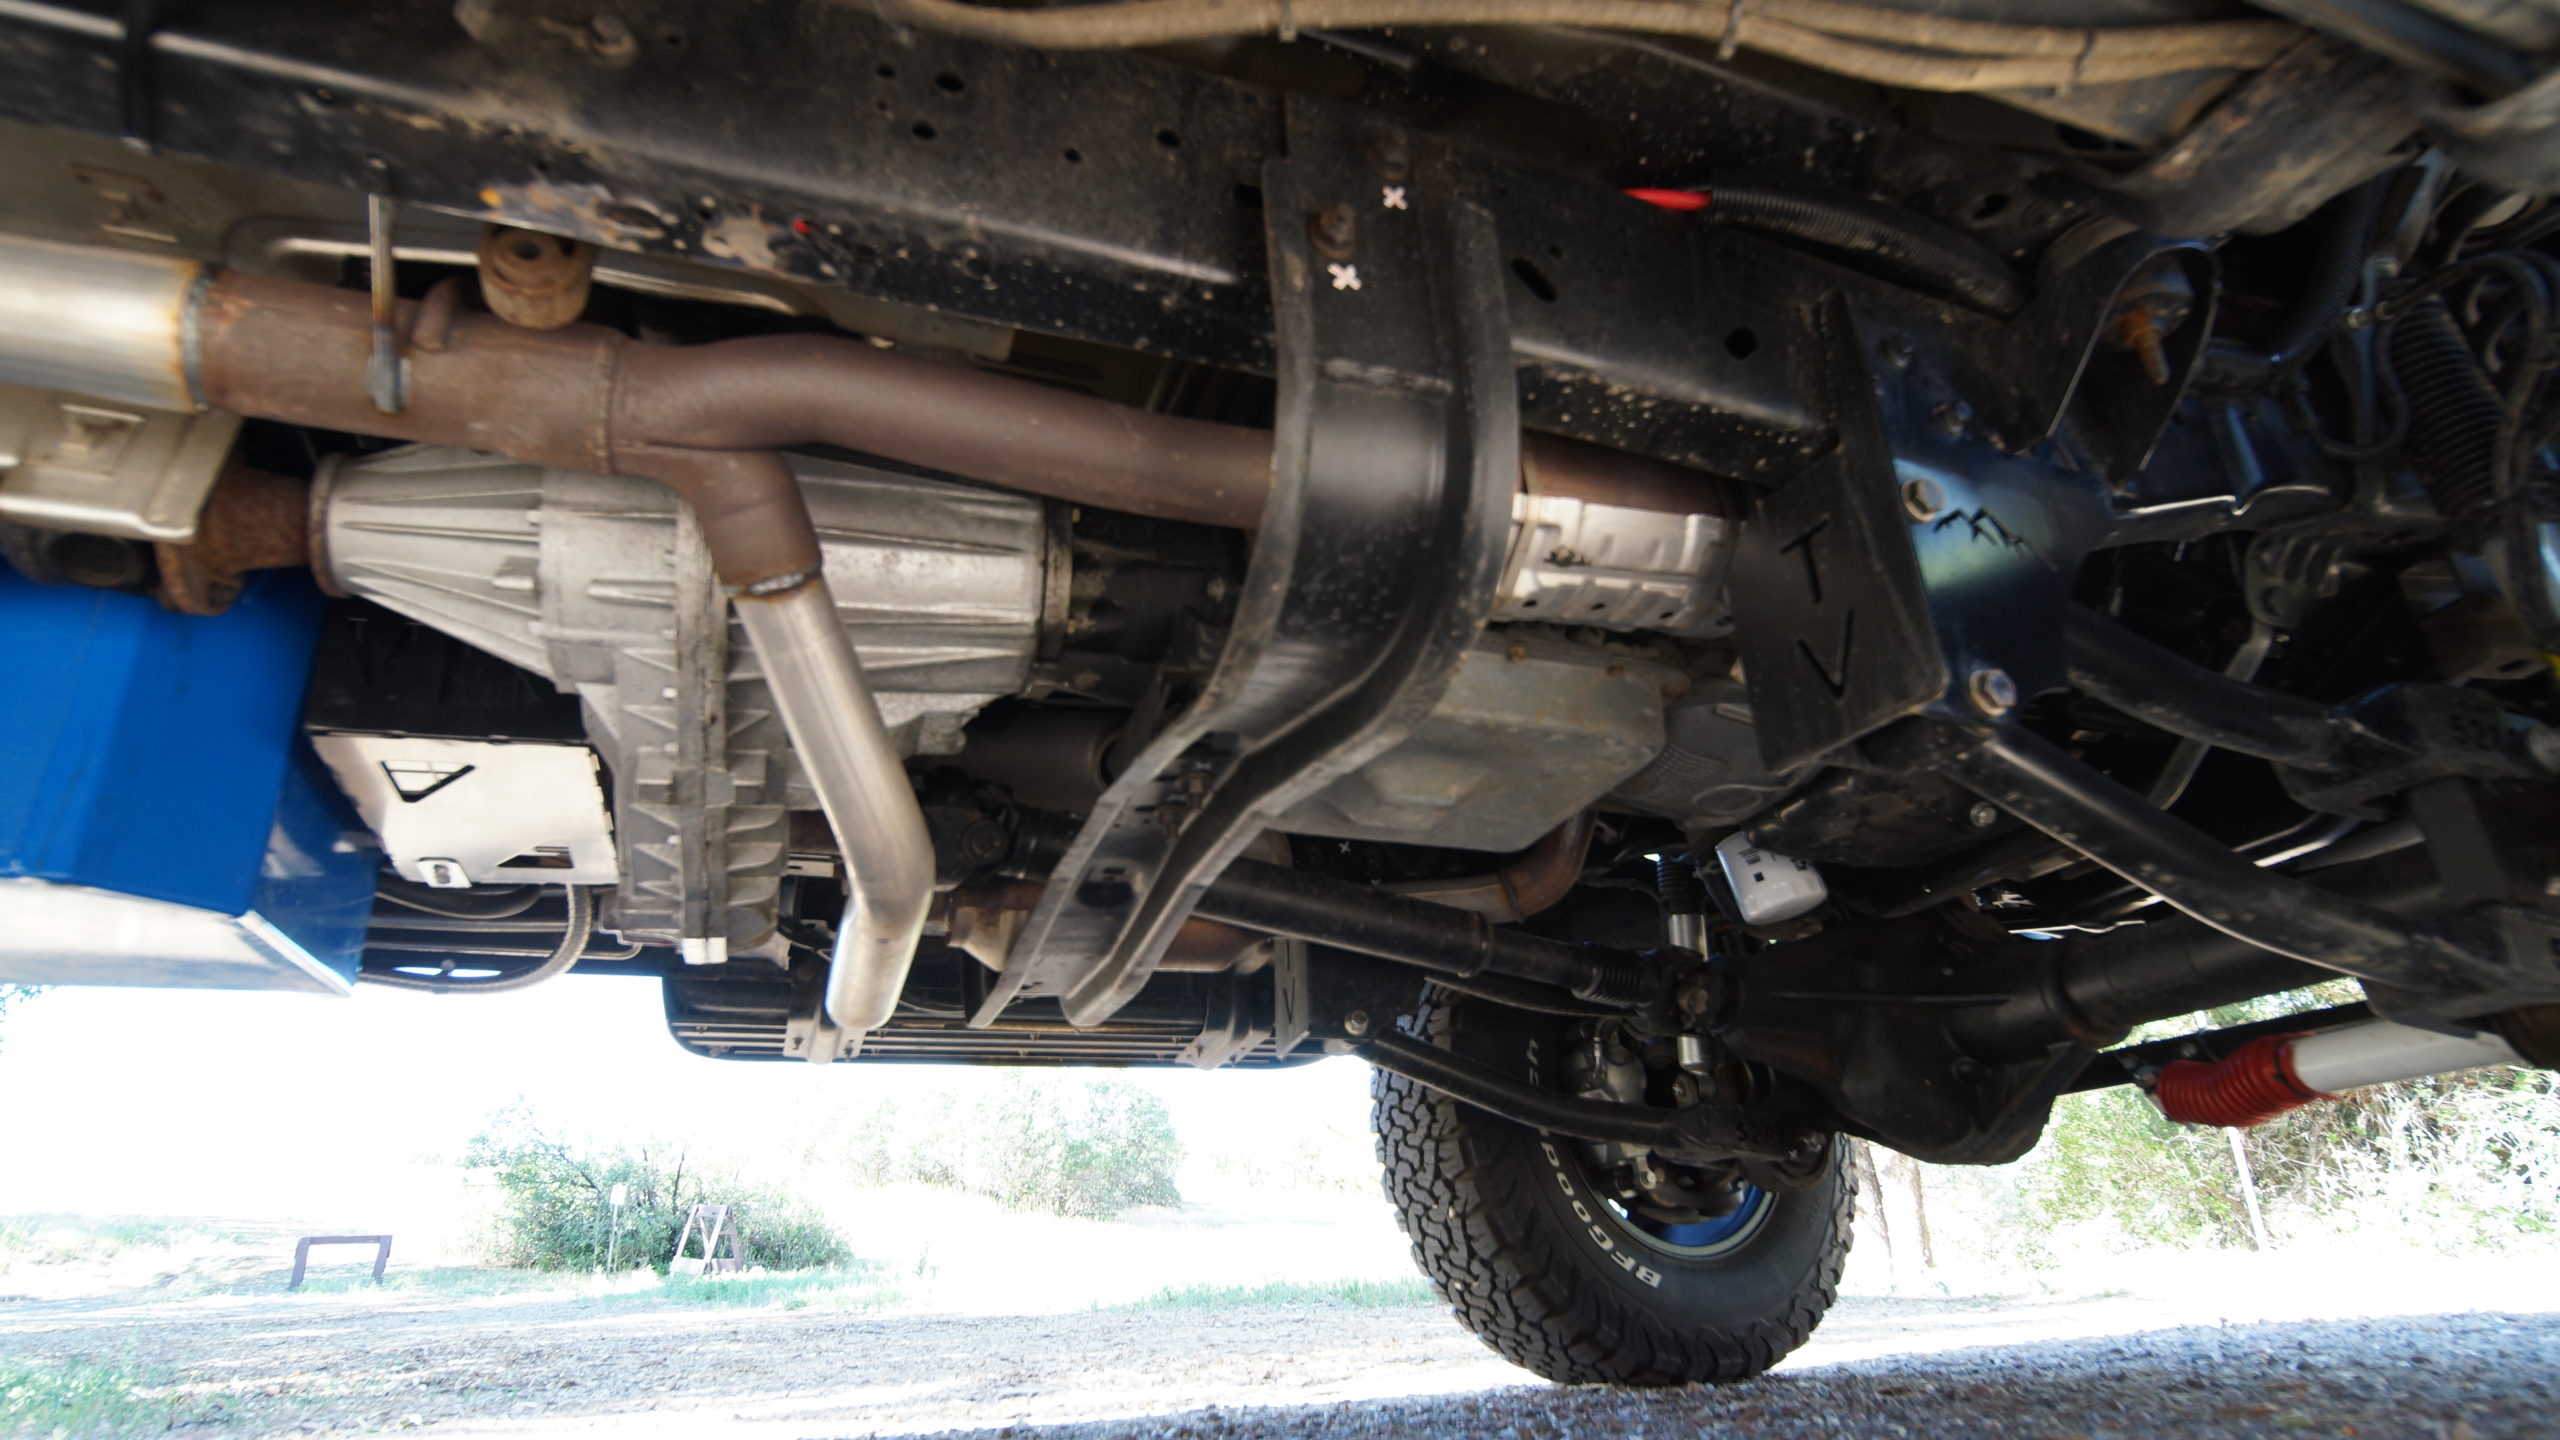
4wd conversion using Ford F350 parts and components, with some modified and custom components that our up-fitter has designed and built over their years doing van conversions:
Re-geared the axels from 3.7 to 4.10
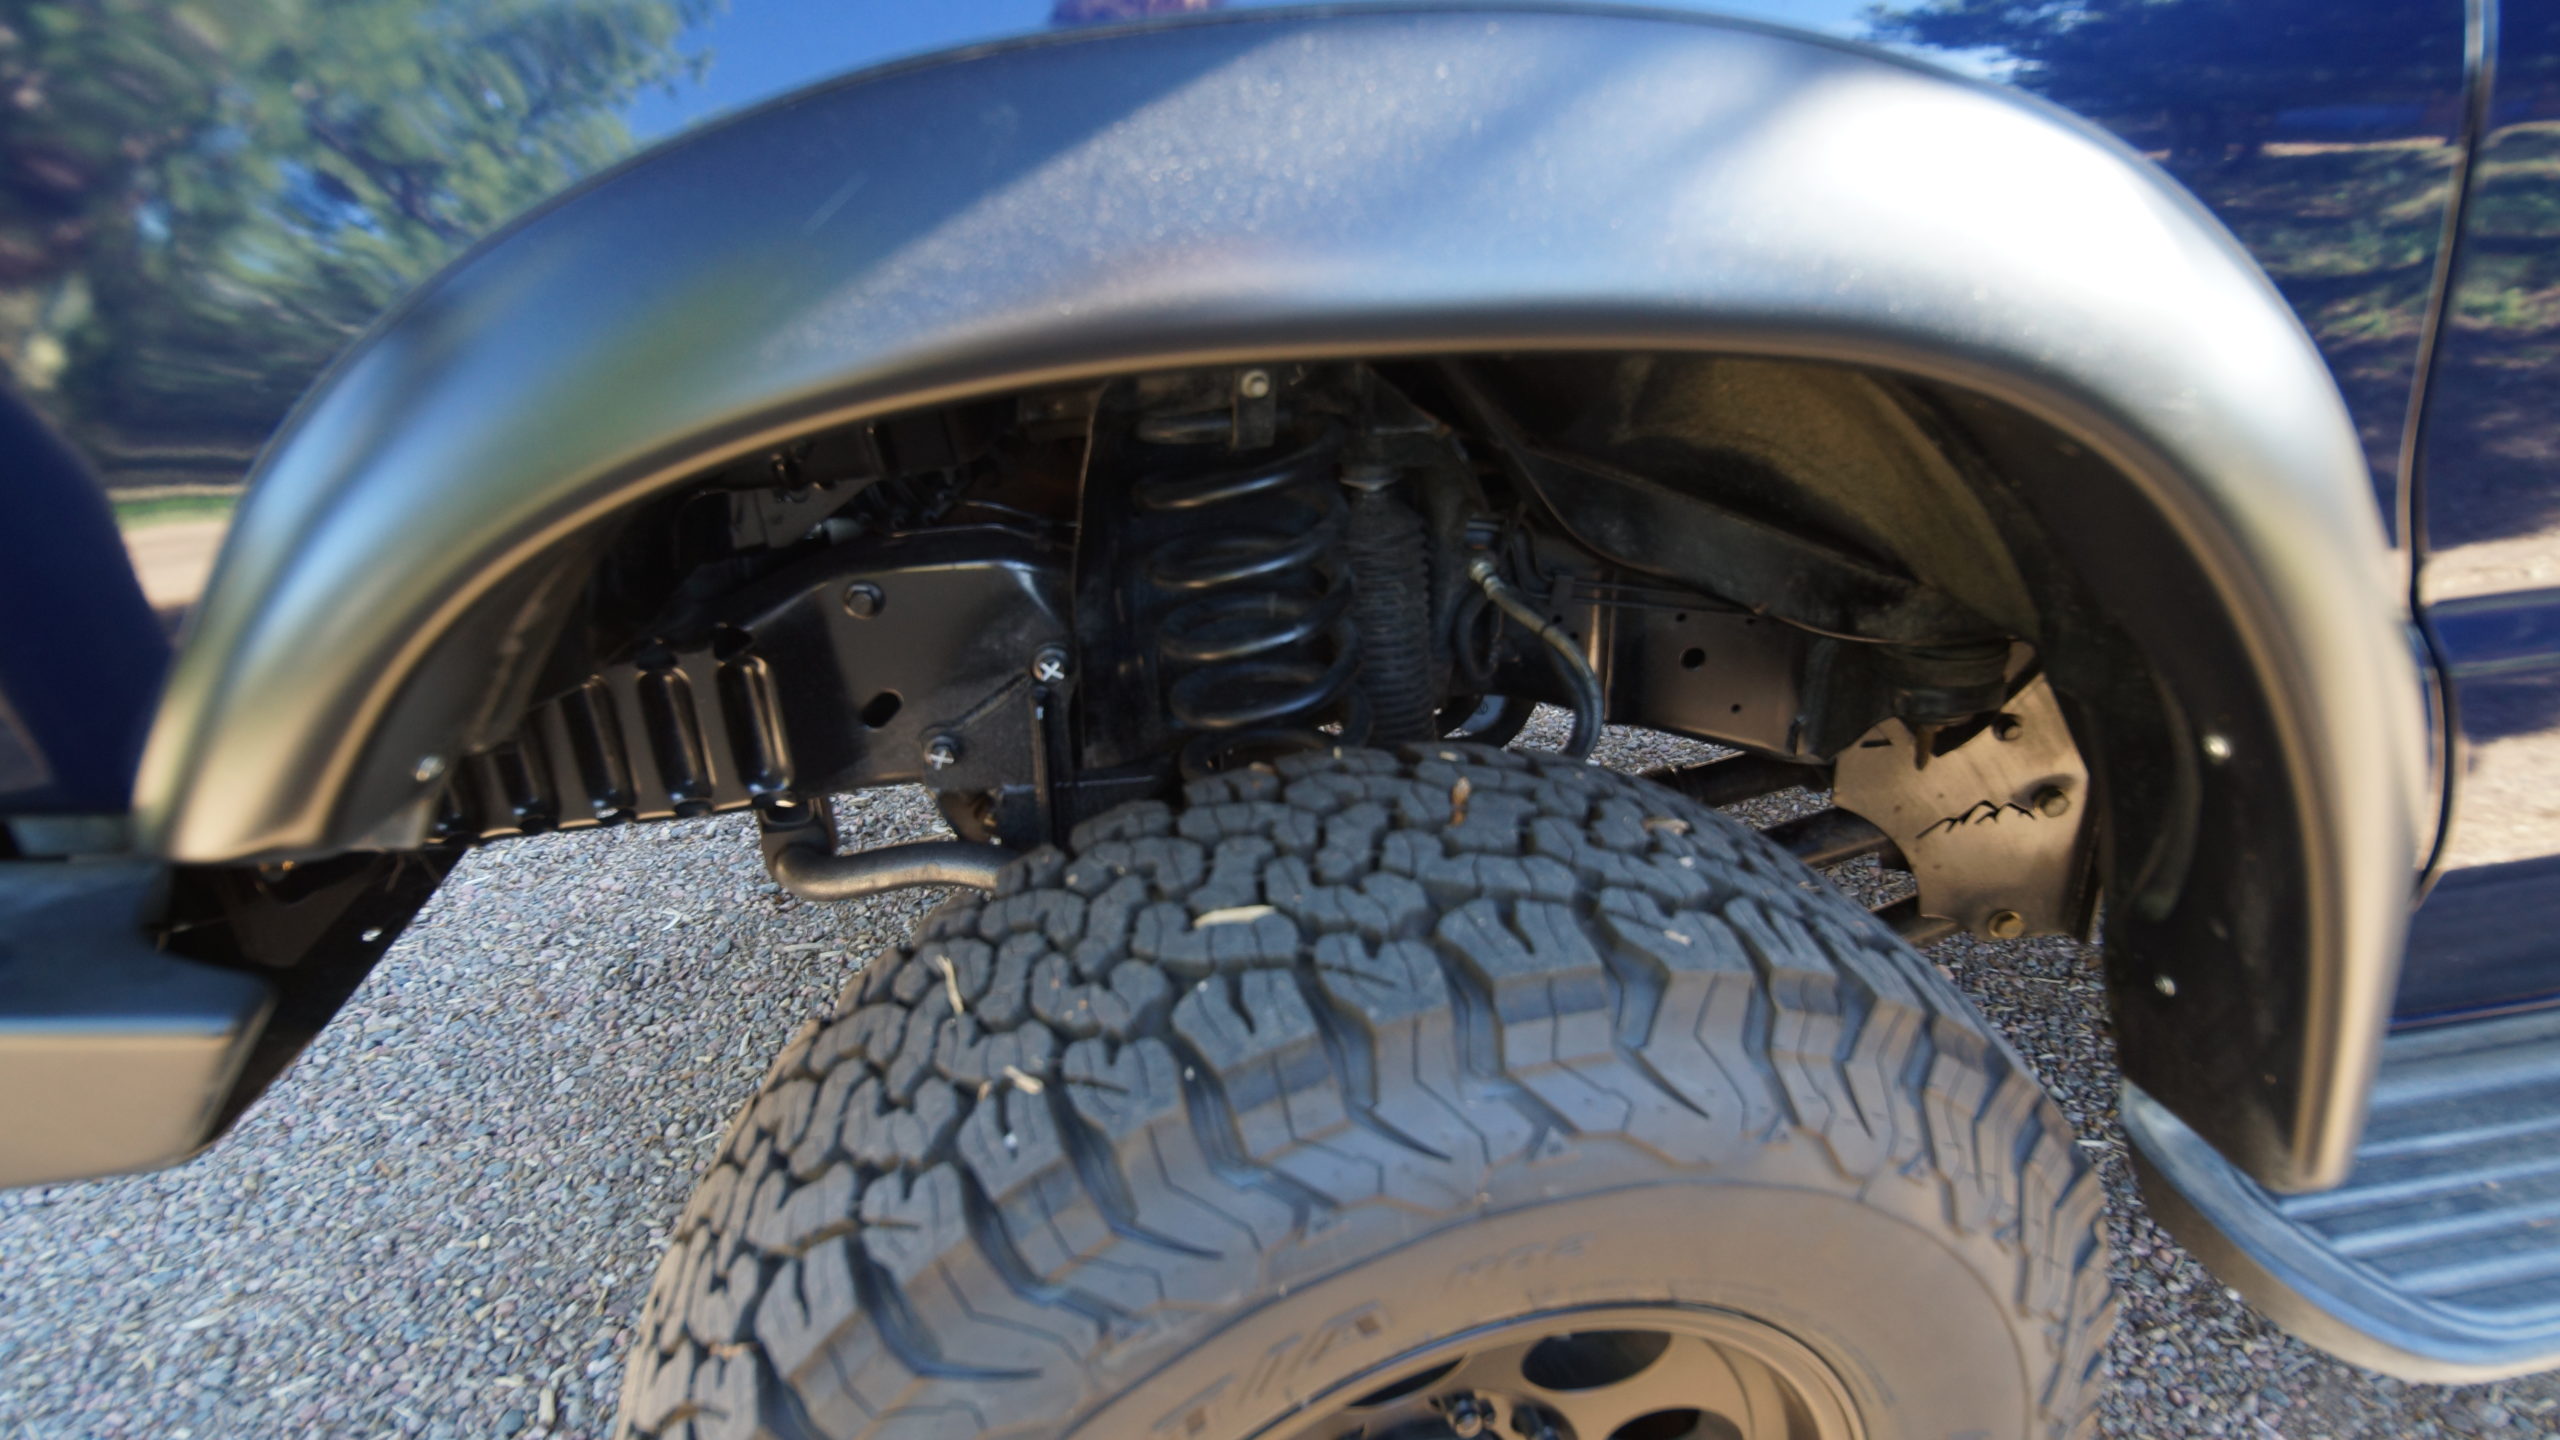
Replaced wheels with 17 inch and tires with 285 70r17
Rebuilt transmission for 4WD
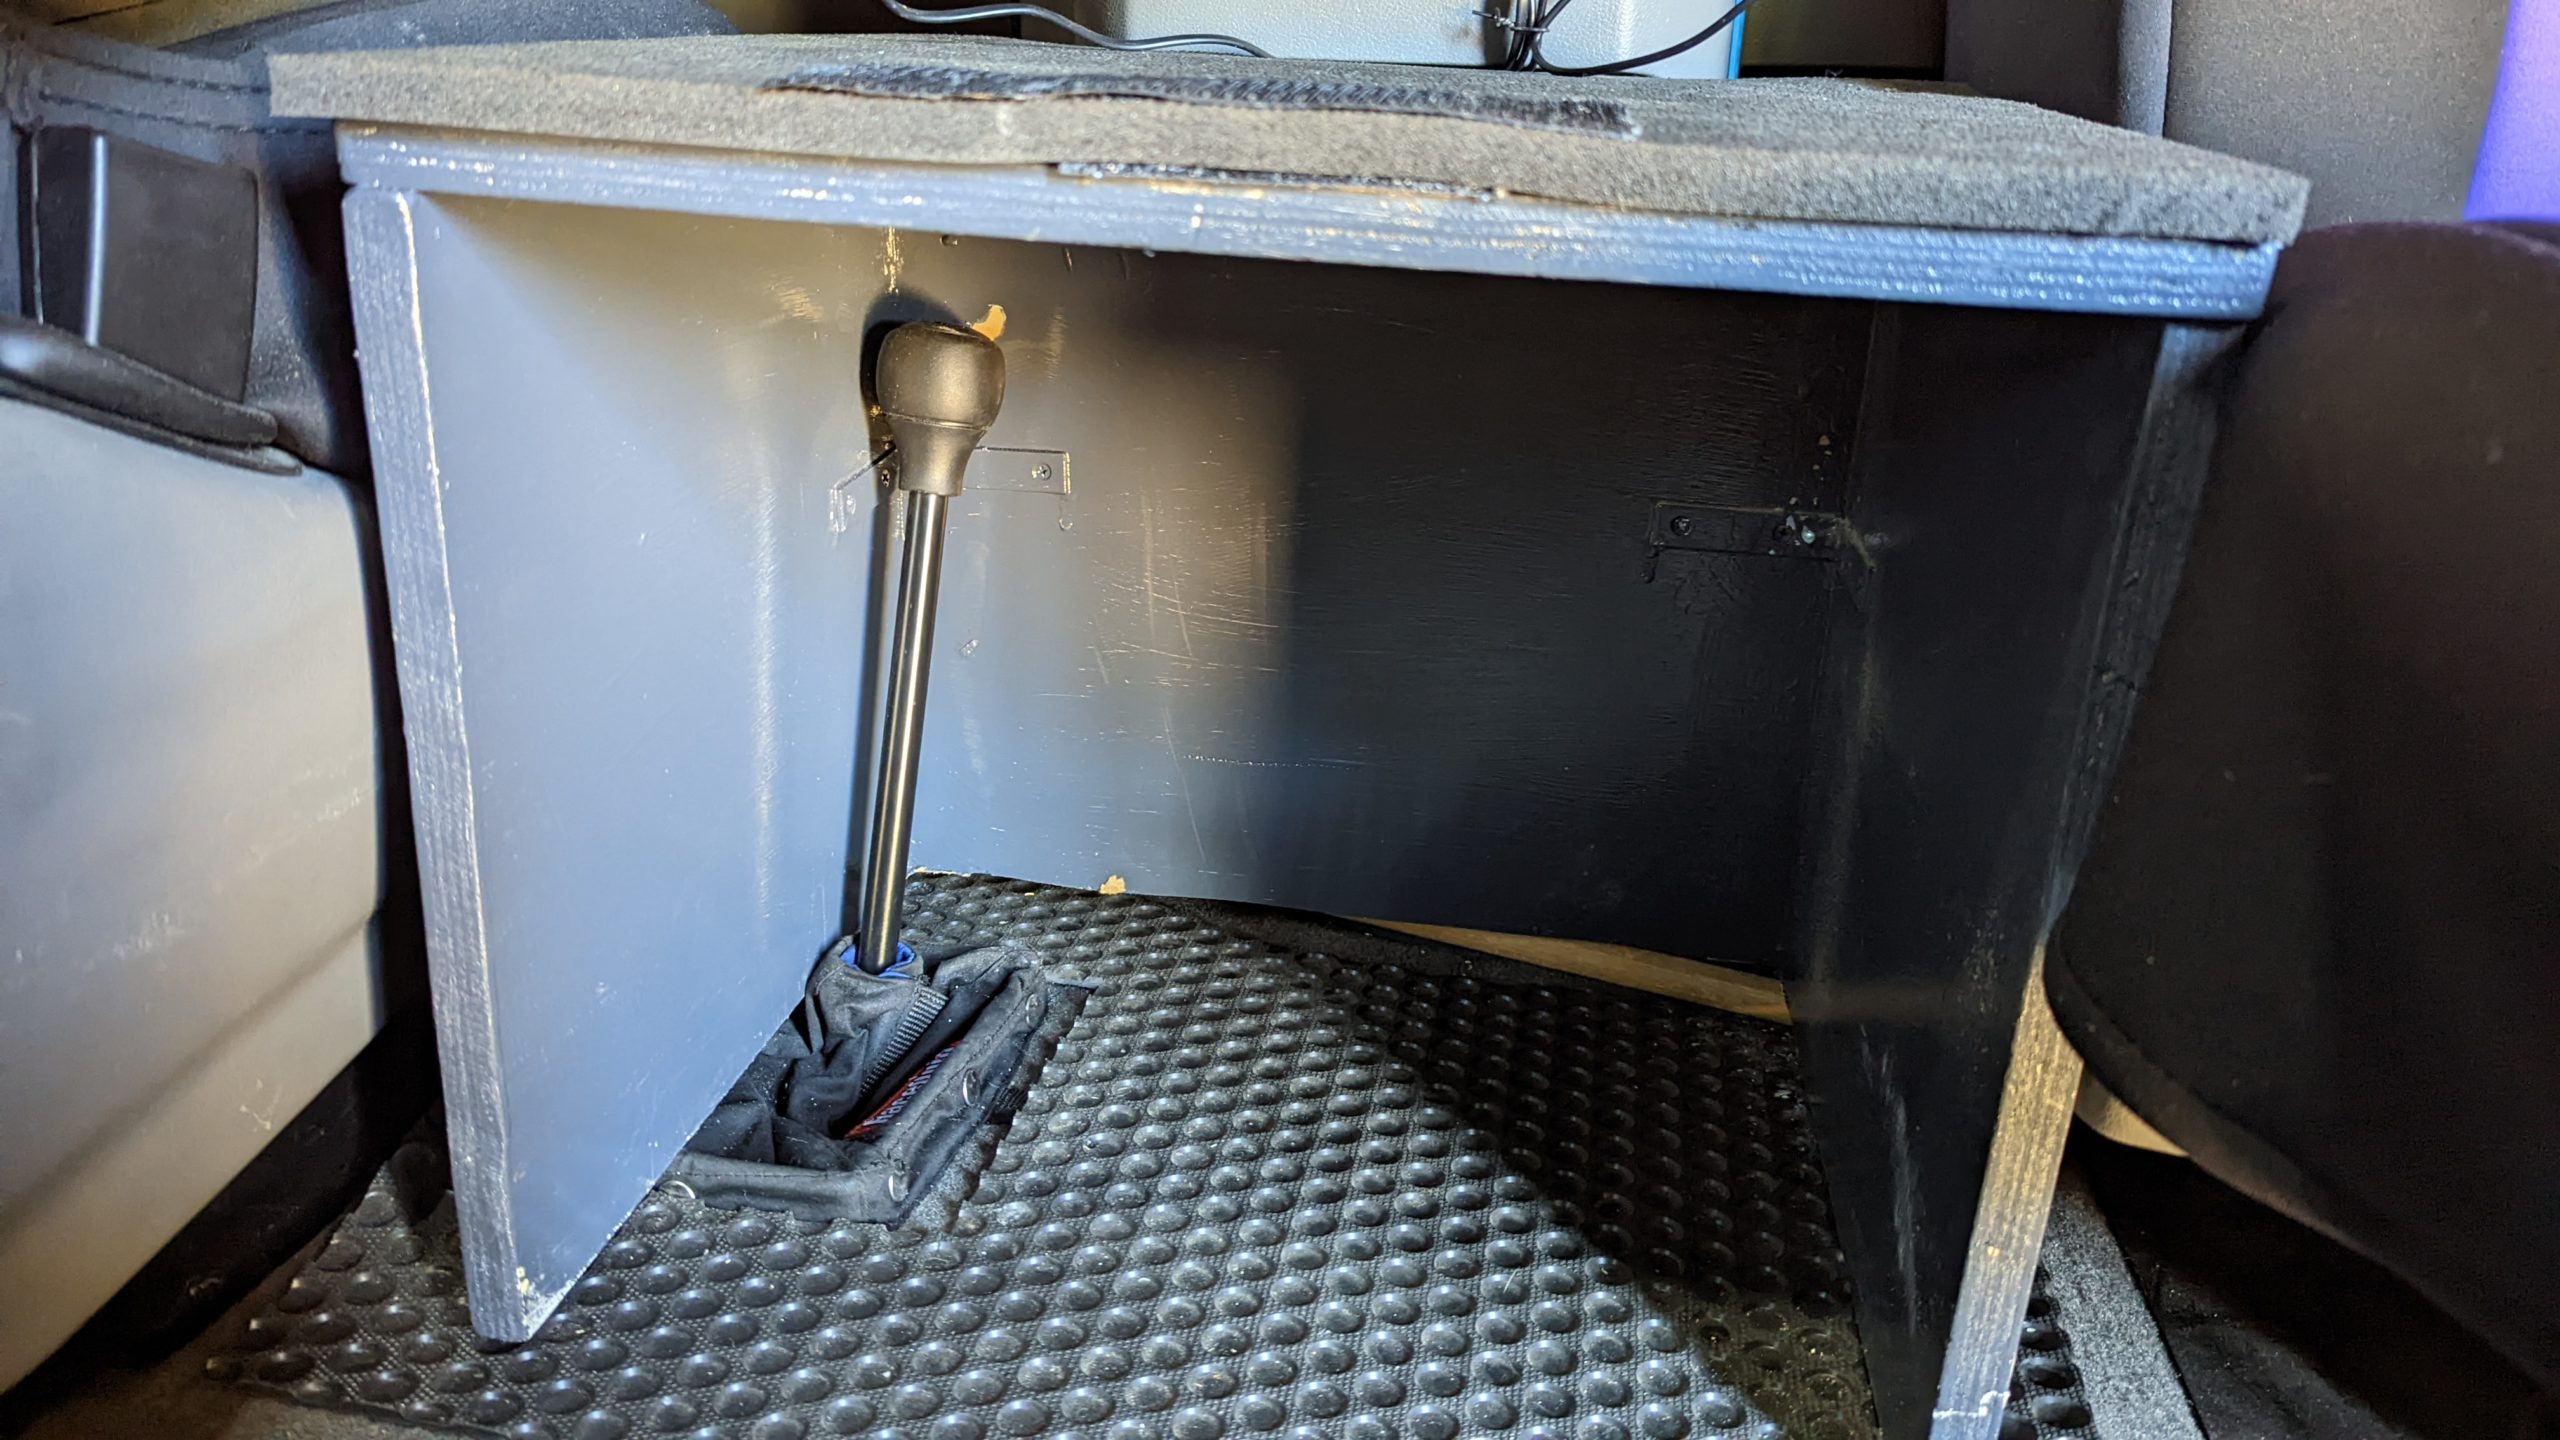
4wd shifter installed between the driver and passenger side seats
Manual locking hubs
Hard Top and Roof Additions
24-Inch Hard Top
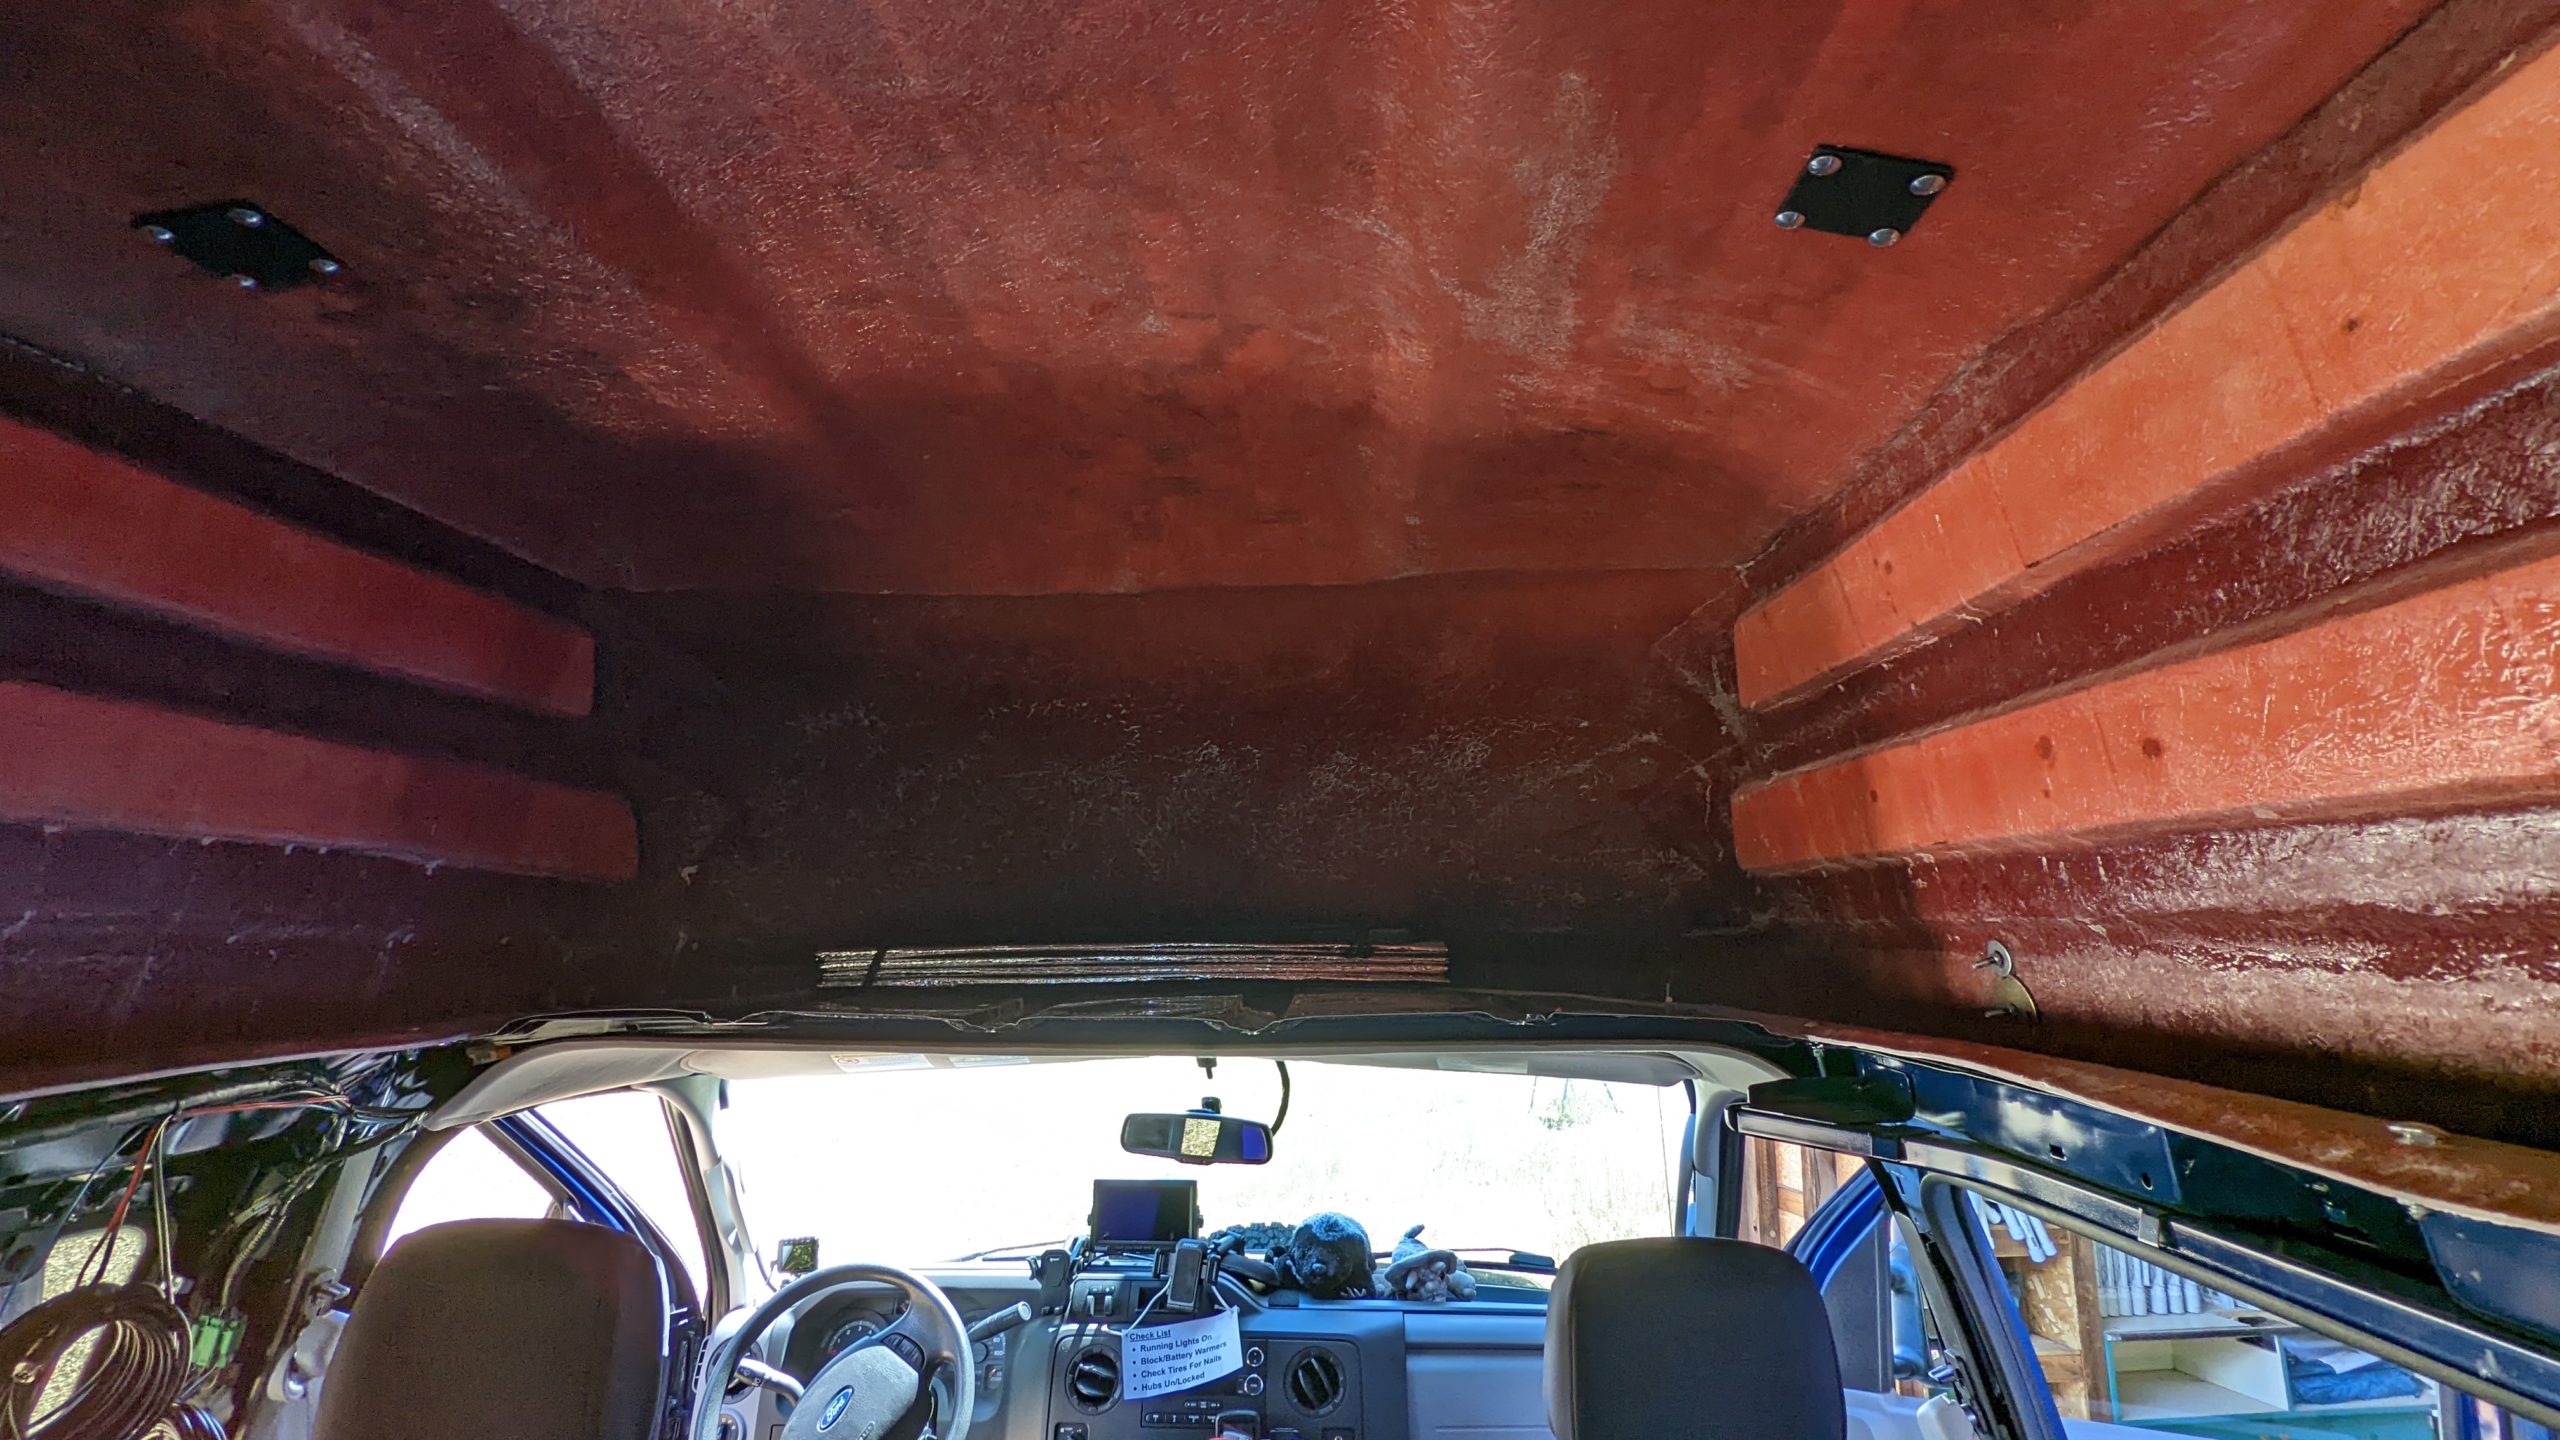
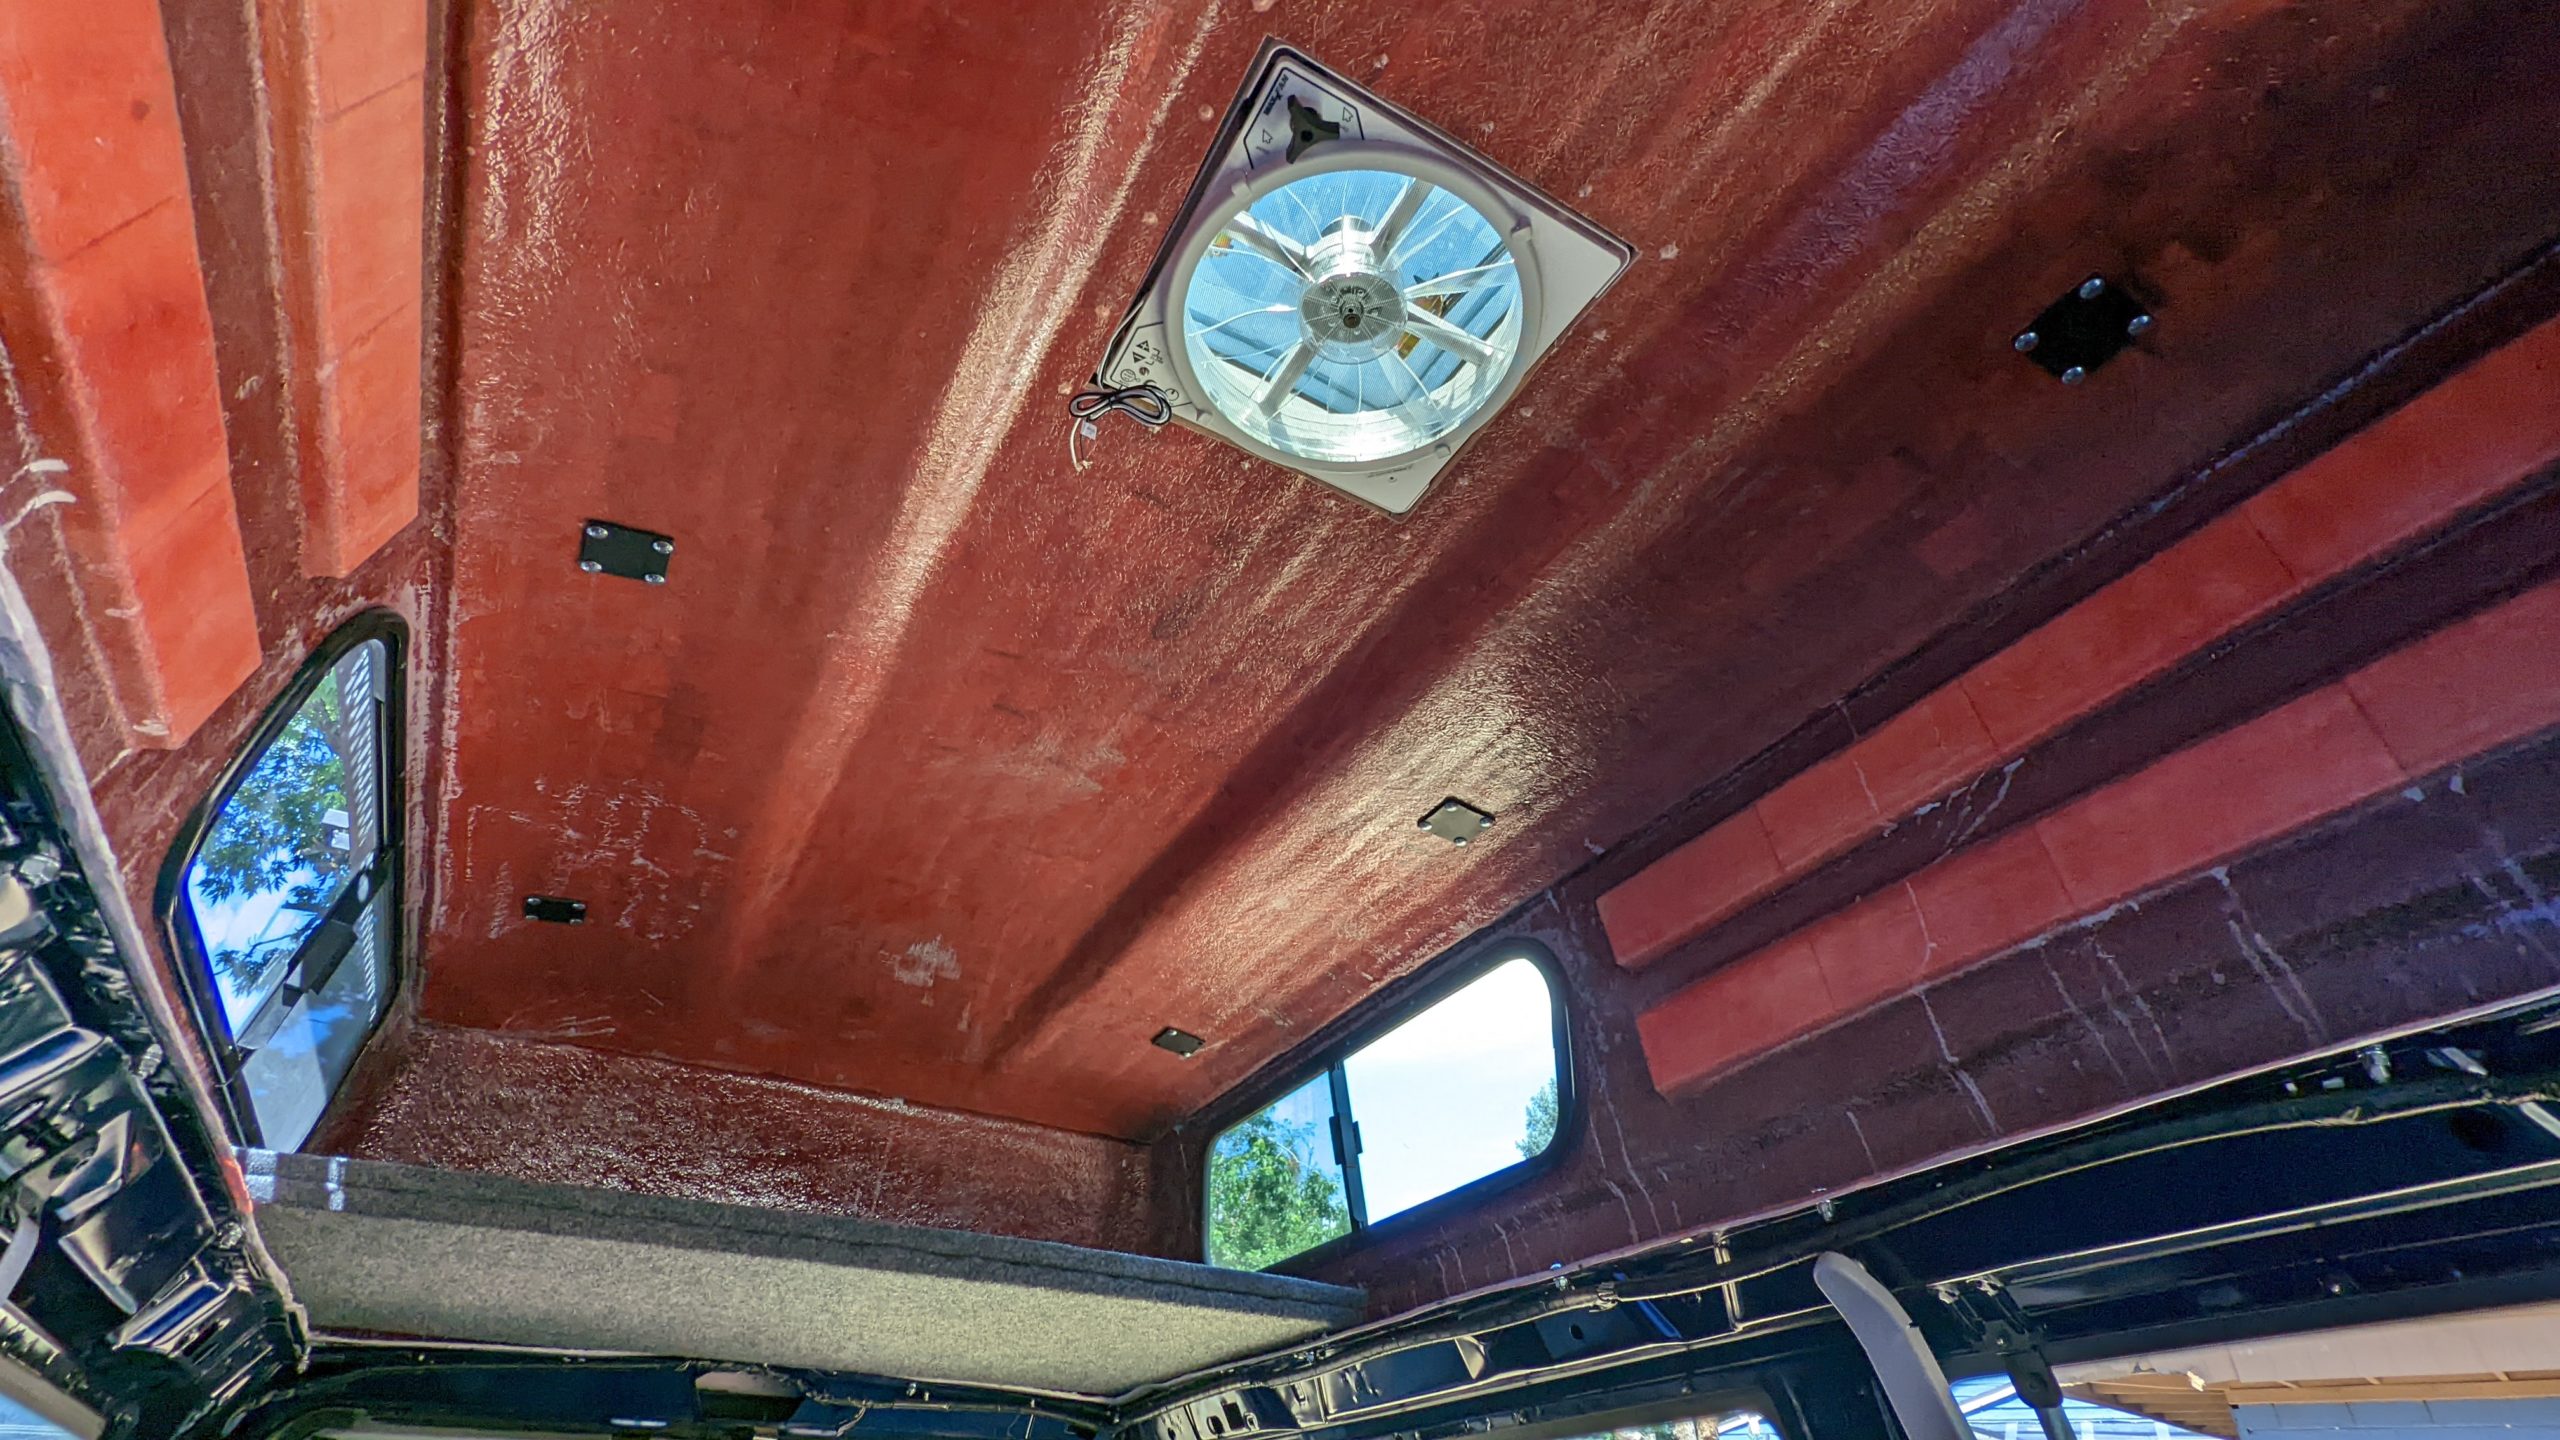
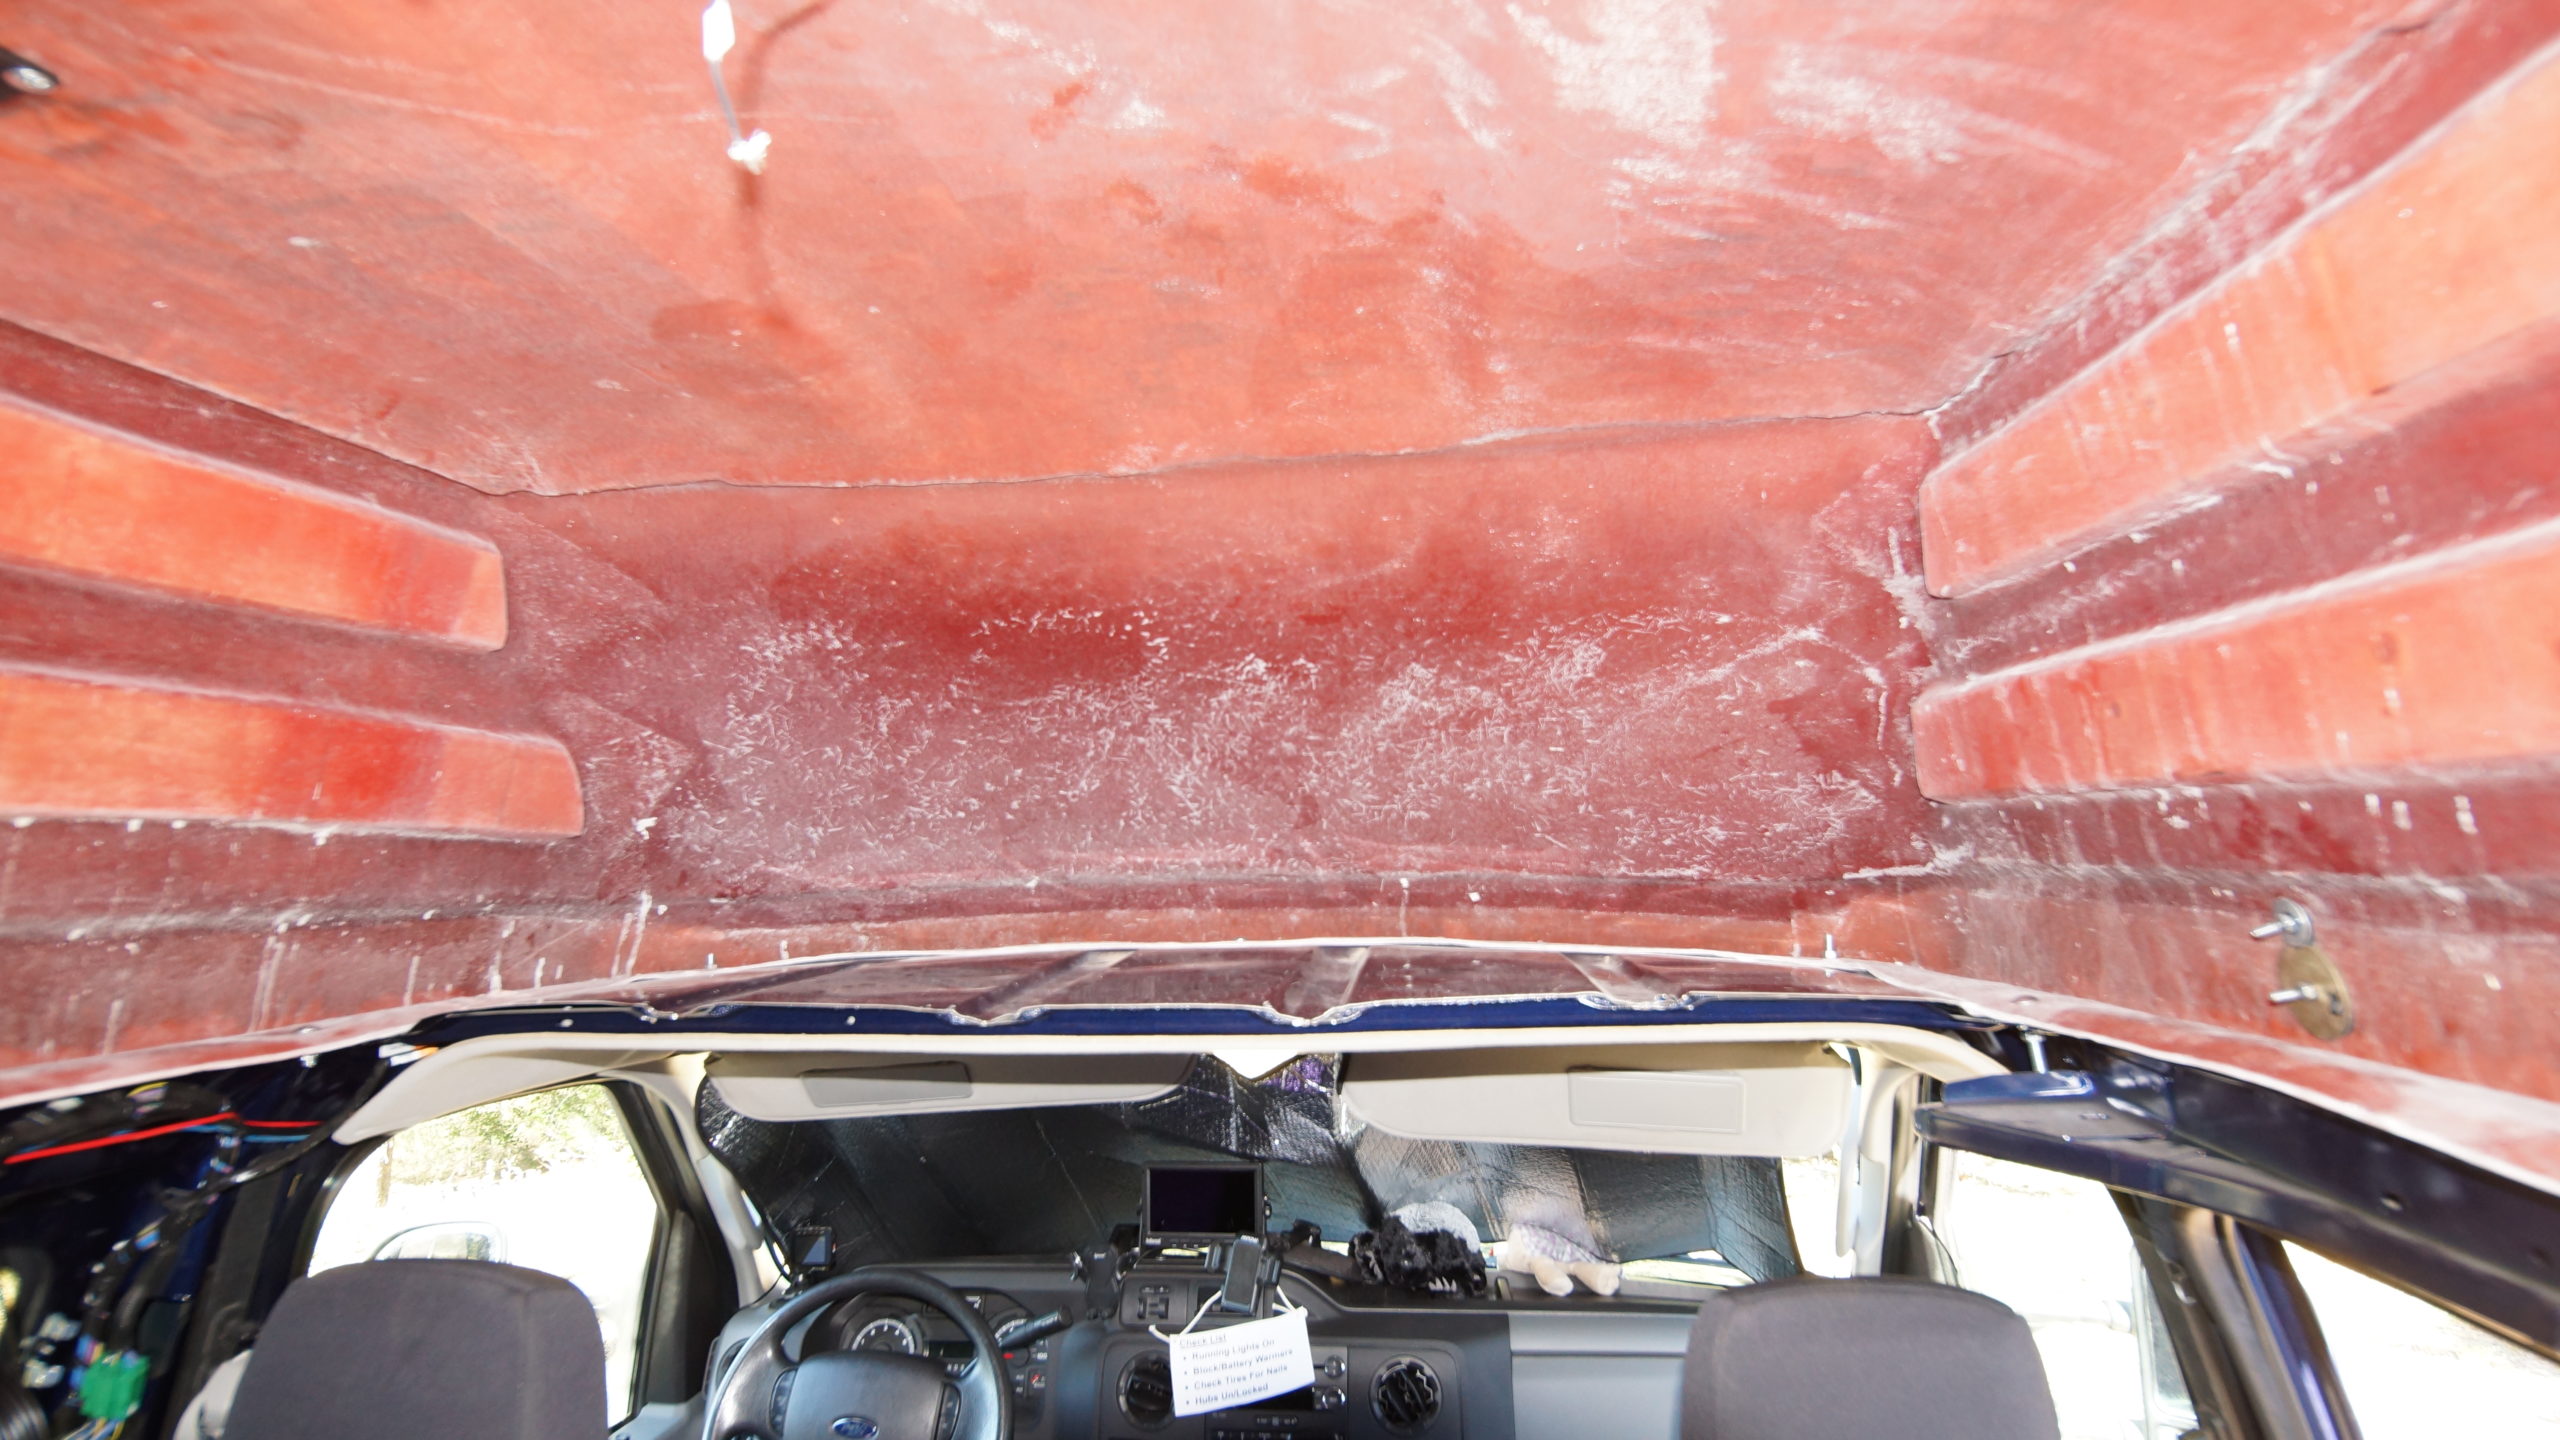
The fiberglass top is 24-inches high with a roof fan and windows.
There are two strips each side of 1″ x 4″ wood slats on sidewalls of hard top to add strength and allow for internal attachments to the sidewall.
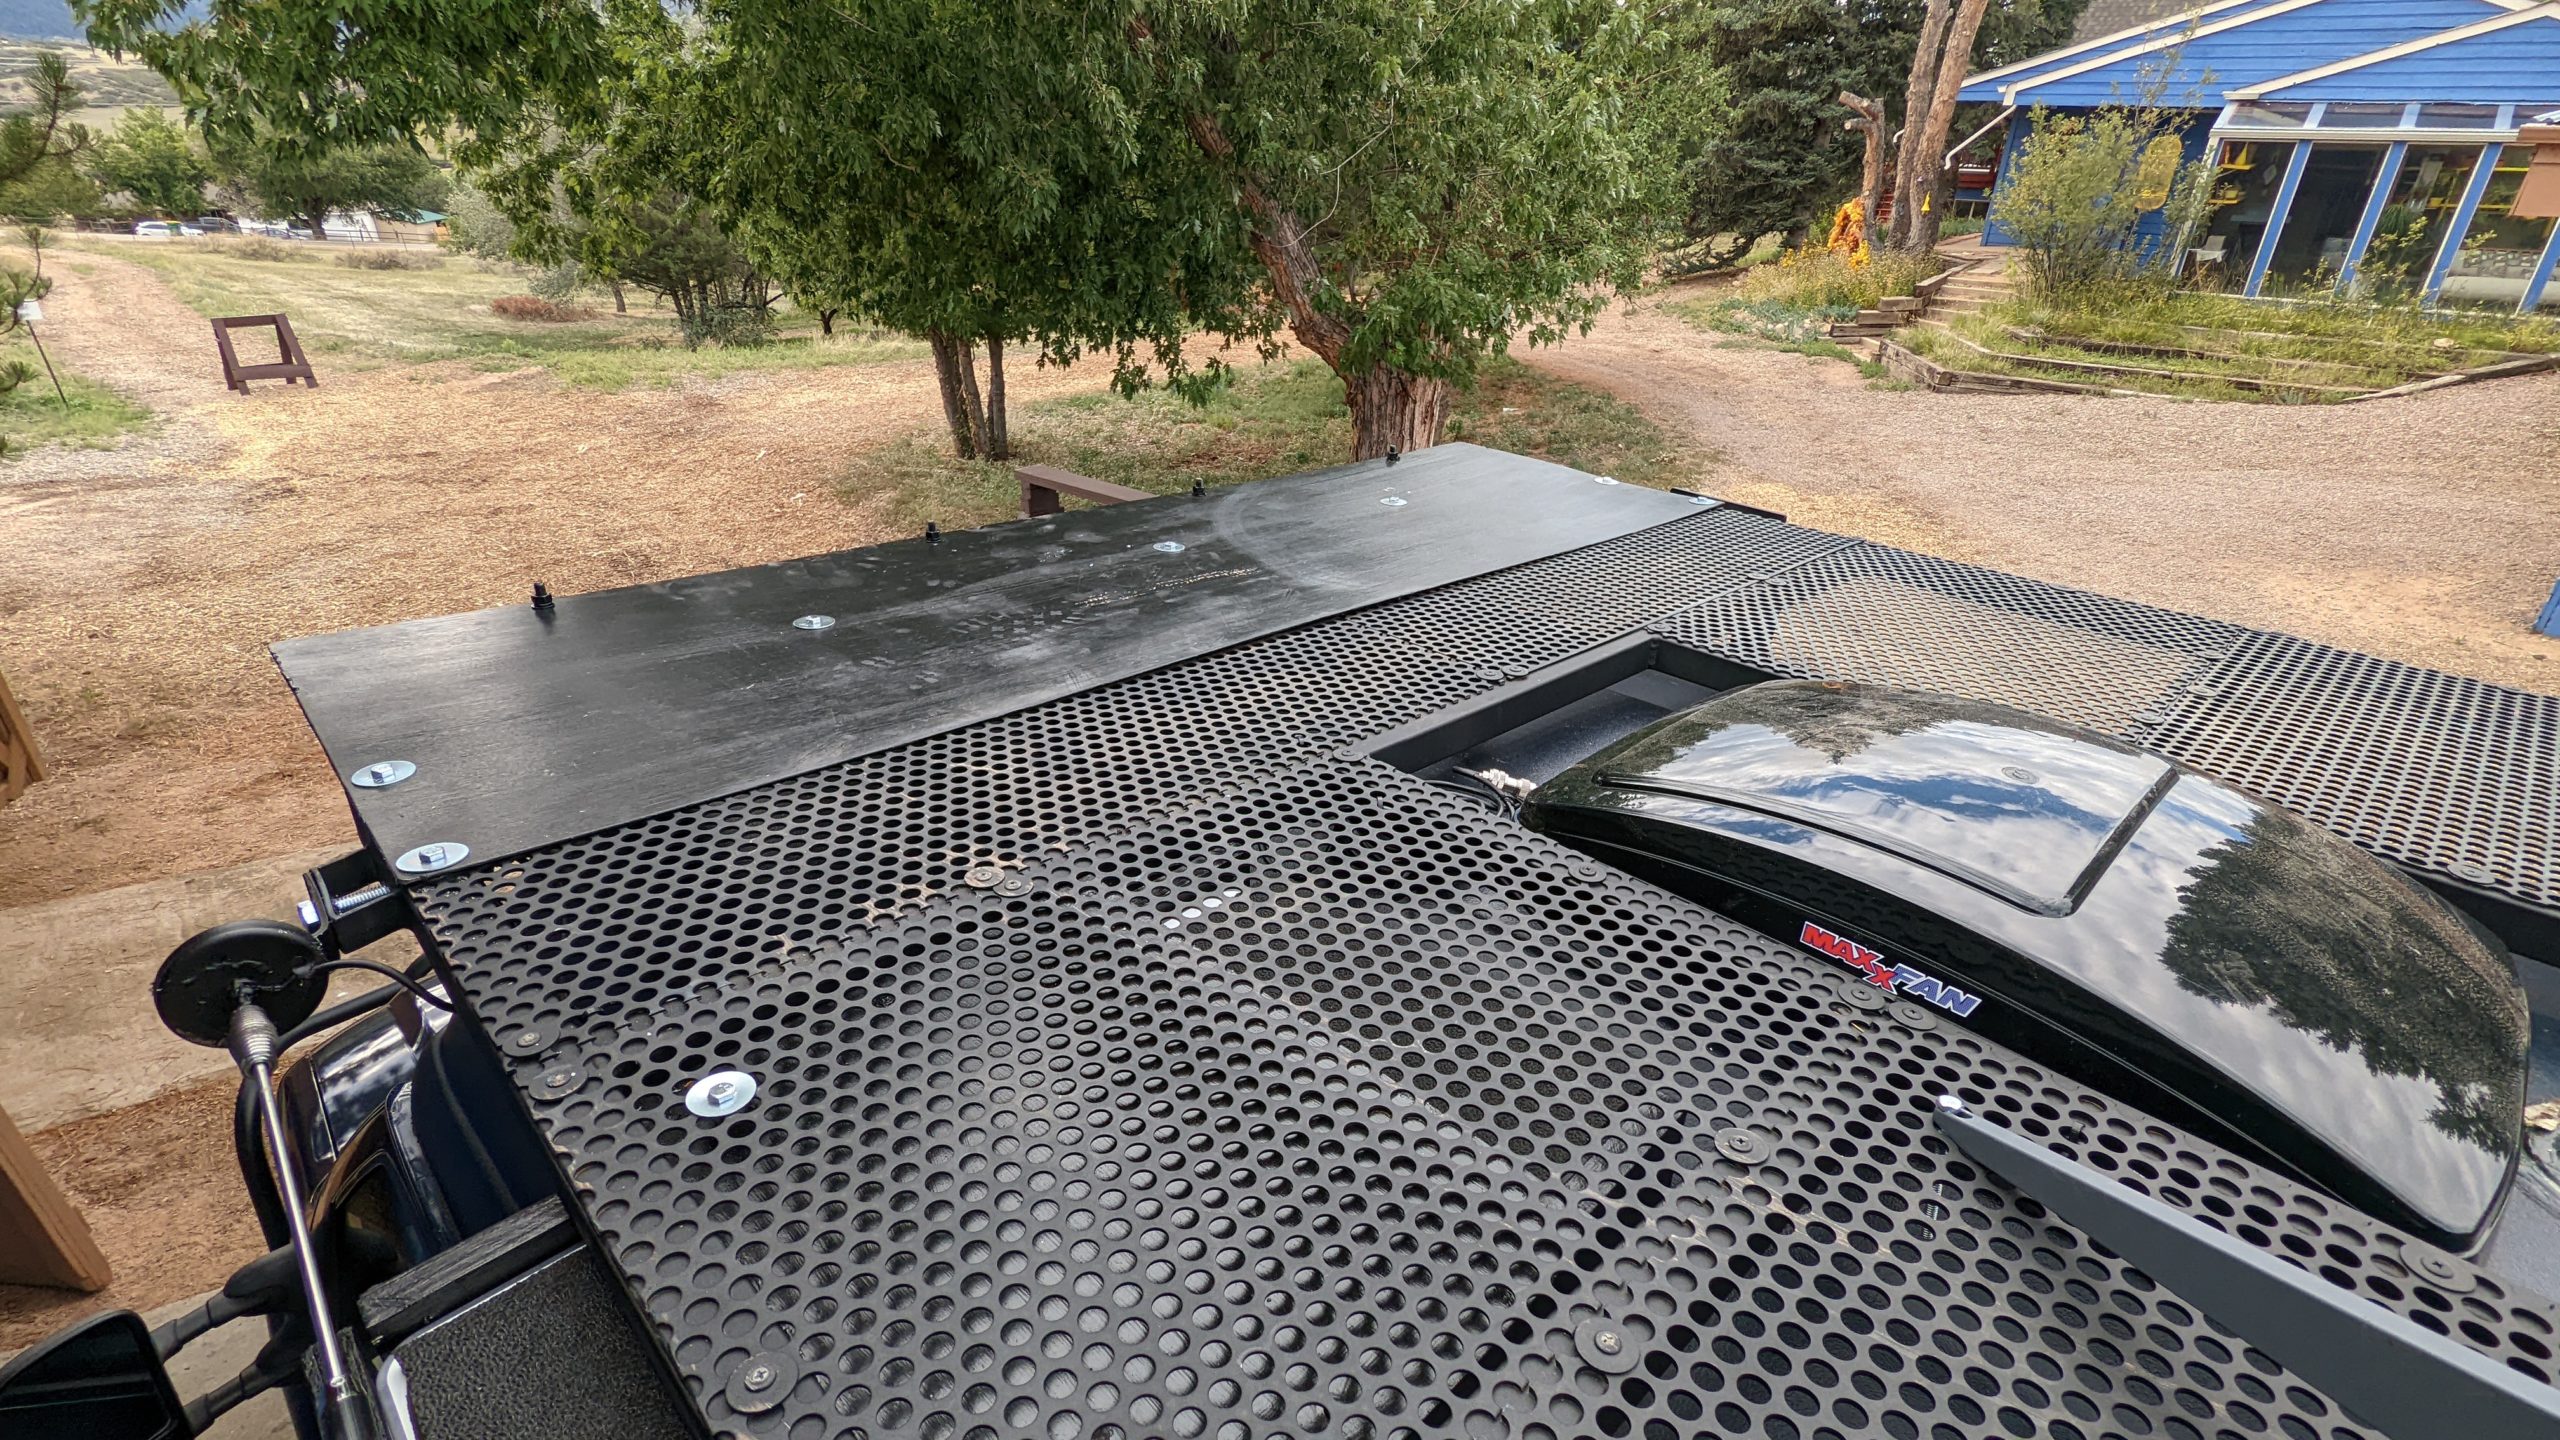
The Maxxfan brand roof fan is installed on top of hard top.
Roof Rack
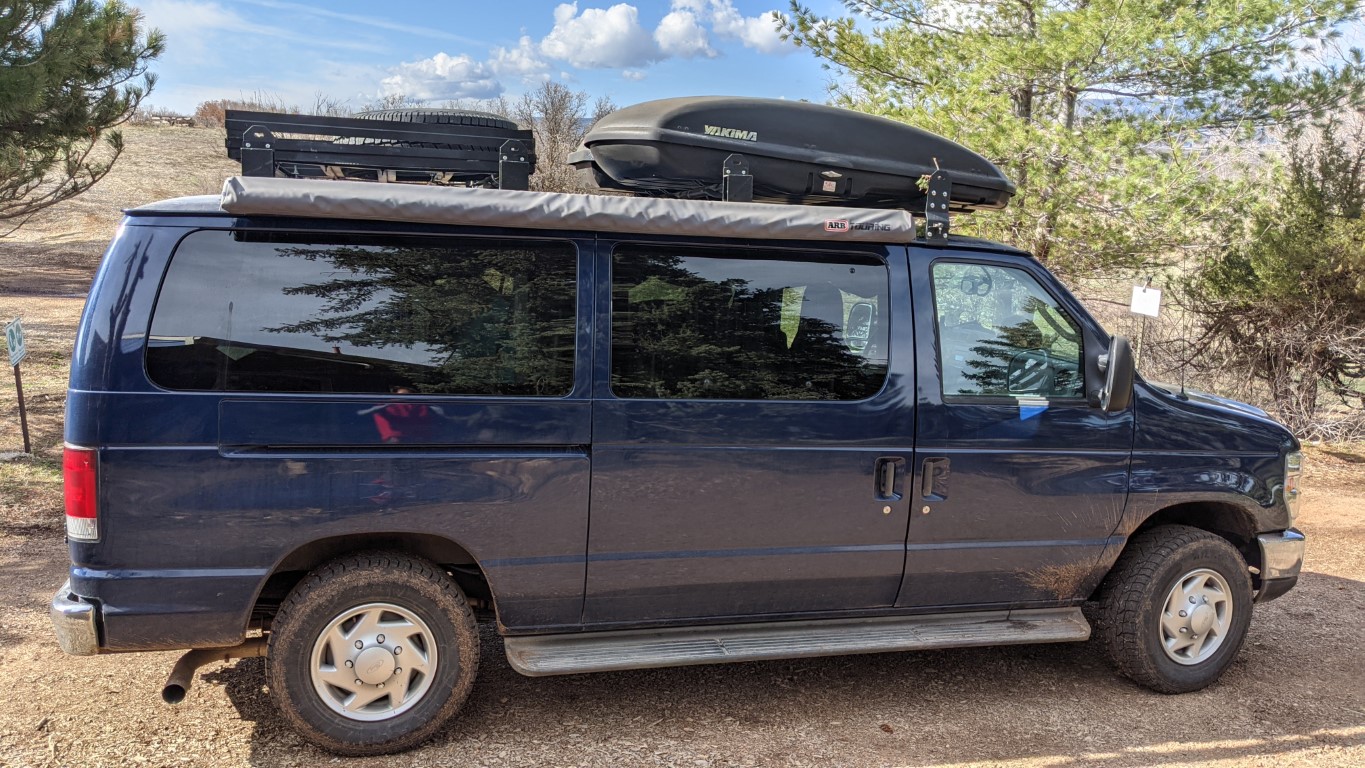
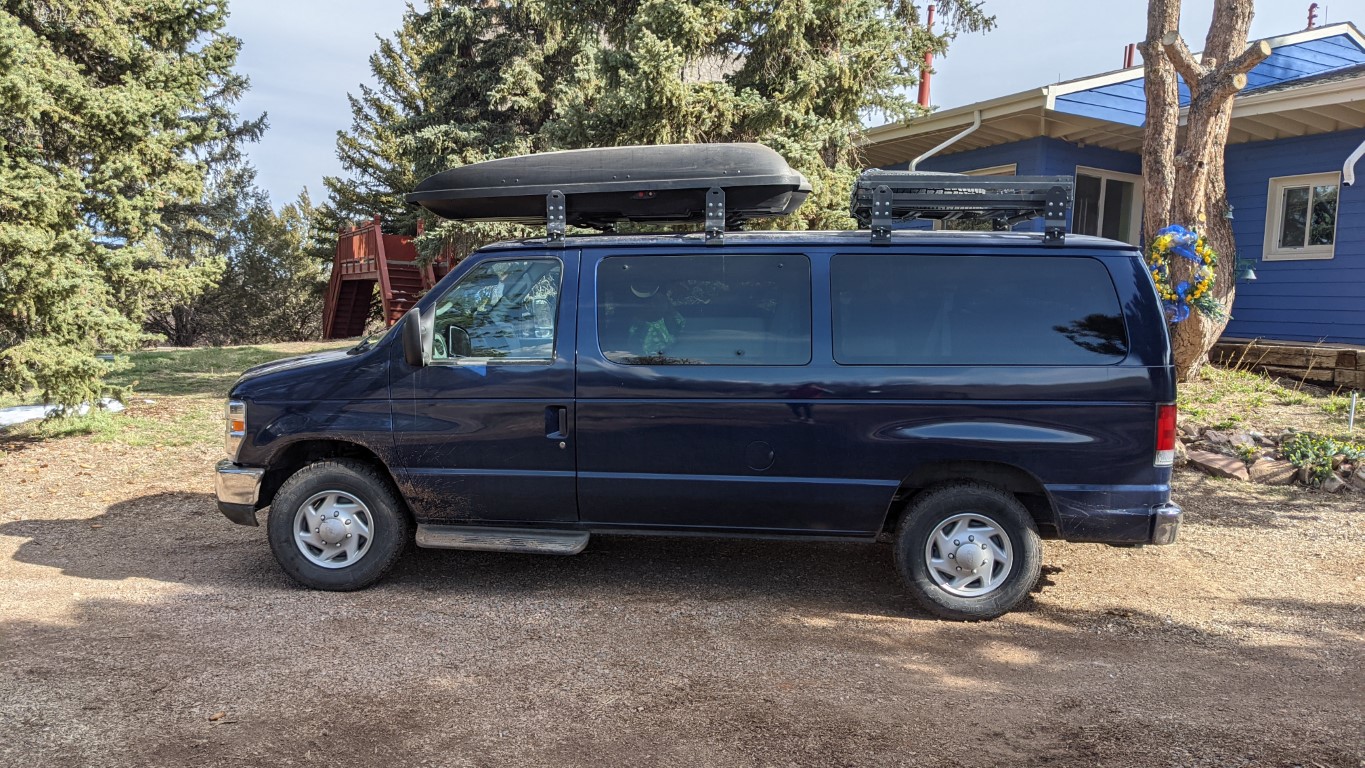
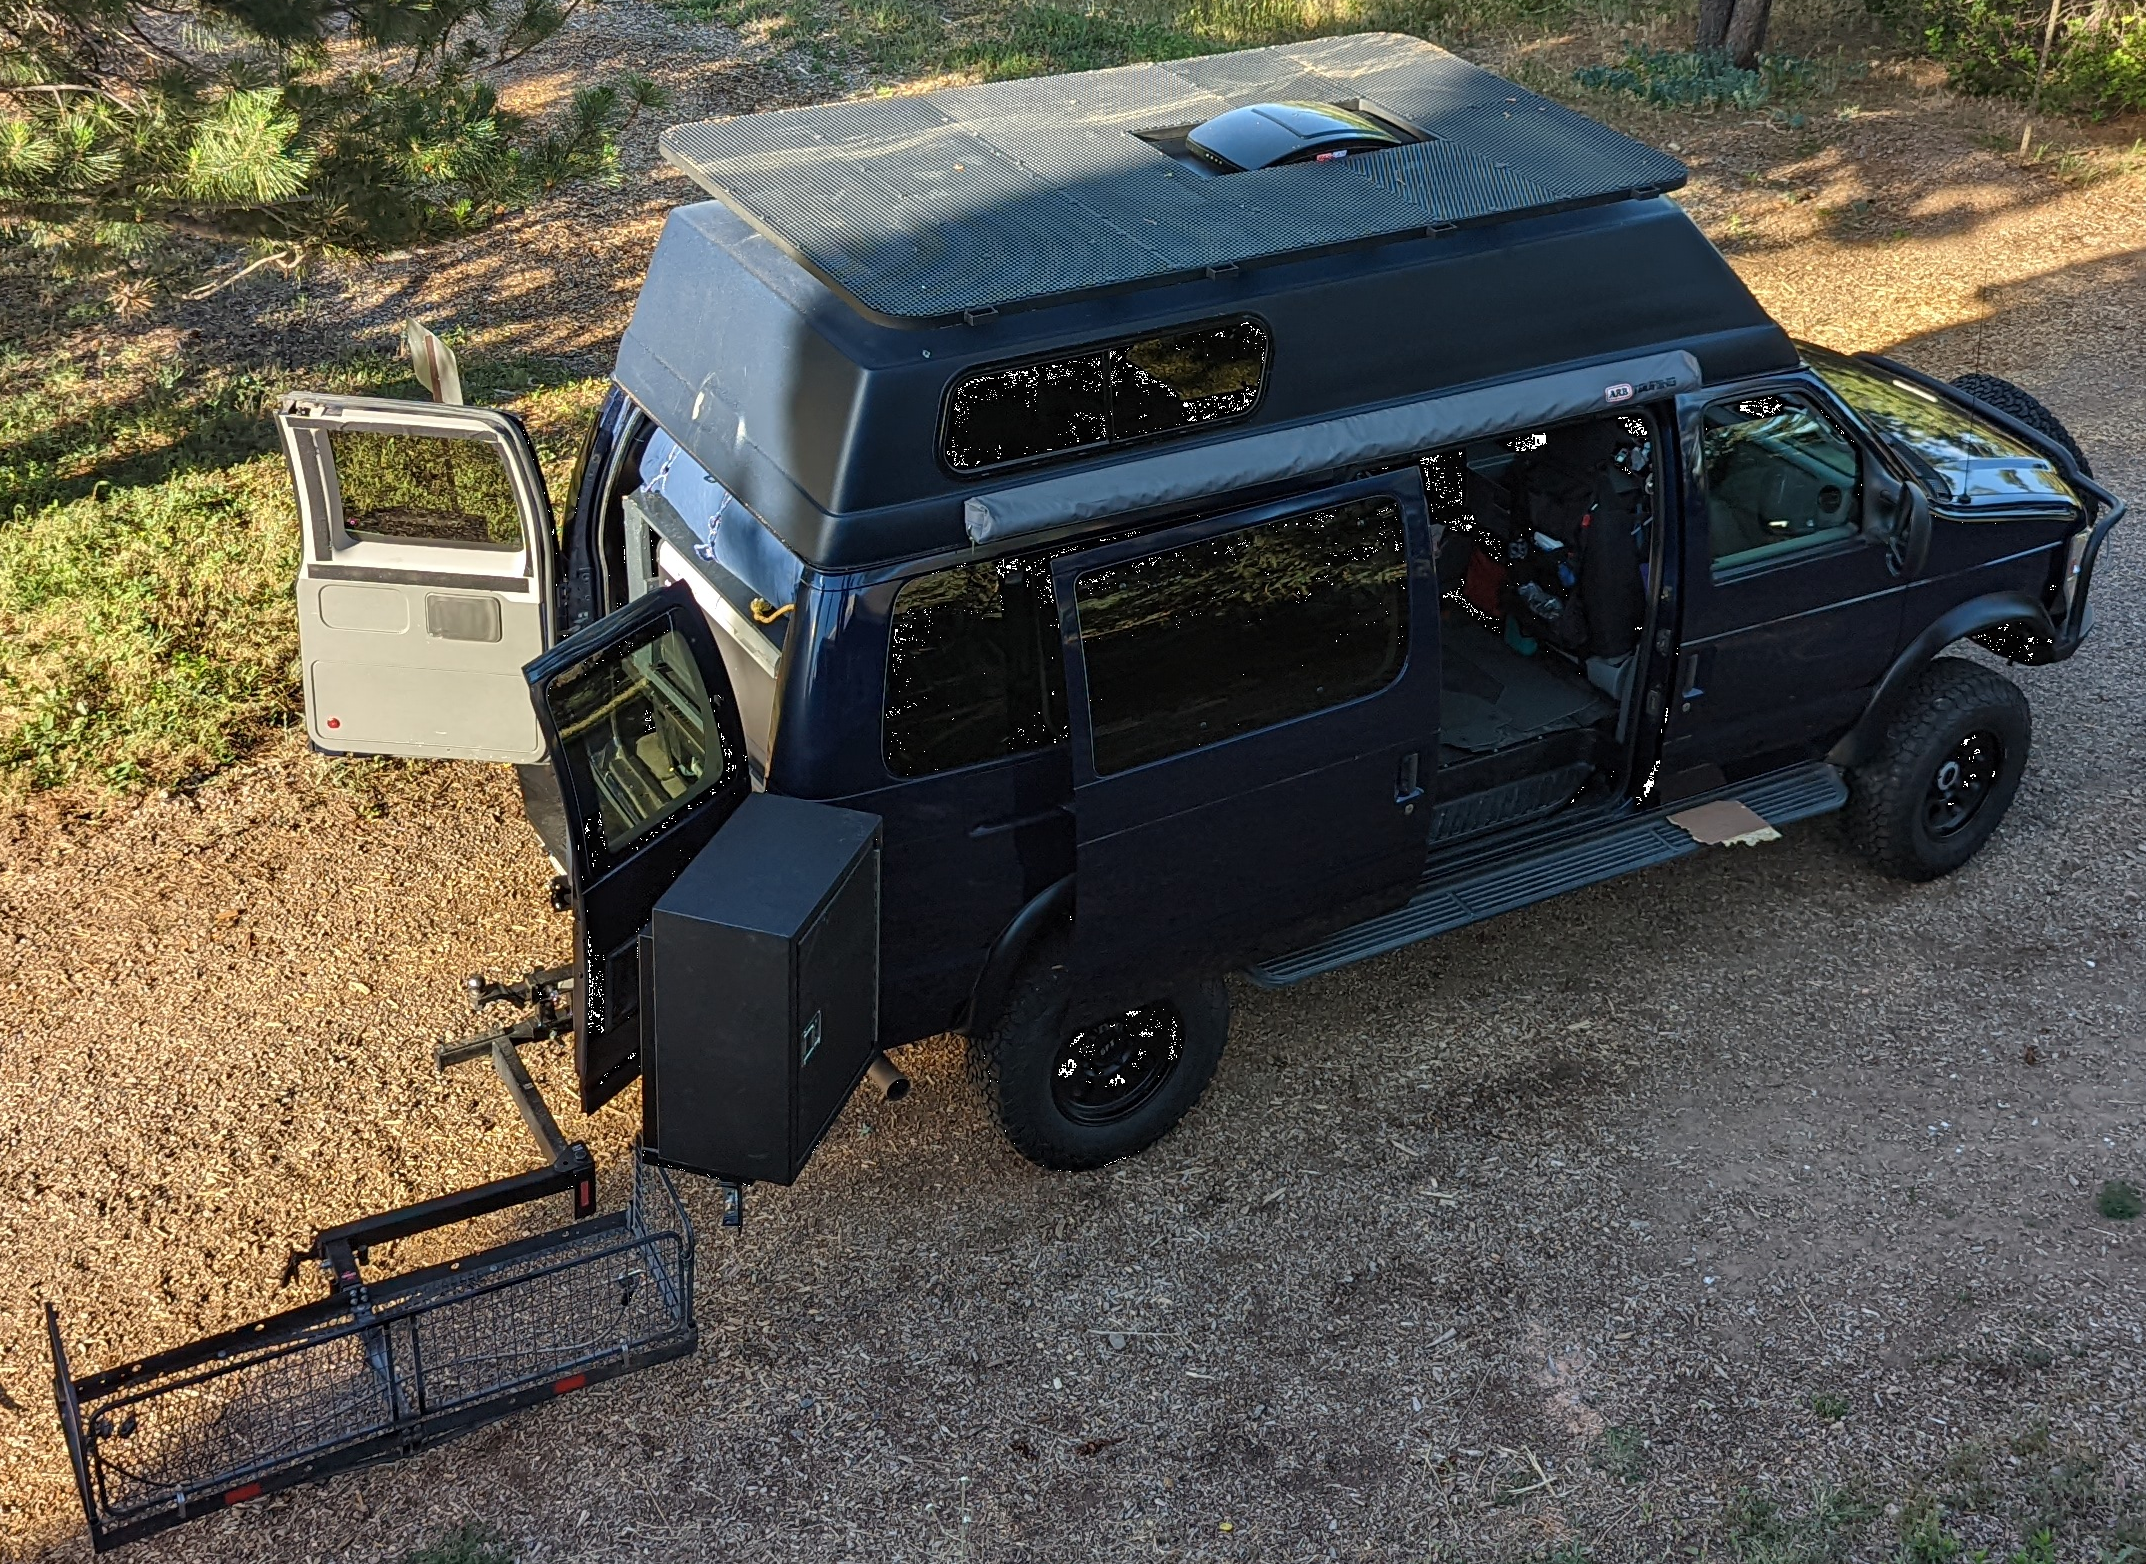
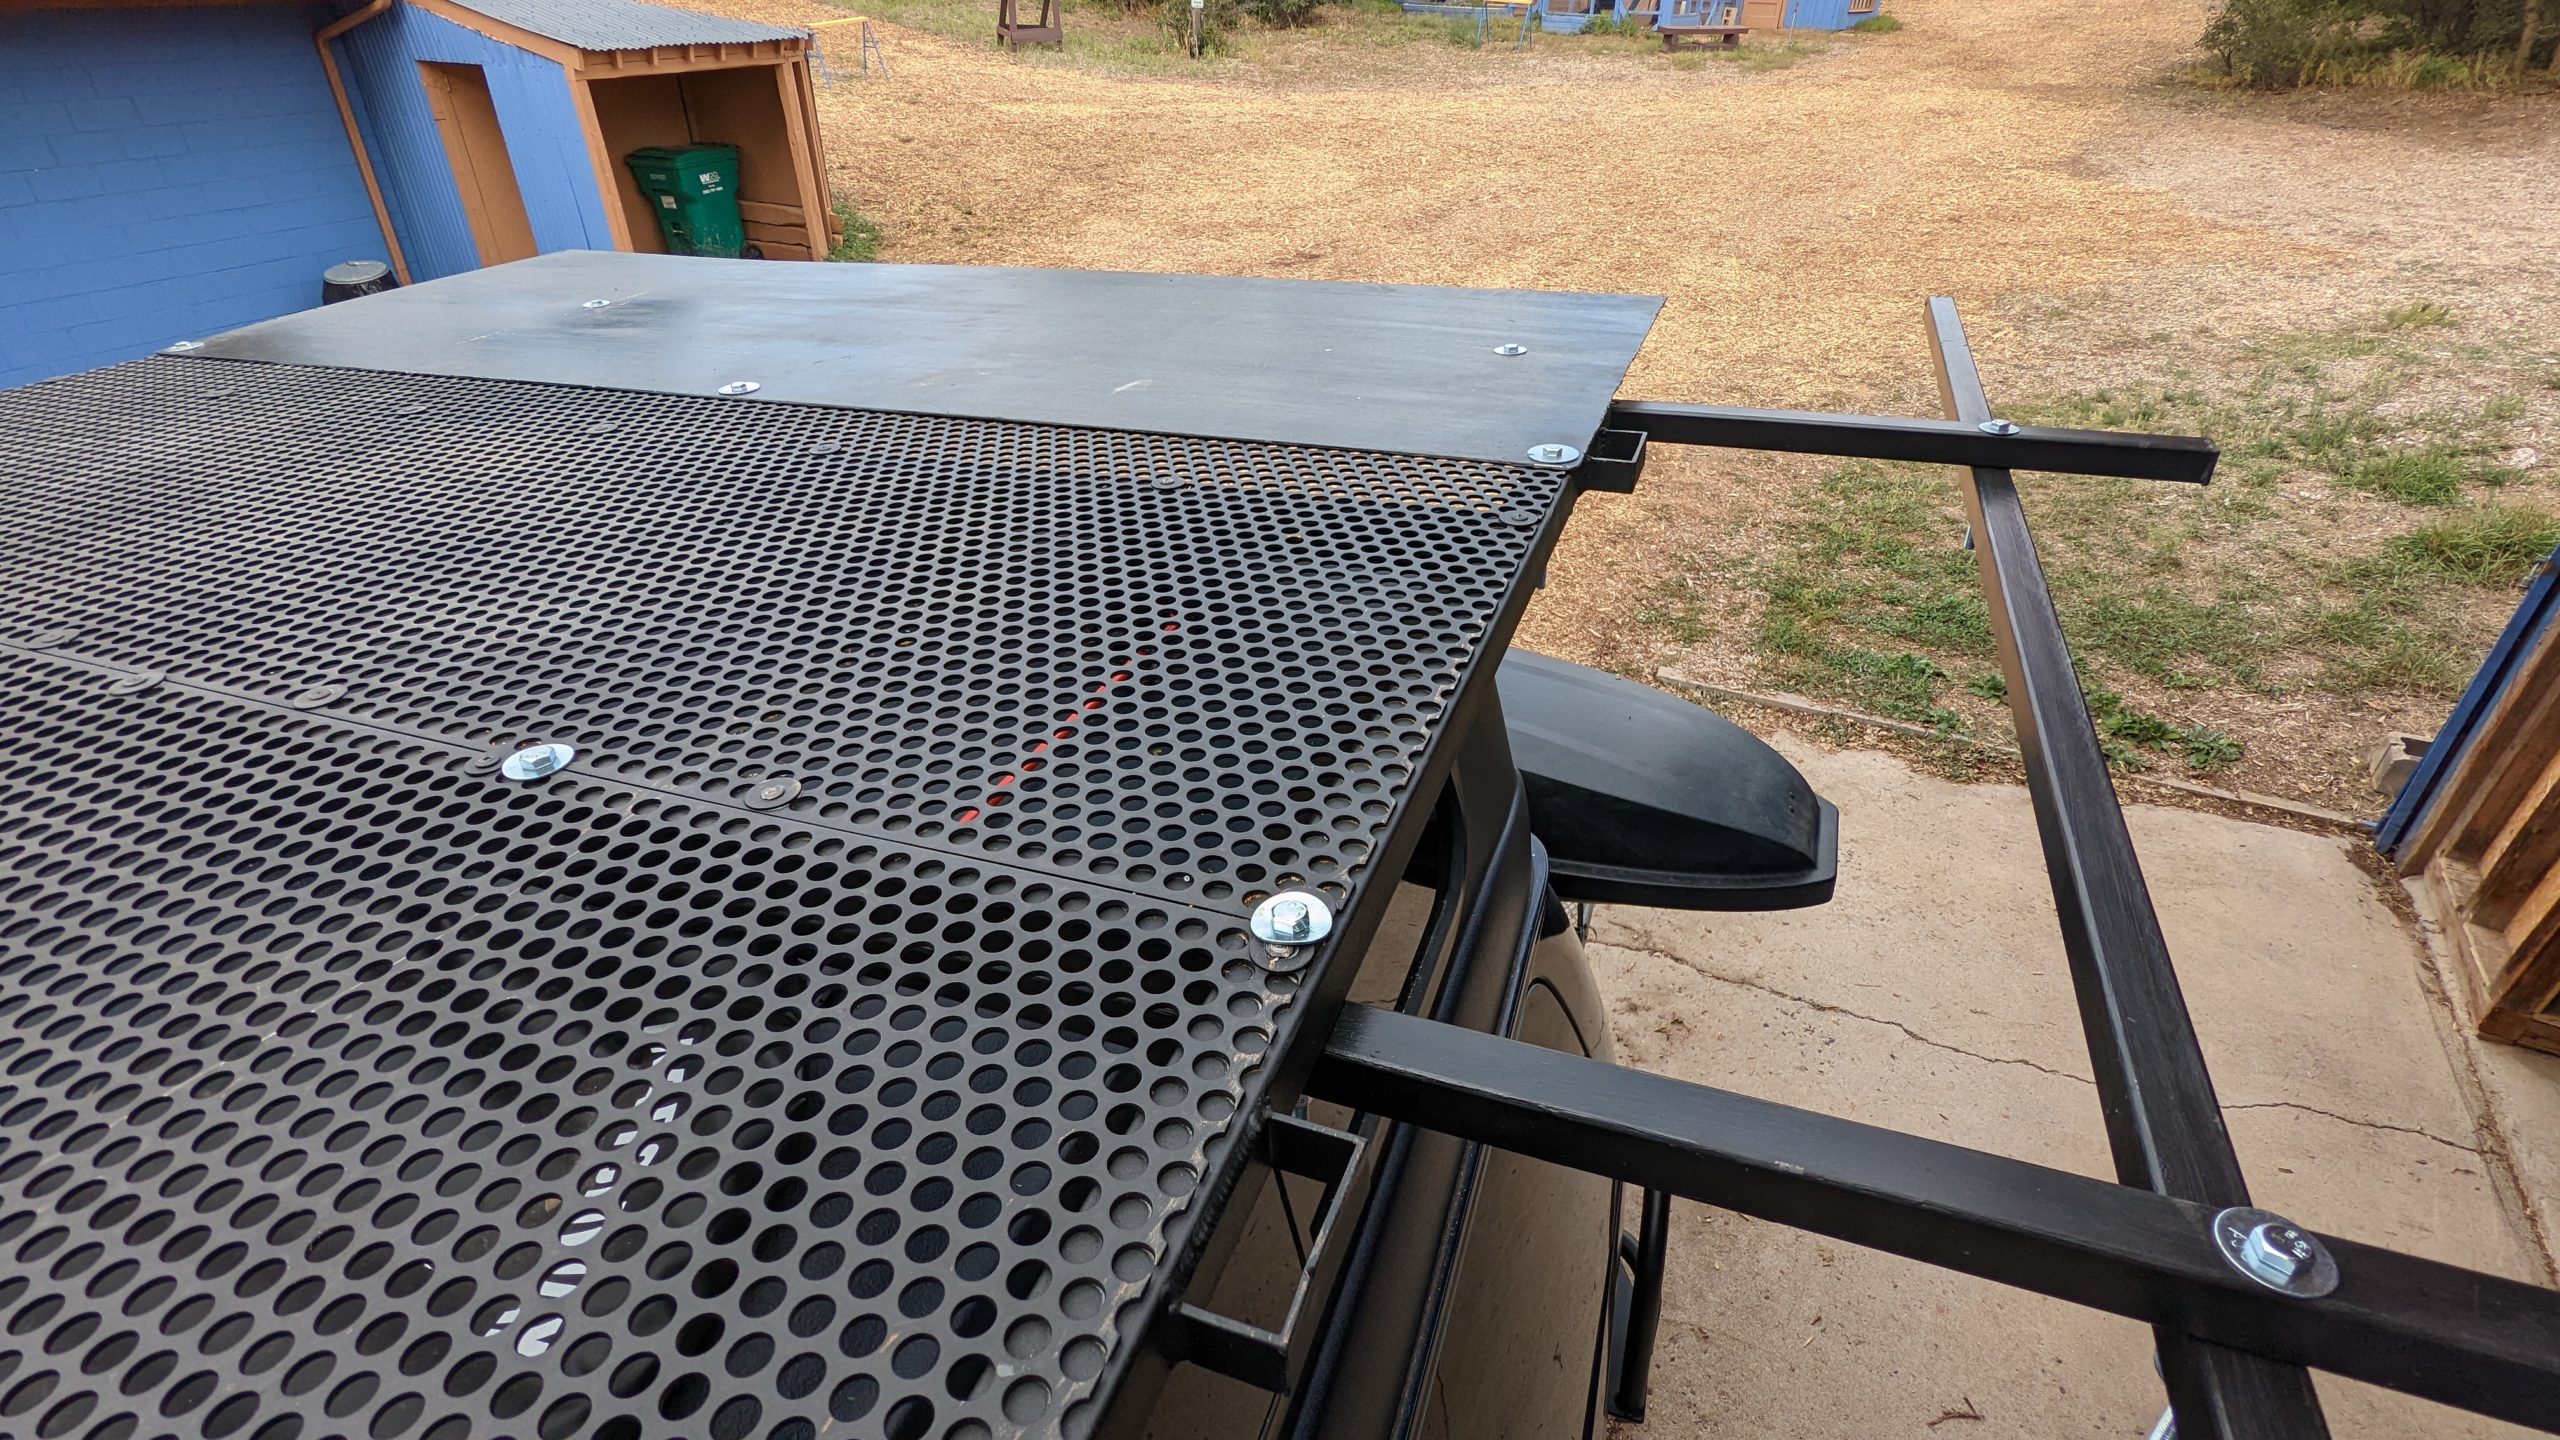
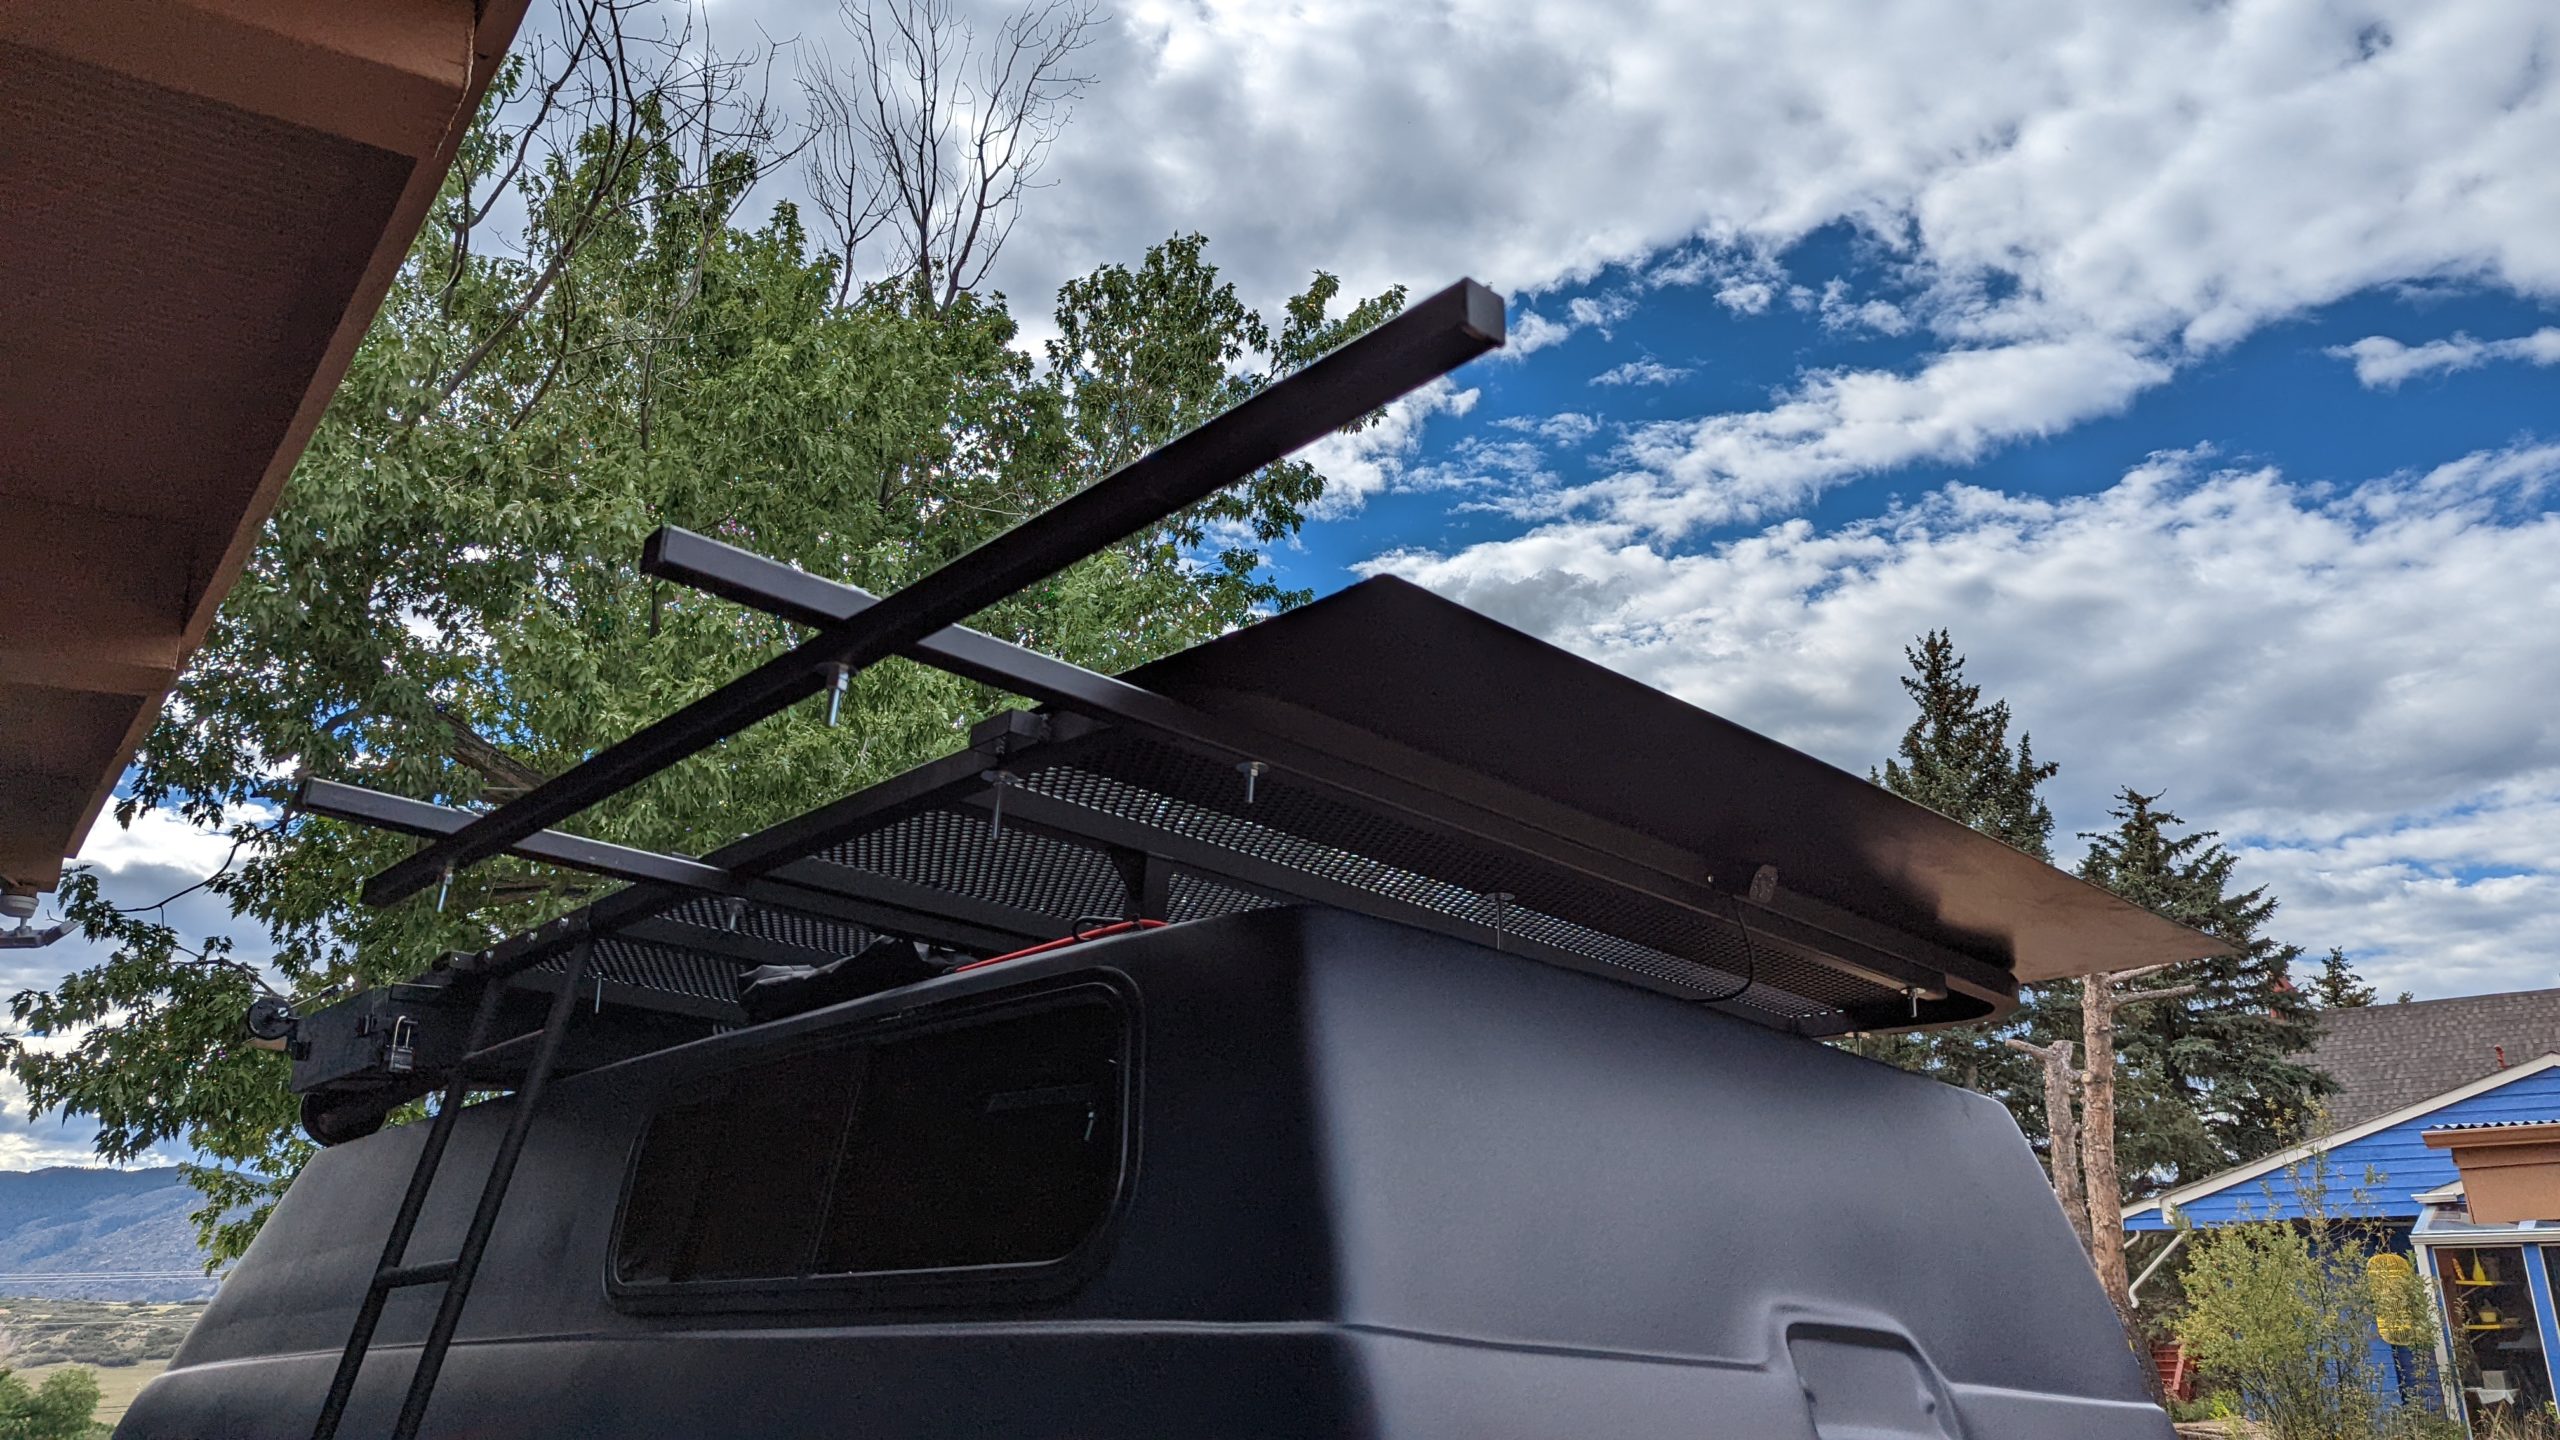
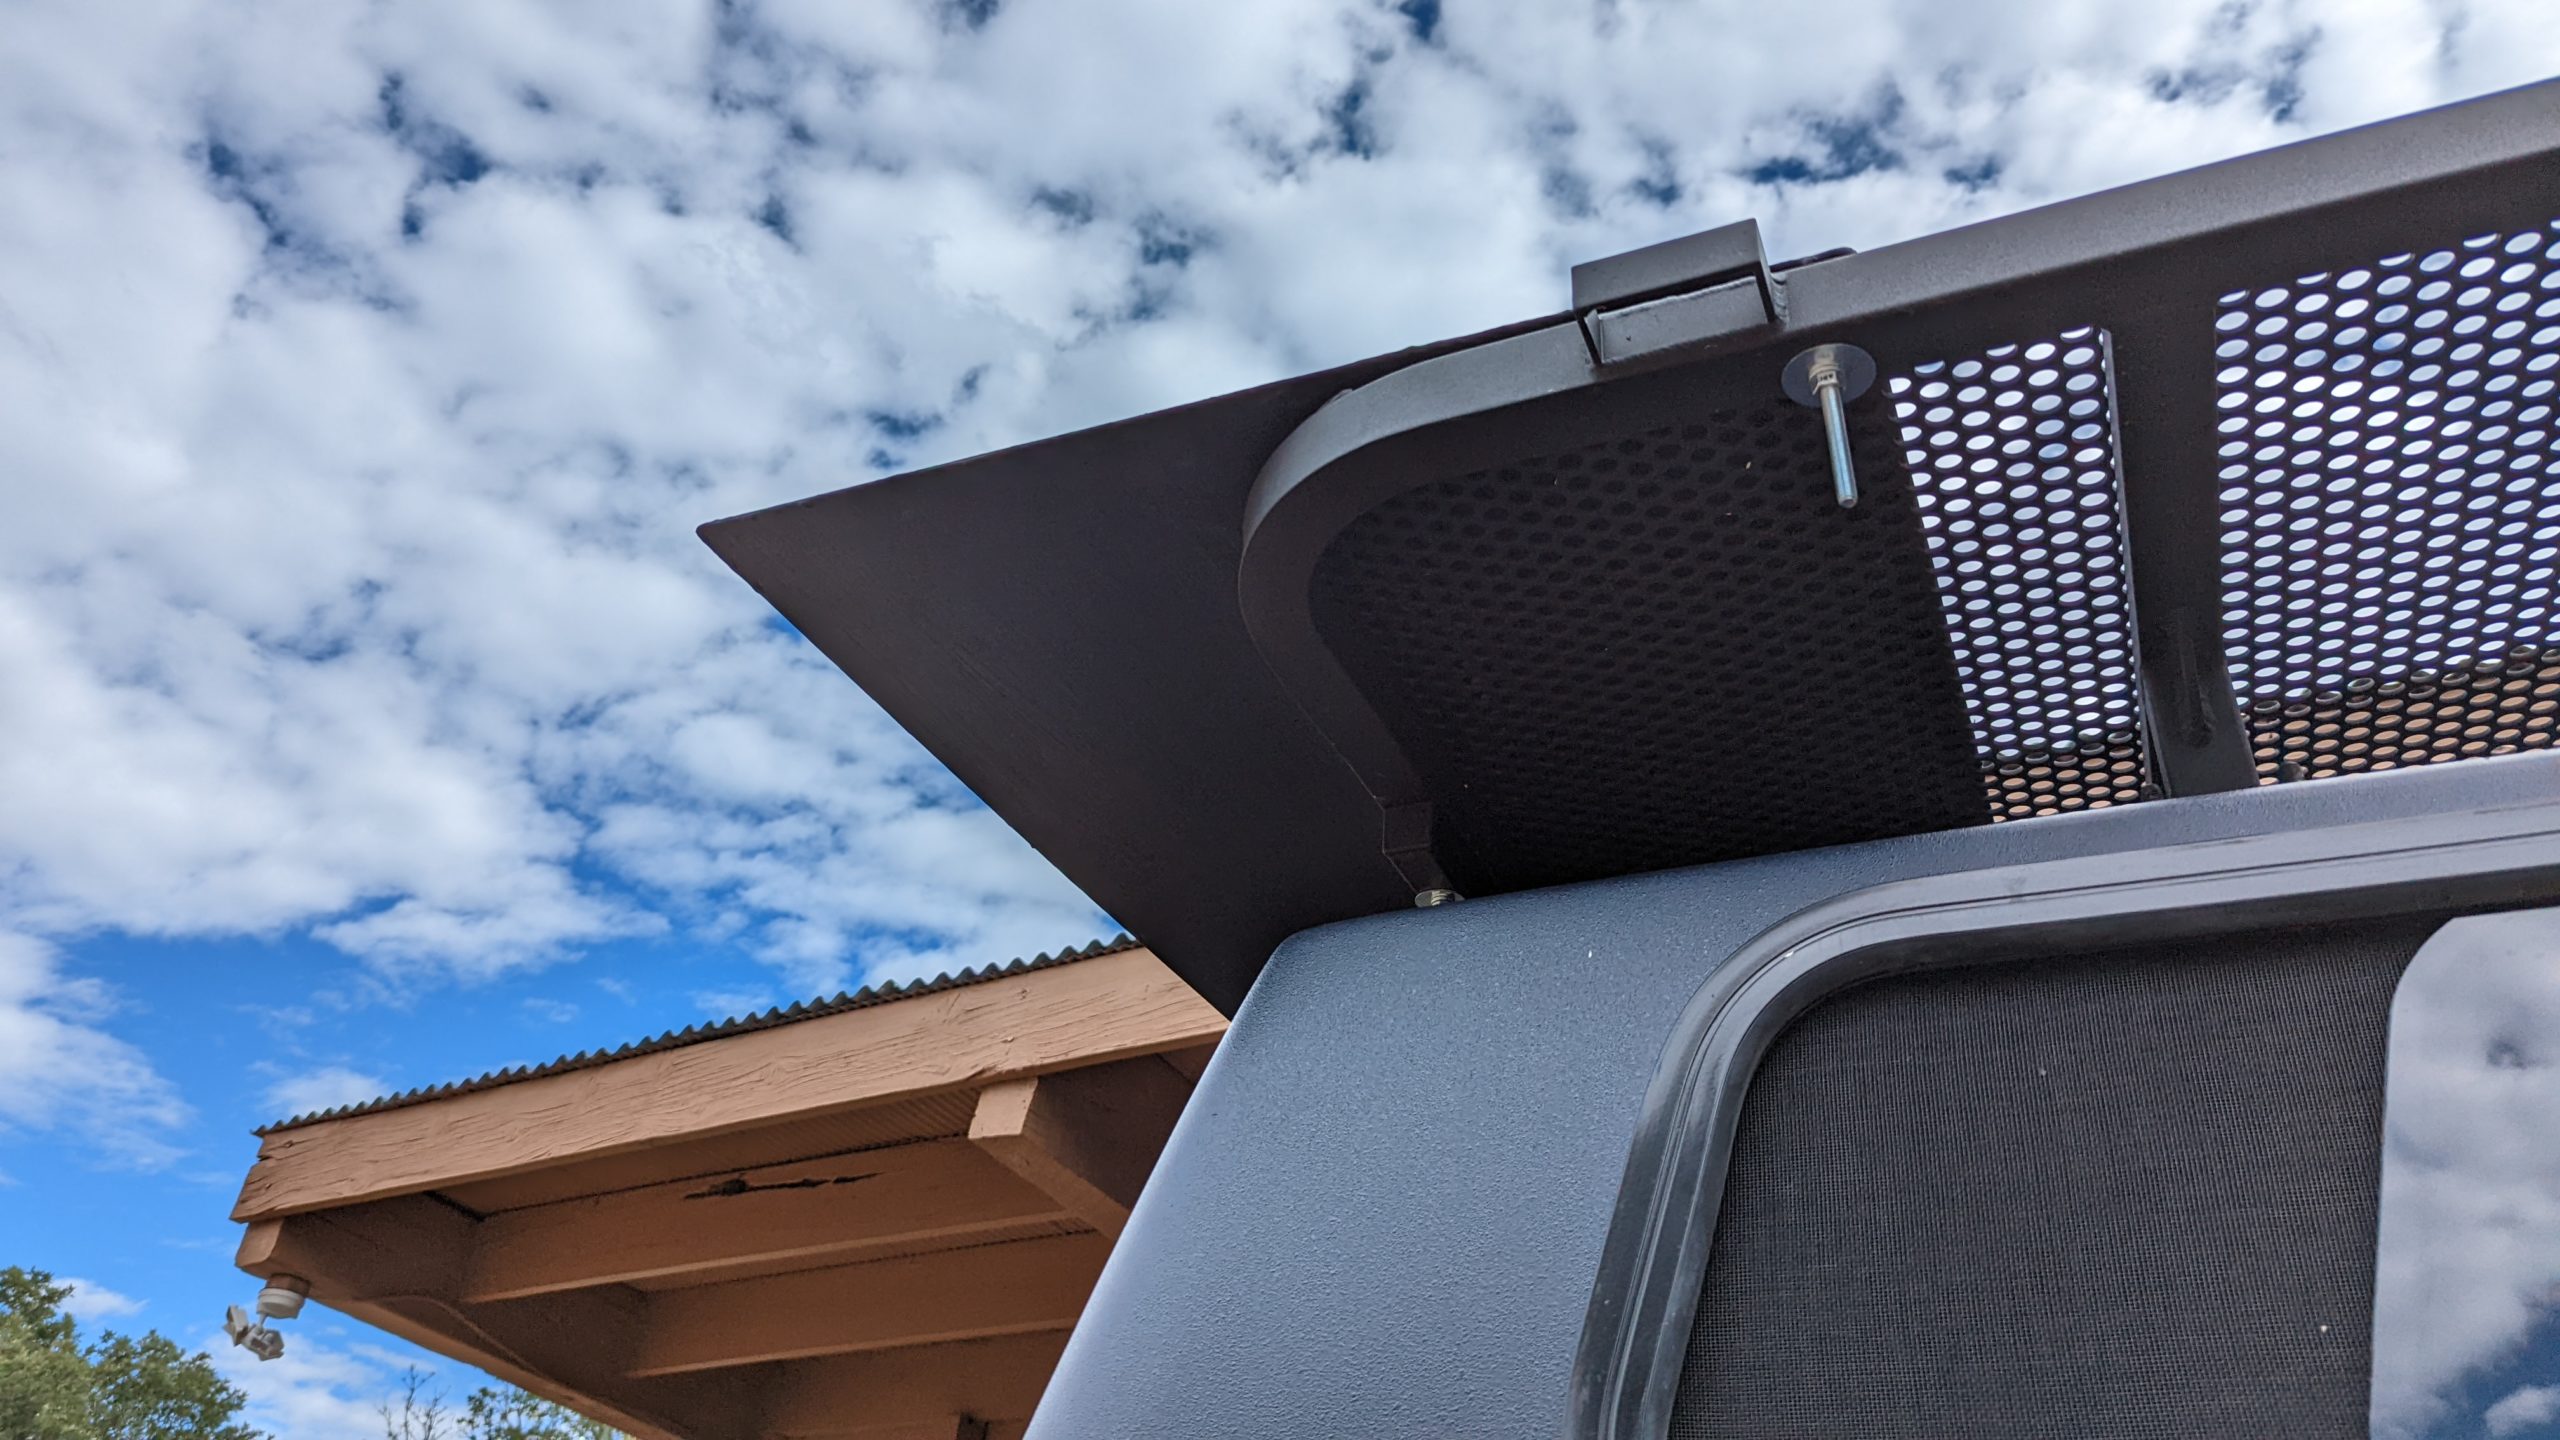
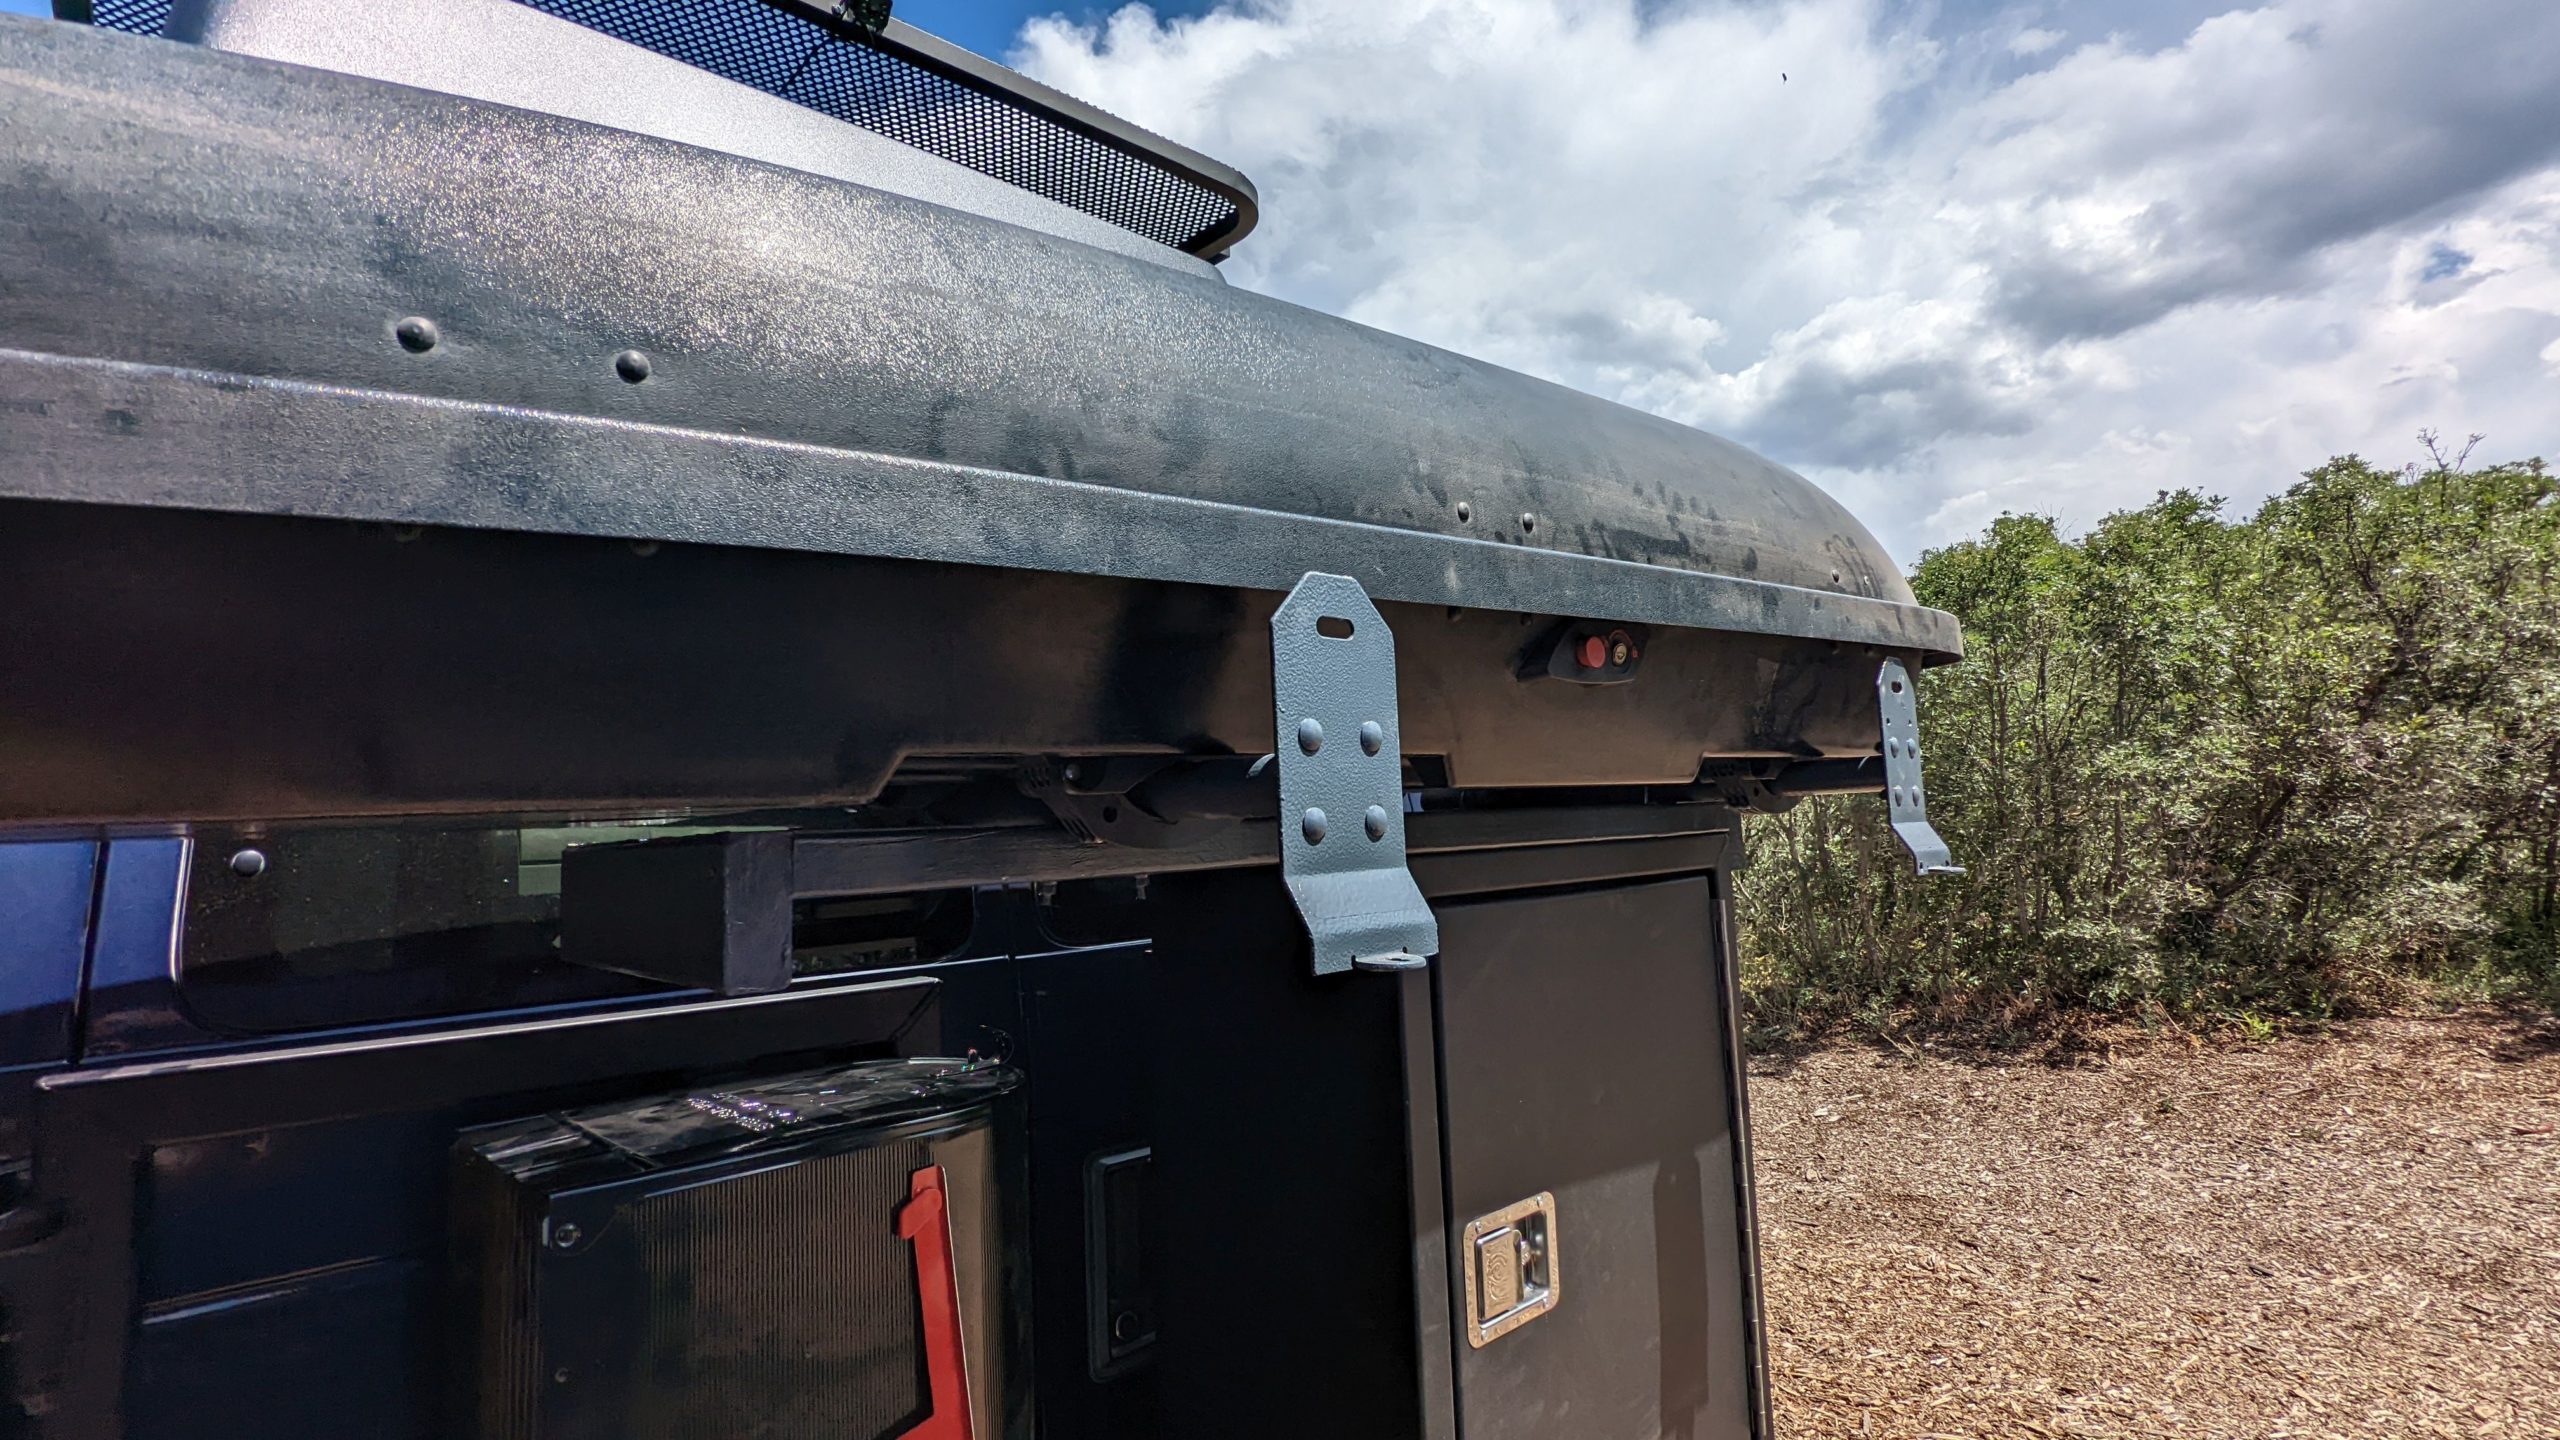
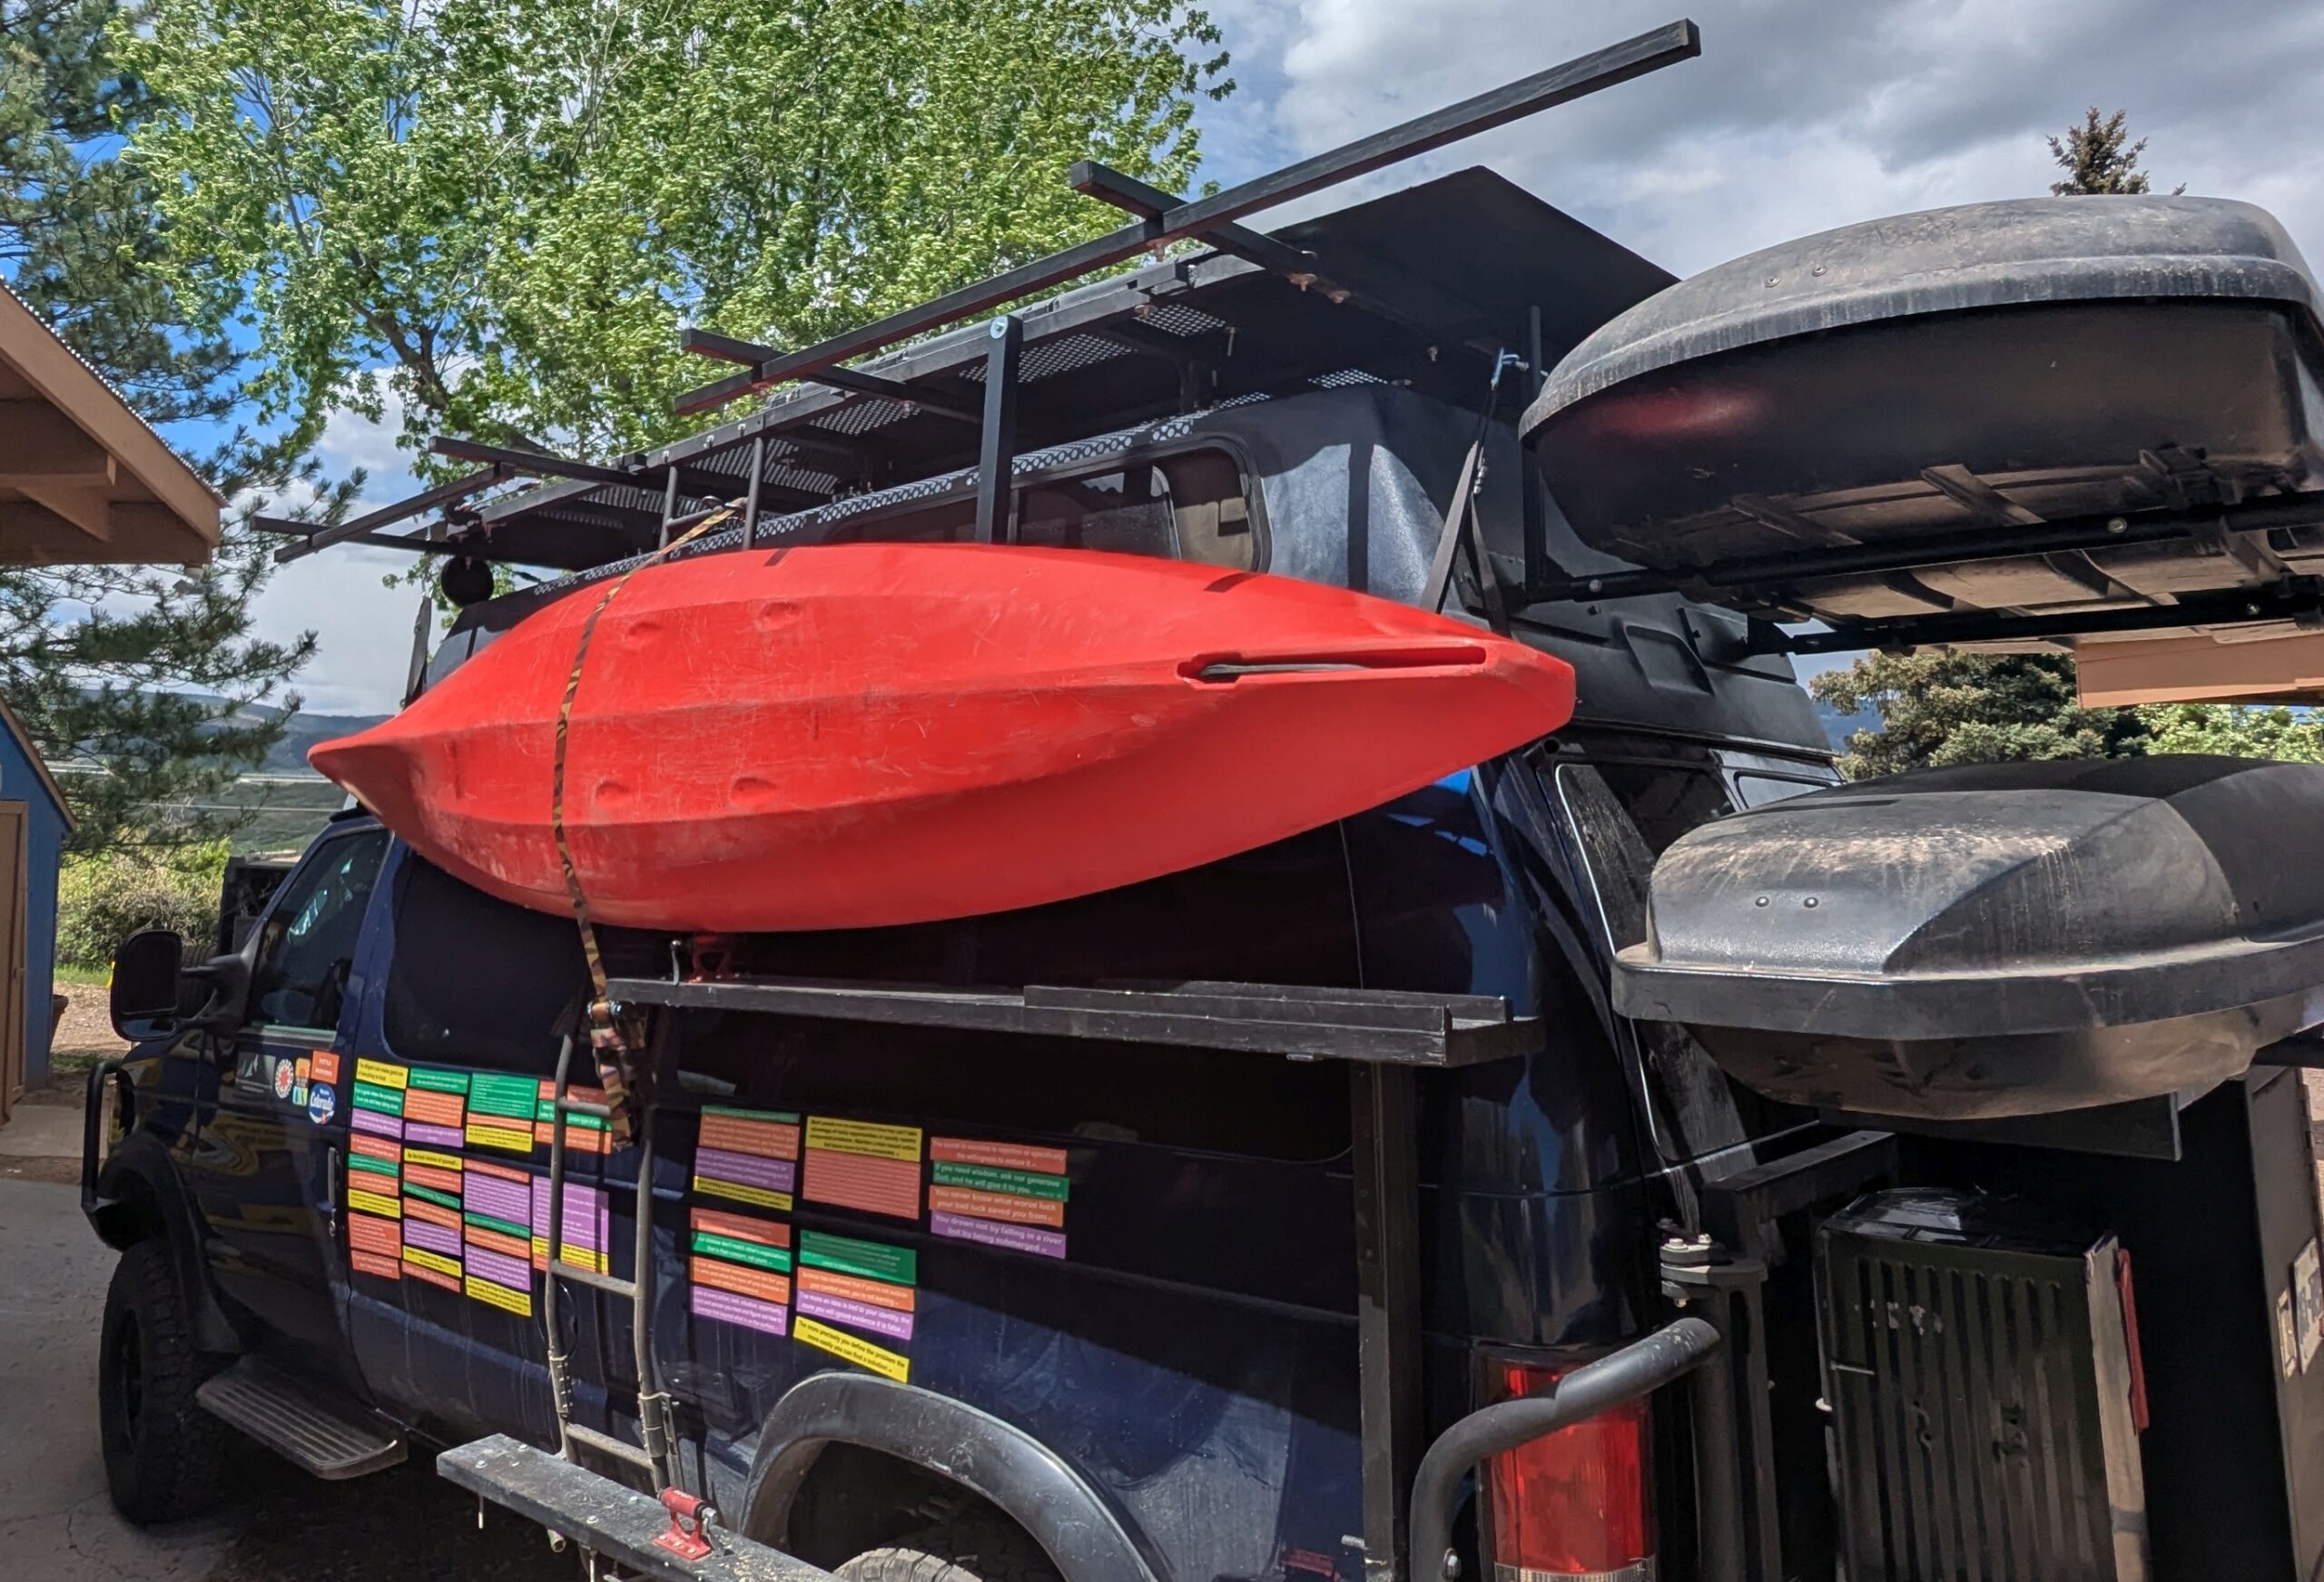
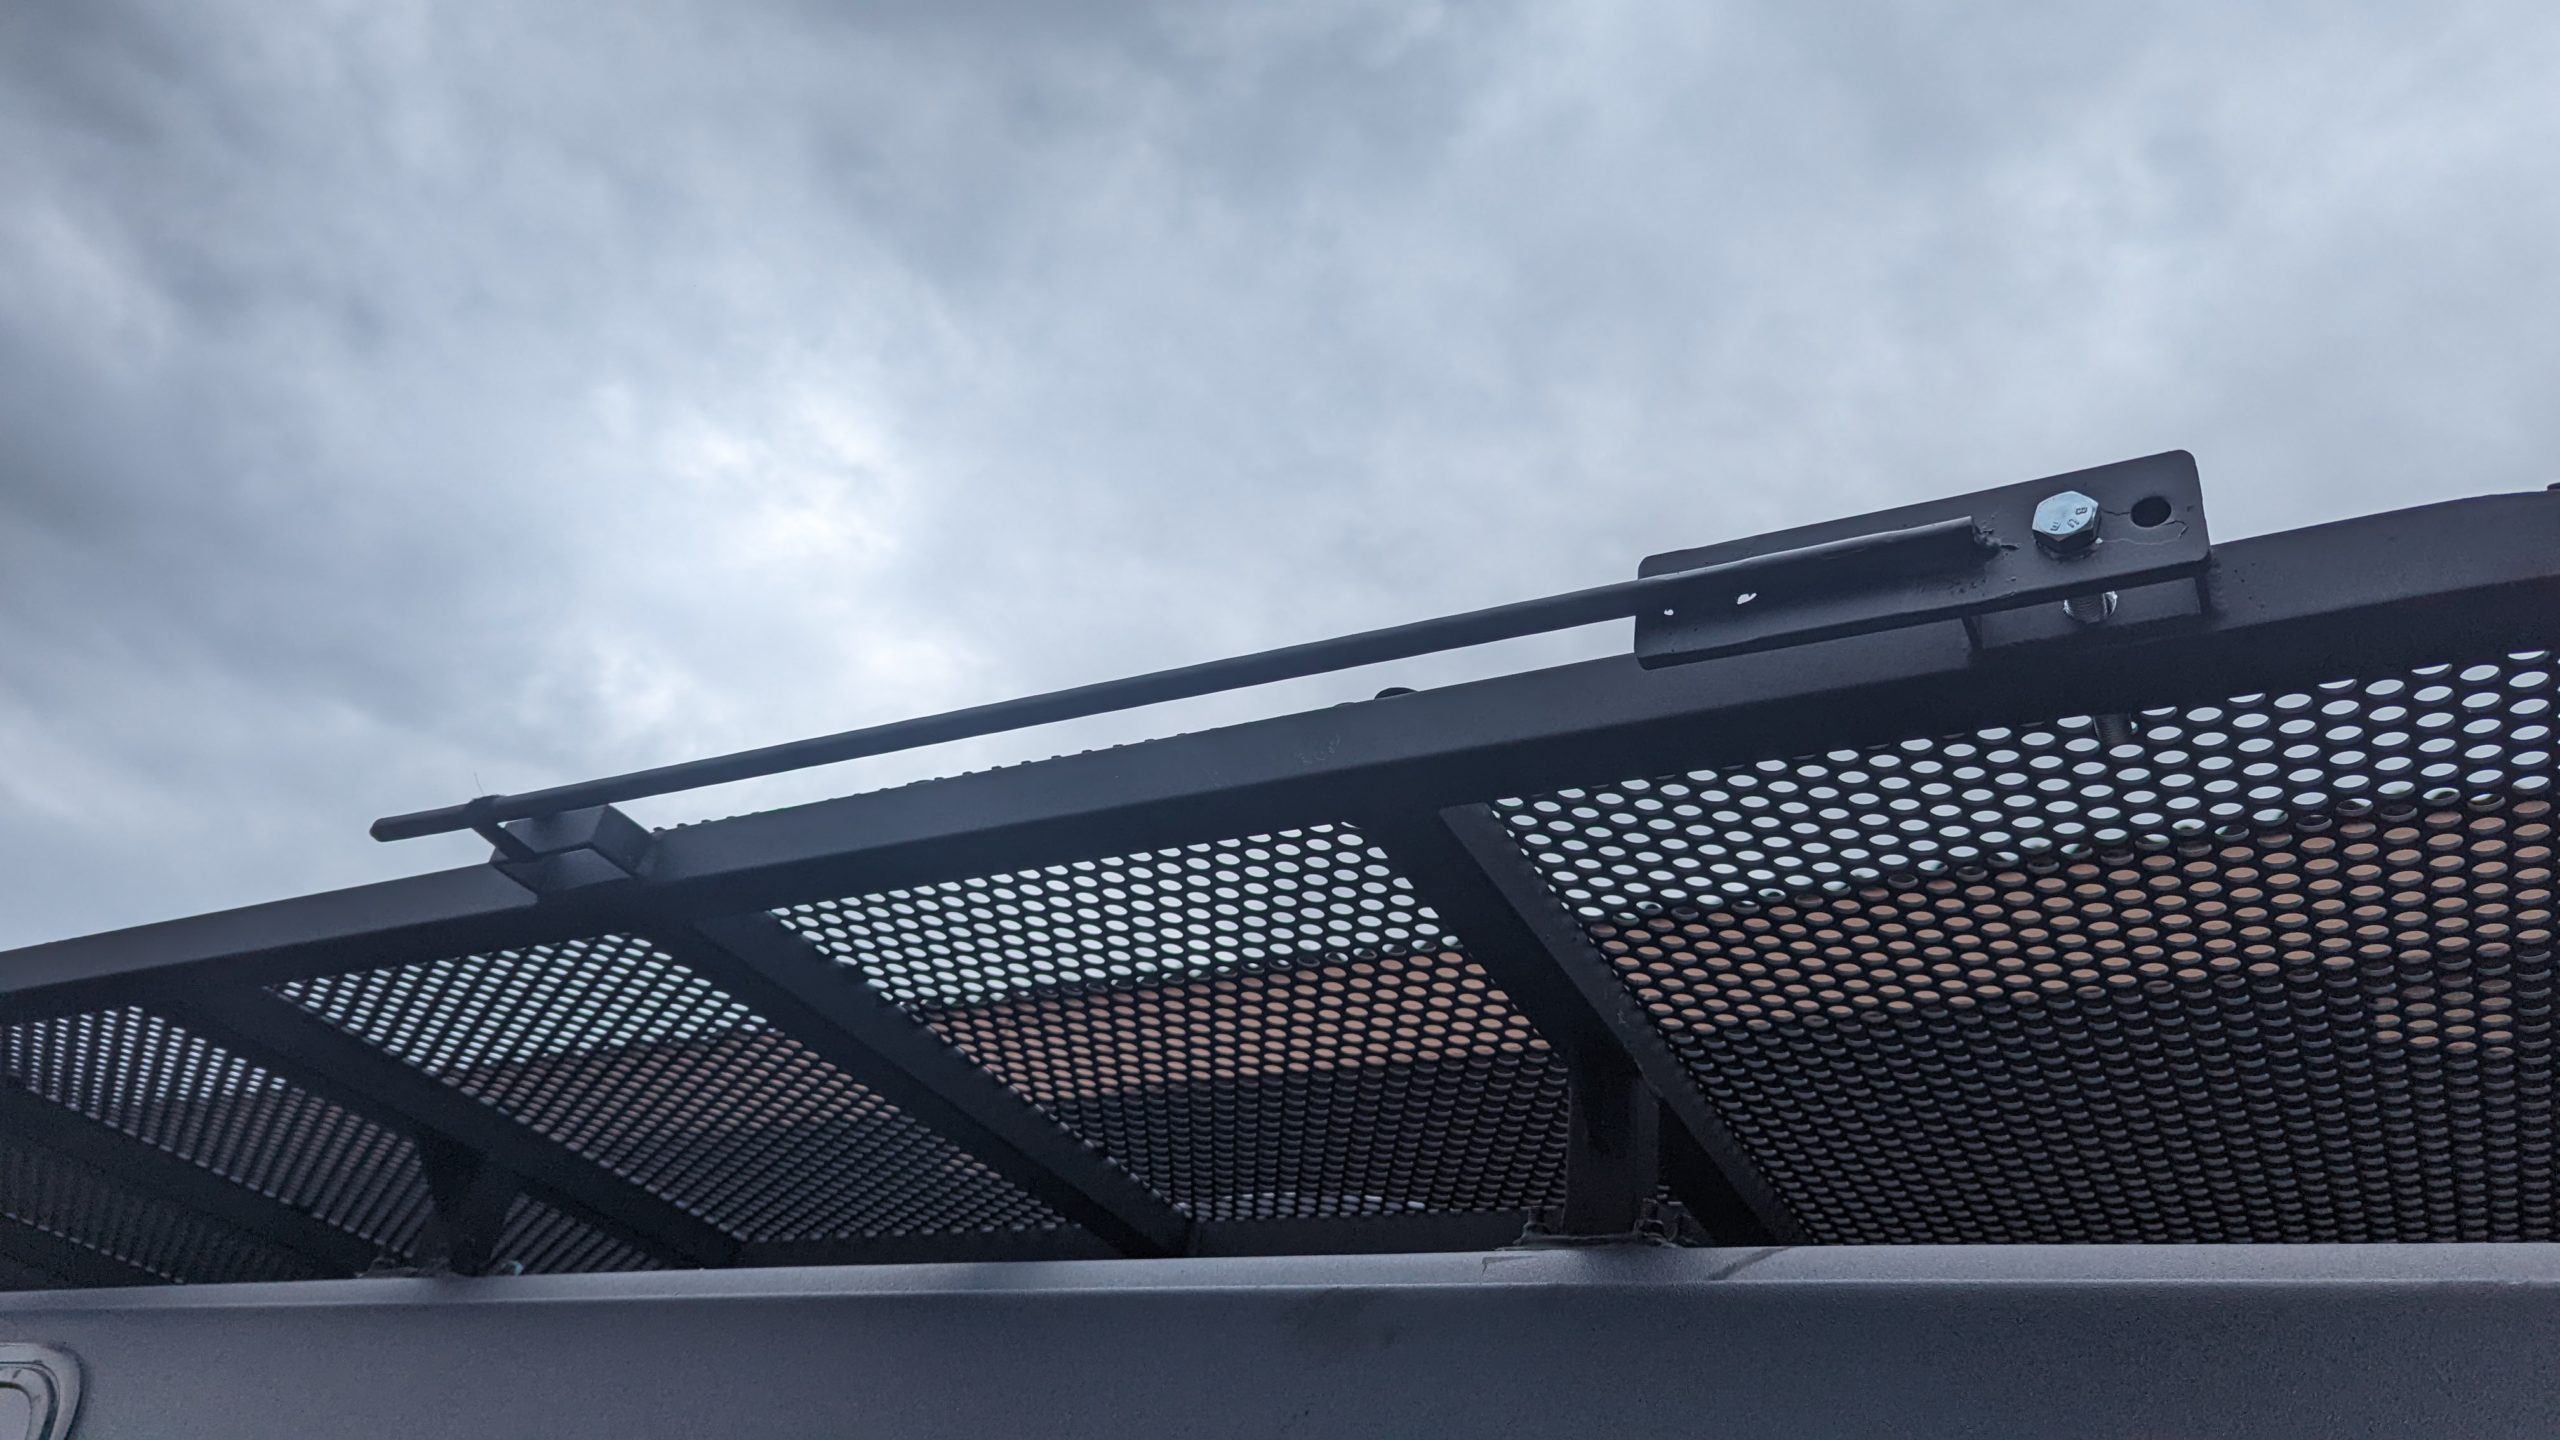
The custom roof rack has an aluminum frame with steel mesh and a steel ladder.
We requested the rack to extend out 6 inches from all 4 sides of the roof, but somehow that was missed and only the sides extend out. As a result, we added steel panel sheets on the front and rear so that the roof extends out as originally requested.
Exterior Roof Lights
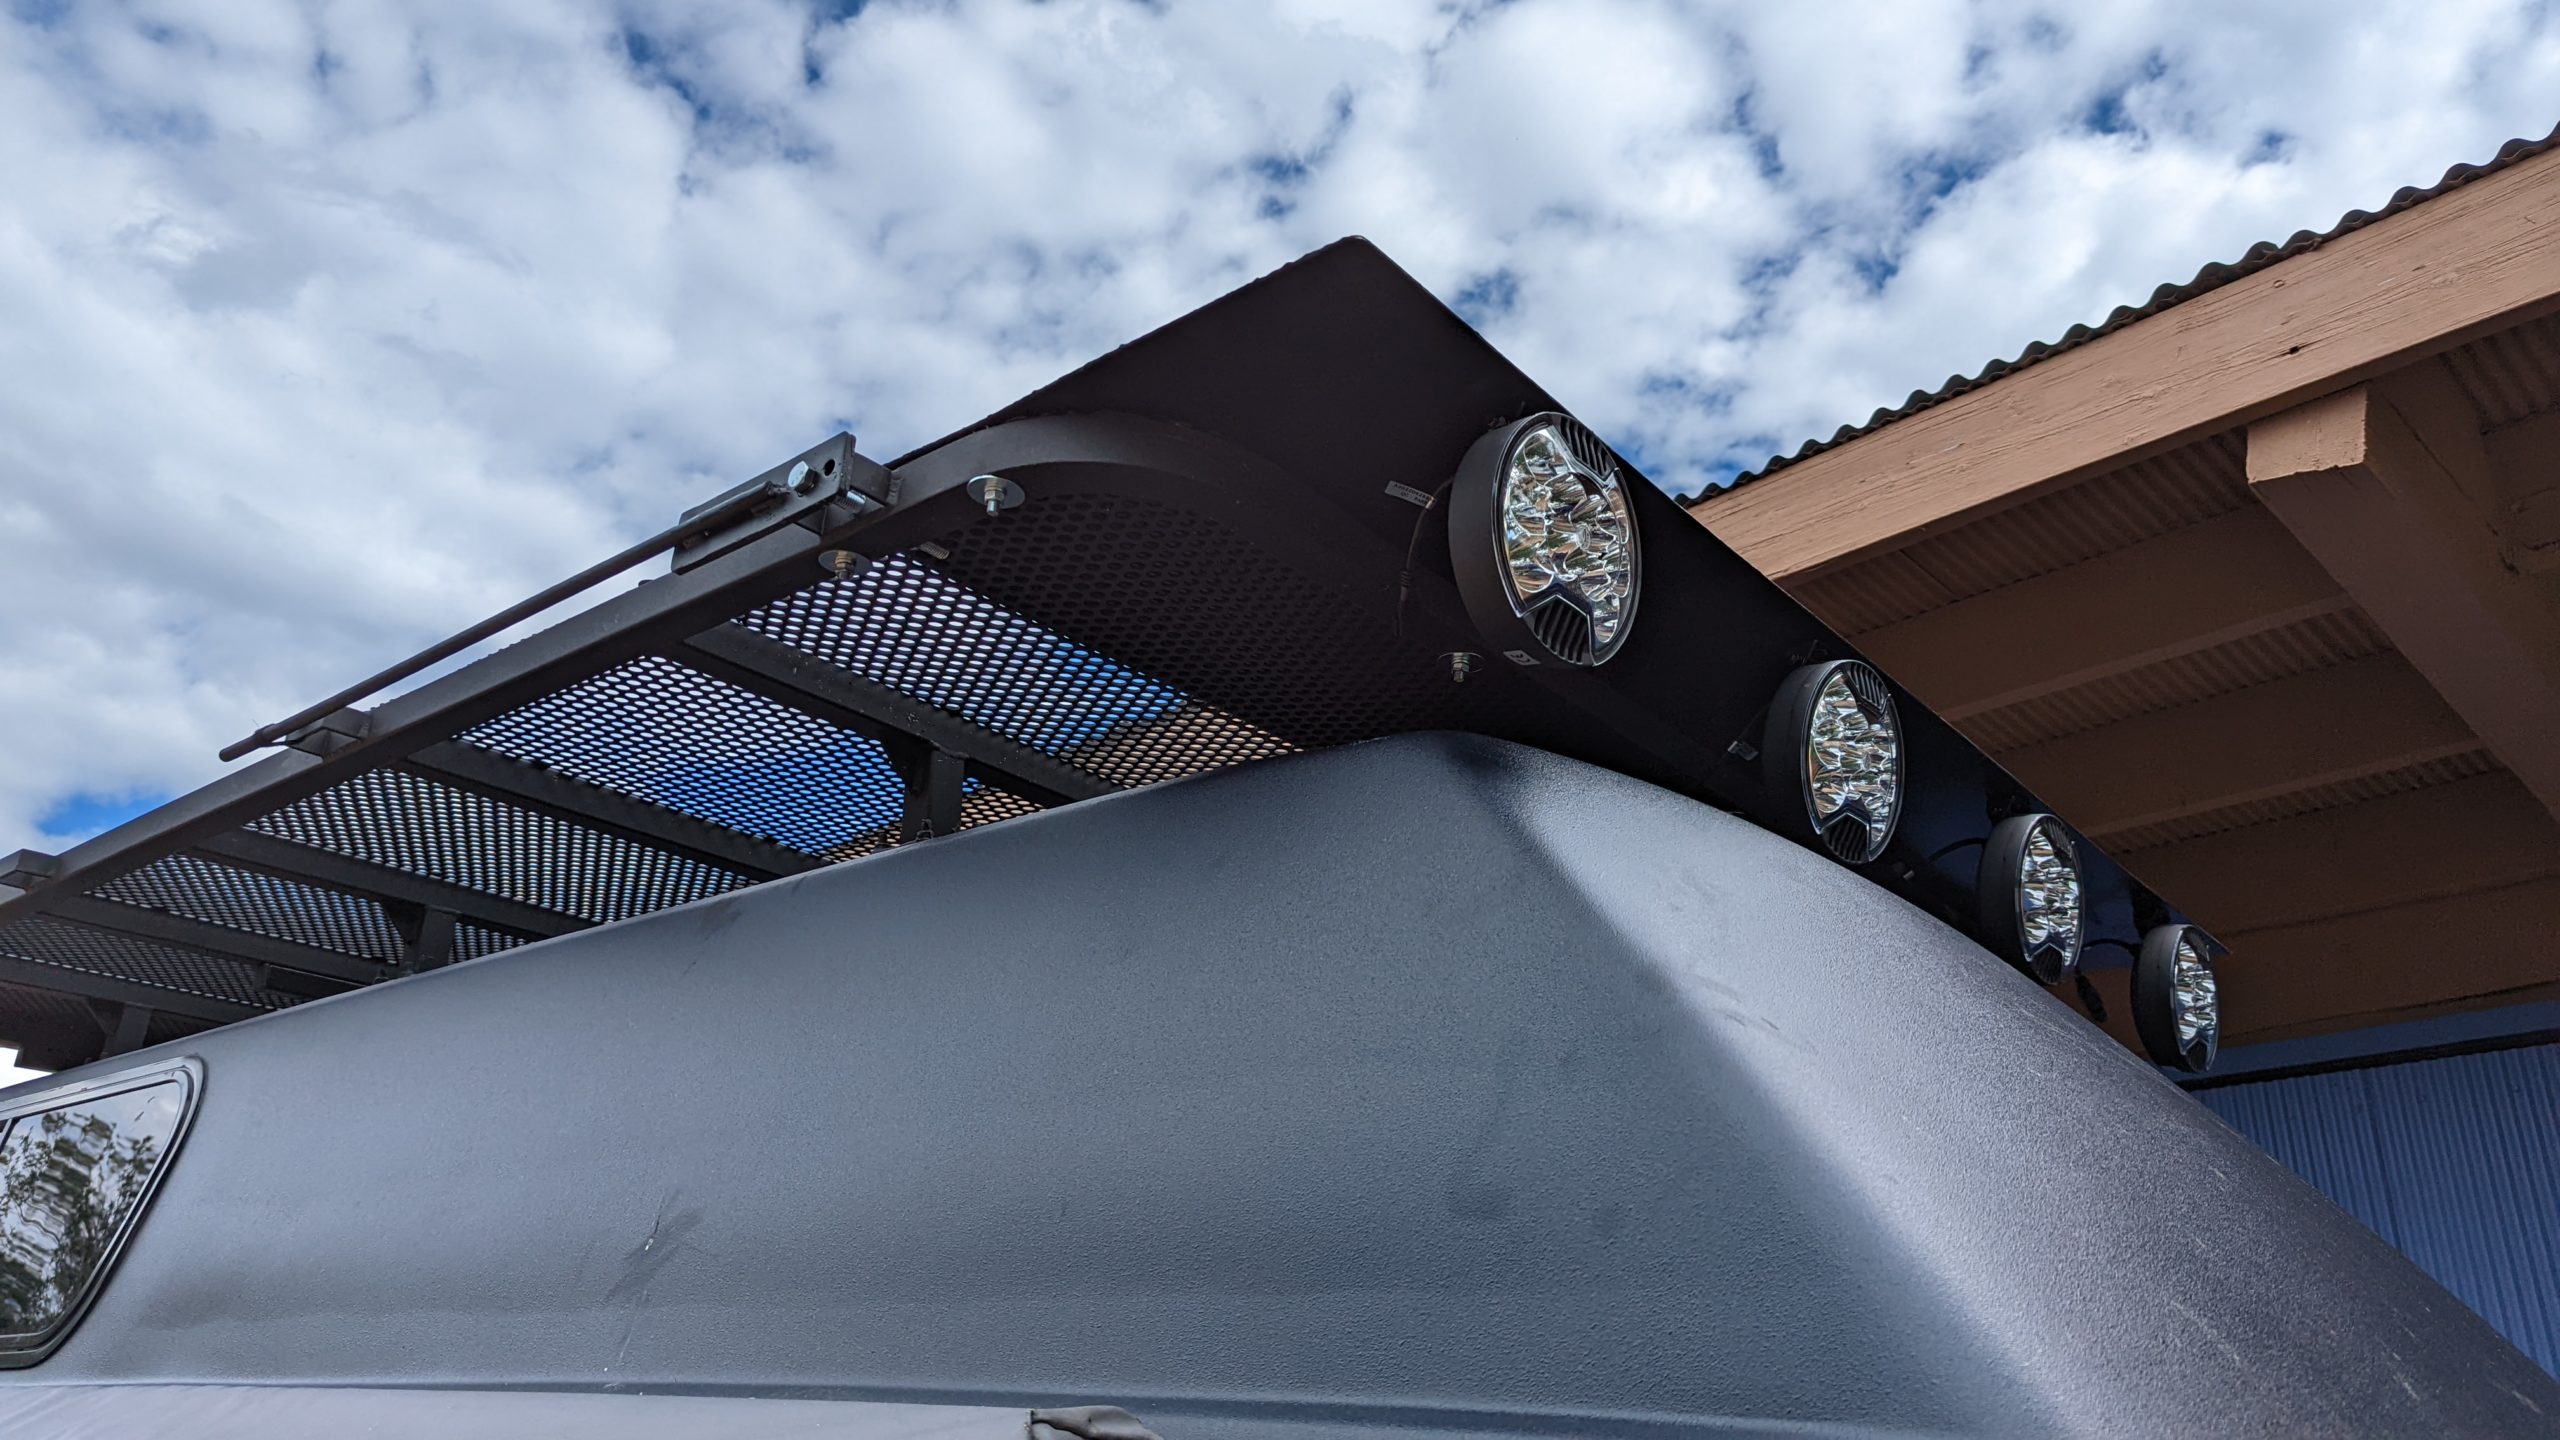
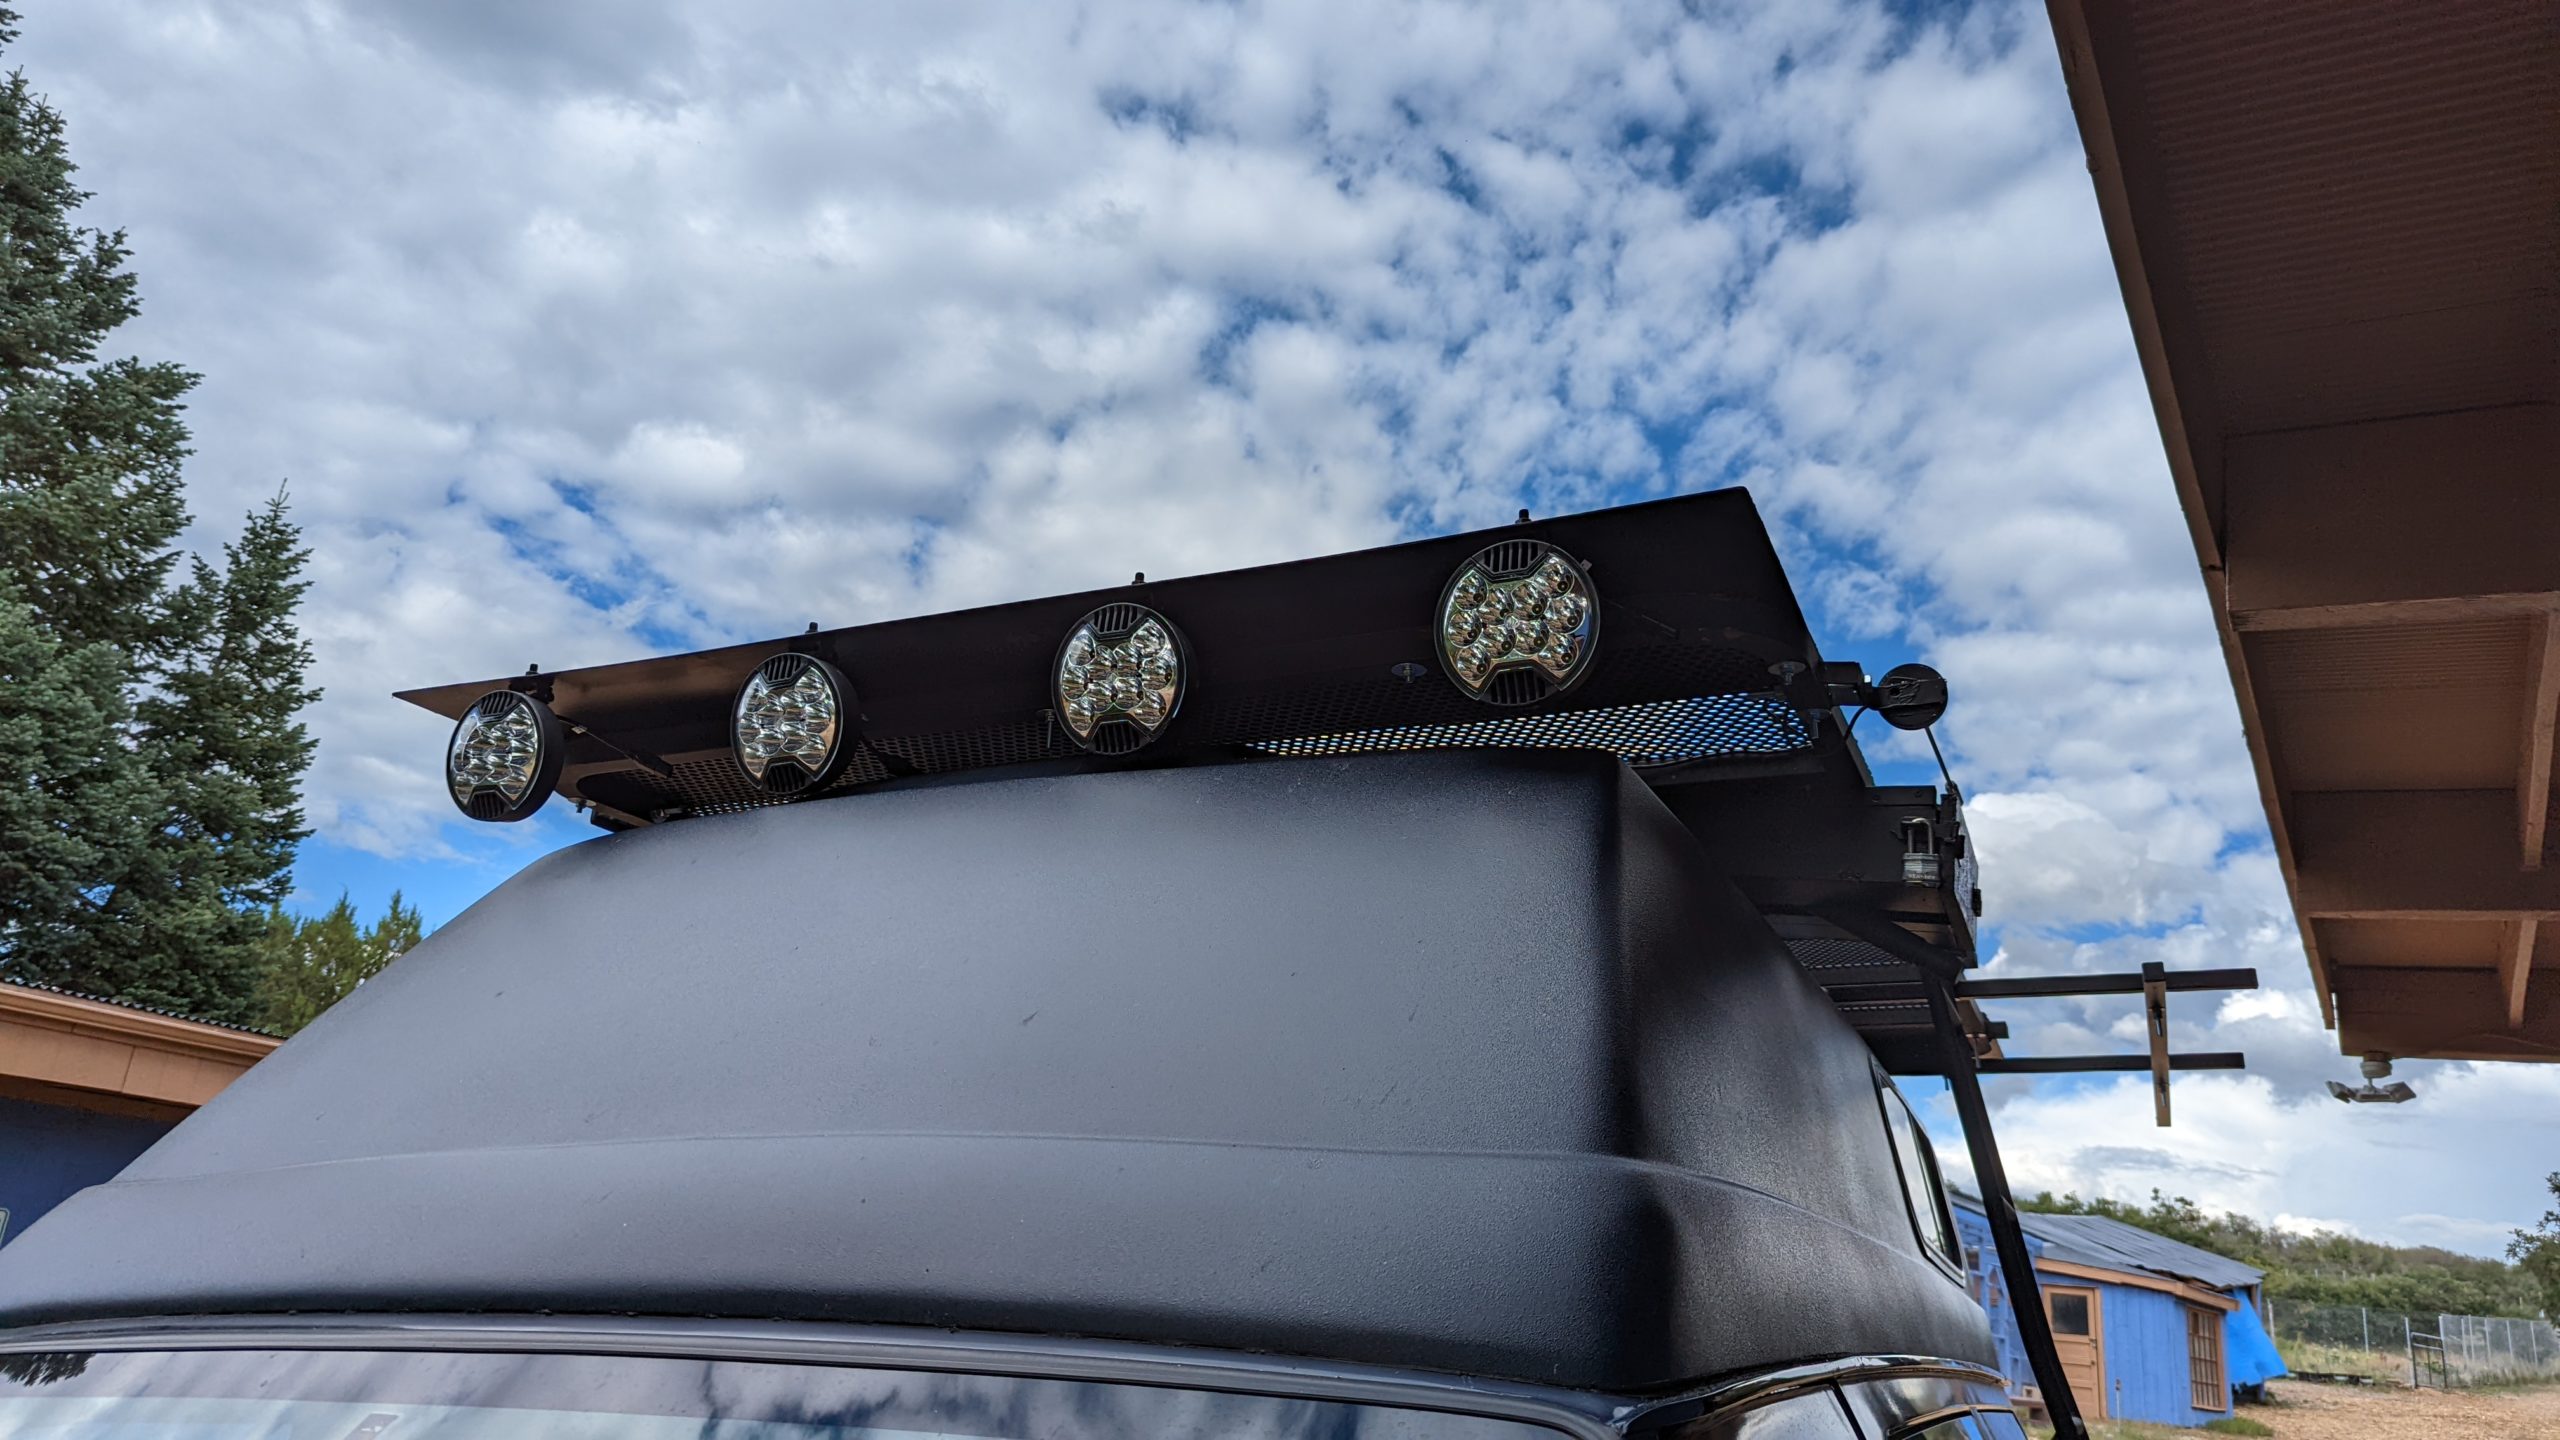
We added 4 additional front lights to the roof front panel.
Pull-up Bar
The drivers side includes 1.25 inch standard steel square tubing attached to the roof rack and extending out to make a pull-up bar with different hand hold configurations. Besides helping stay in shape on road trips, the bar is a great way to hang and stretch the back on long driving trips.
Exterior
Sliding Door Mods
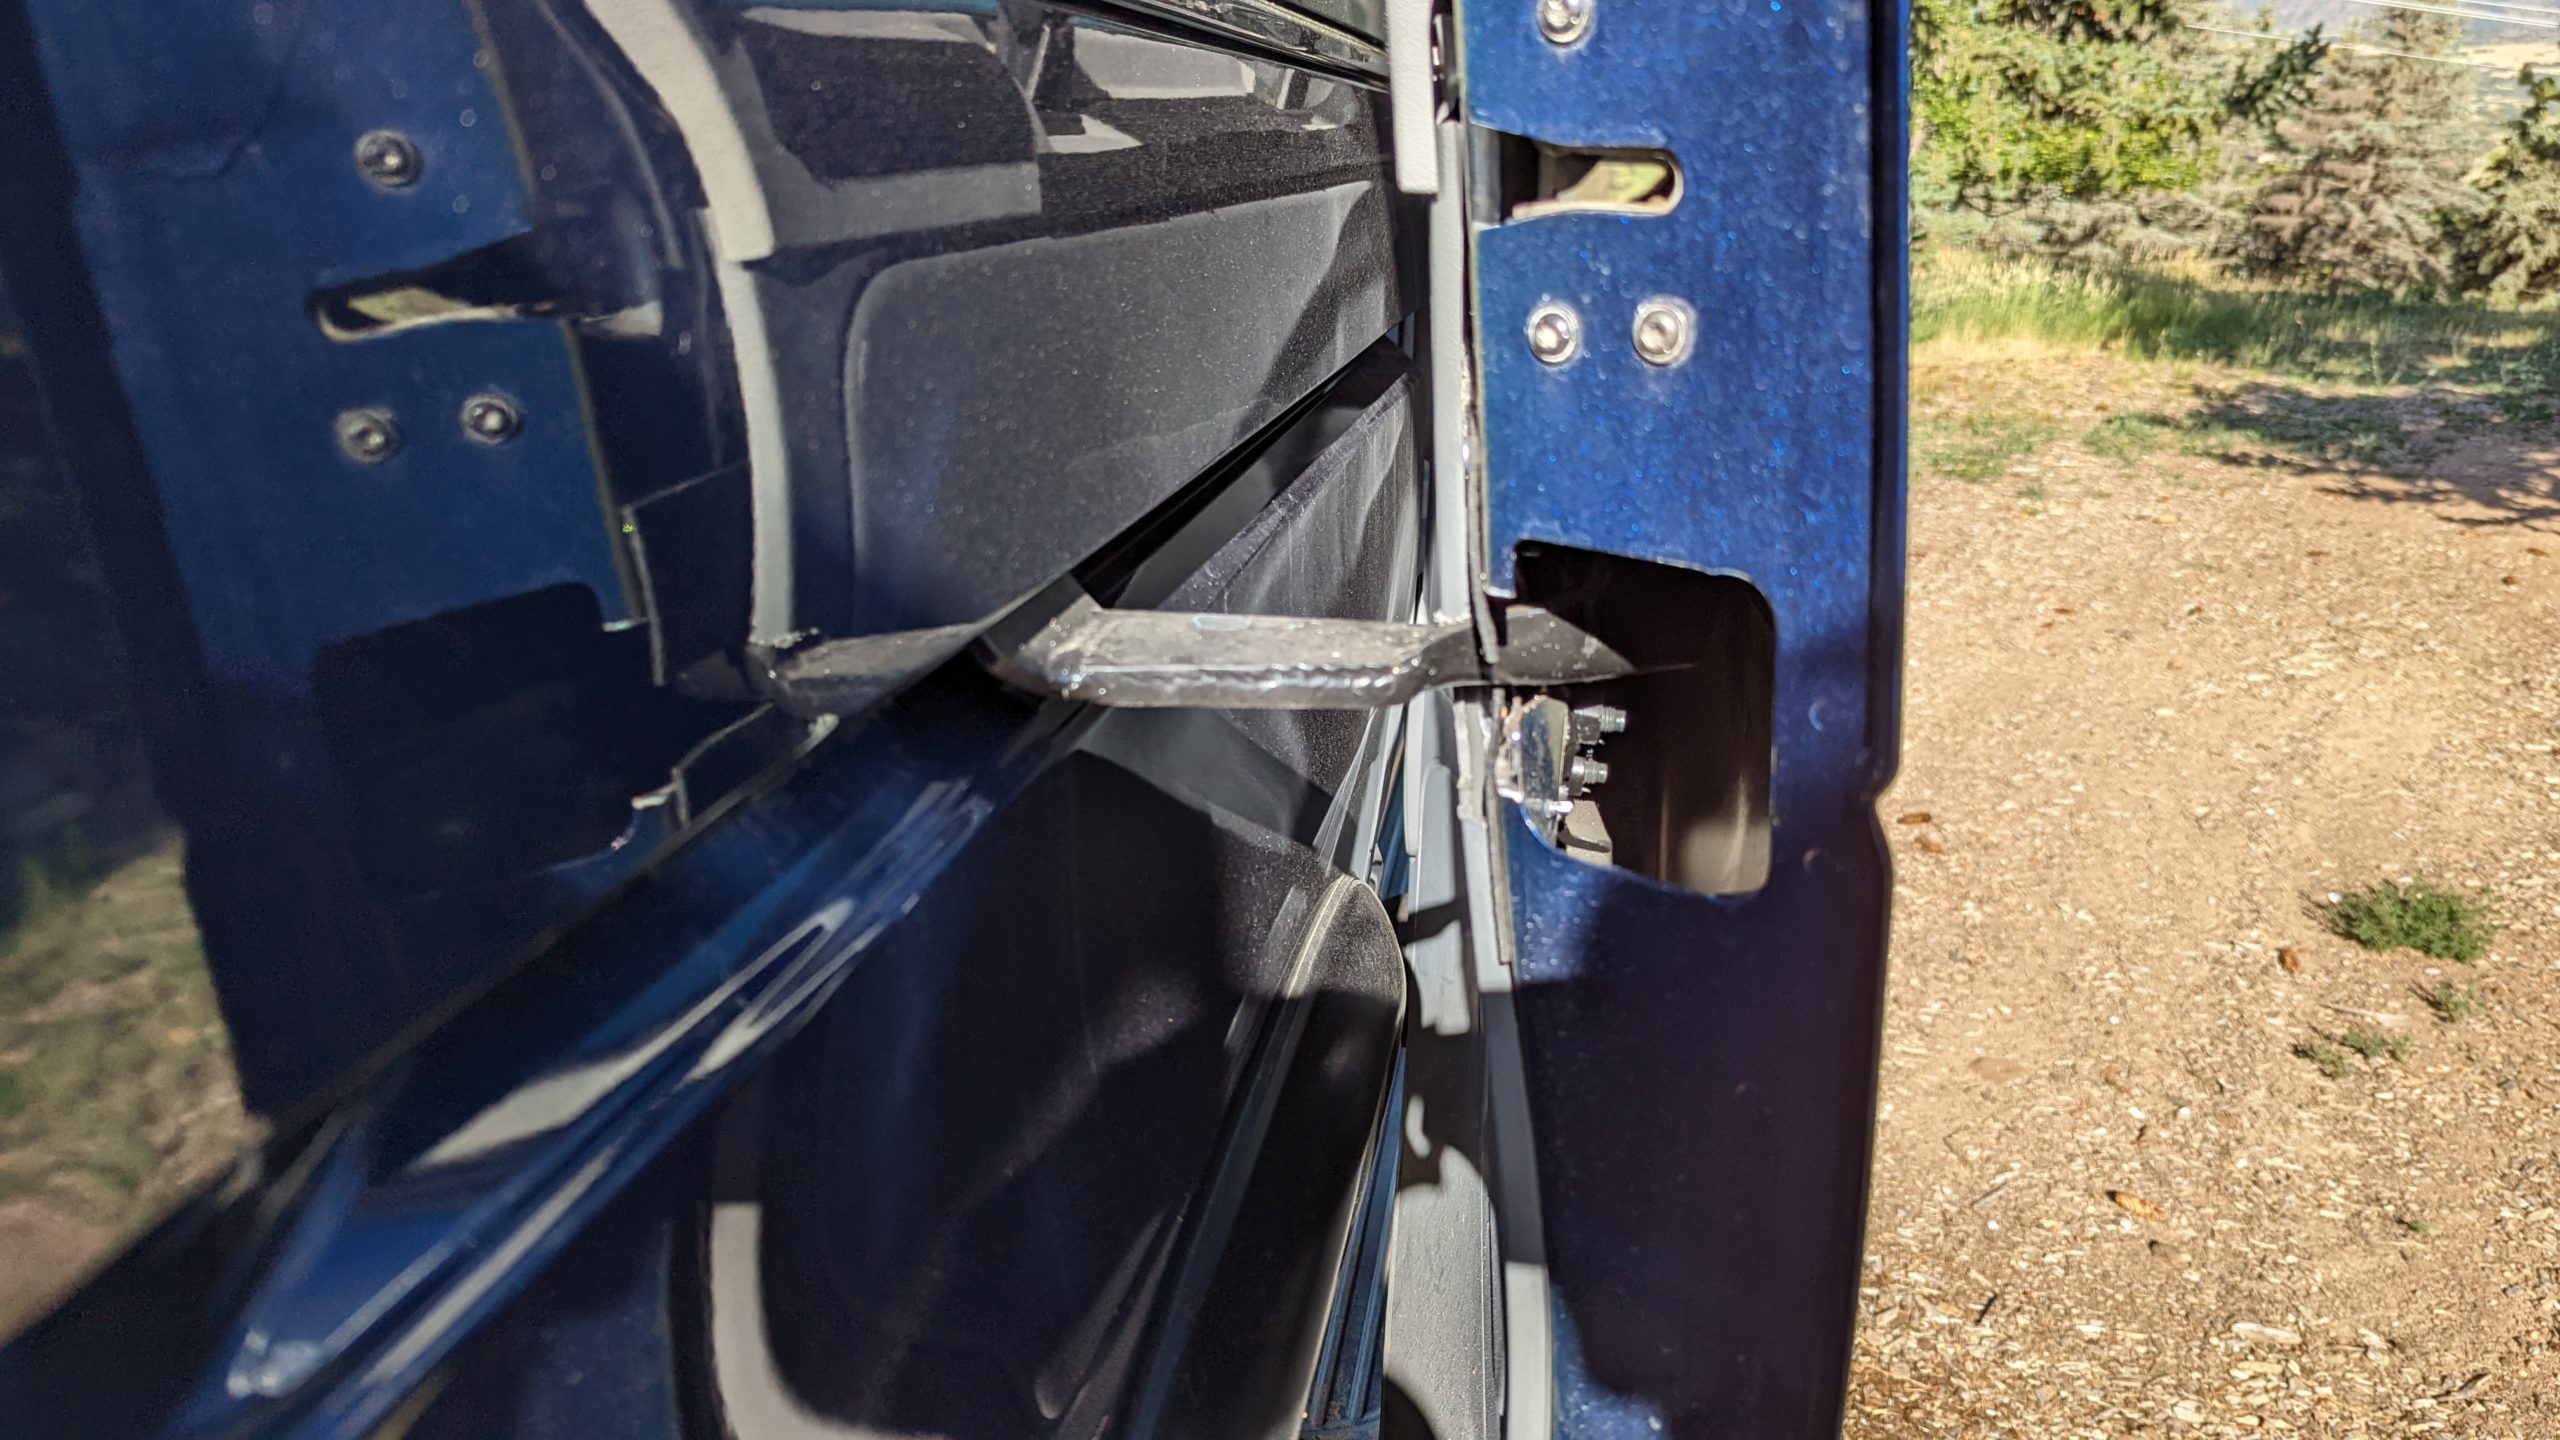
There was a sliding door modification installed that kicks out the door more on opening to accommodate the larger tires.
Front Bumper
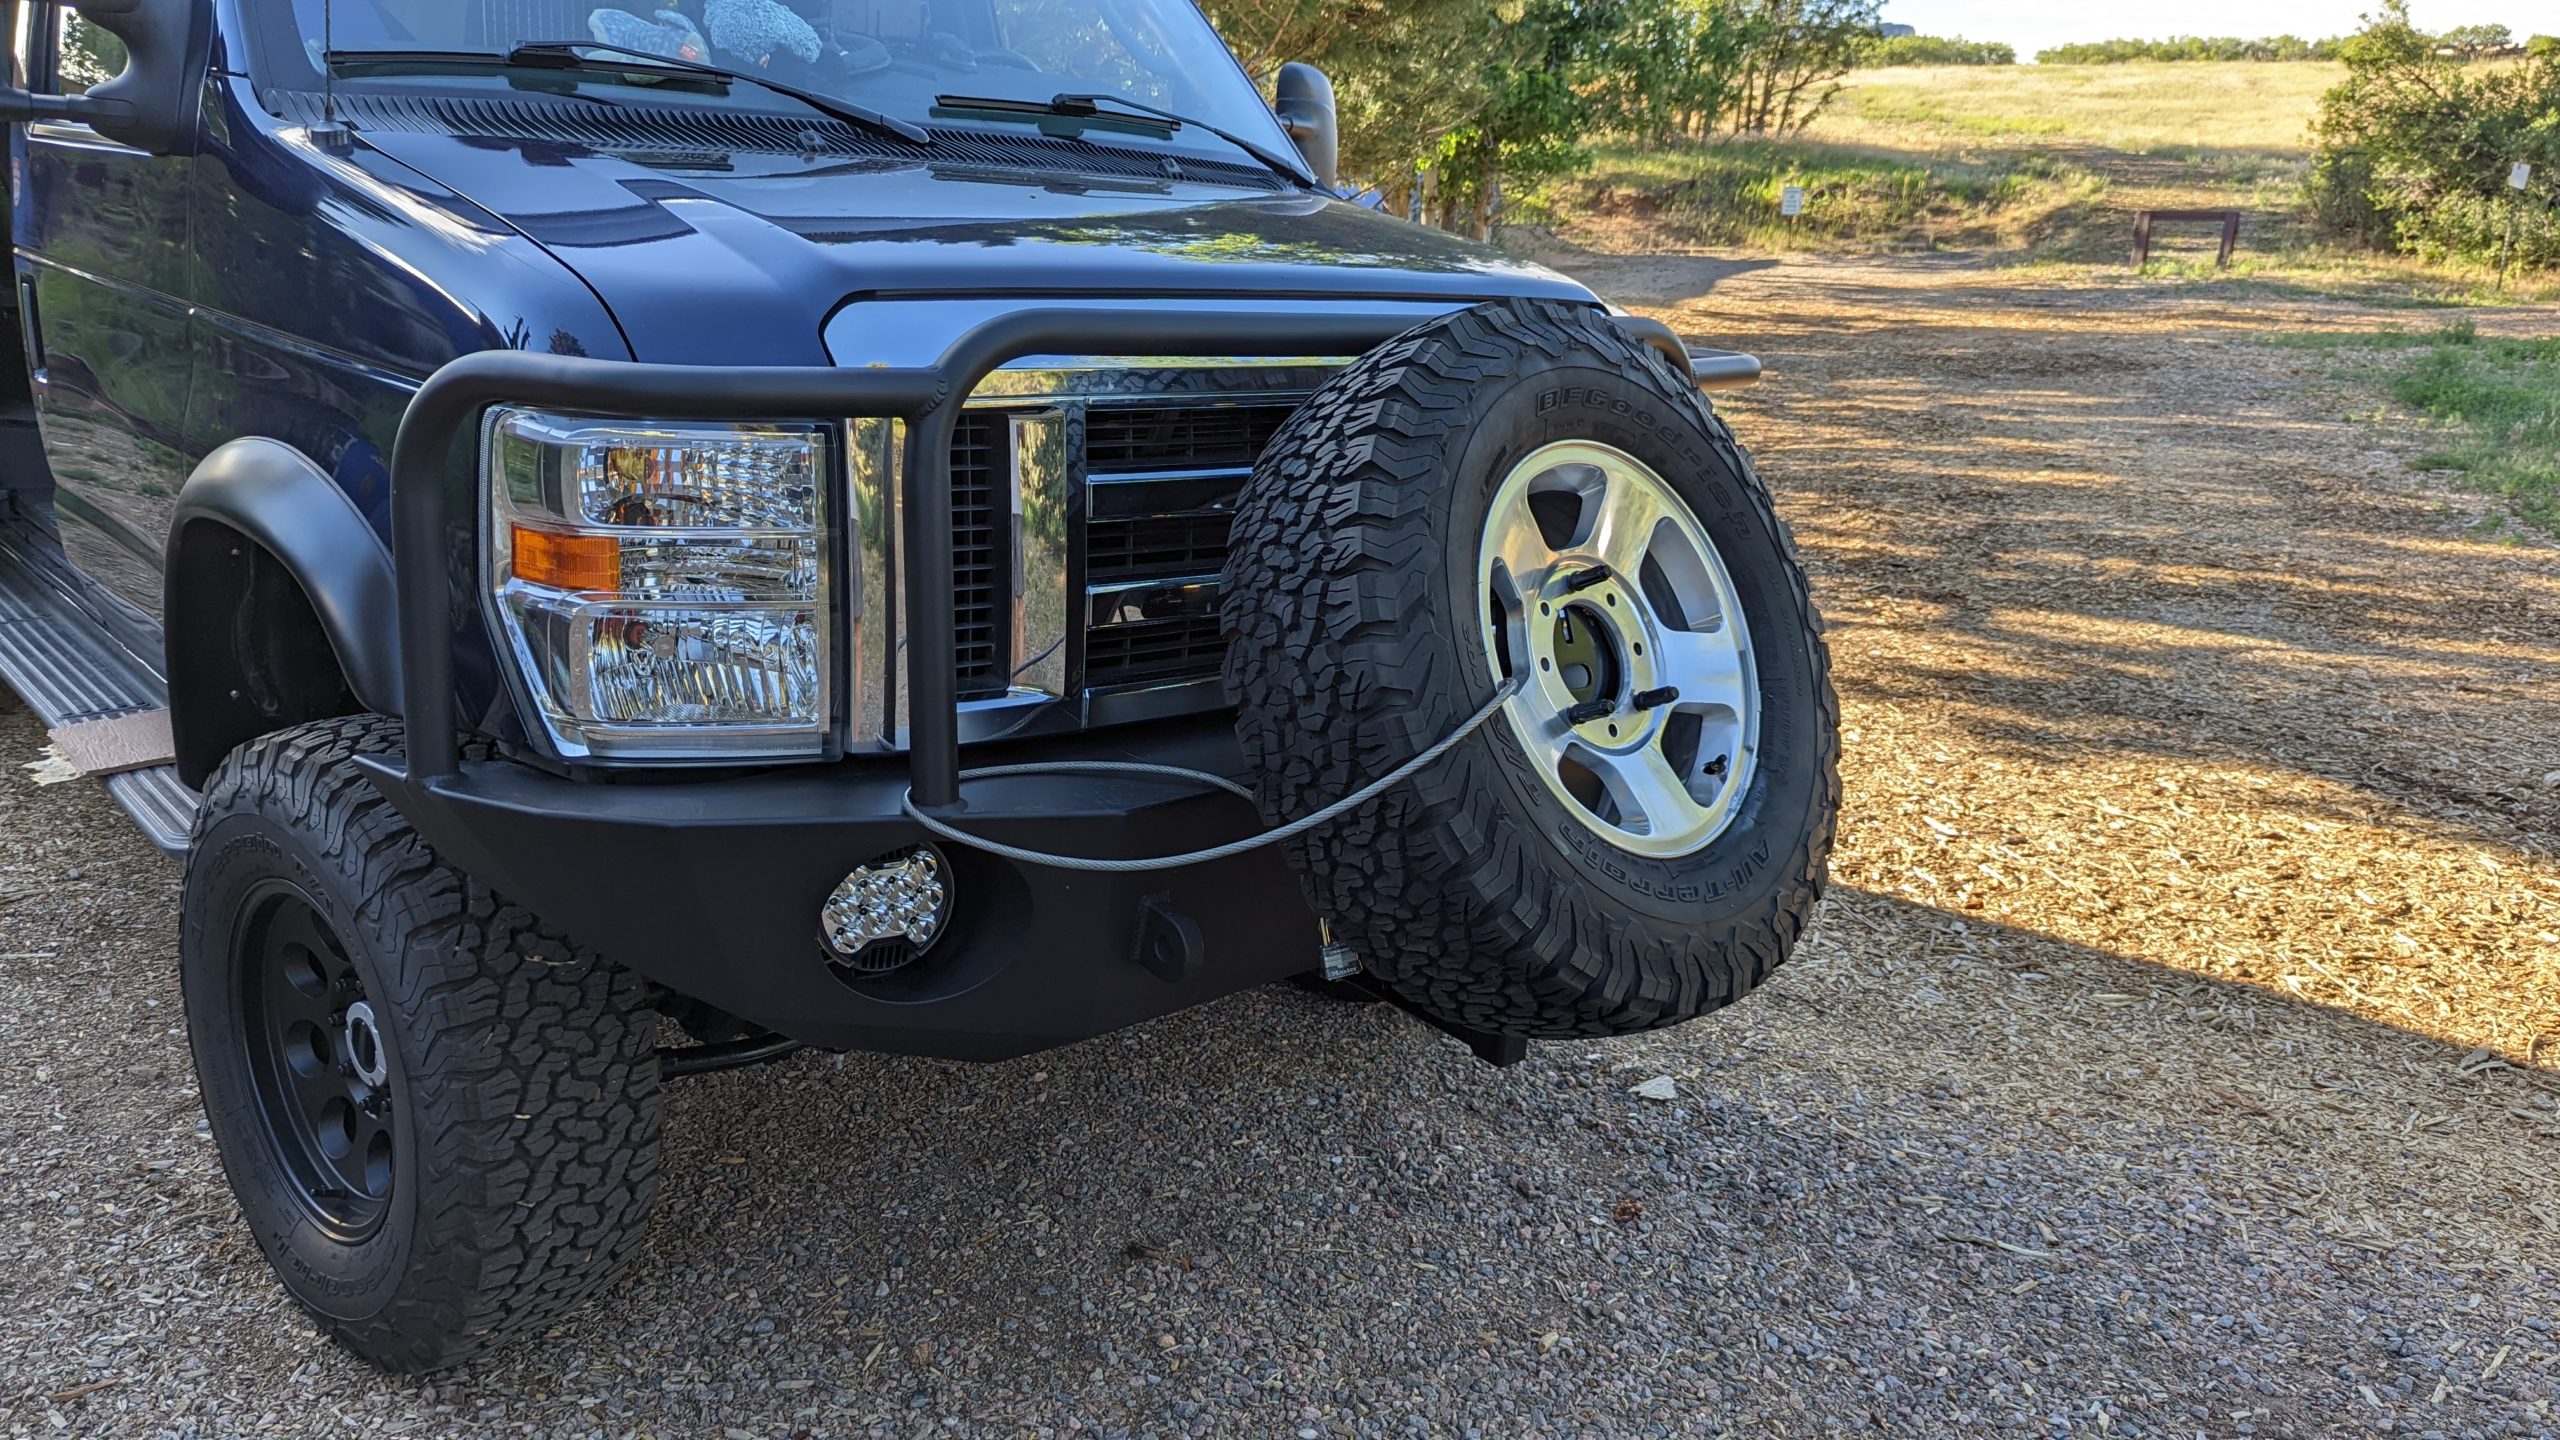
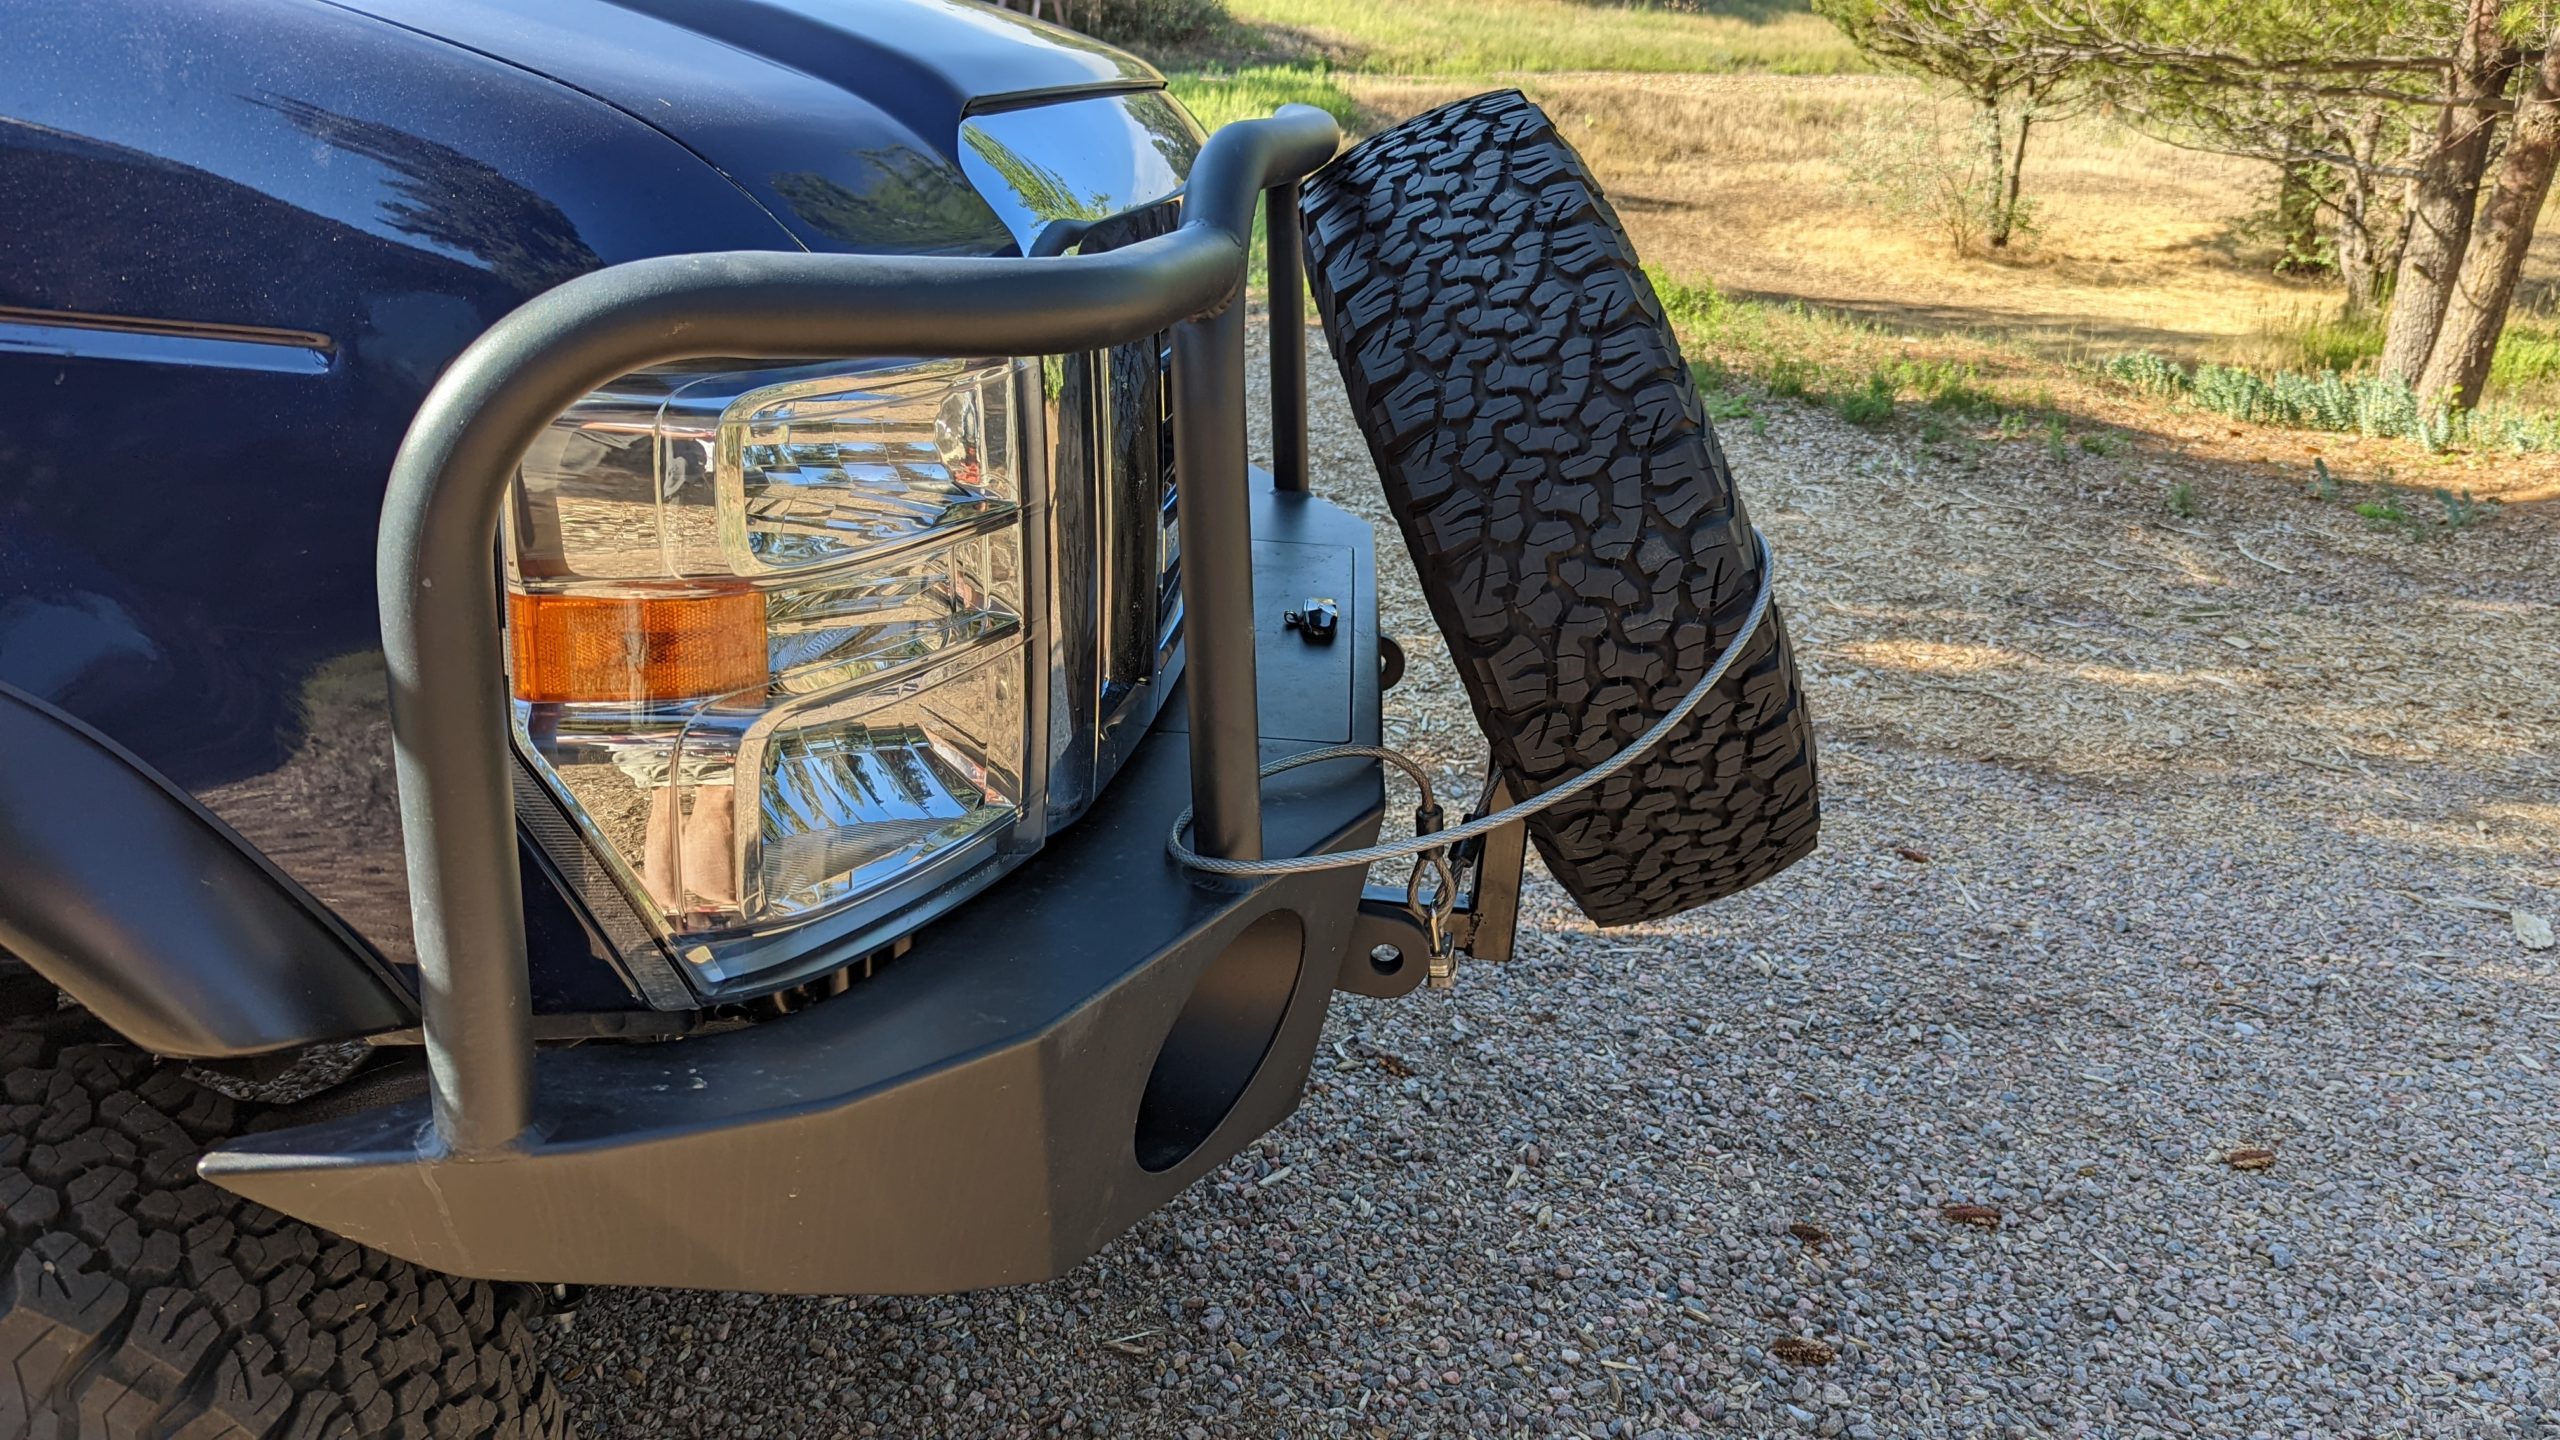
We replaced the front bumper with an Aluminus brand aluminum bumper with a cargo area and installed additional LED front headlights. The cargo area holds our lightning/static electricity ground rod and wire and a winch electrical connection point.
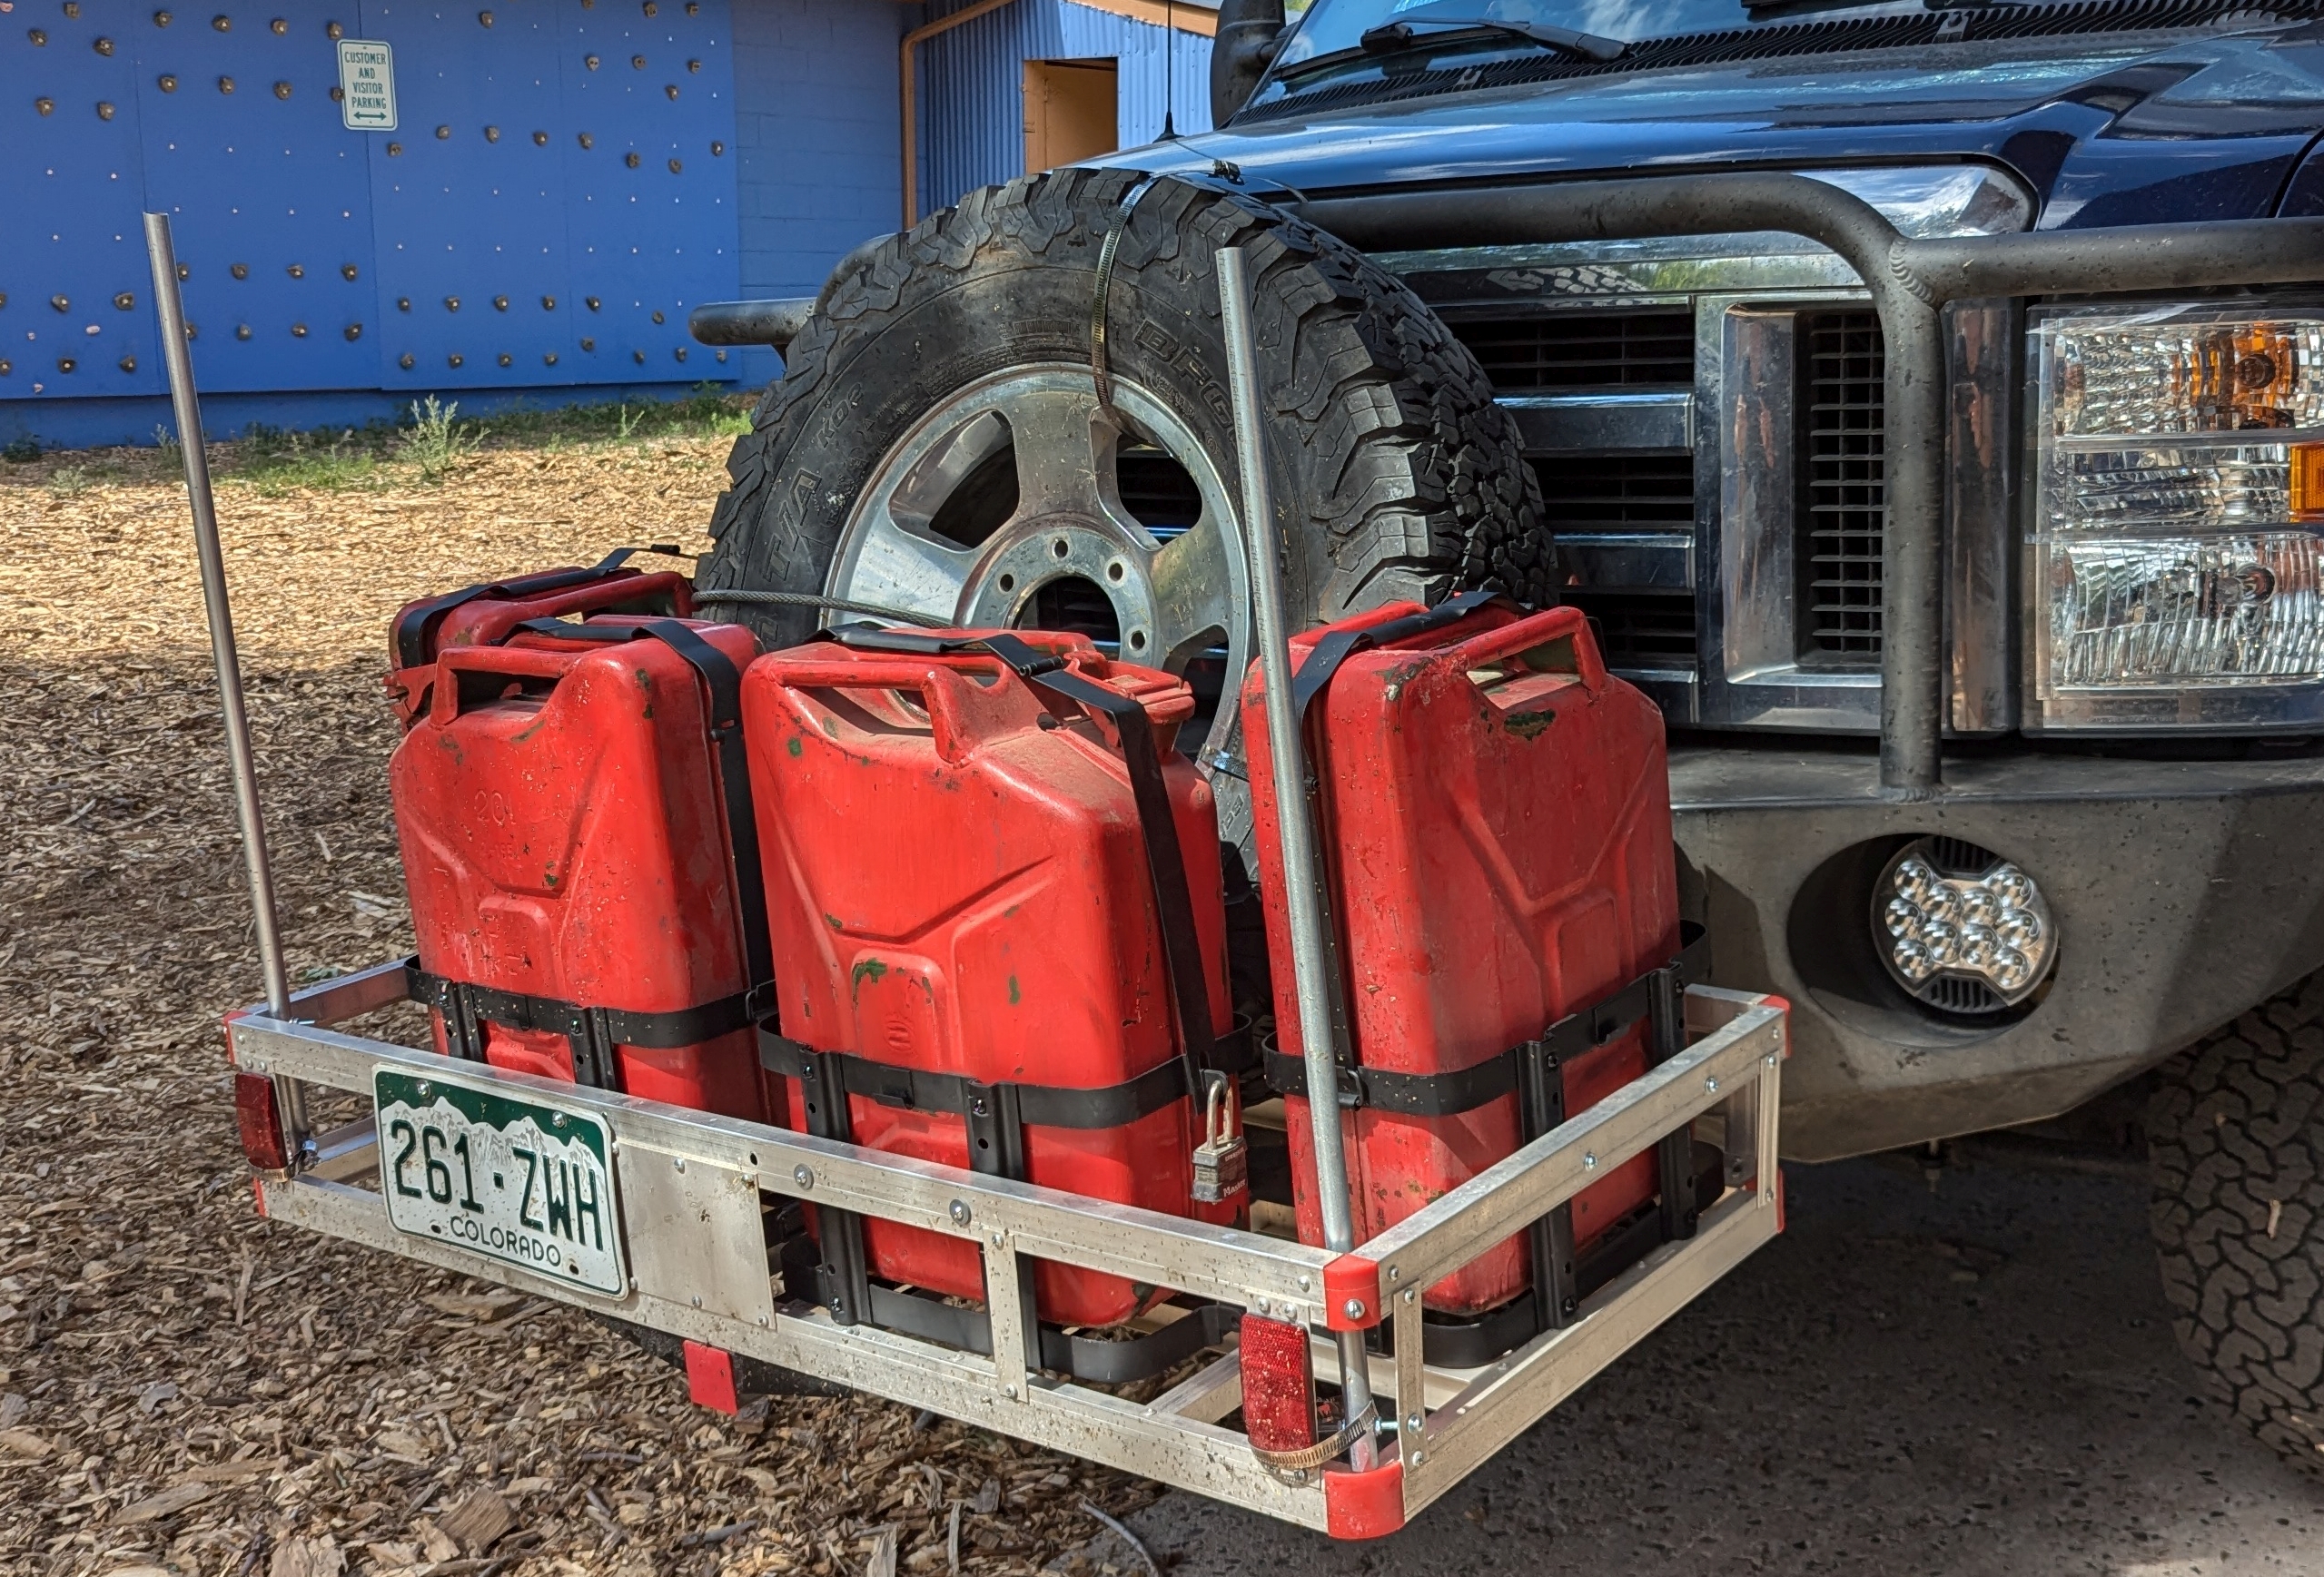
We previously installed a front bumper 2×2 trailer receiver that holds a spare tire and can also be used as the receiver for a winch. That has evolved to include a gear carrier with the extra fuel tanks included, all of which stays on permanently and is a great counterbalance to the weight in the rear of the van.
Rear Bumper
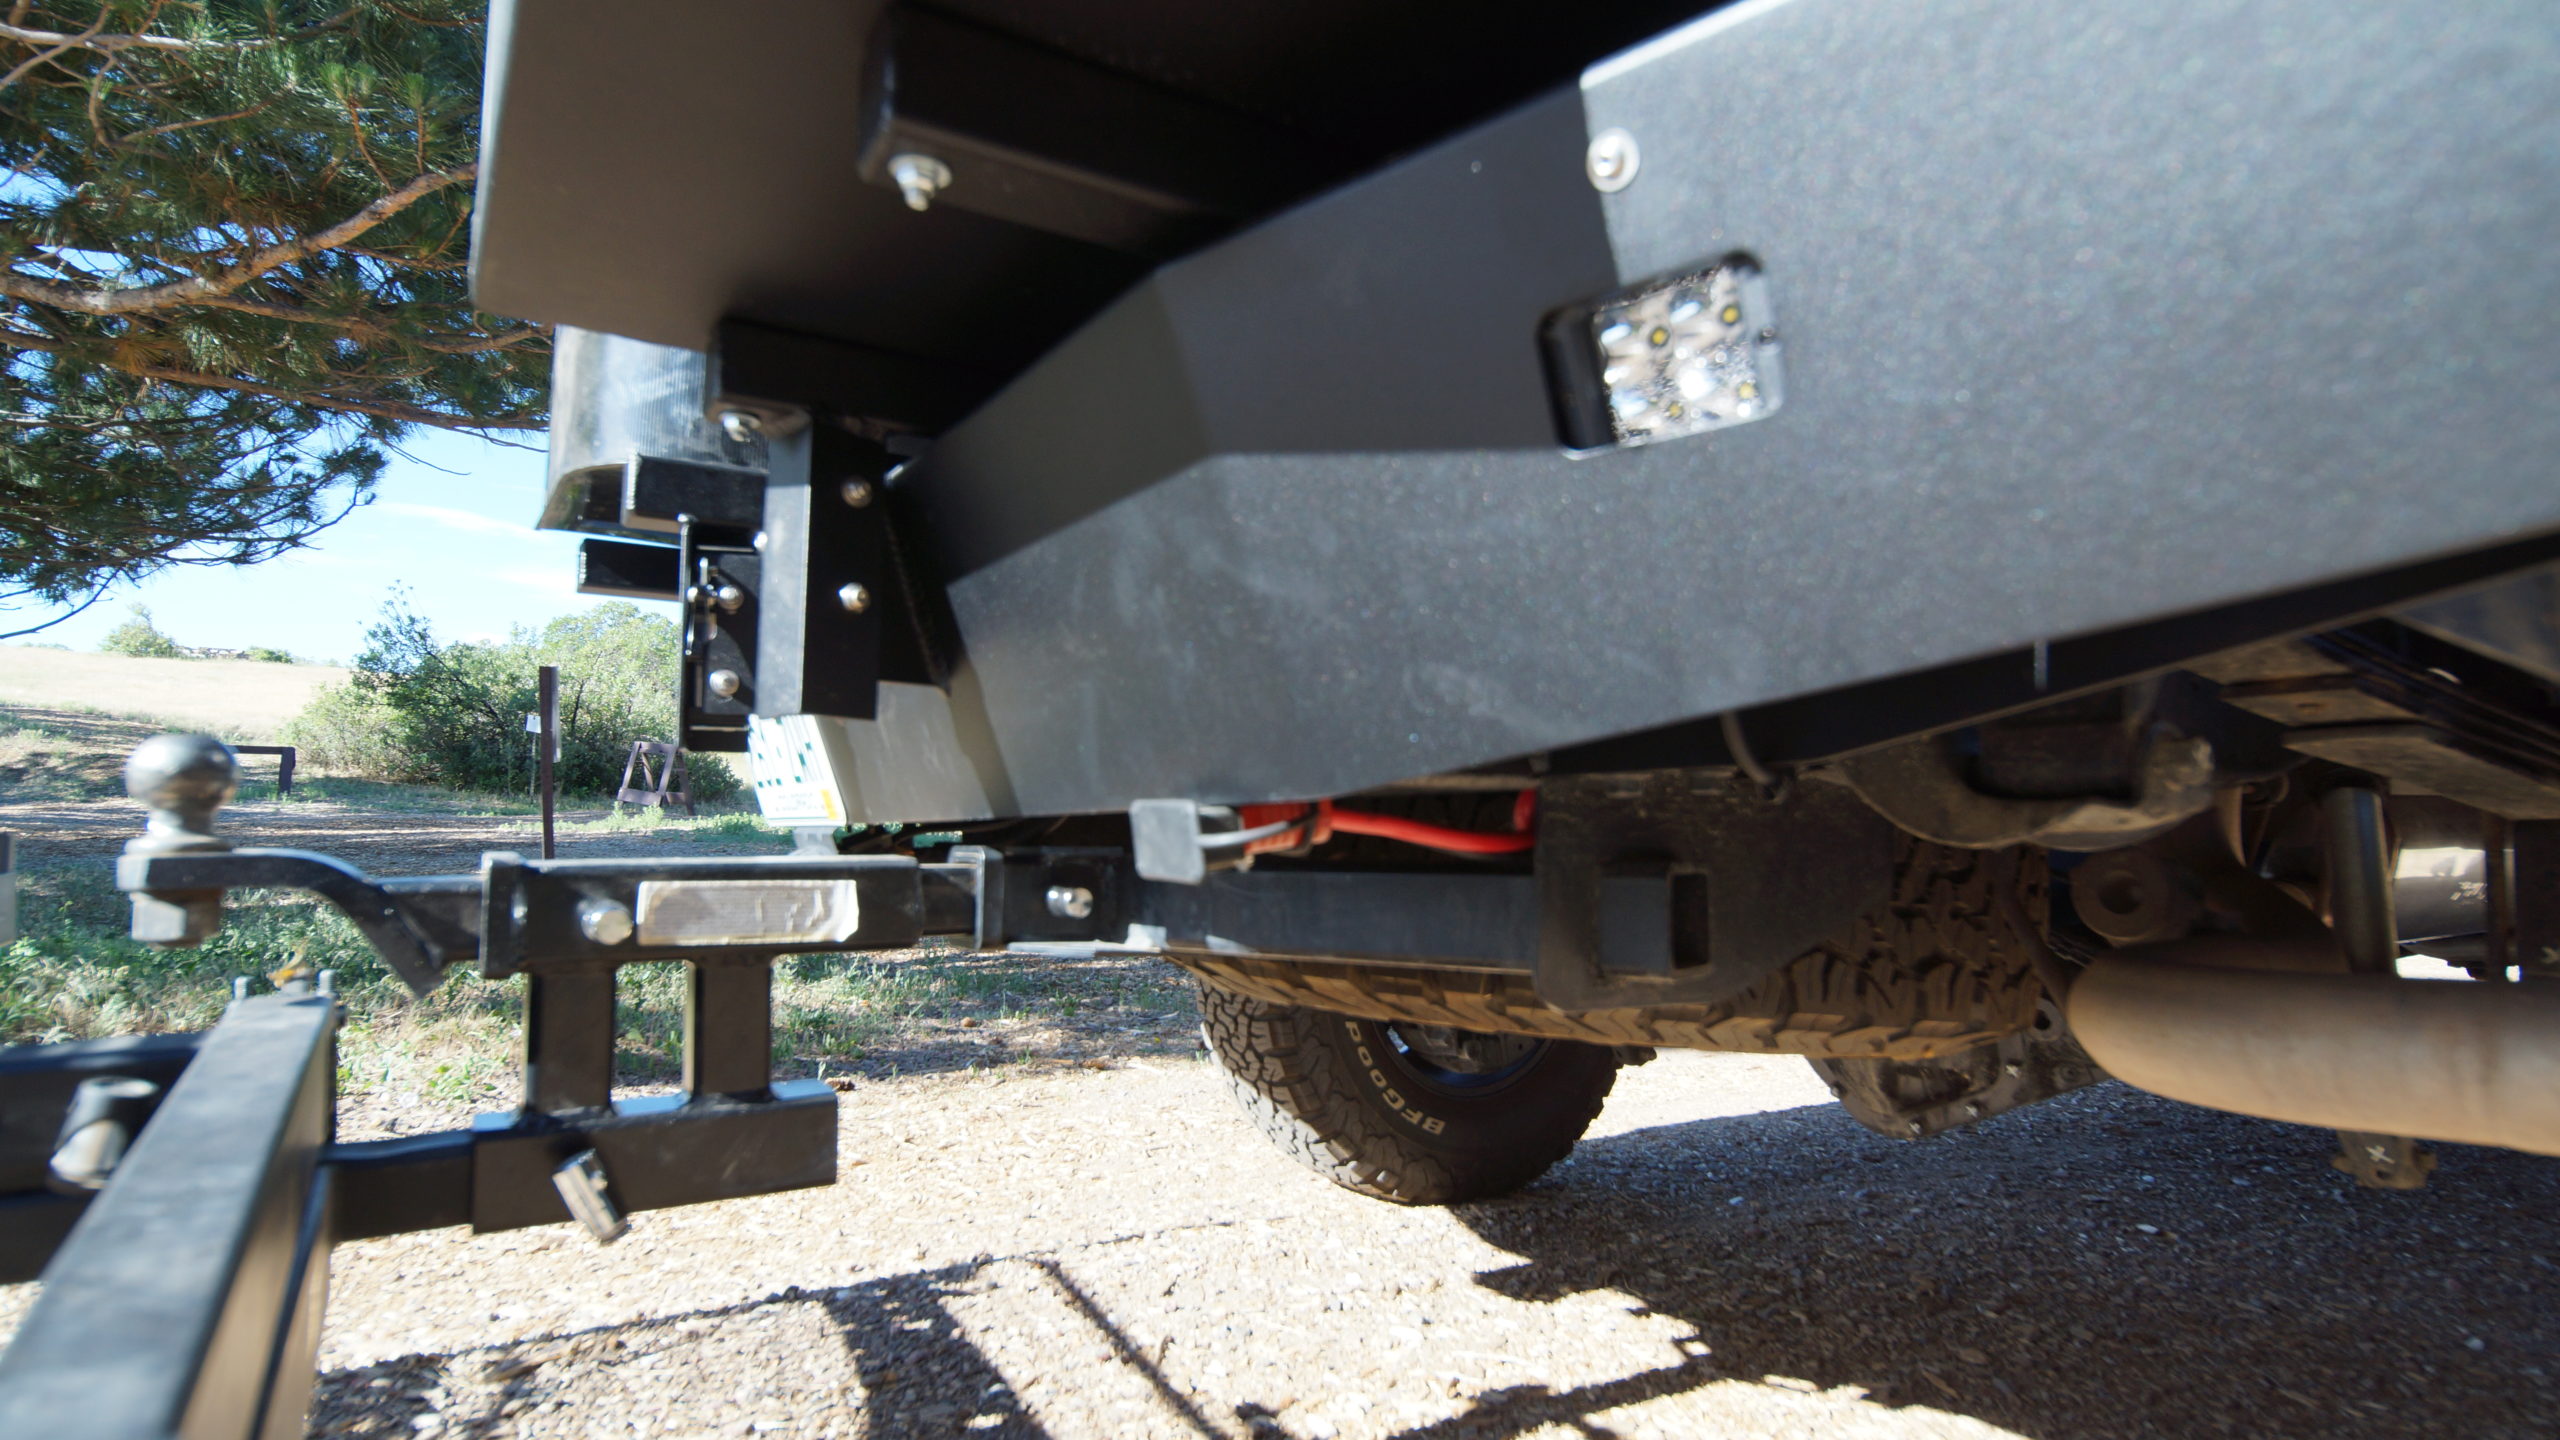
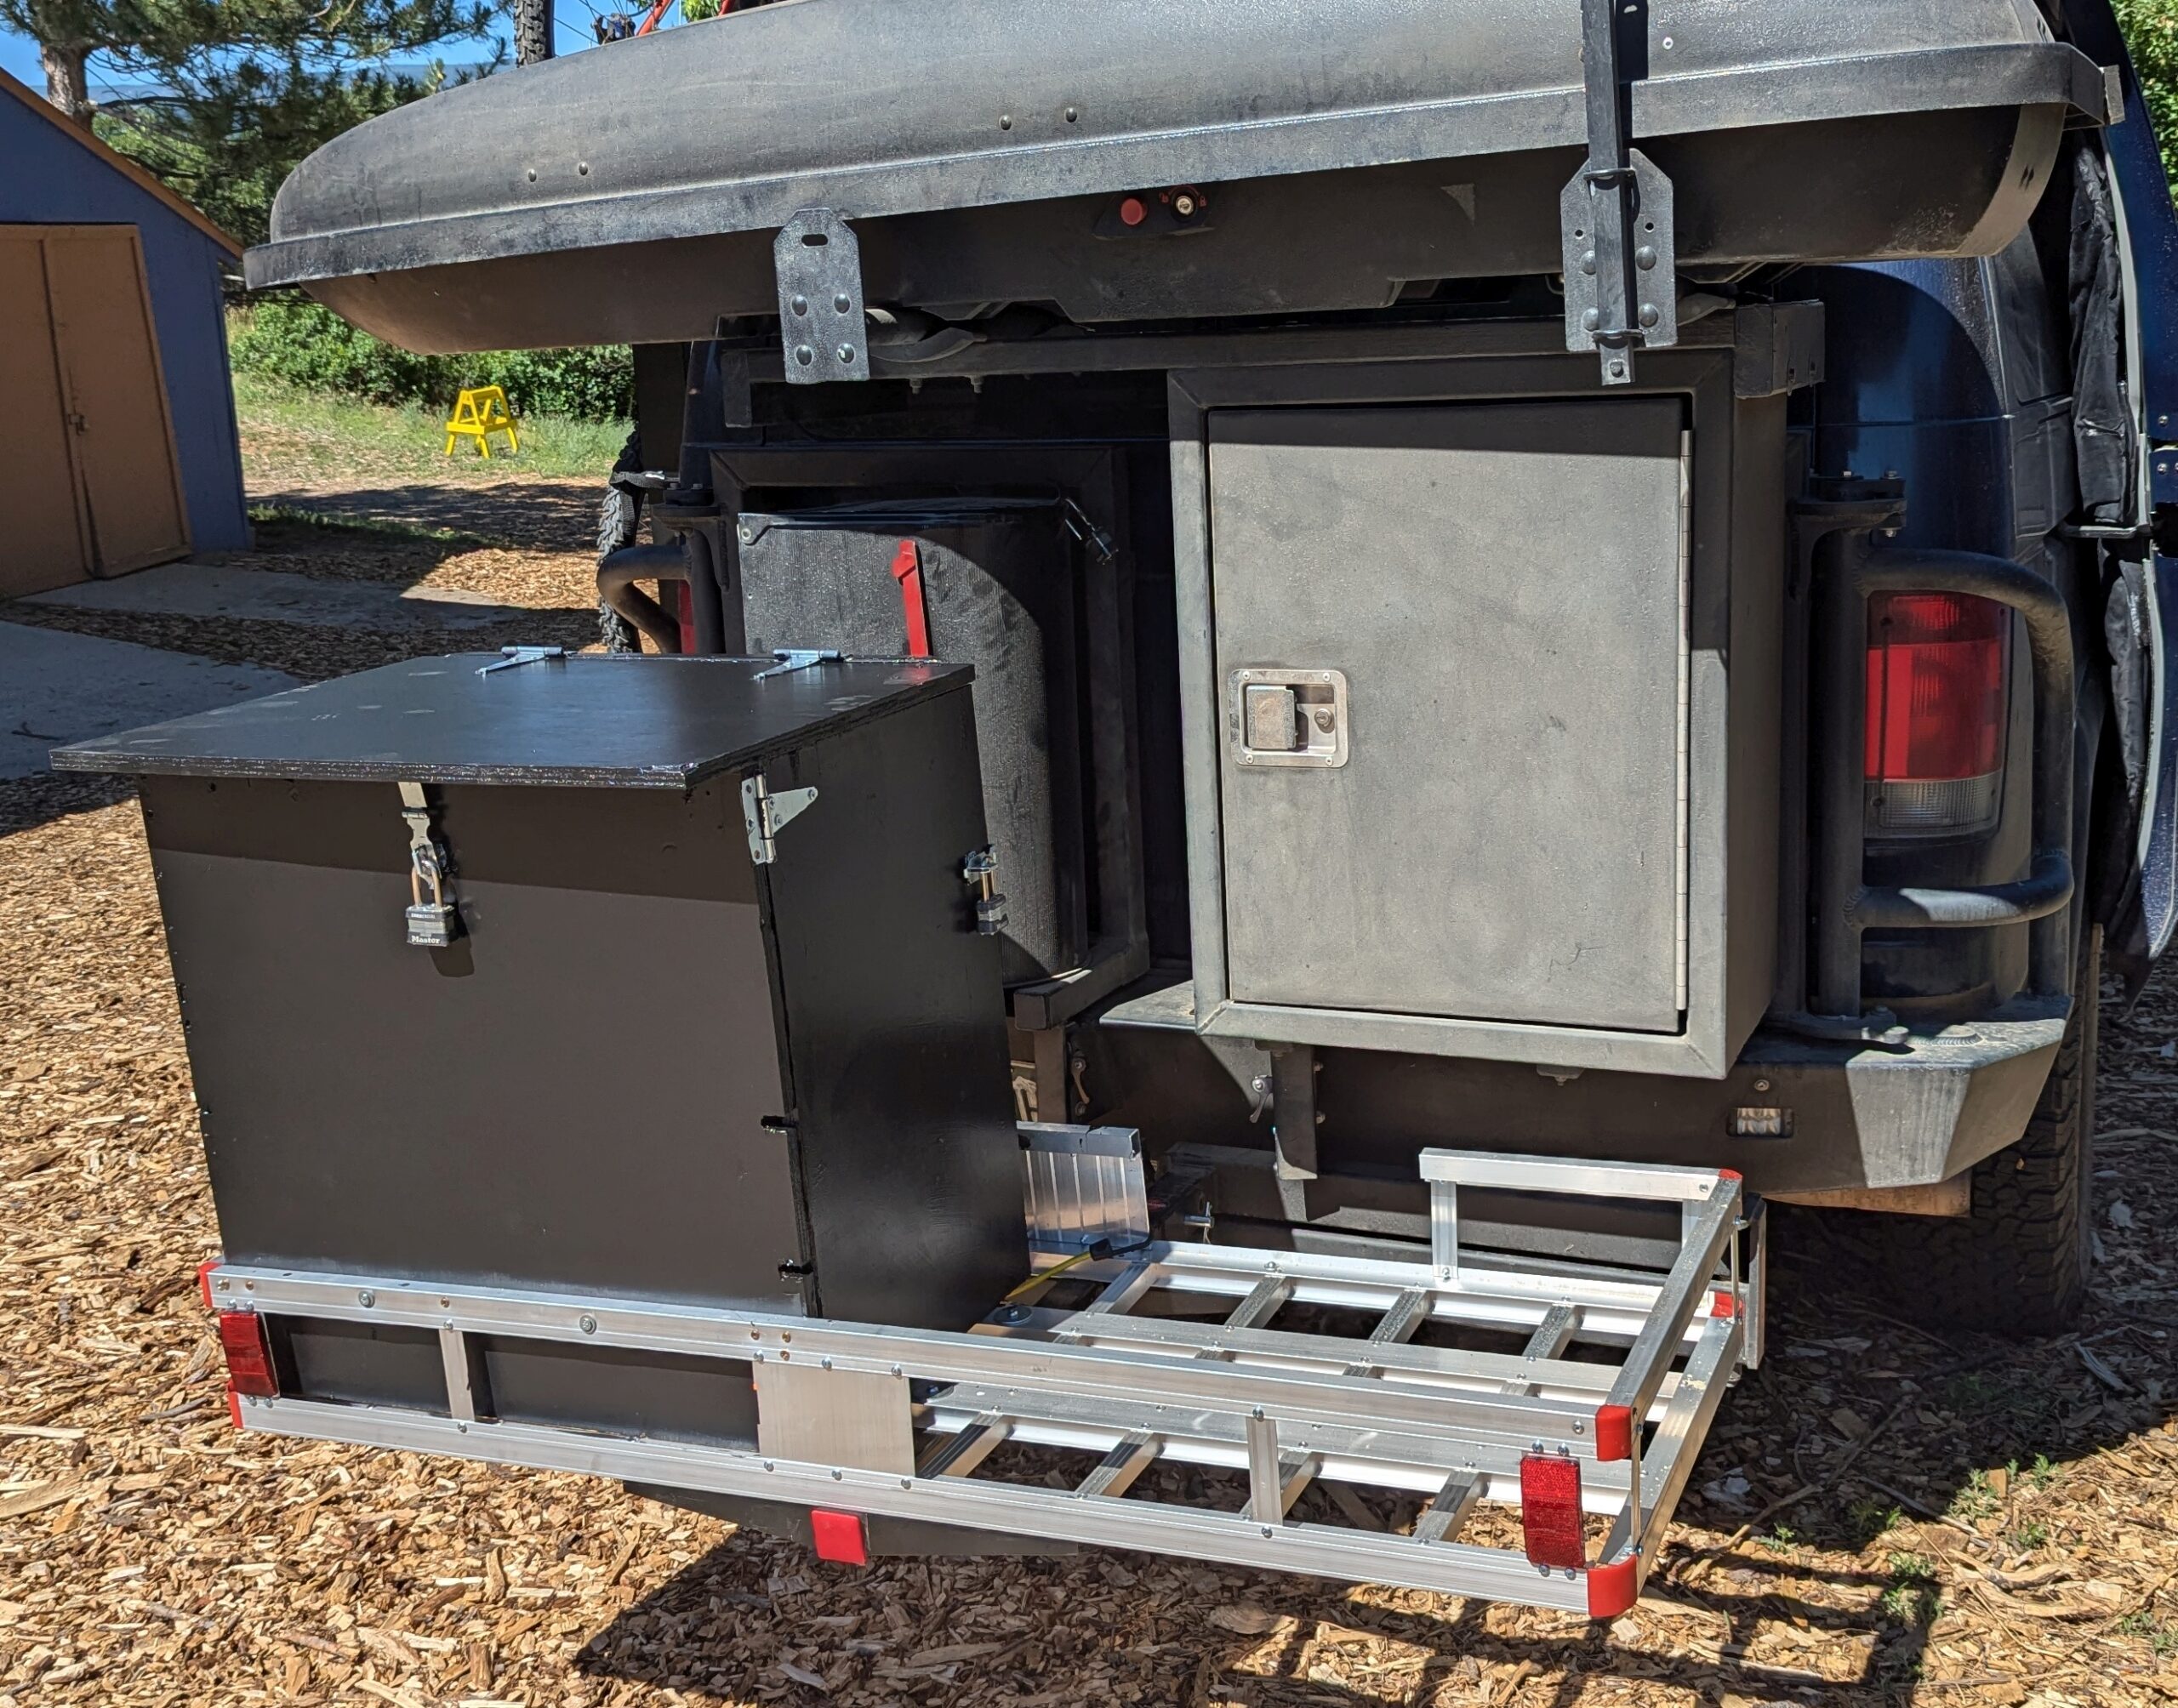
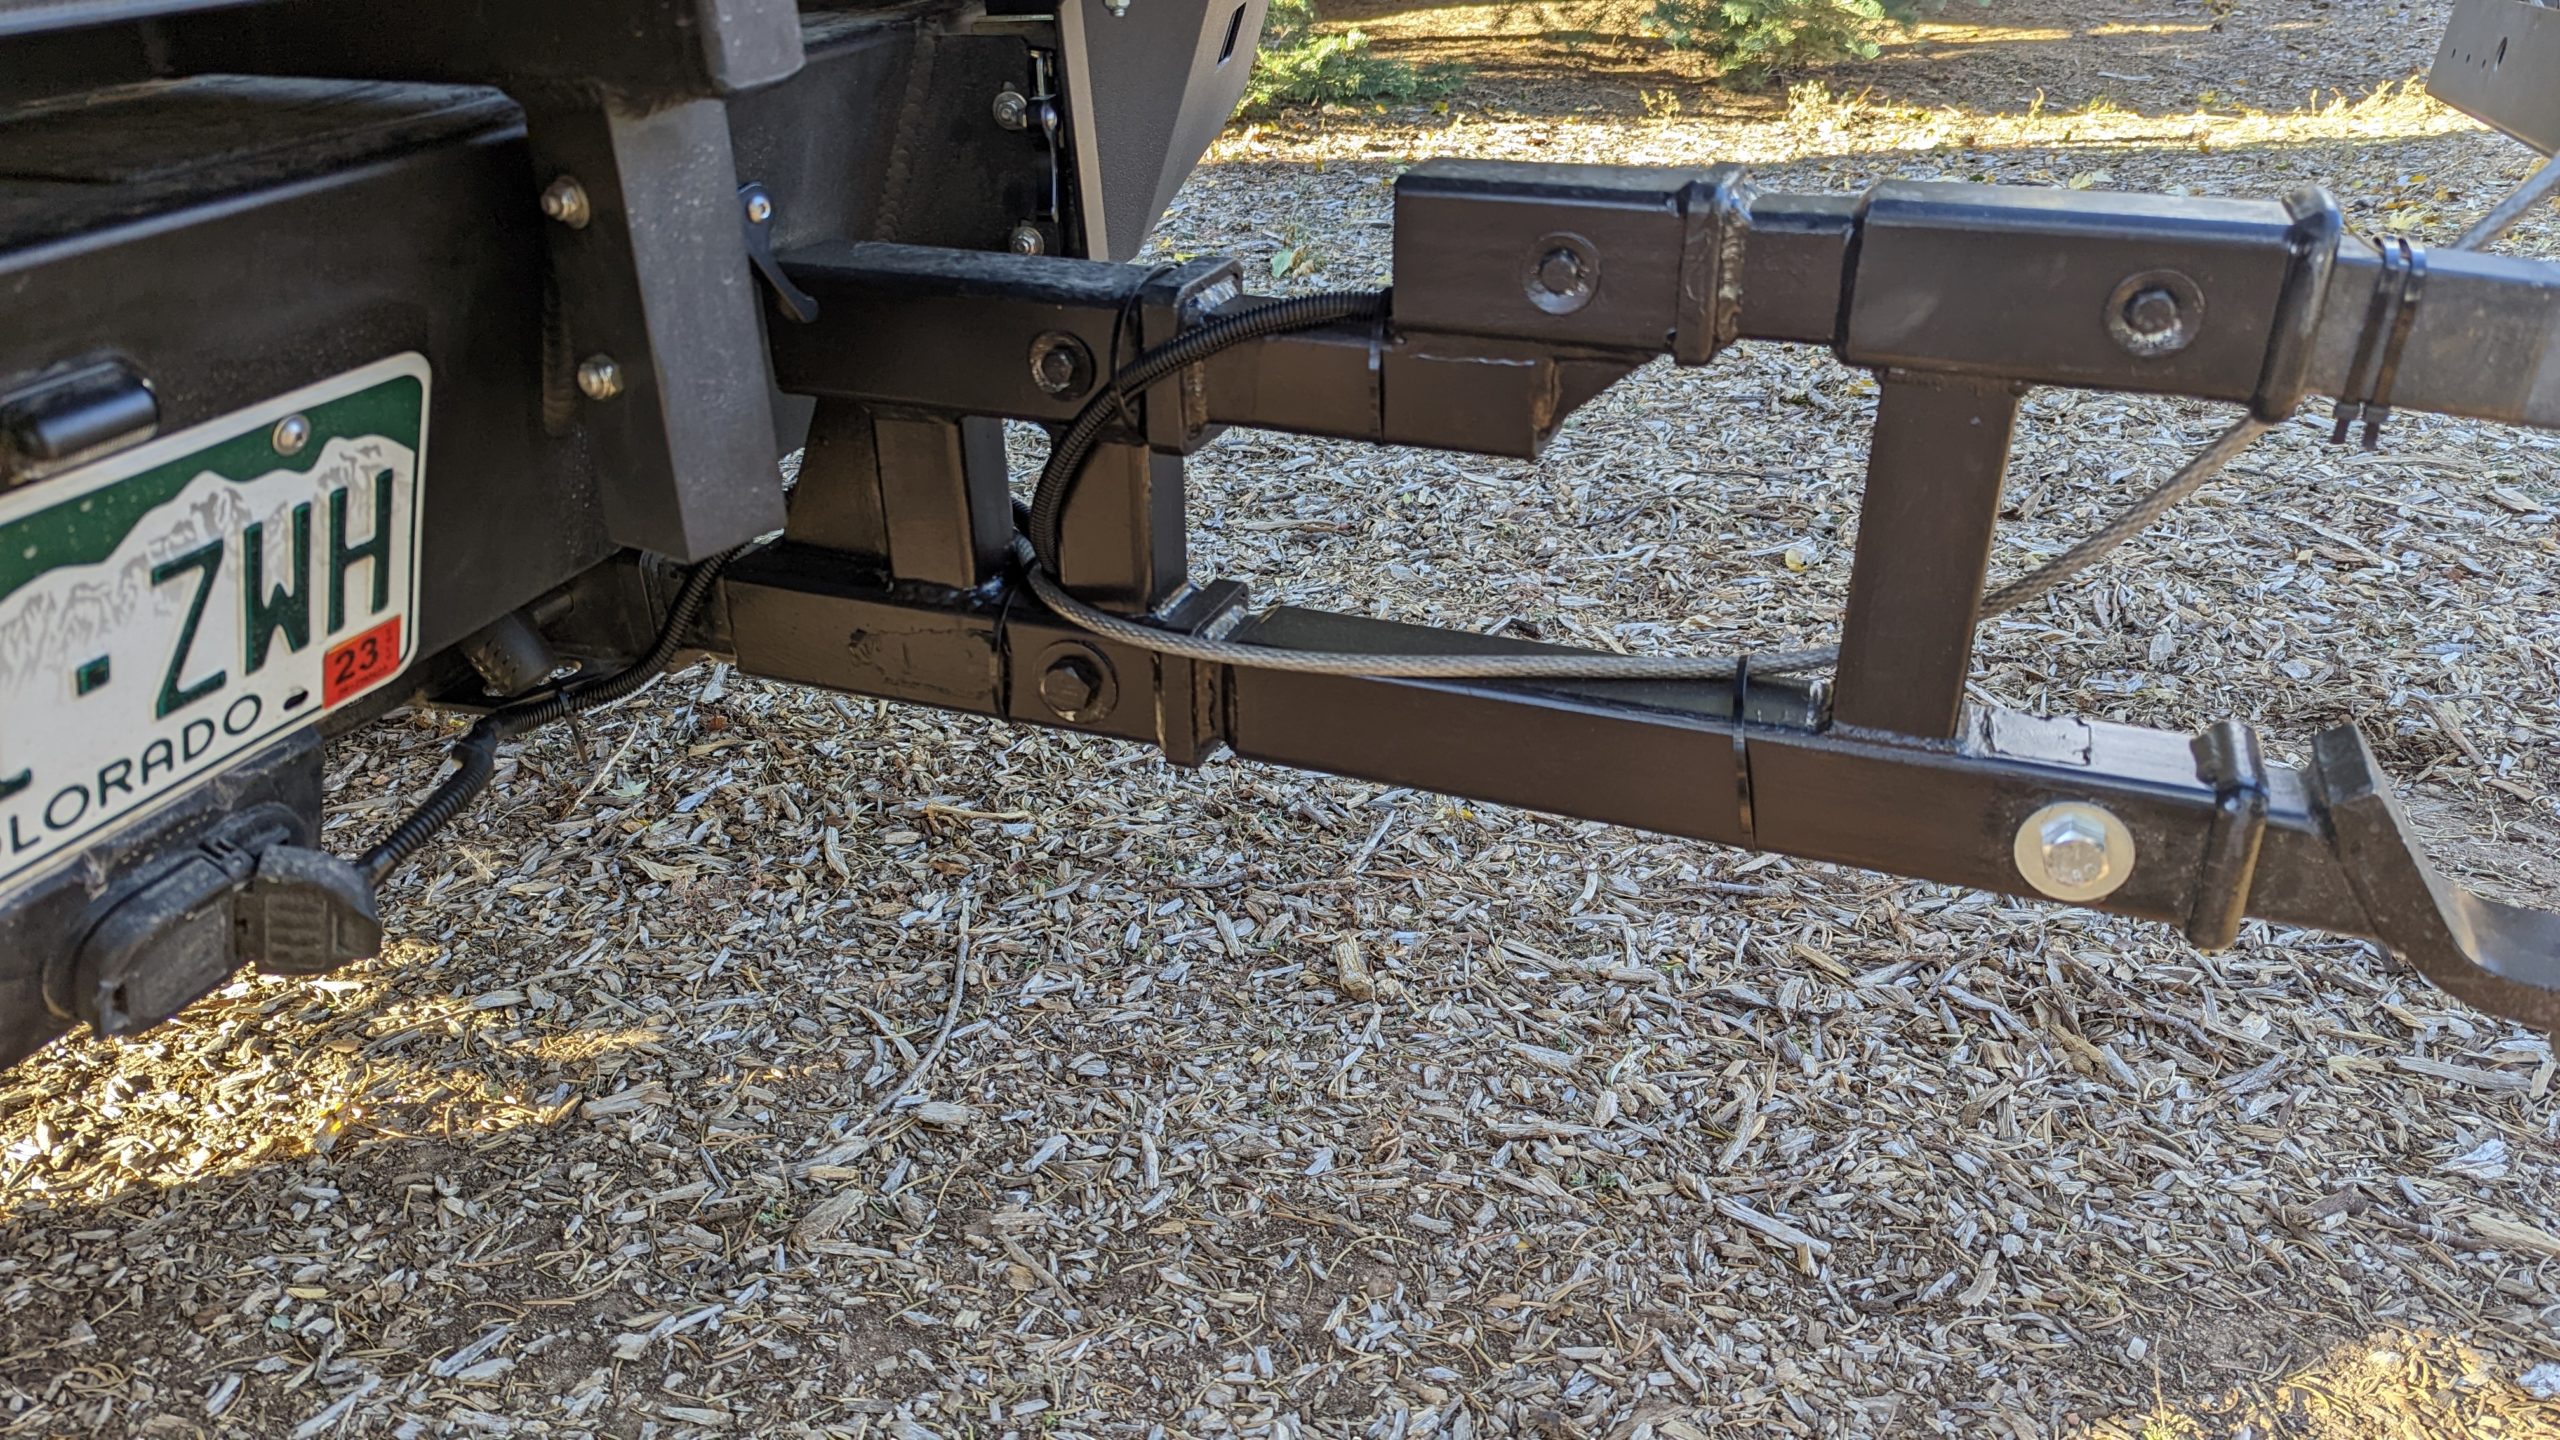
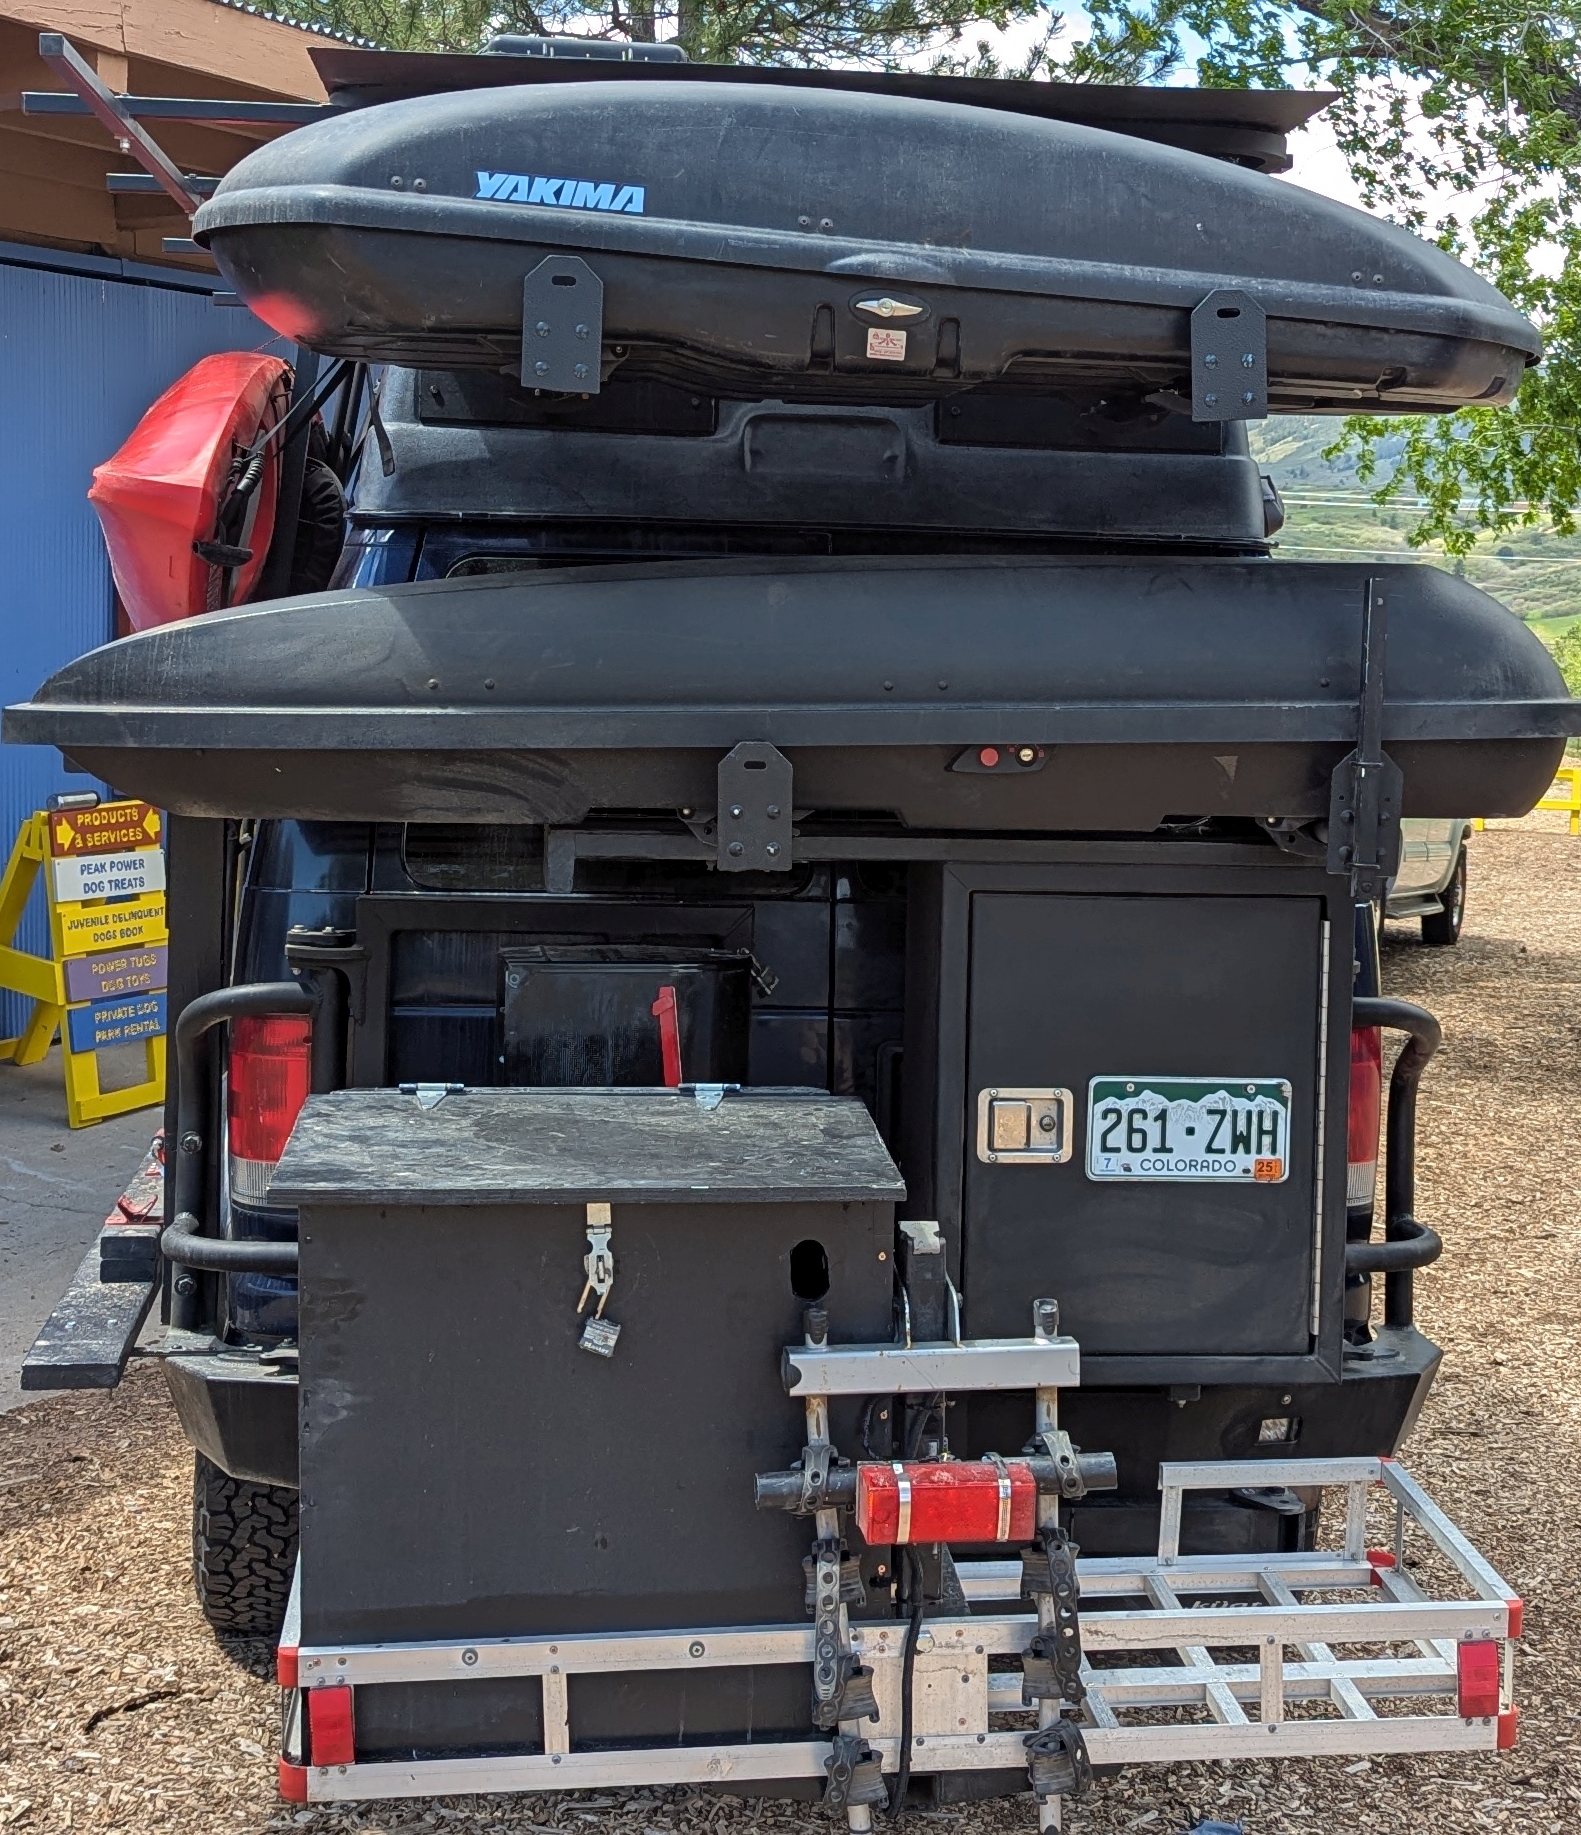
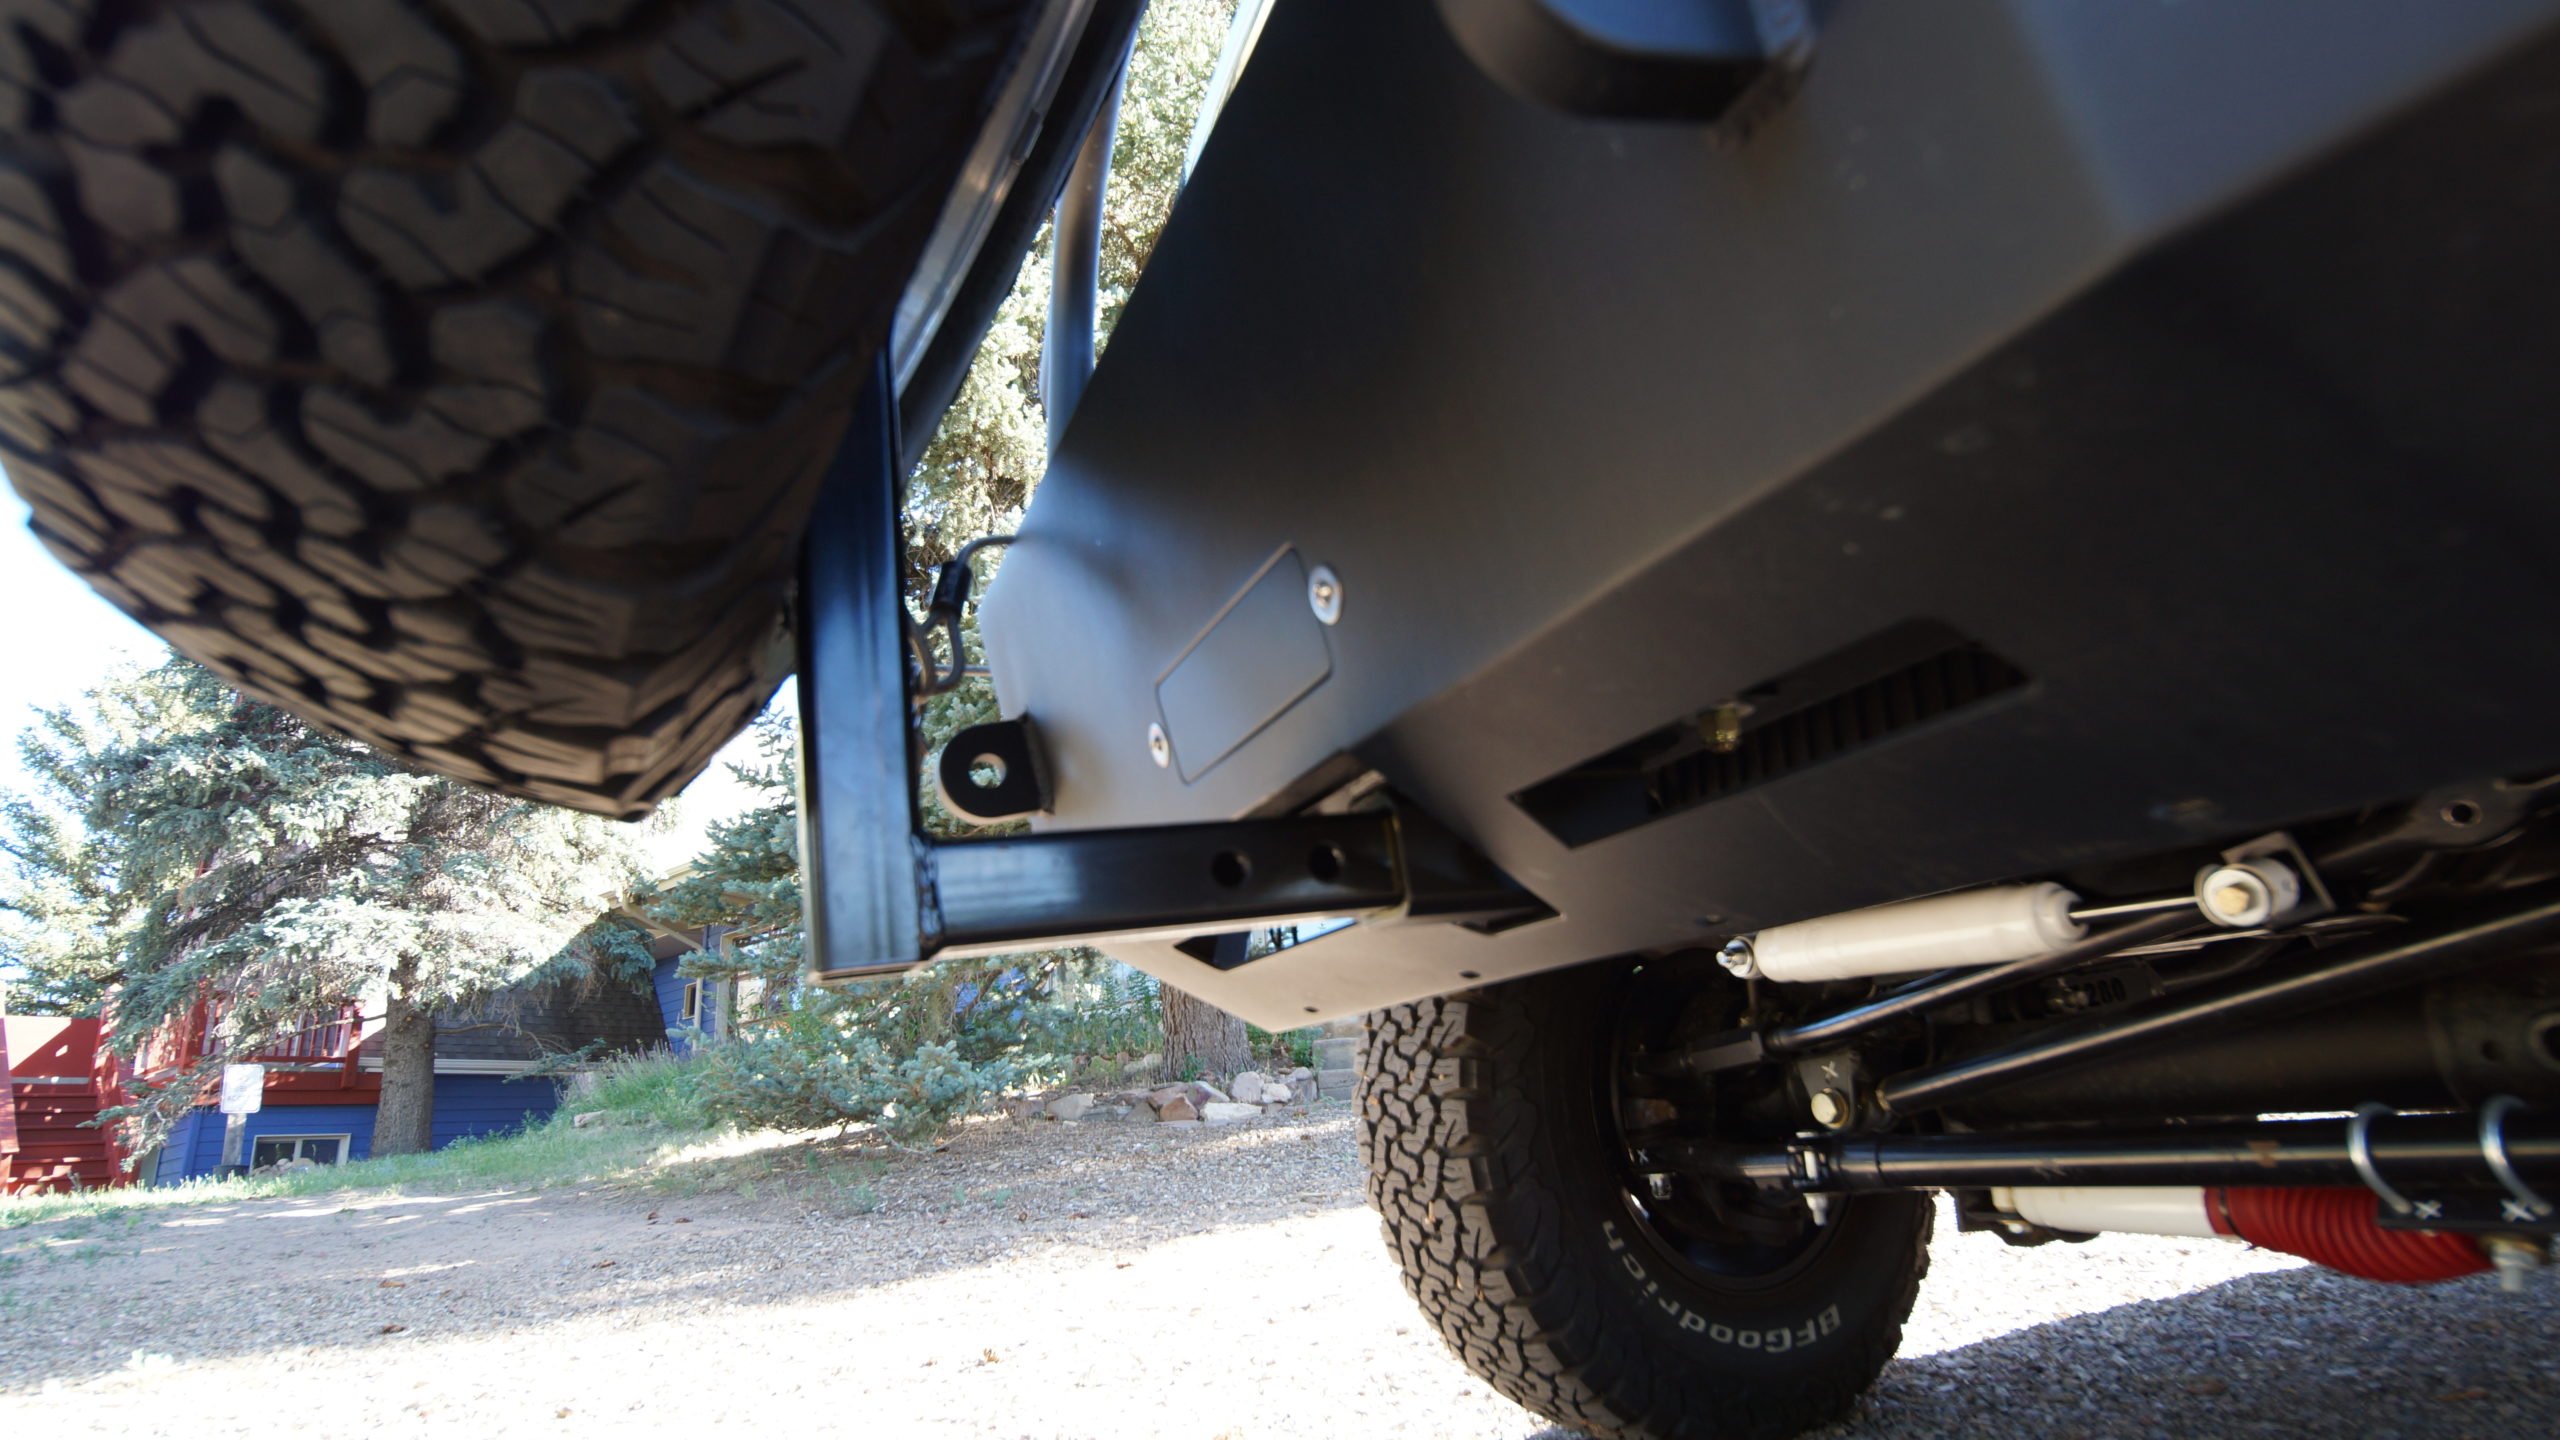
We replaced the rear bumper with an Aluminus brand aluminum bumper with a cargo area that holds spare liquids (oil, antifreeze, propane gas tanks) It contains swing out arms on both sides to attached boxes and other equipment. The swing out arms have a weight capacity of 150 lbs.
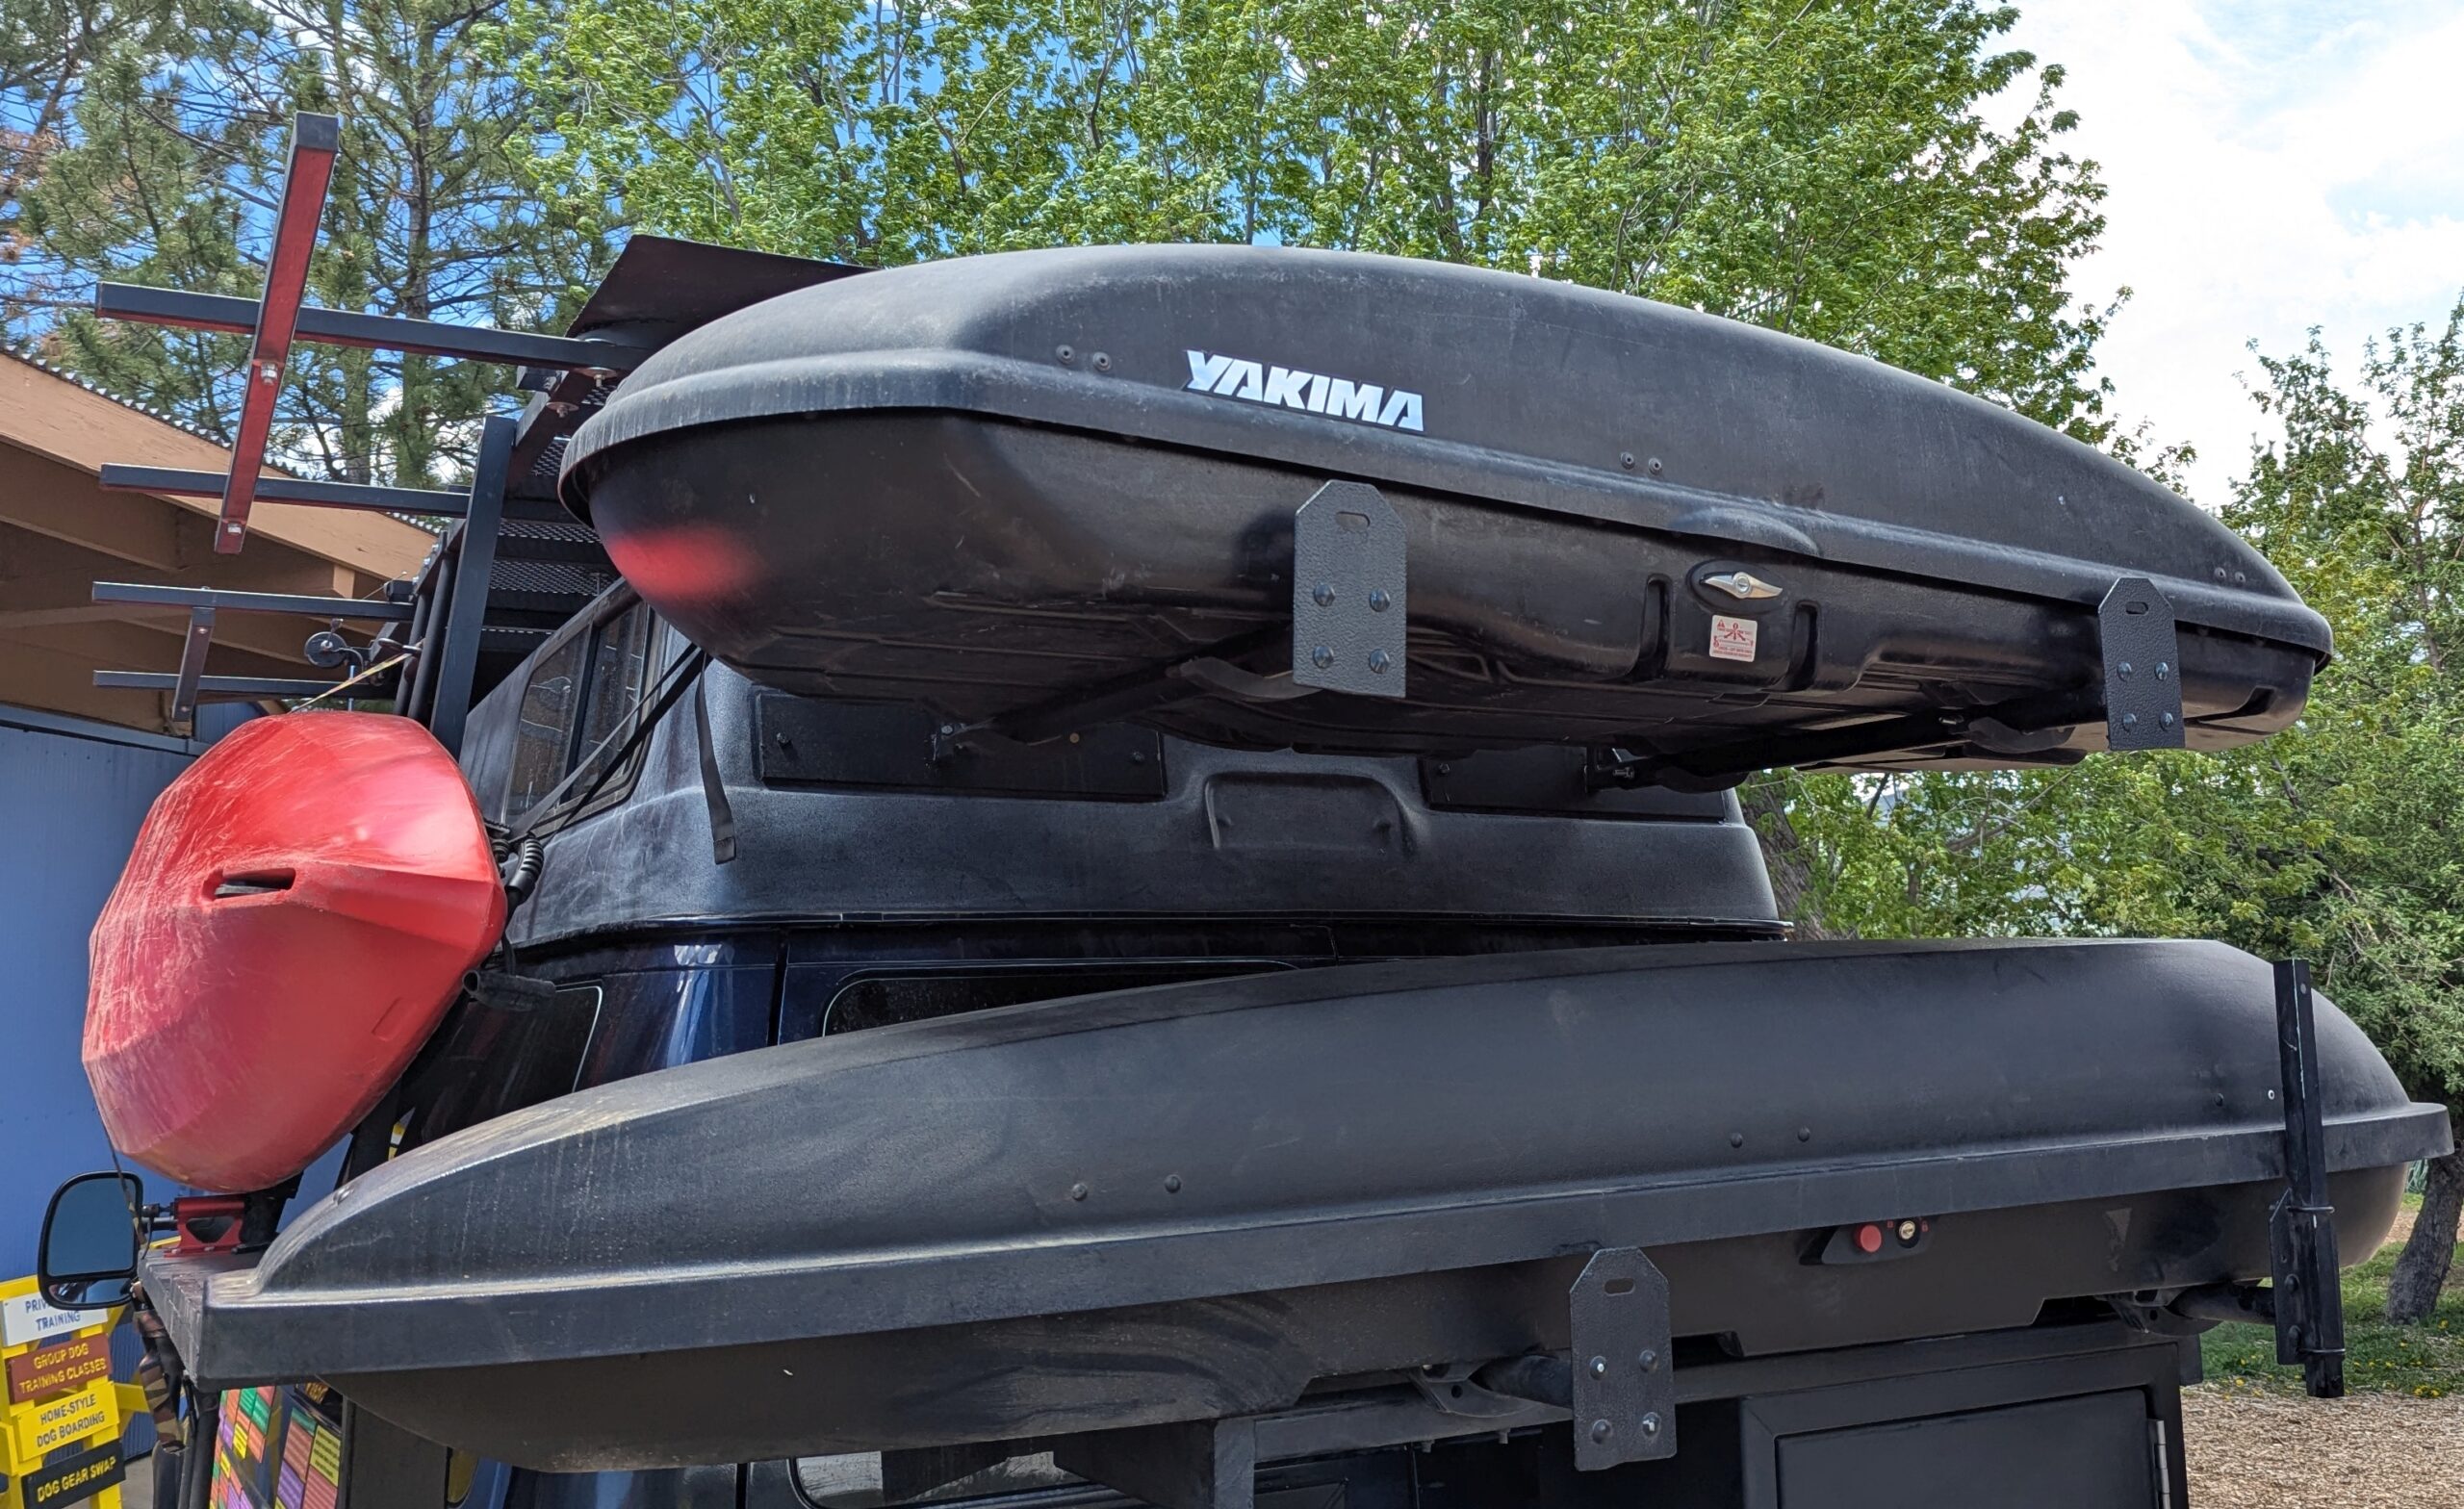
On the passenger side is an Aluminus brand cargo box, and on top is a custom mount built out of wood and metal racks to hold a Yakima luggage box. The weight of the setup is 80 lbs, giving us an additional 70 lbs of capacity.
The driver’s side box is a metal mailbox we had lying around and makes for a perfect trash bin.
Rear Trailer Hitch
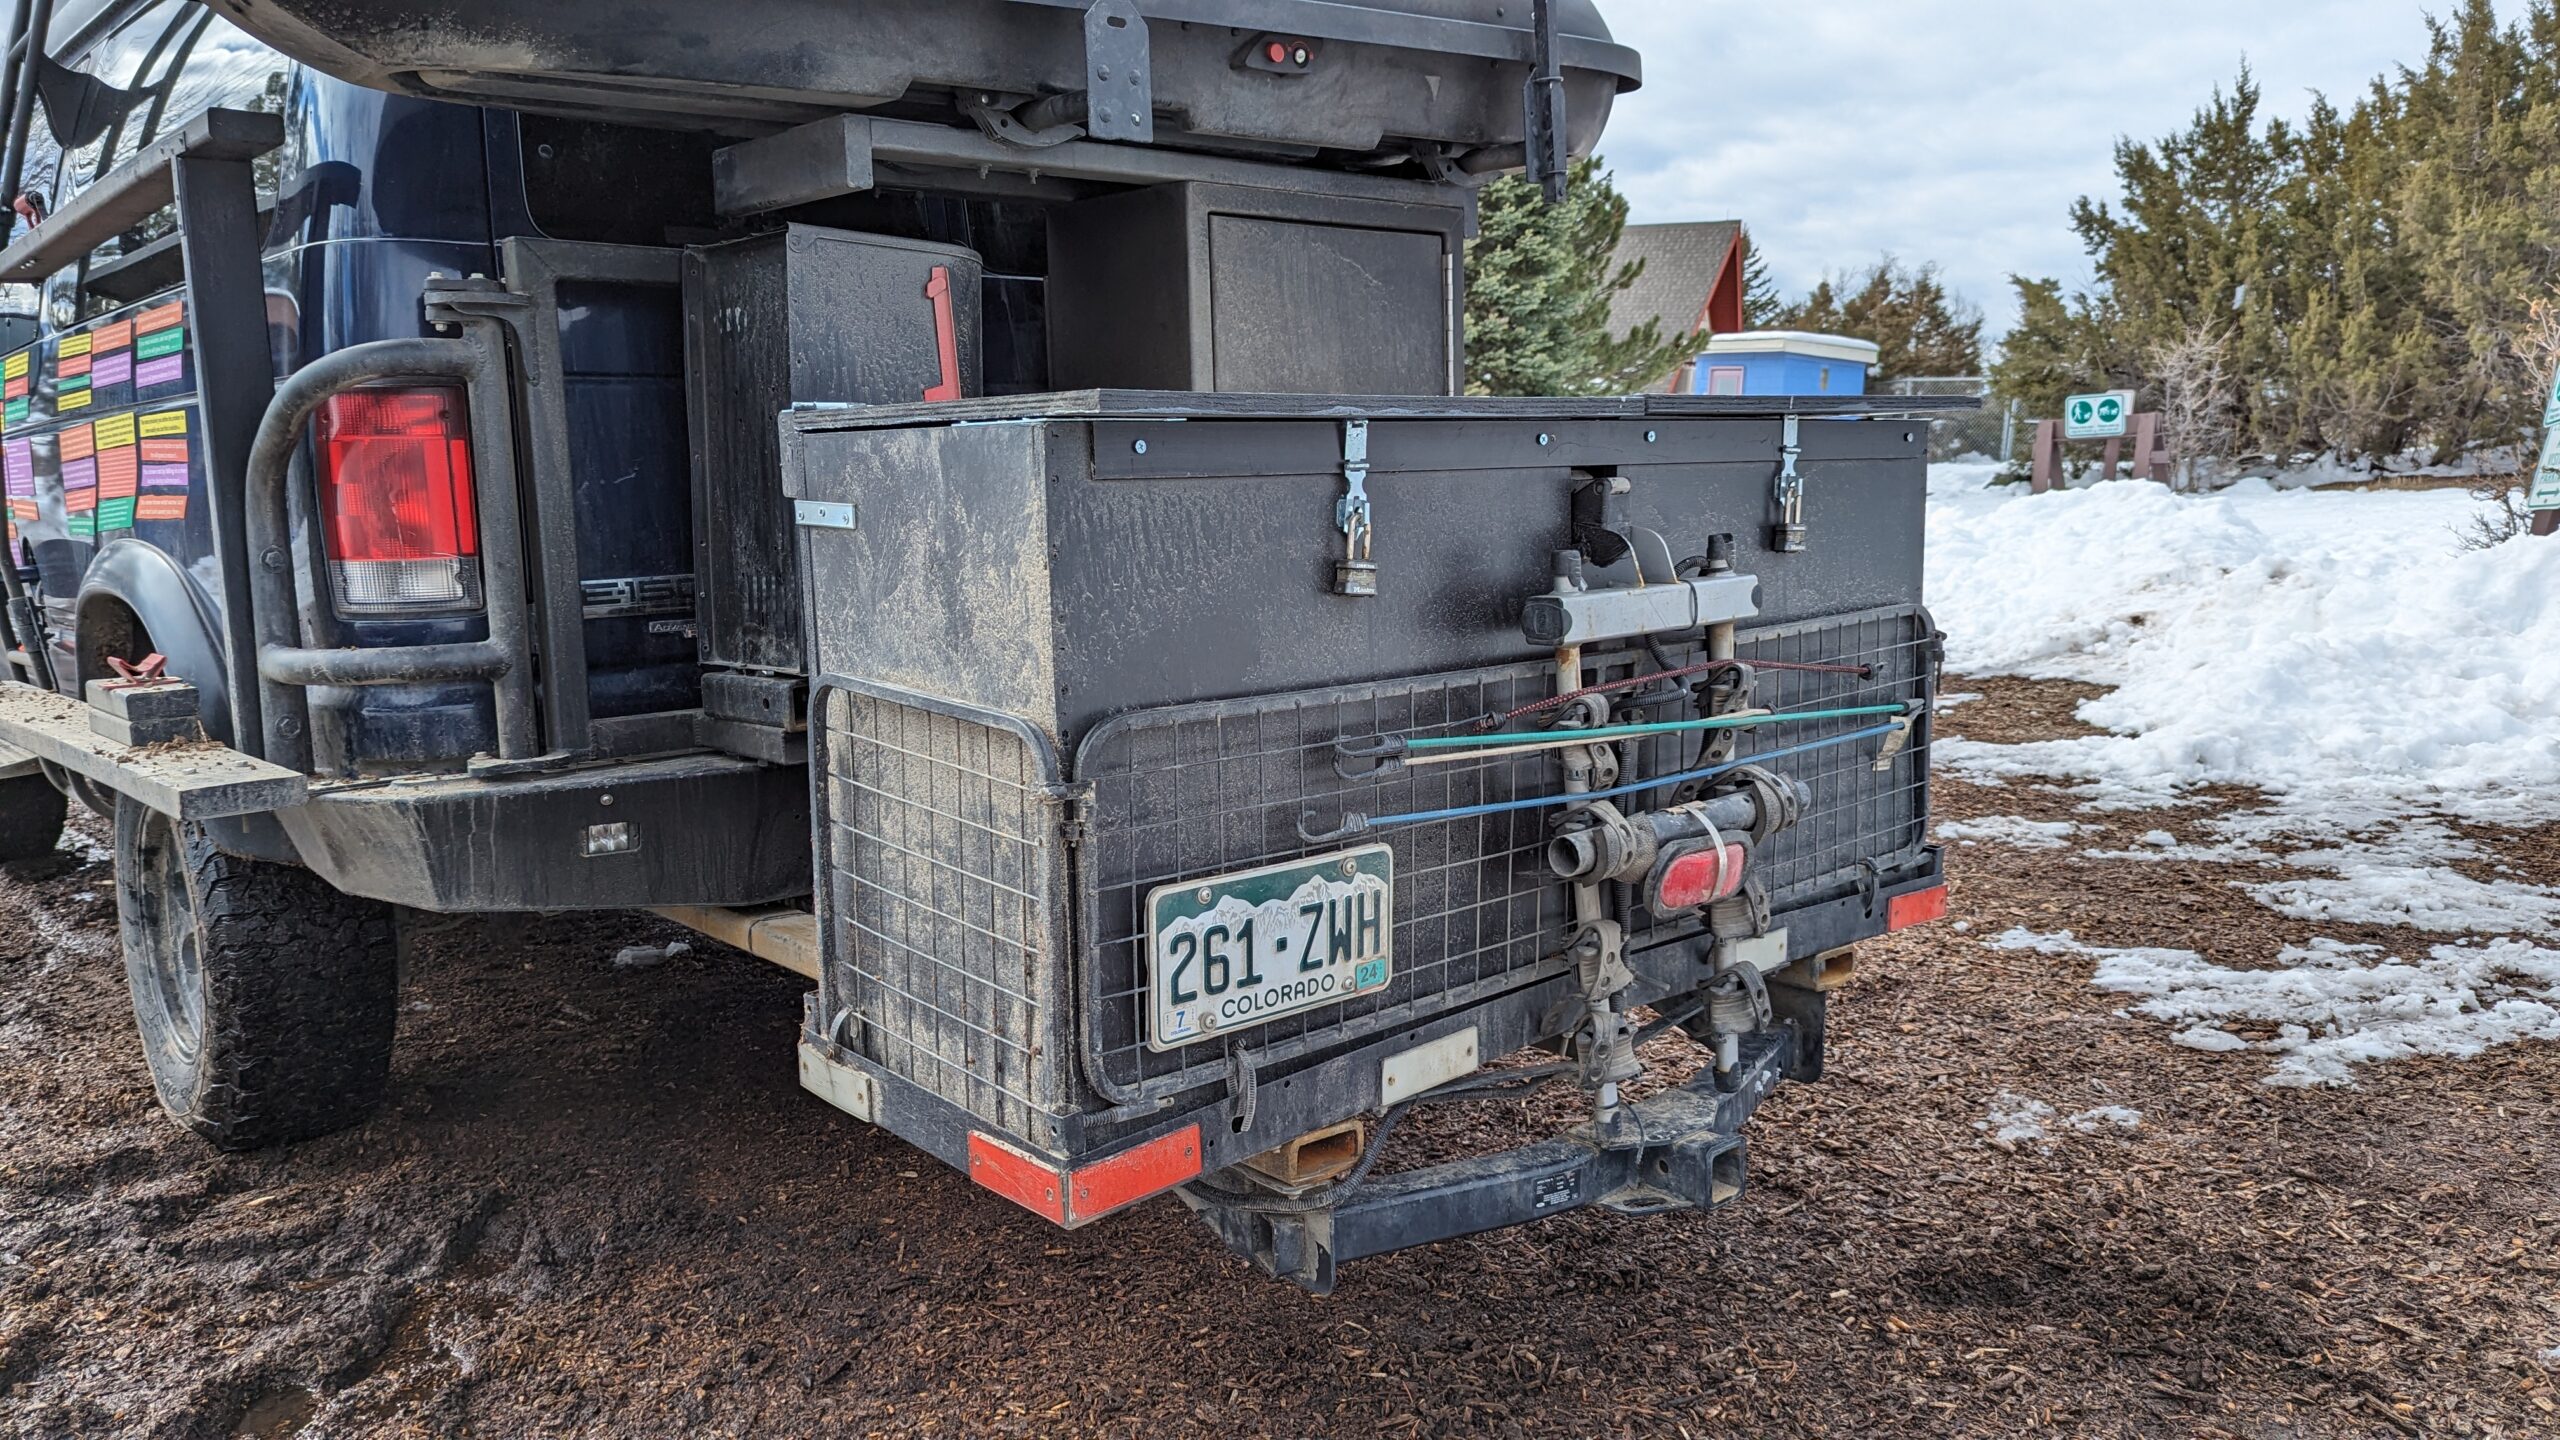
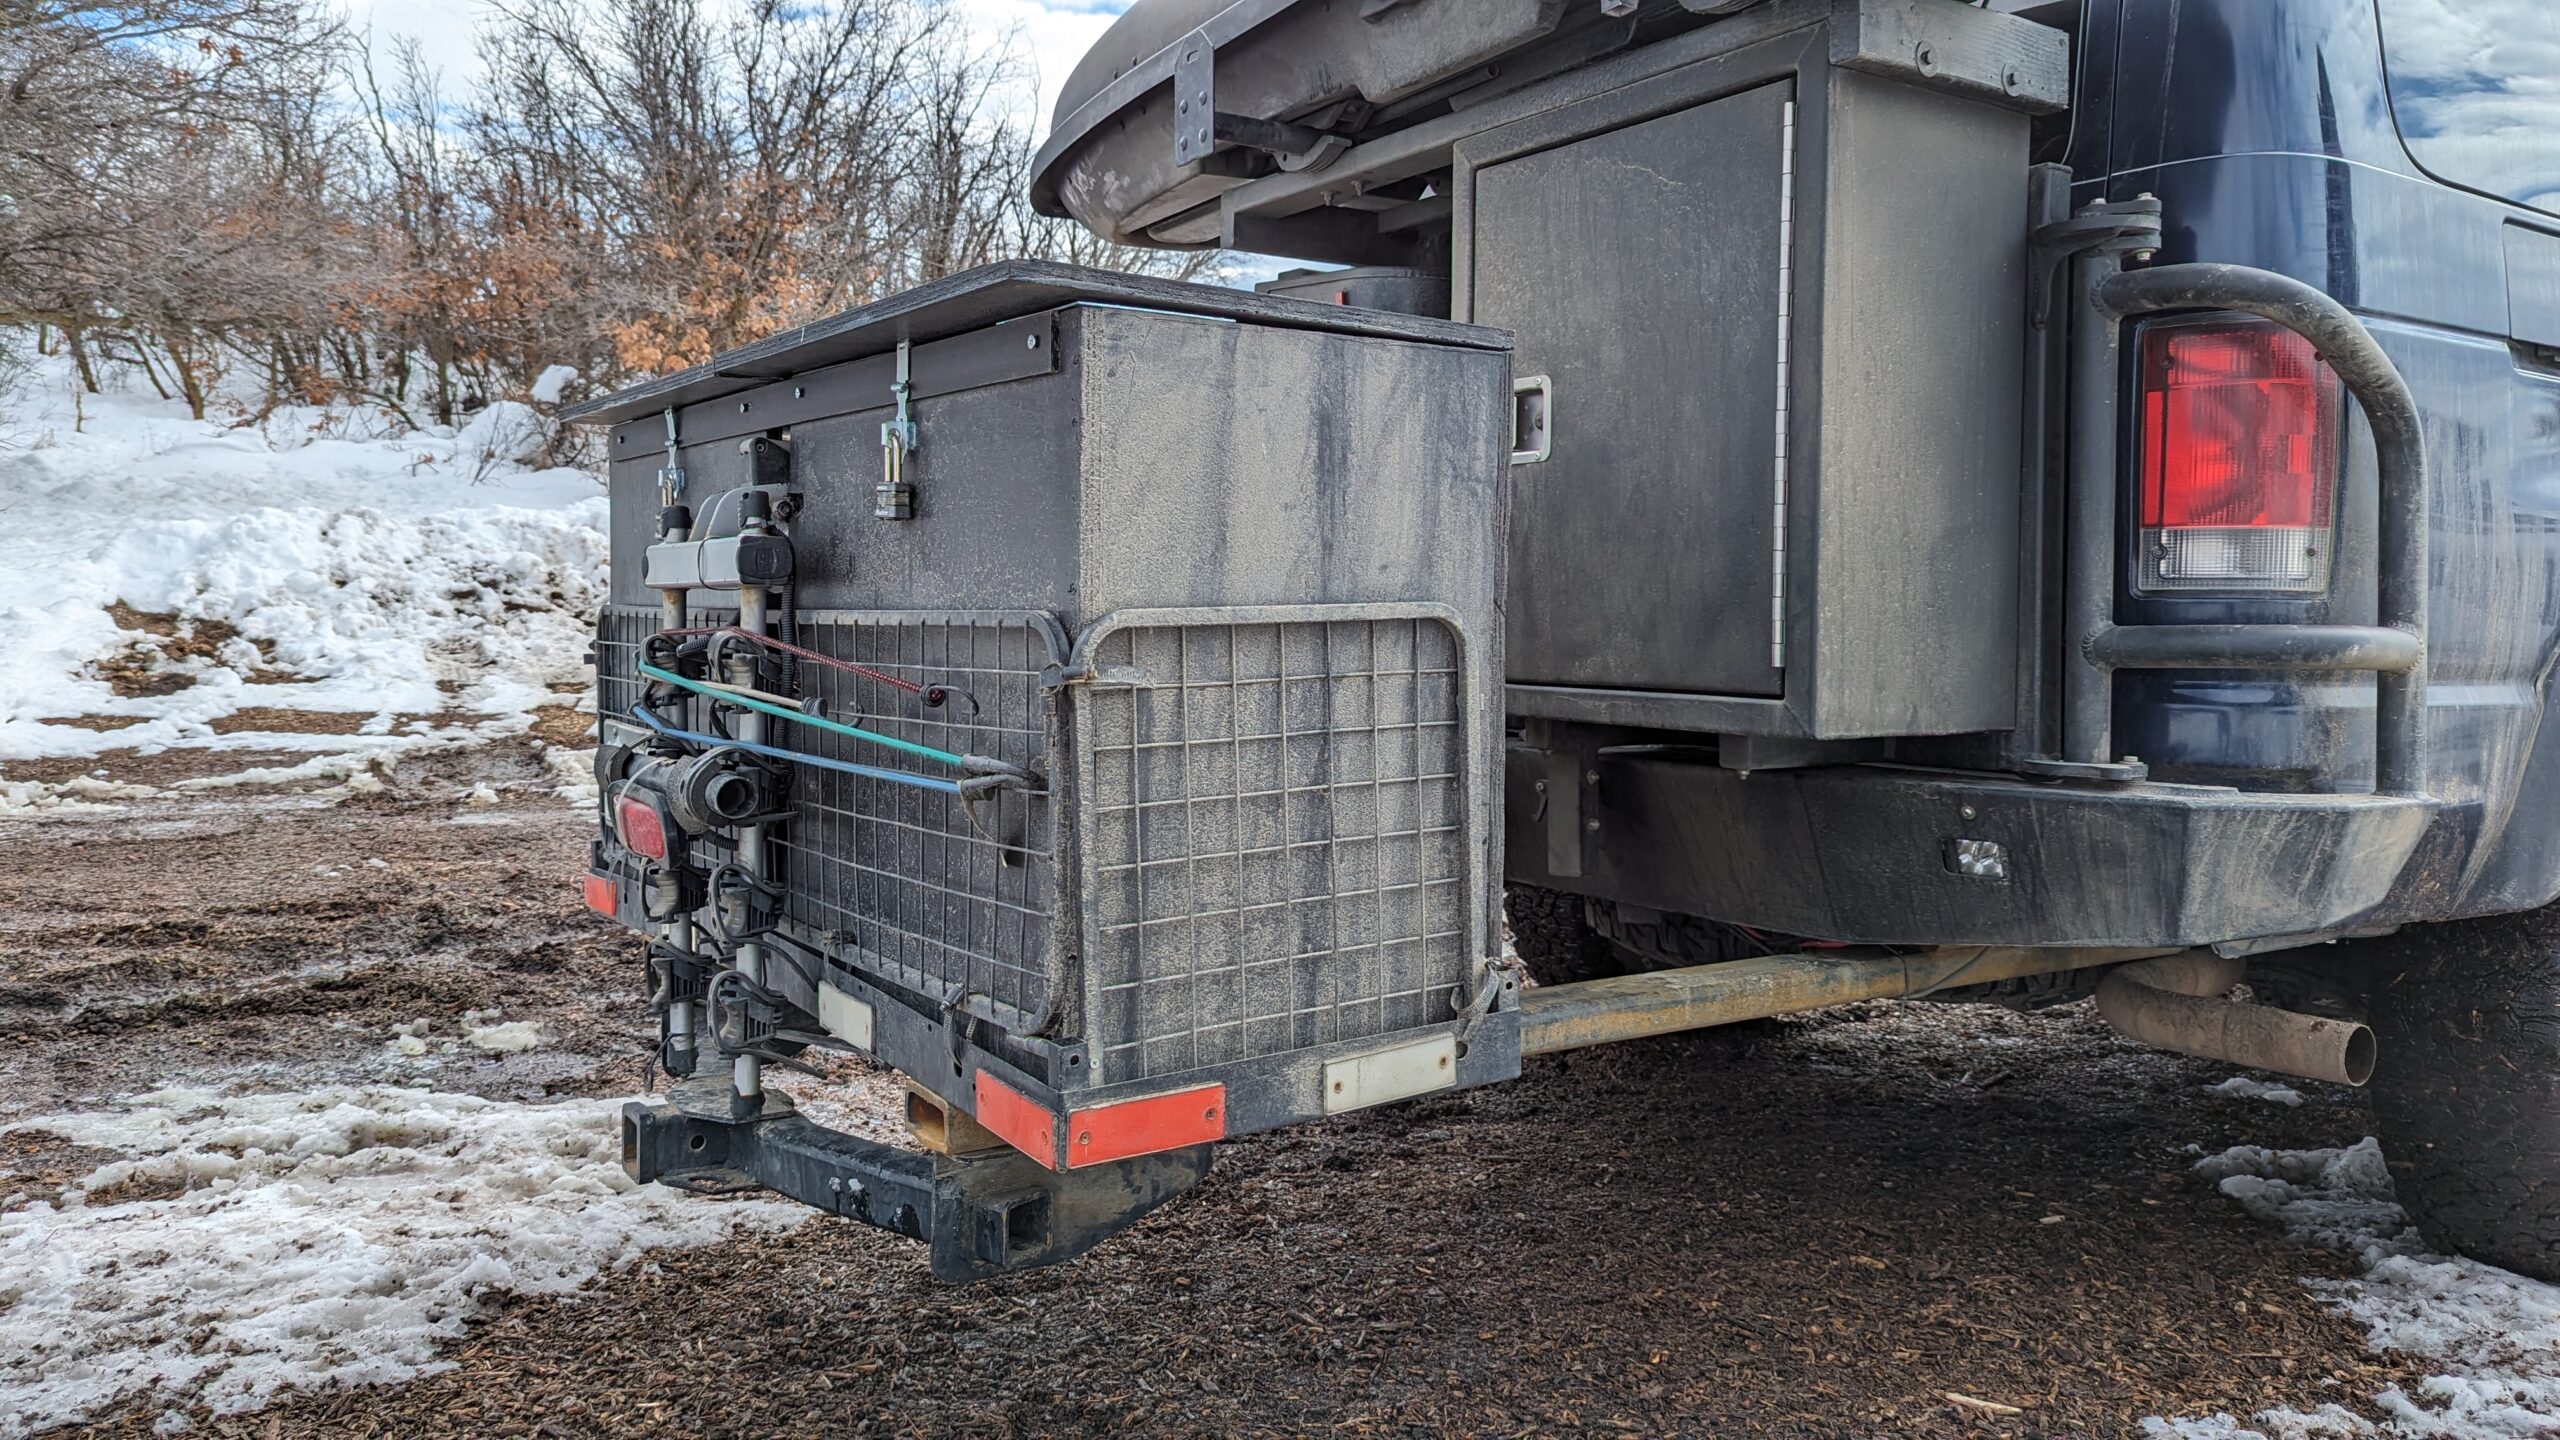
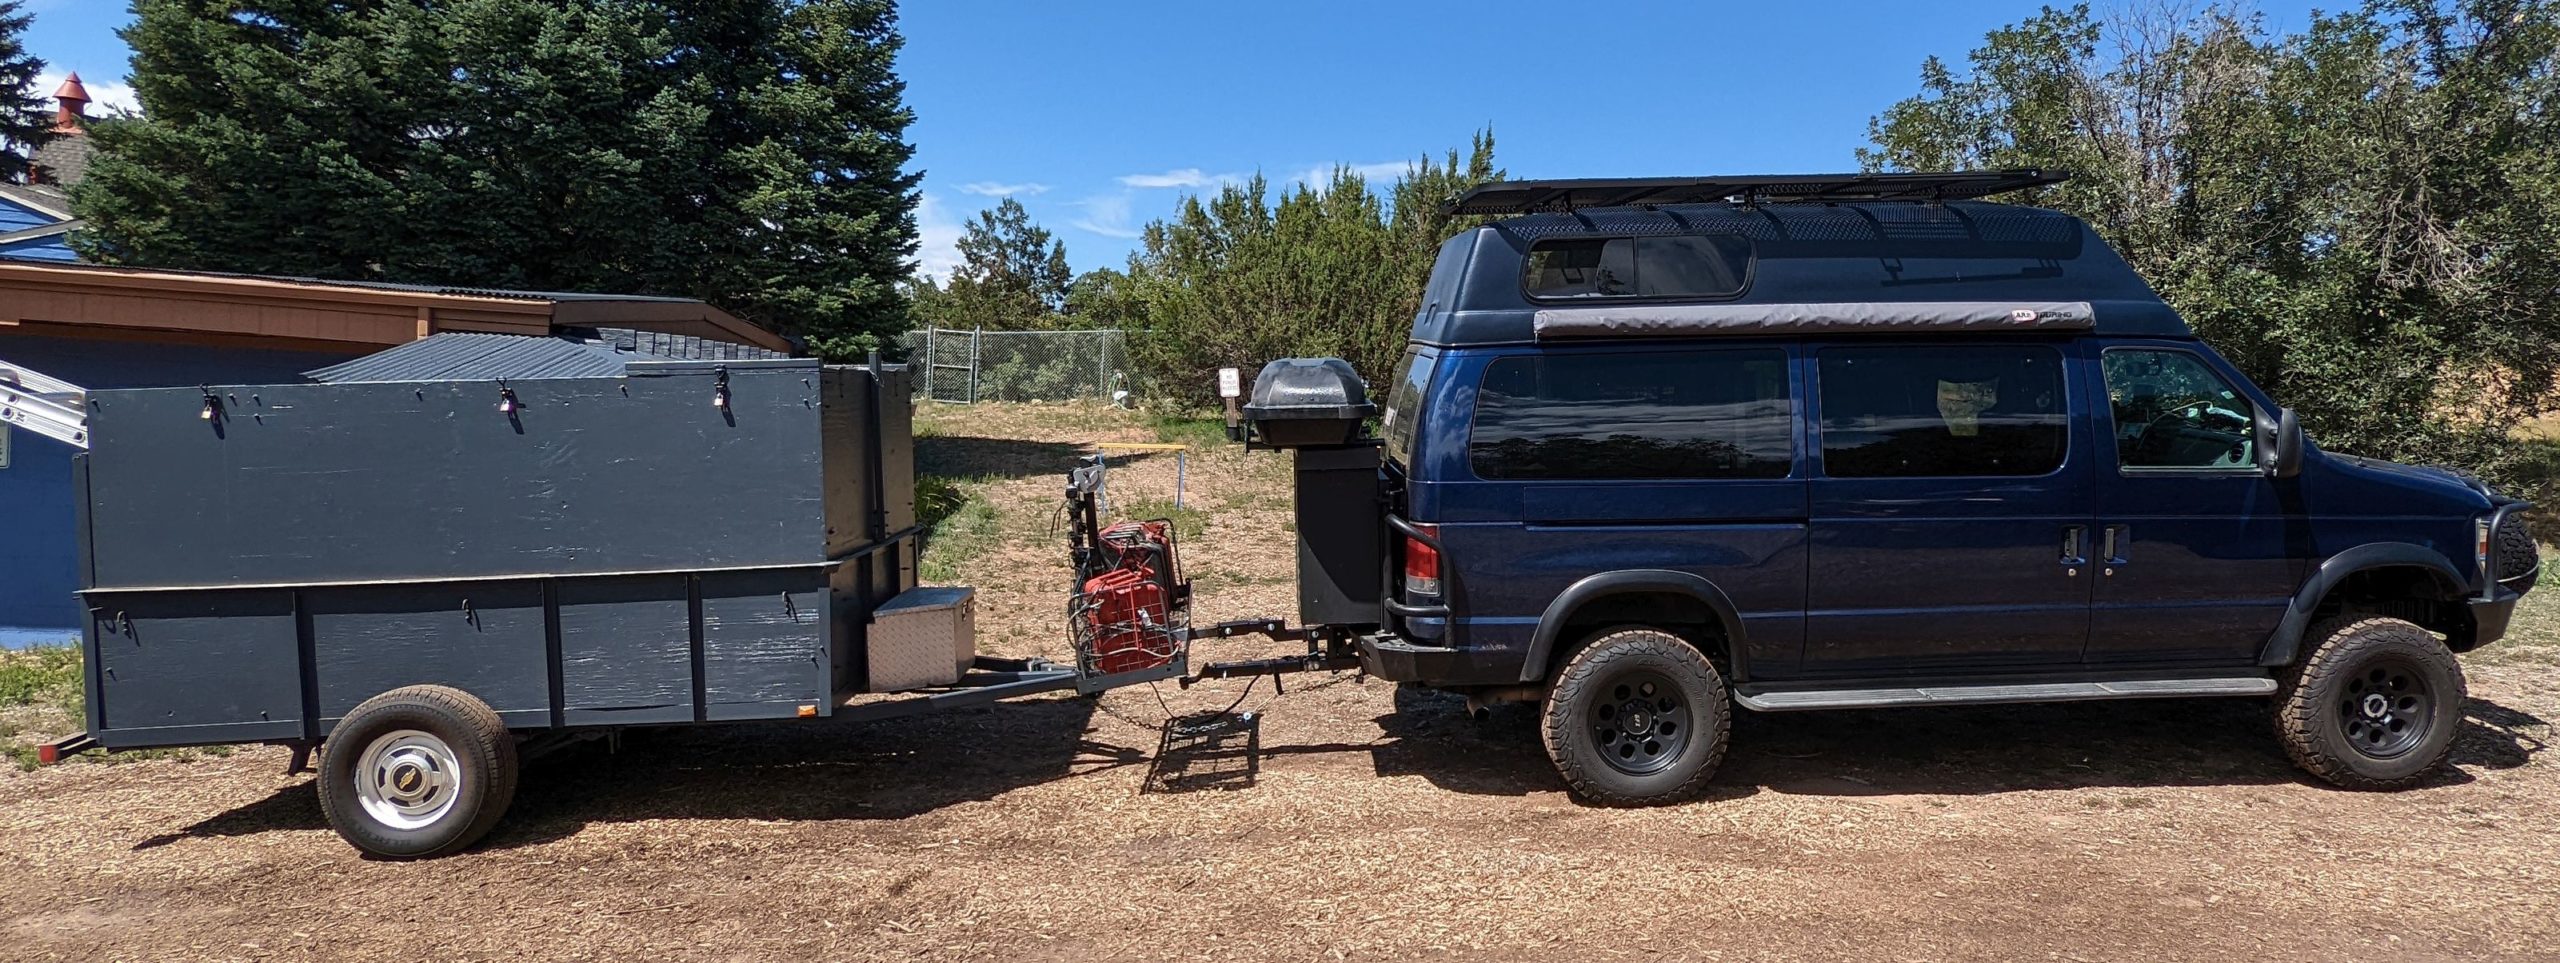
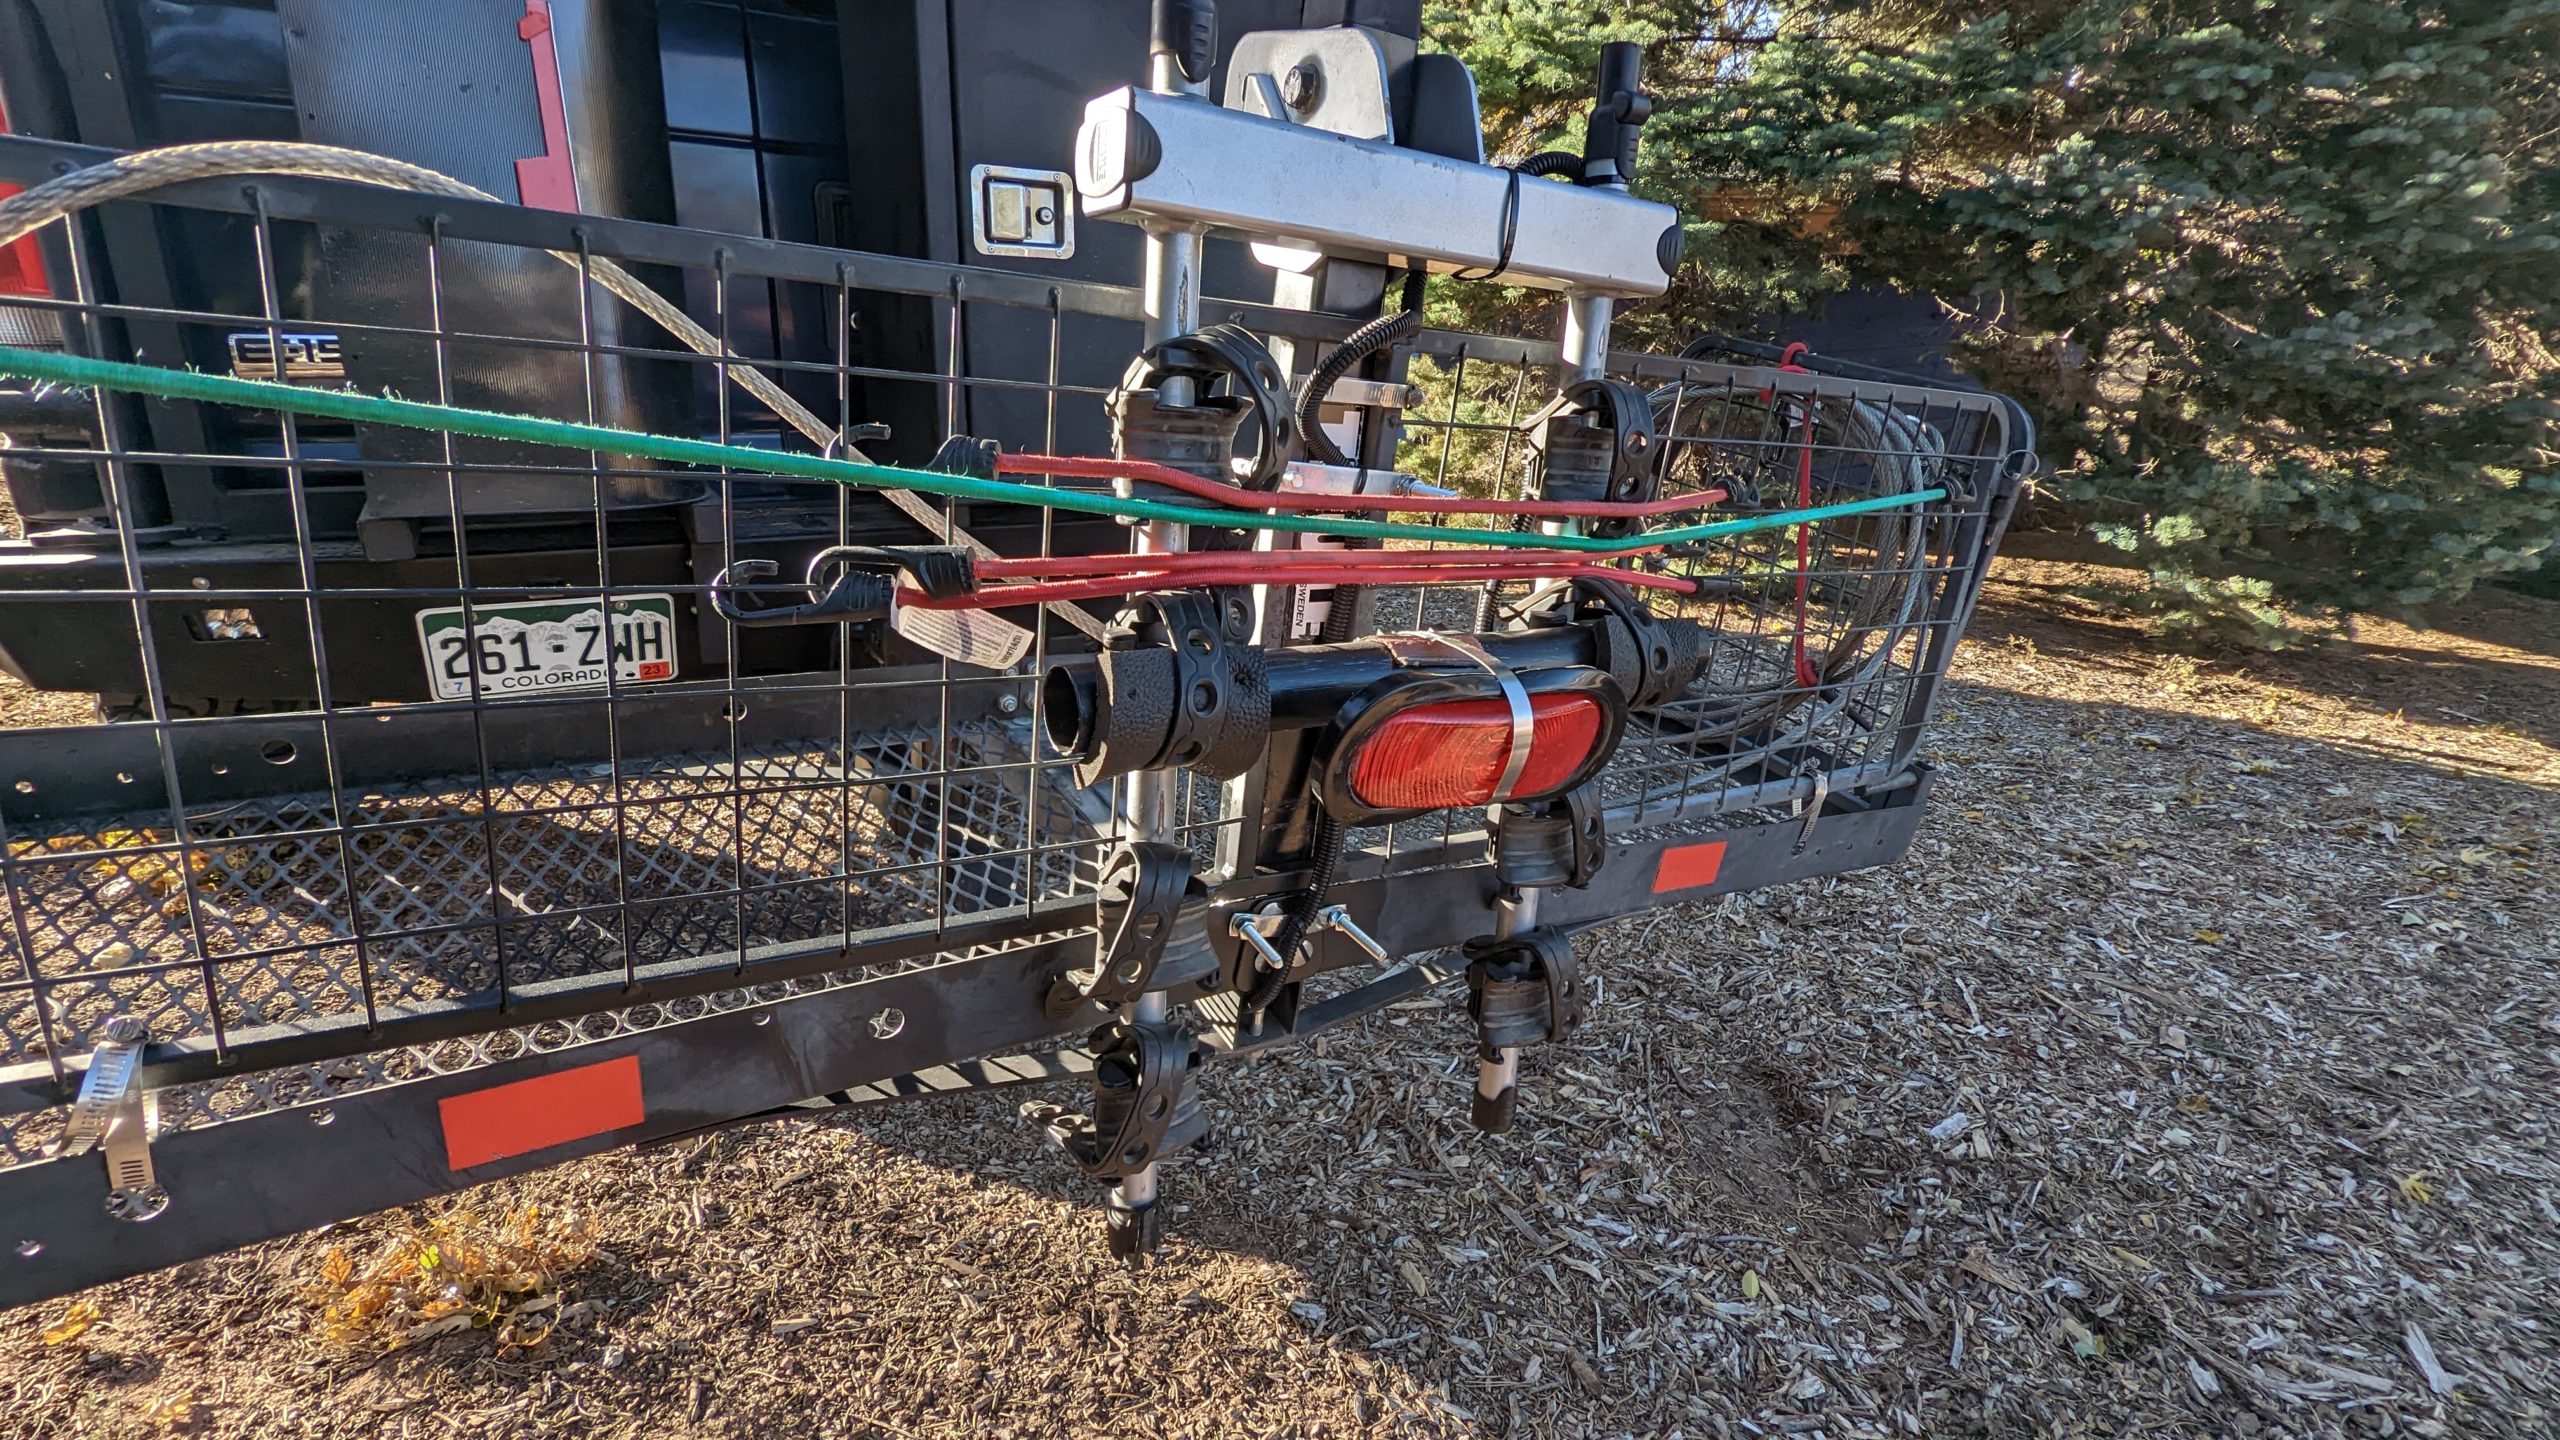
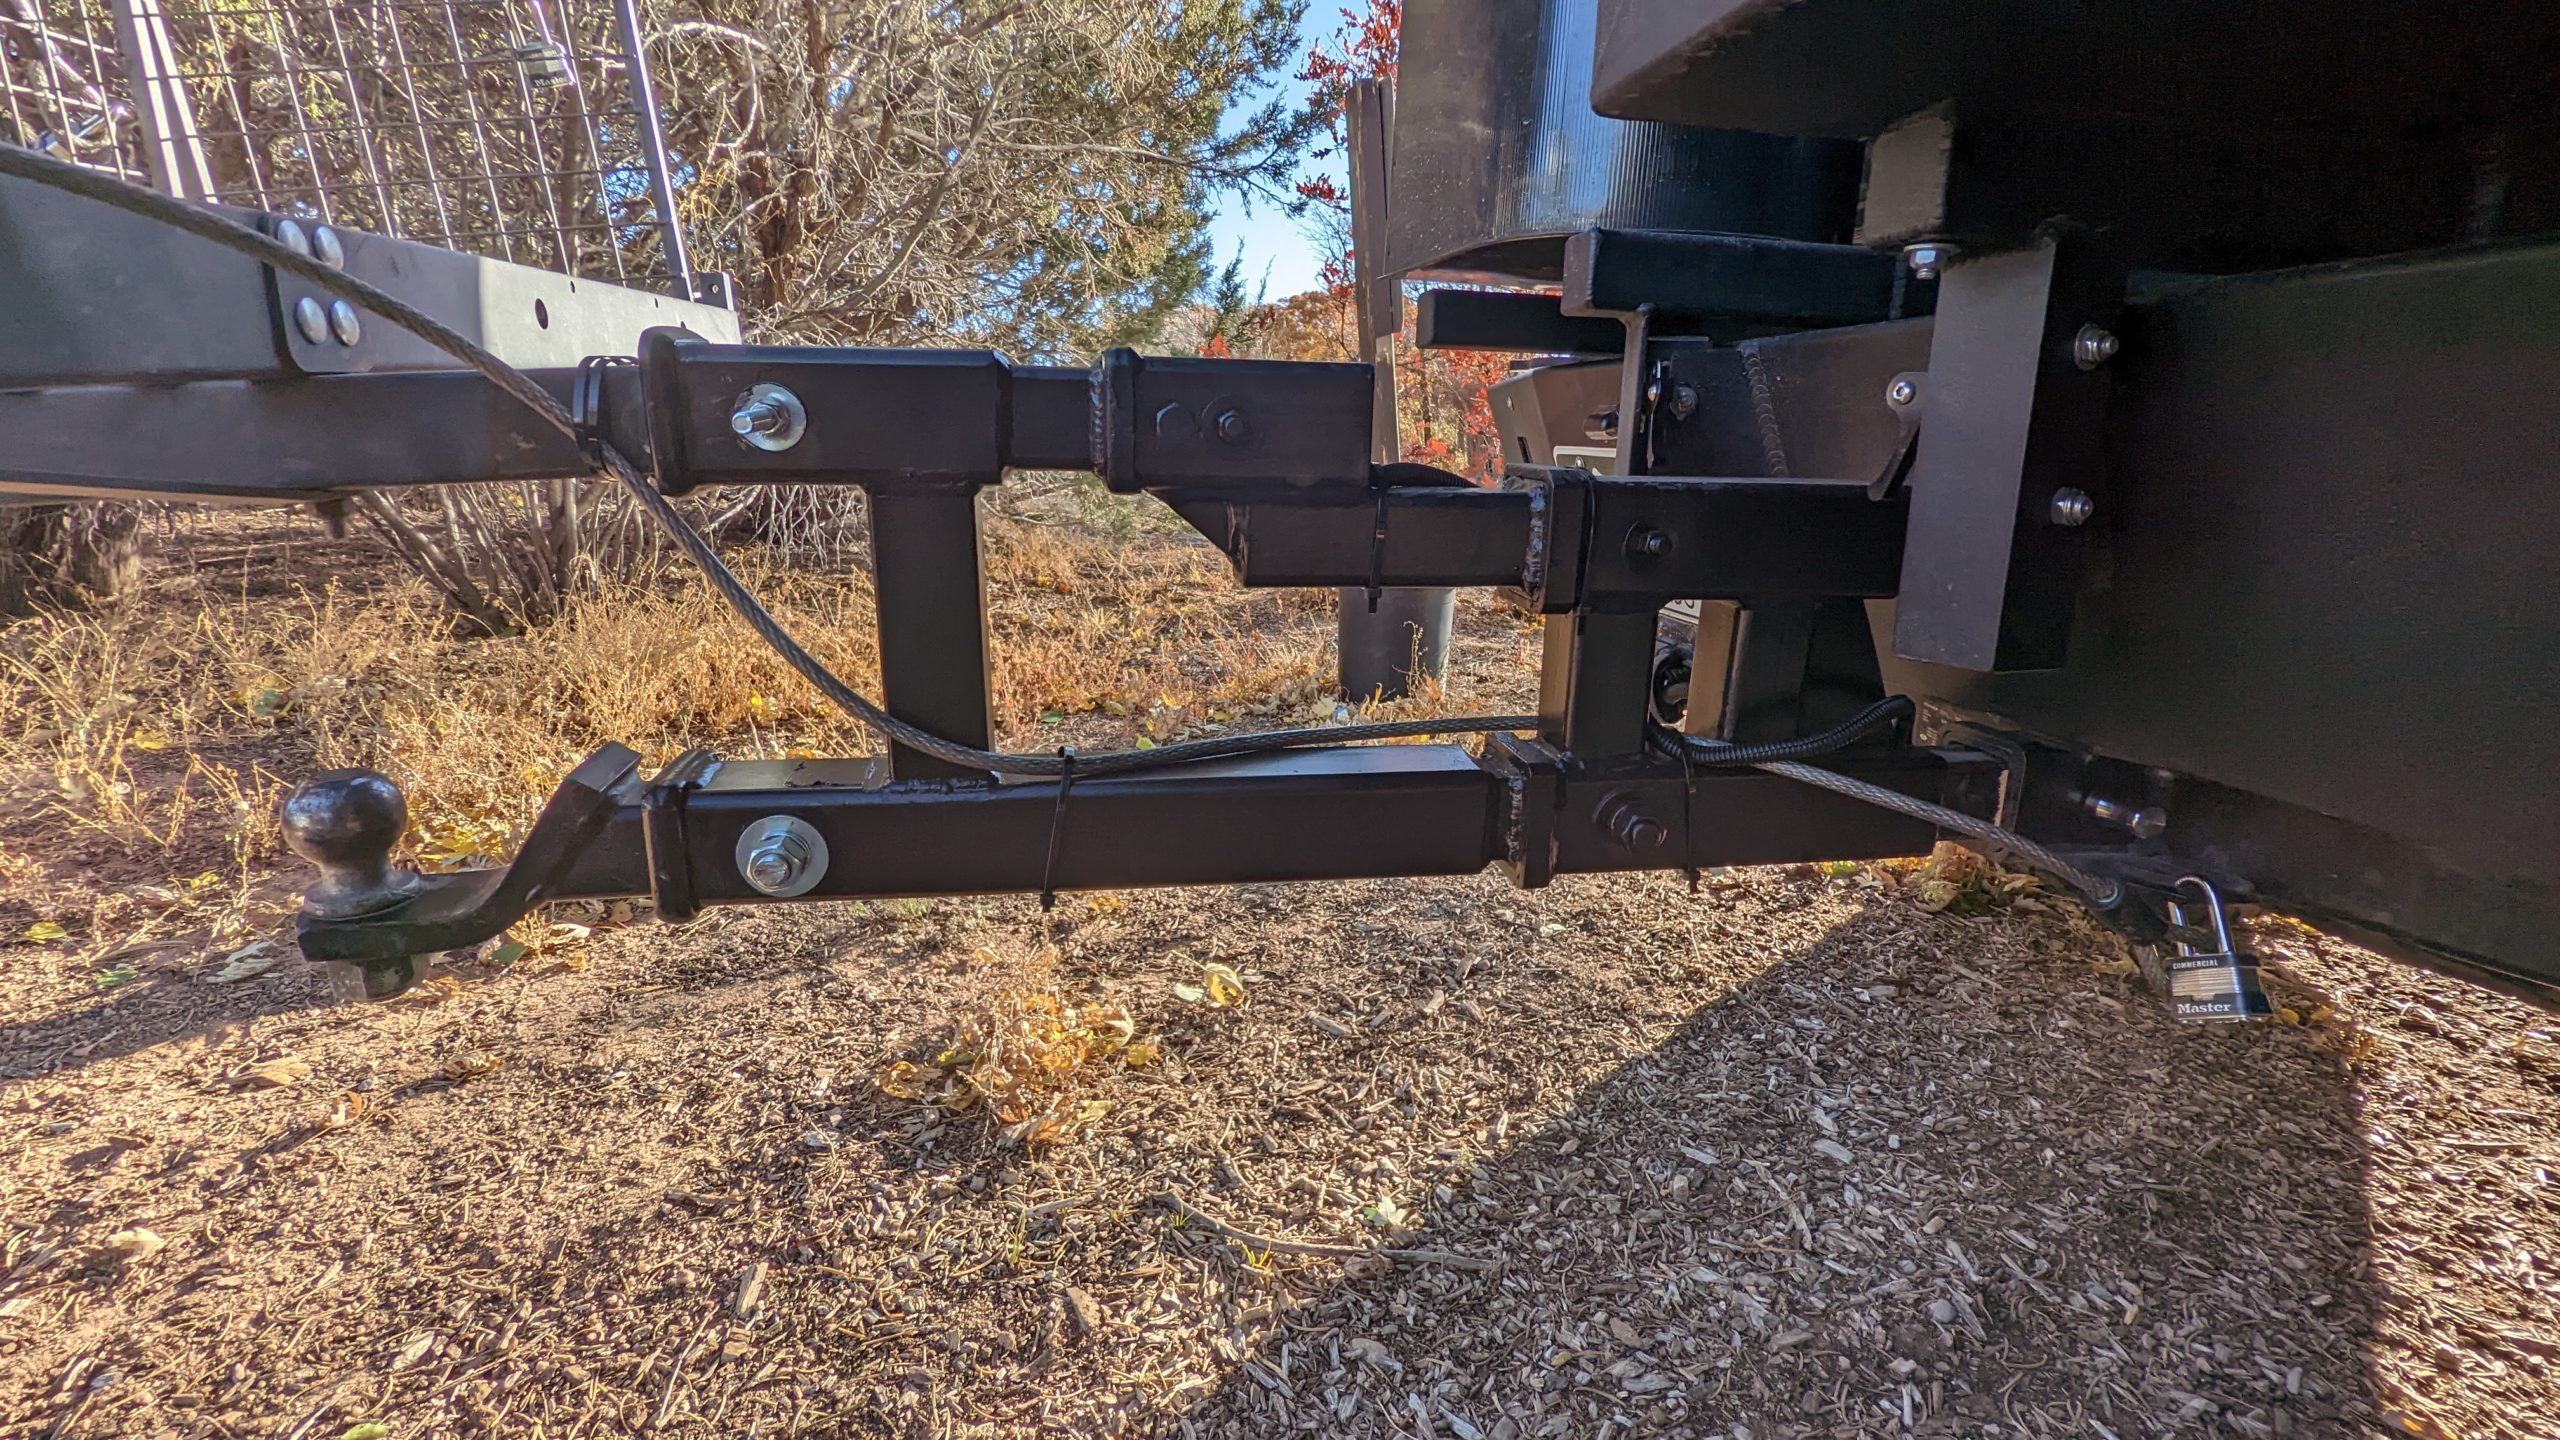
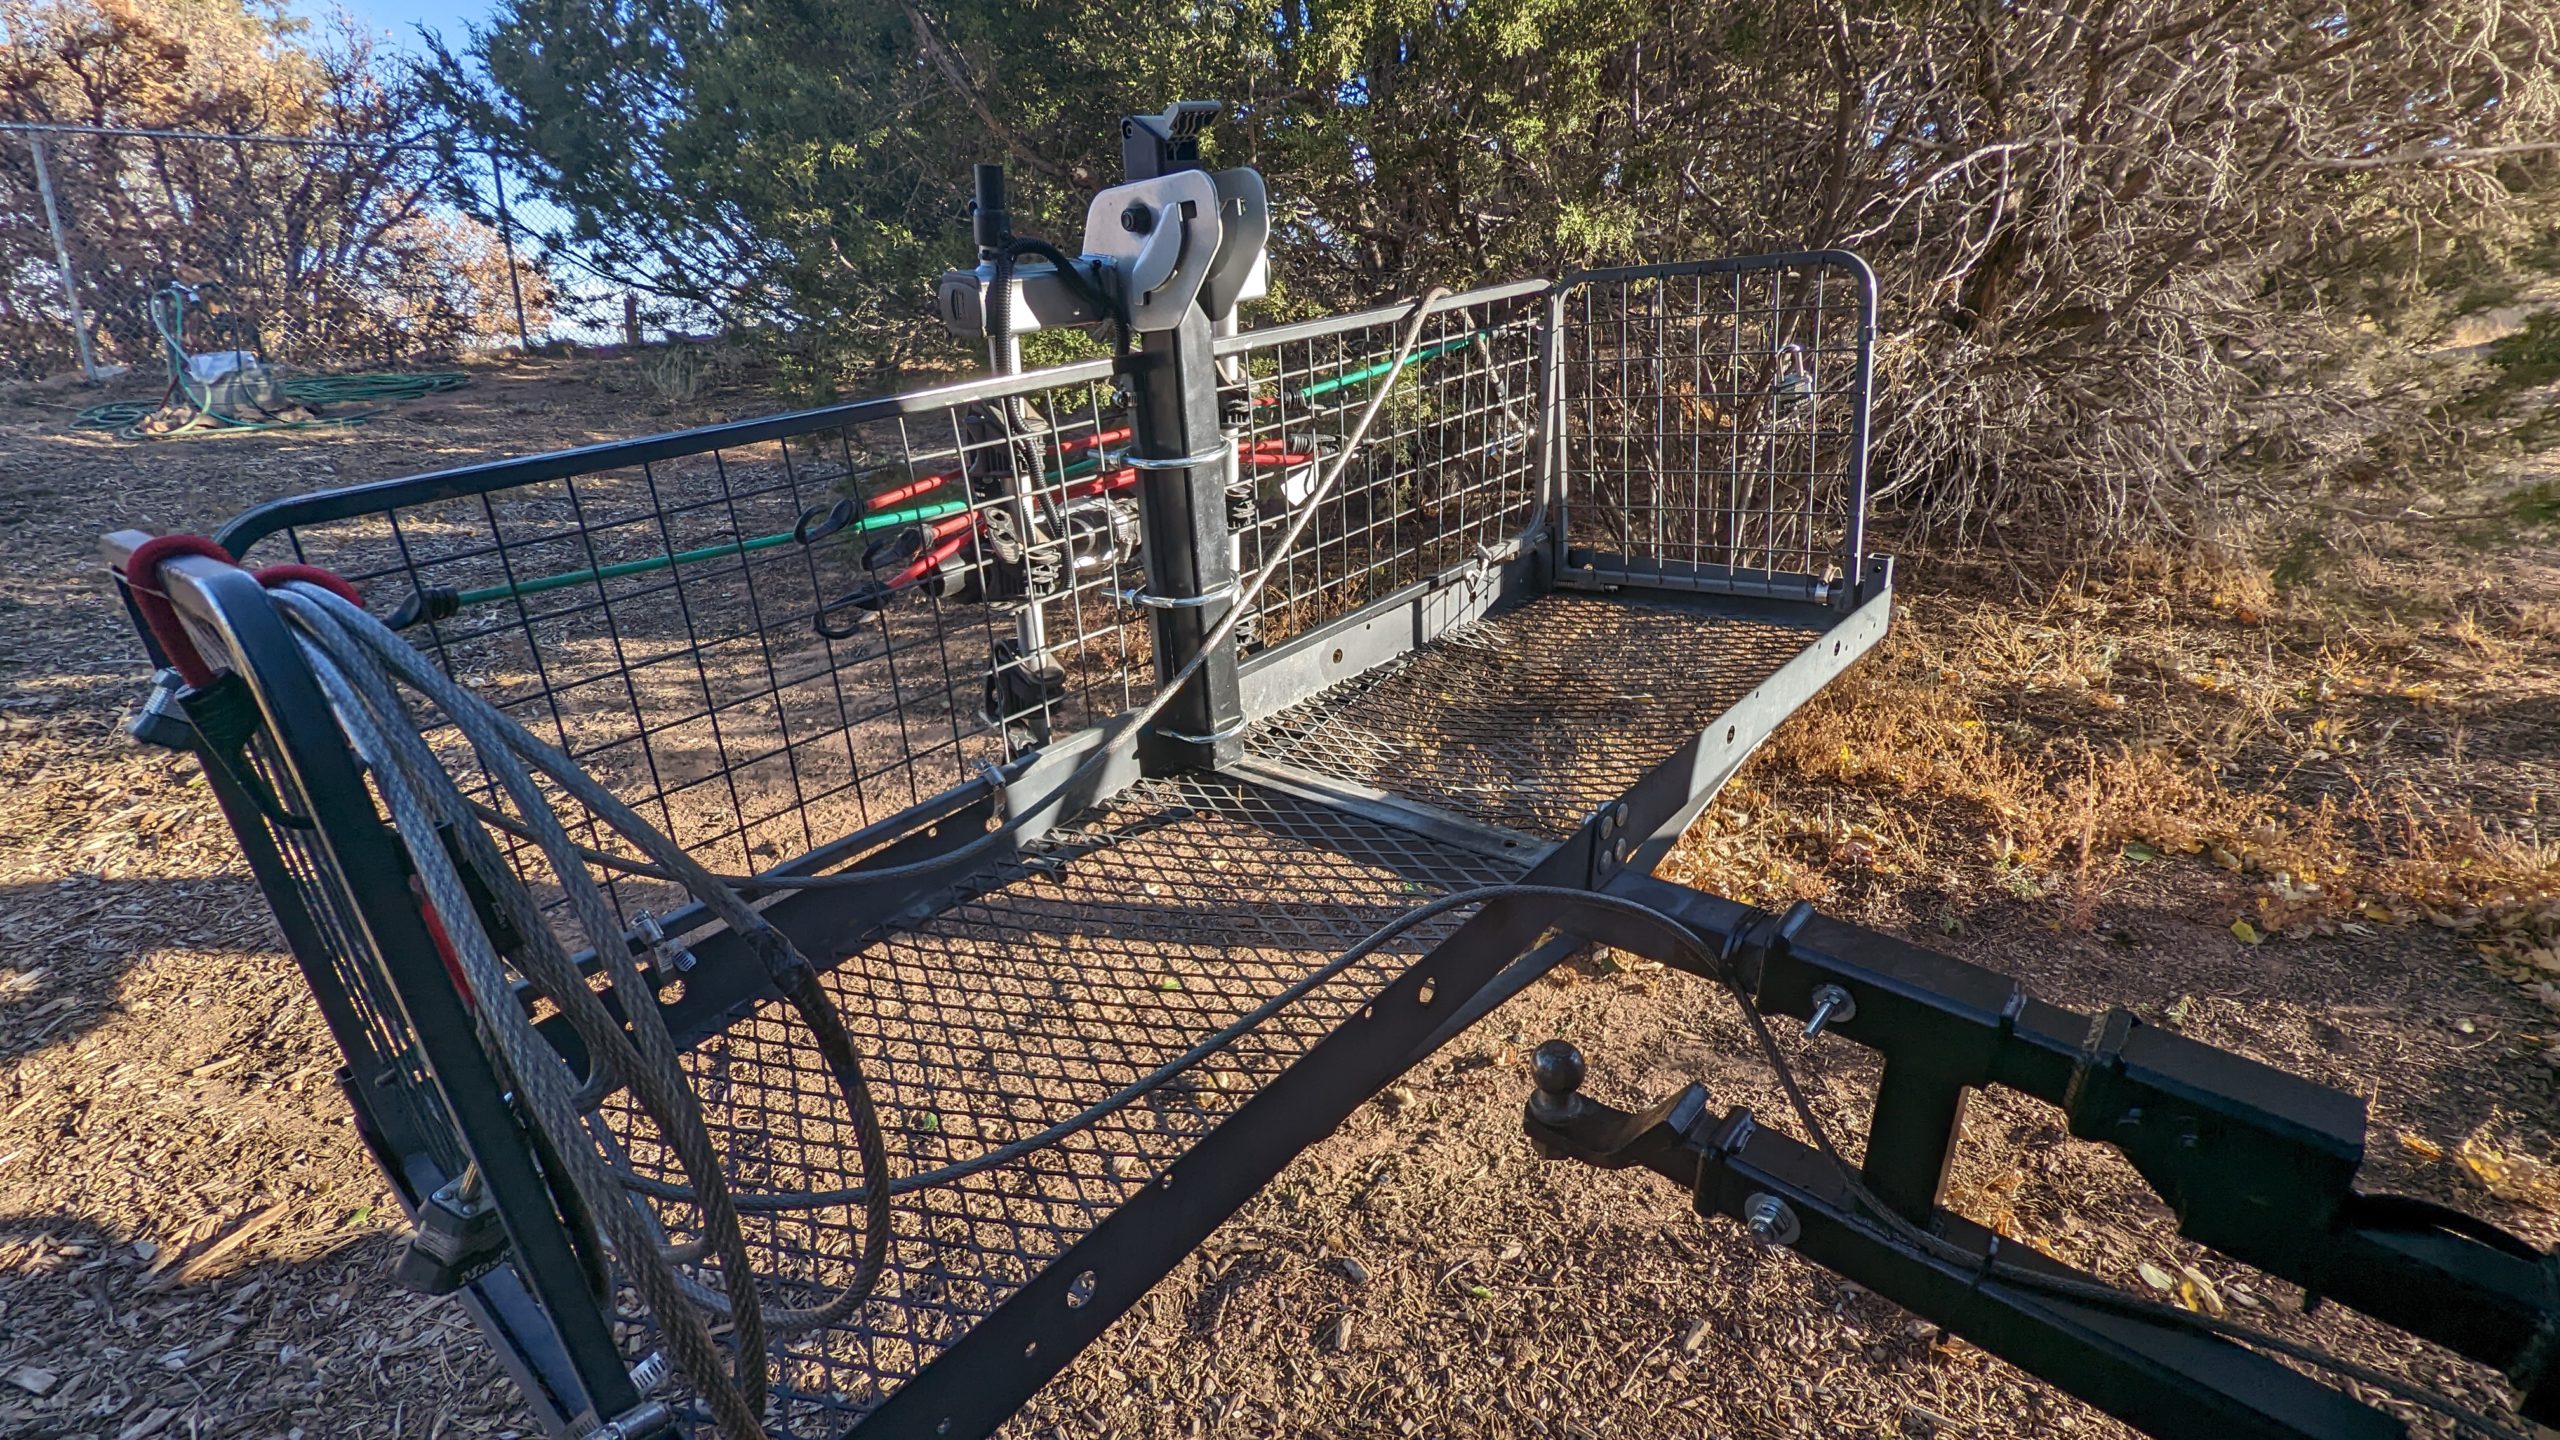
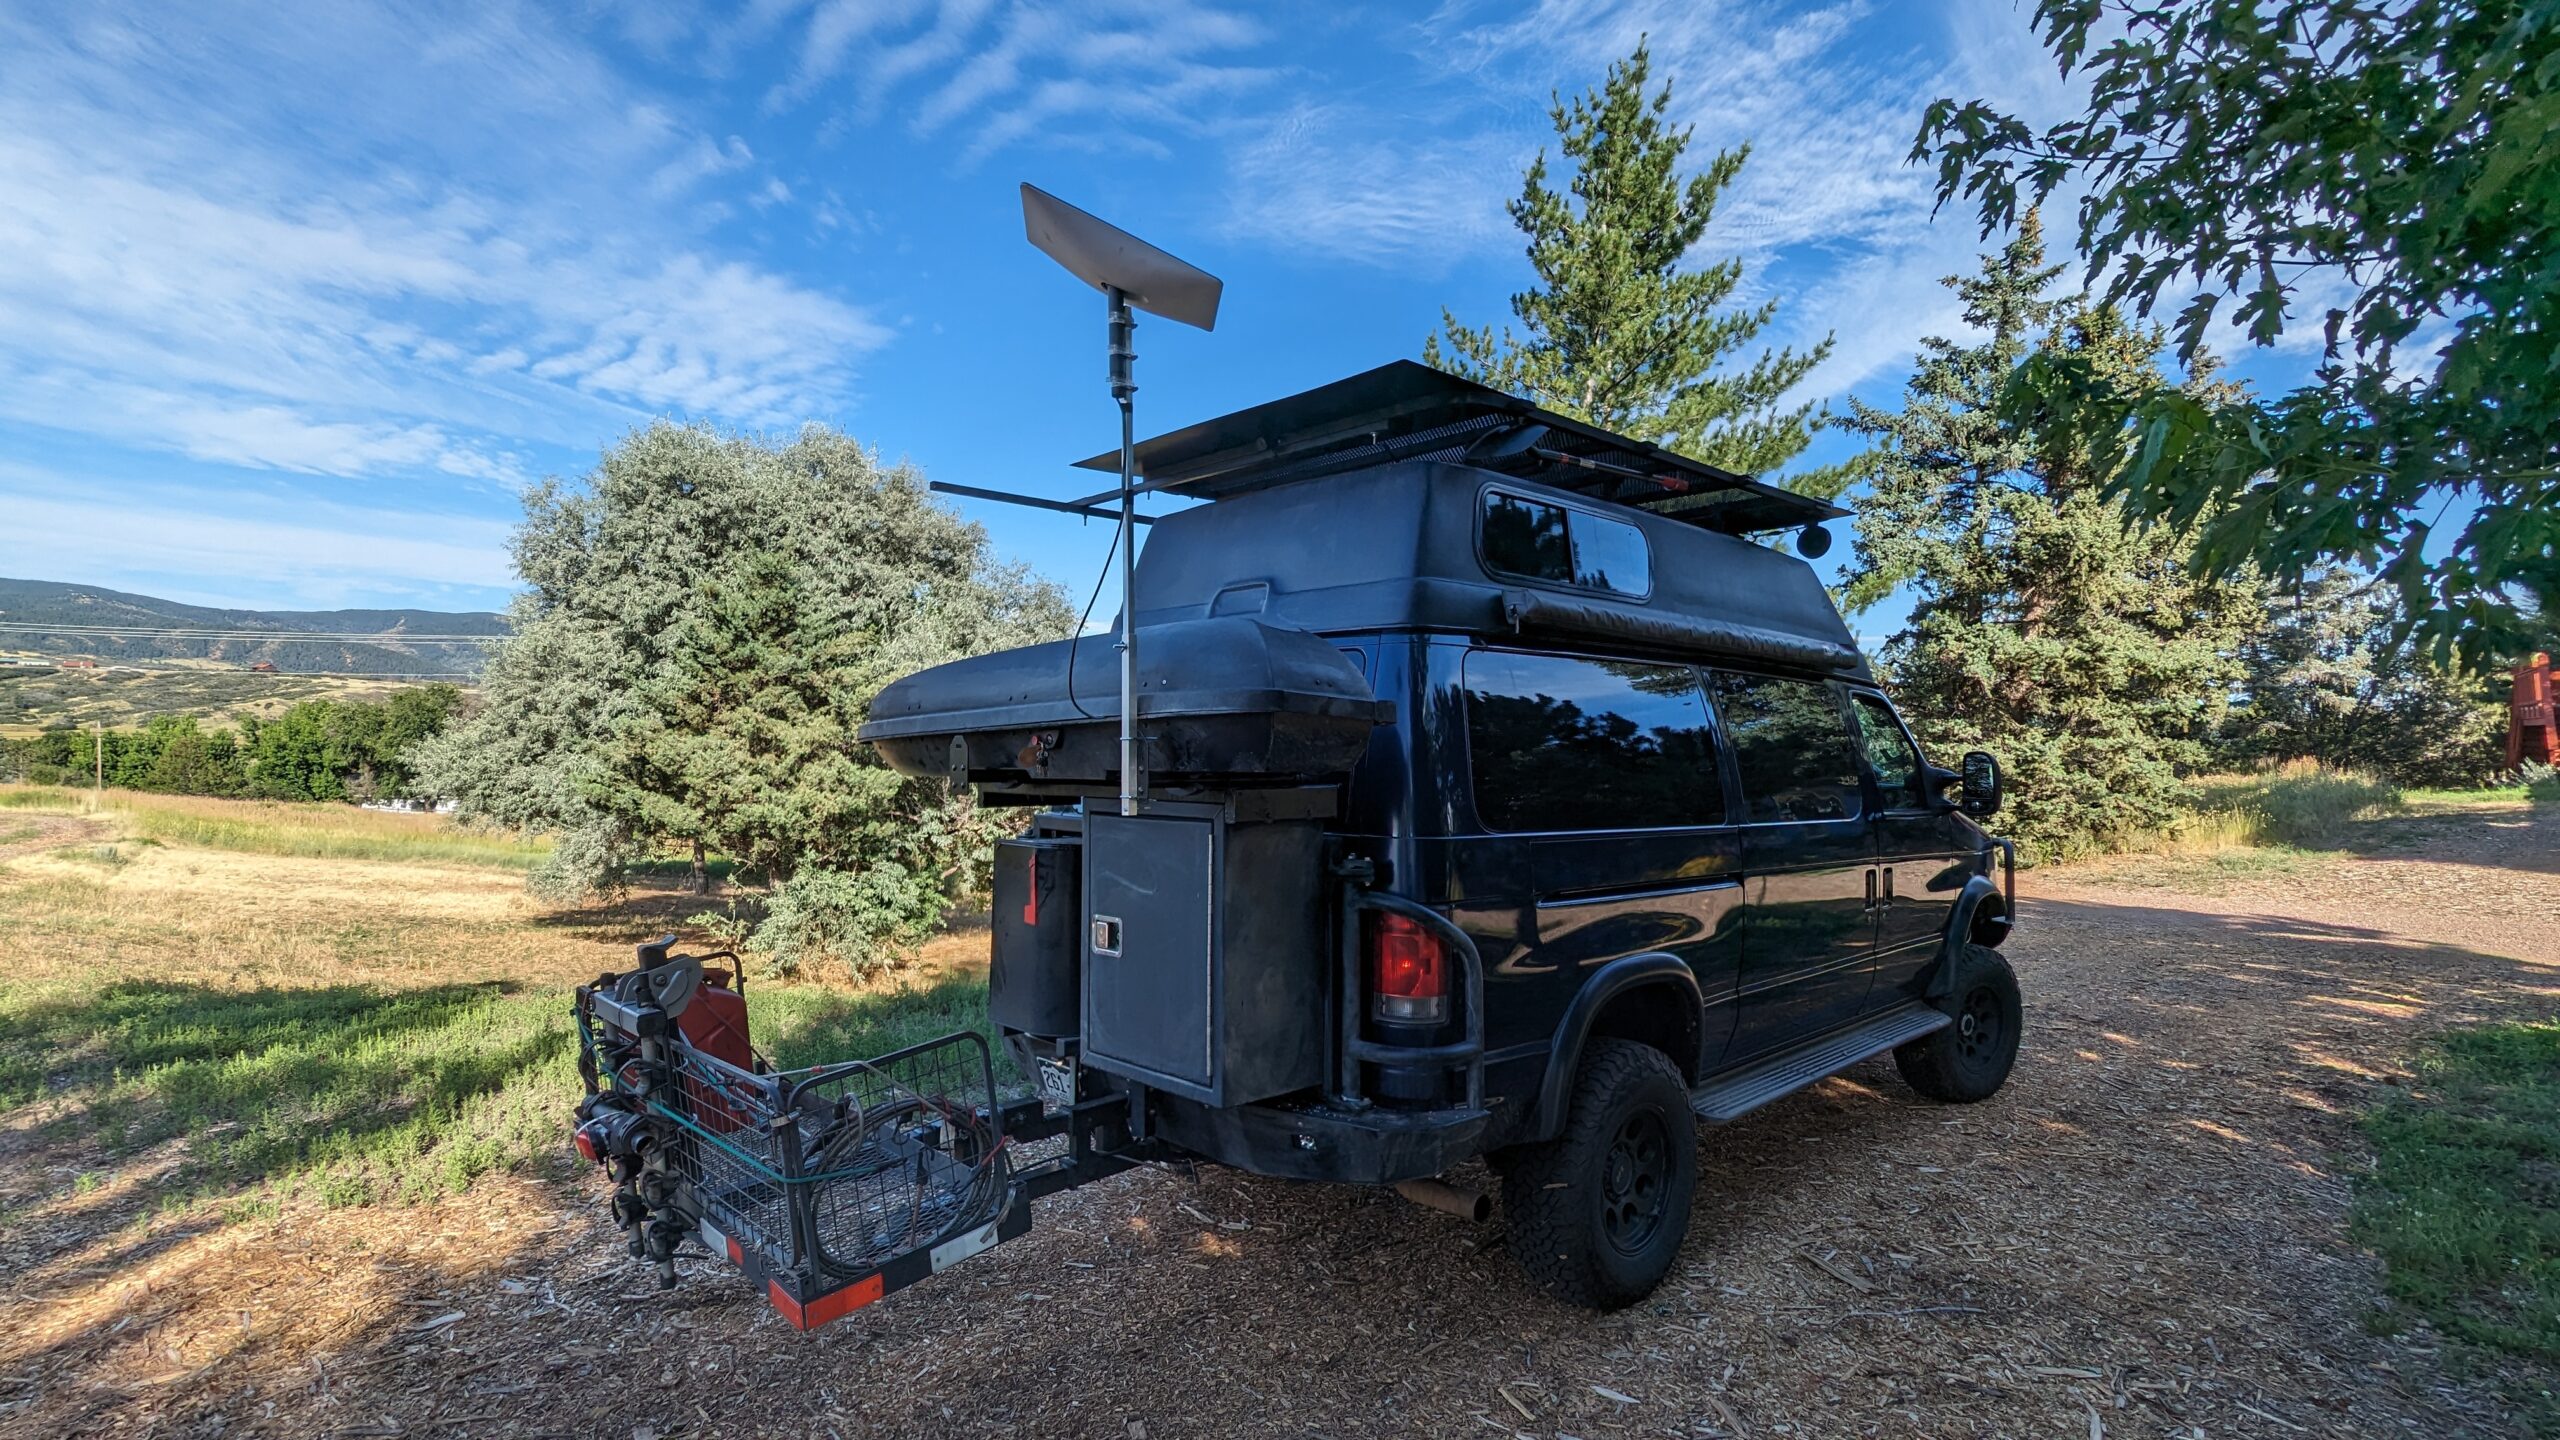
This has evolved over time to its current setup, which is a swing arm (to accommodate opening the aluminum bumper cabinets and the doors), with an aluminum gear carrier and a half-cabinet. A previous build included a 3/8 inch 2×4 steel tubing bolted to the vehicle frame that supported a rear carrier with a cabinet built in. This ended up being overkill for our needs and the rear weight was misbalancing the vehicle causing death wobble issues in the front steering. I have left images of previous setups. We added luggage carries midway (attached to swing arm on right bumper) and top (attached to the top rack via welded brackets)
Fender Flares
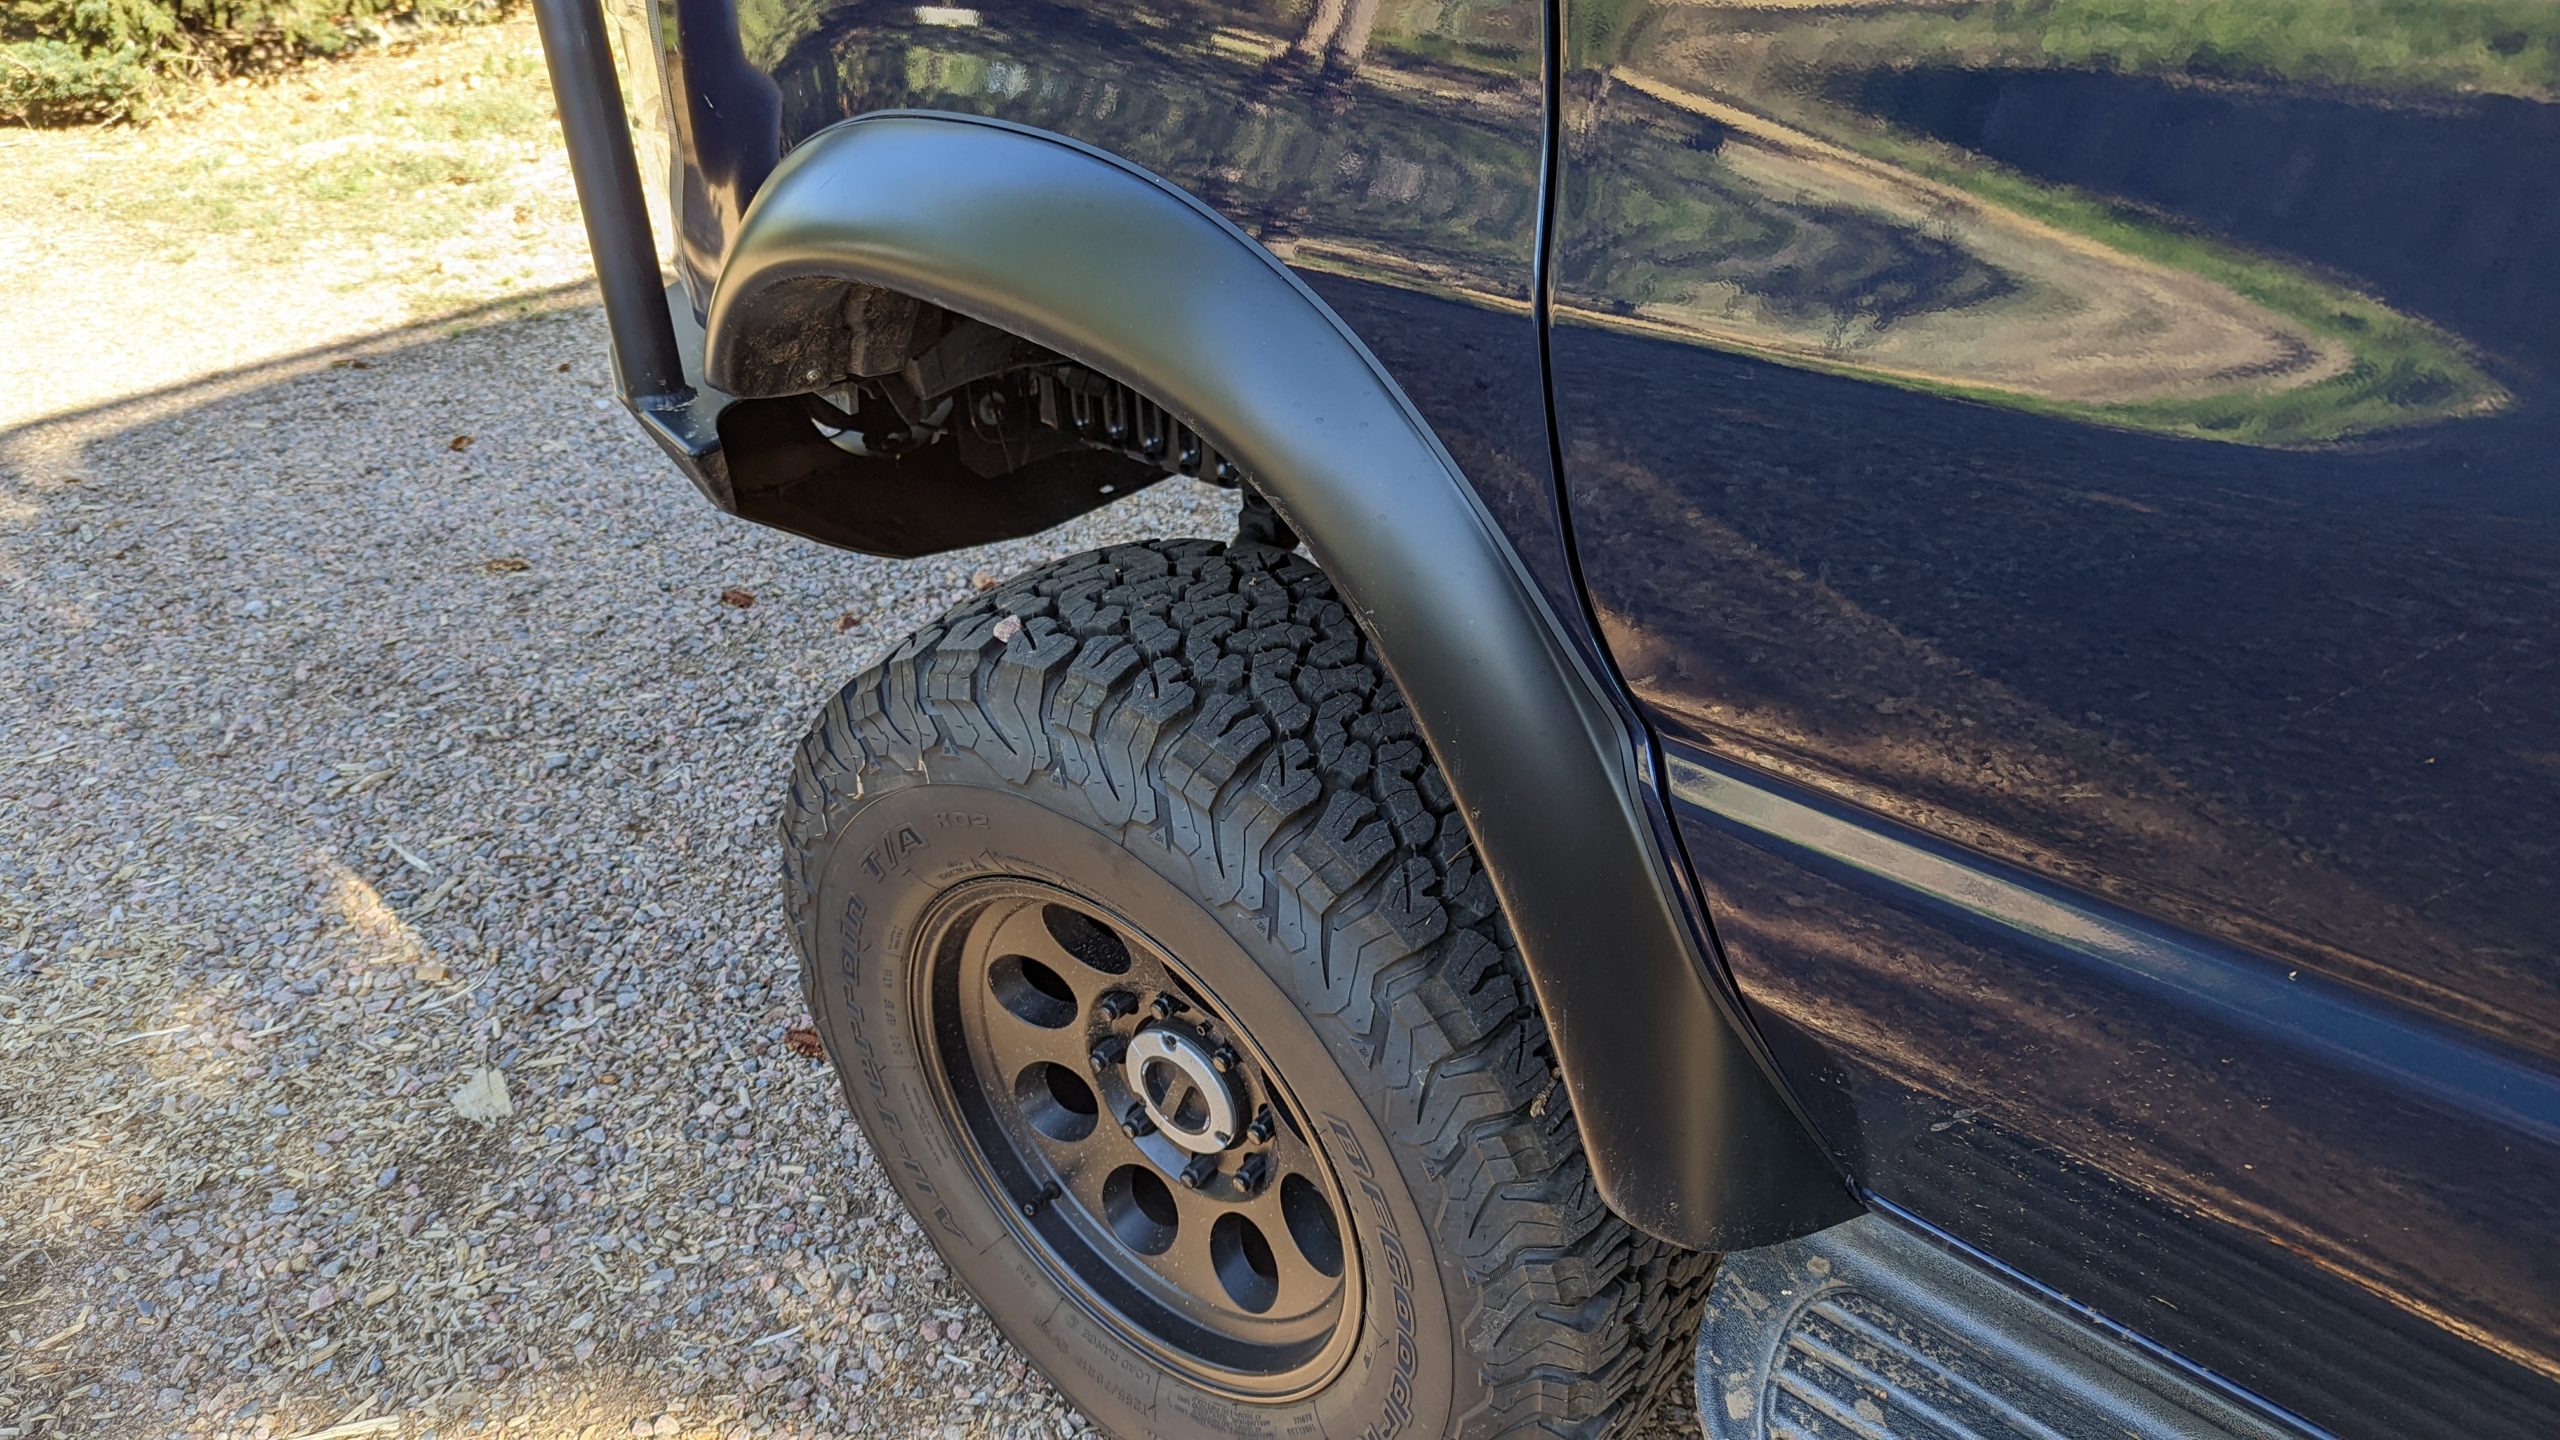
Pretty basic ones to keep the sidewalls cleaner, but I am not sure they help.
Fuel Tank
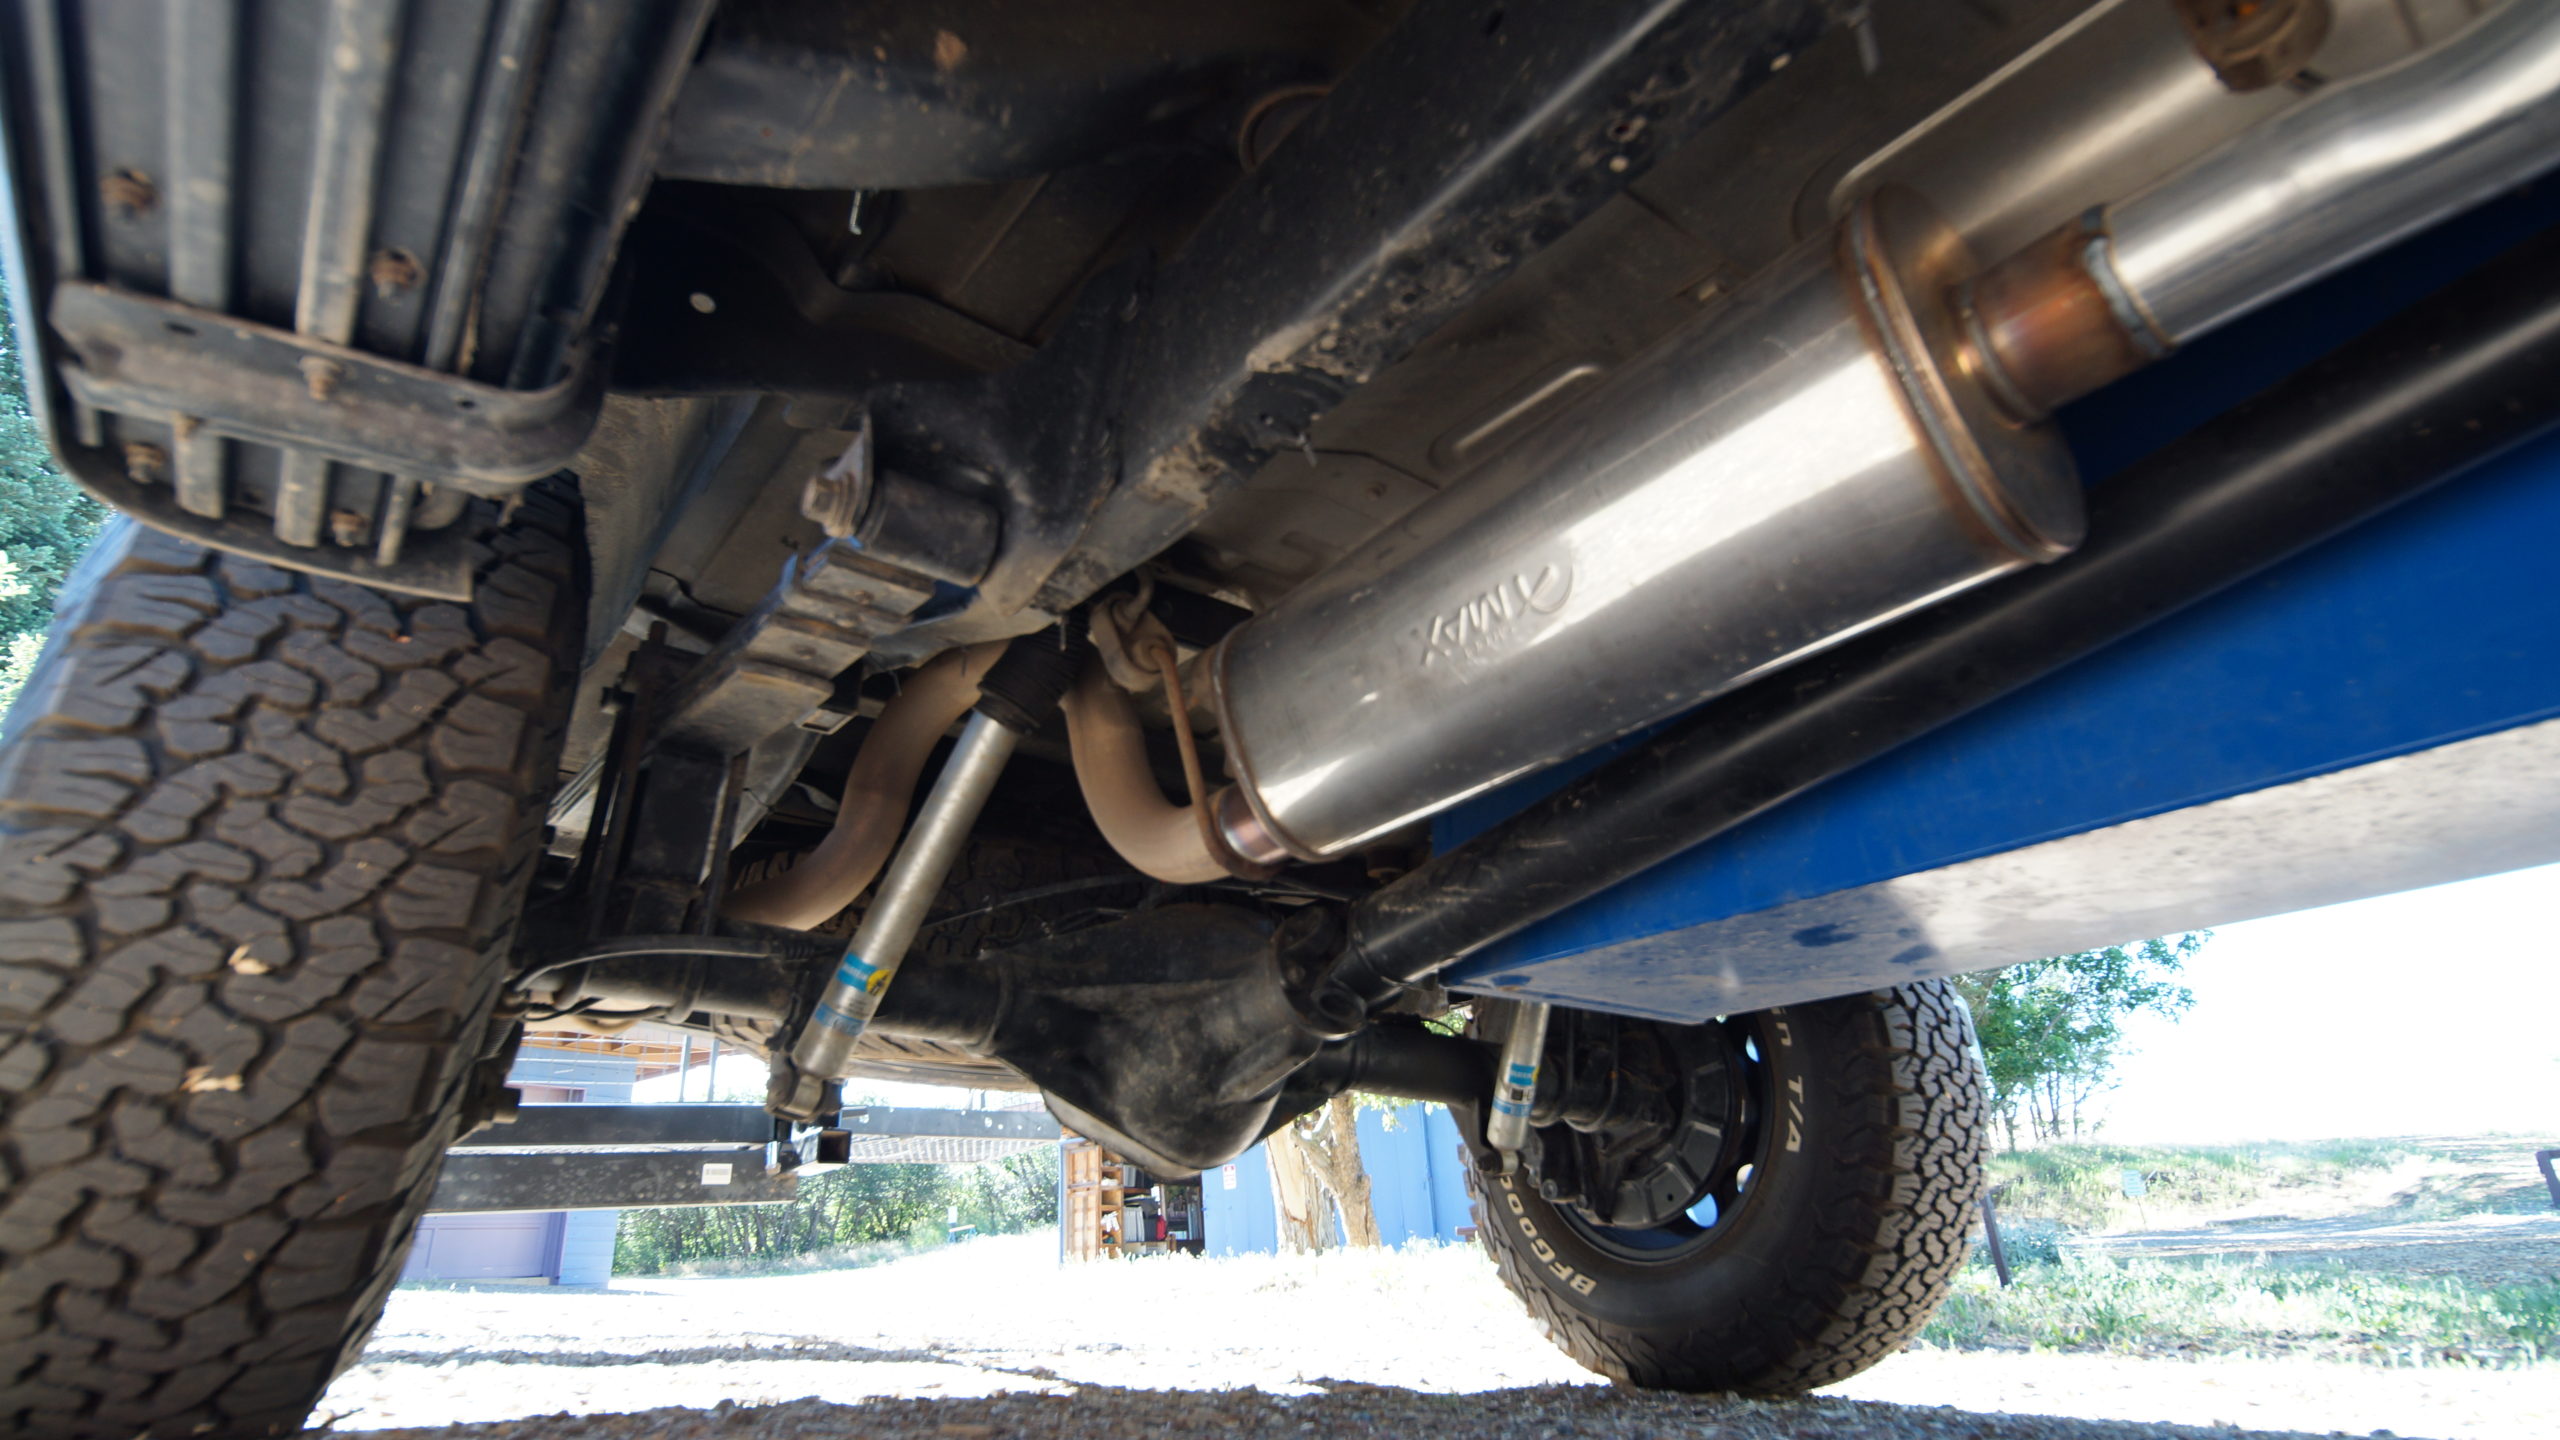
Replaced 33 gallon fuel tank with 46 gallon aluminum that has additional steel protective shell installed around it.
Muffler
Replaced muffler with flow-through type to increase engine power.
Awning
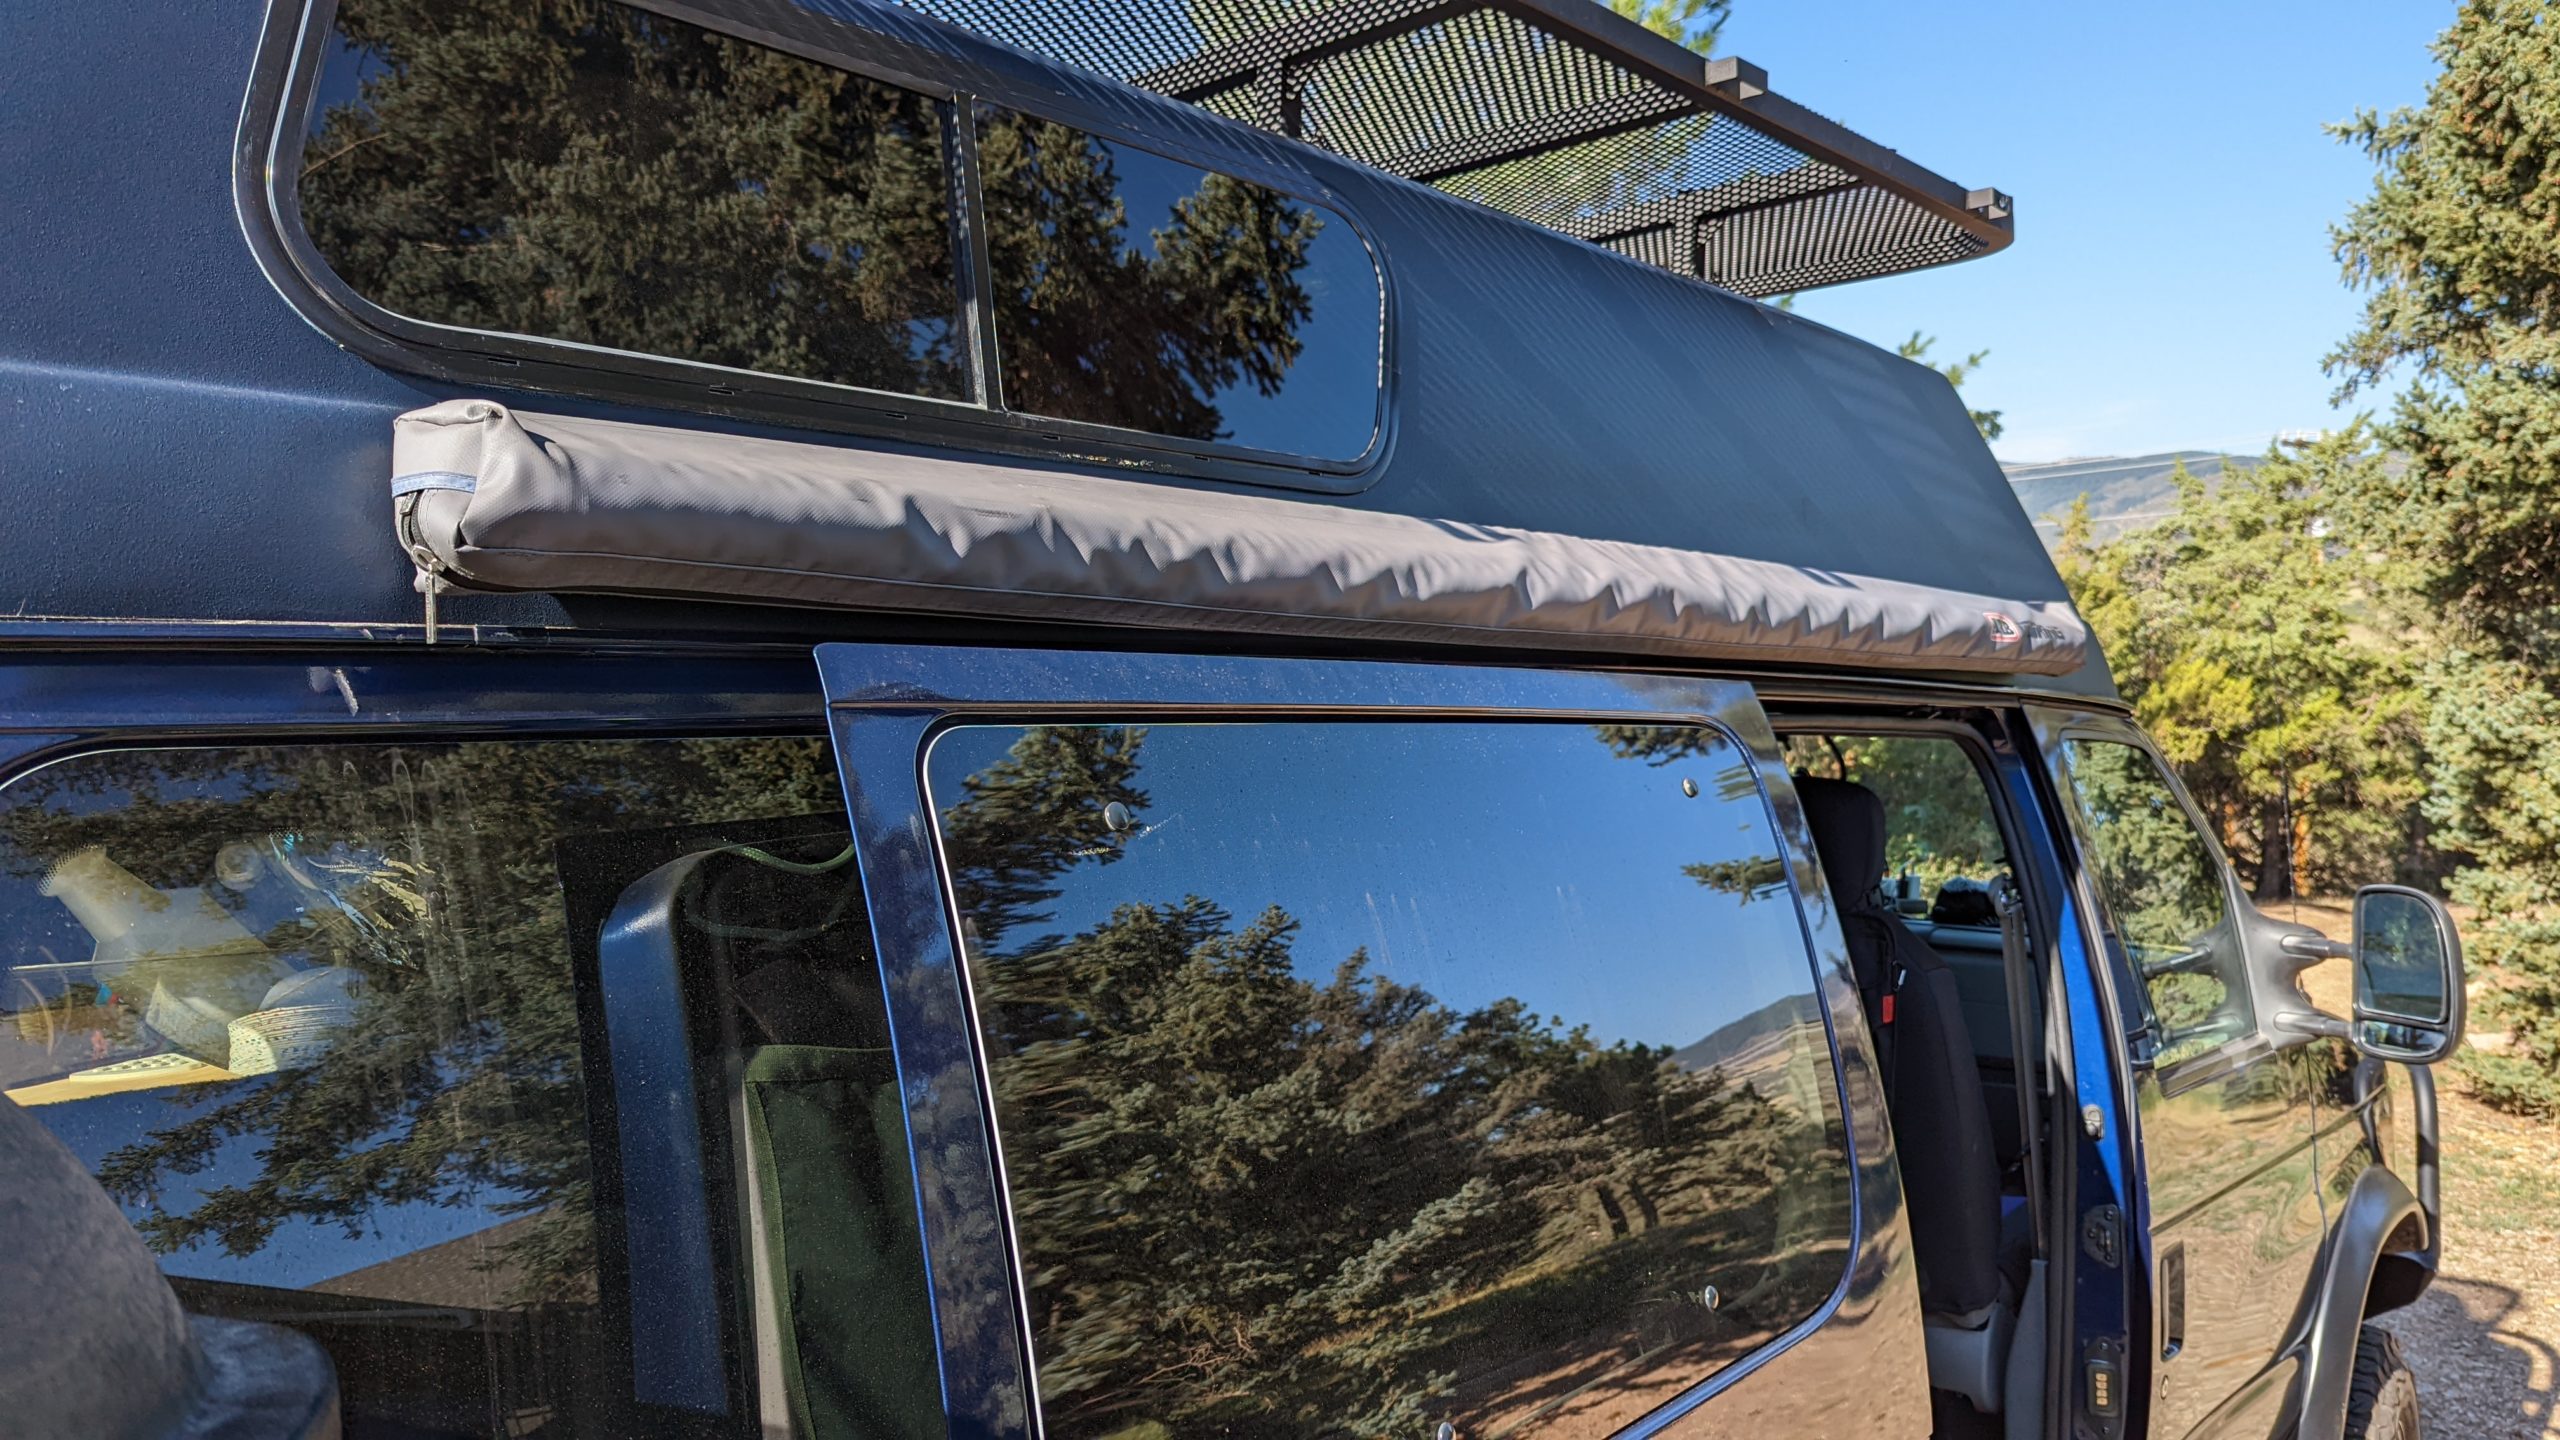
An ARB roll out awning shade was installed on the passenger side. We also got the sidewall attachment to make a complete tent out of it to help protect from weather elements.
Two Spare Tires
We maintain two spare tires. One housed in the usual compartment underneath the rear and the other on the front bumper via an extension plugged into the trailer receiver.
Mounting the secondary spare in front helps protect the front grill from road objects that can puncture the radiator.
Side Bike Rack
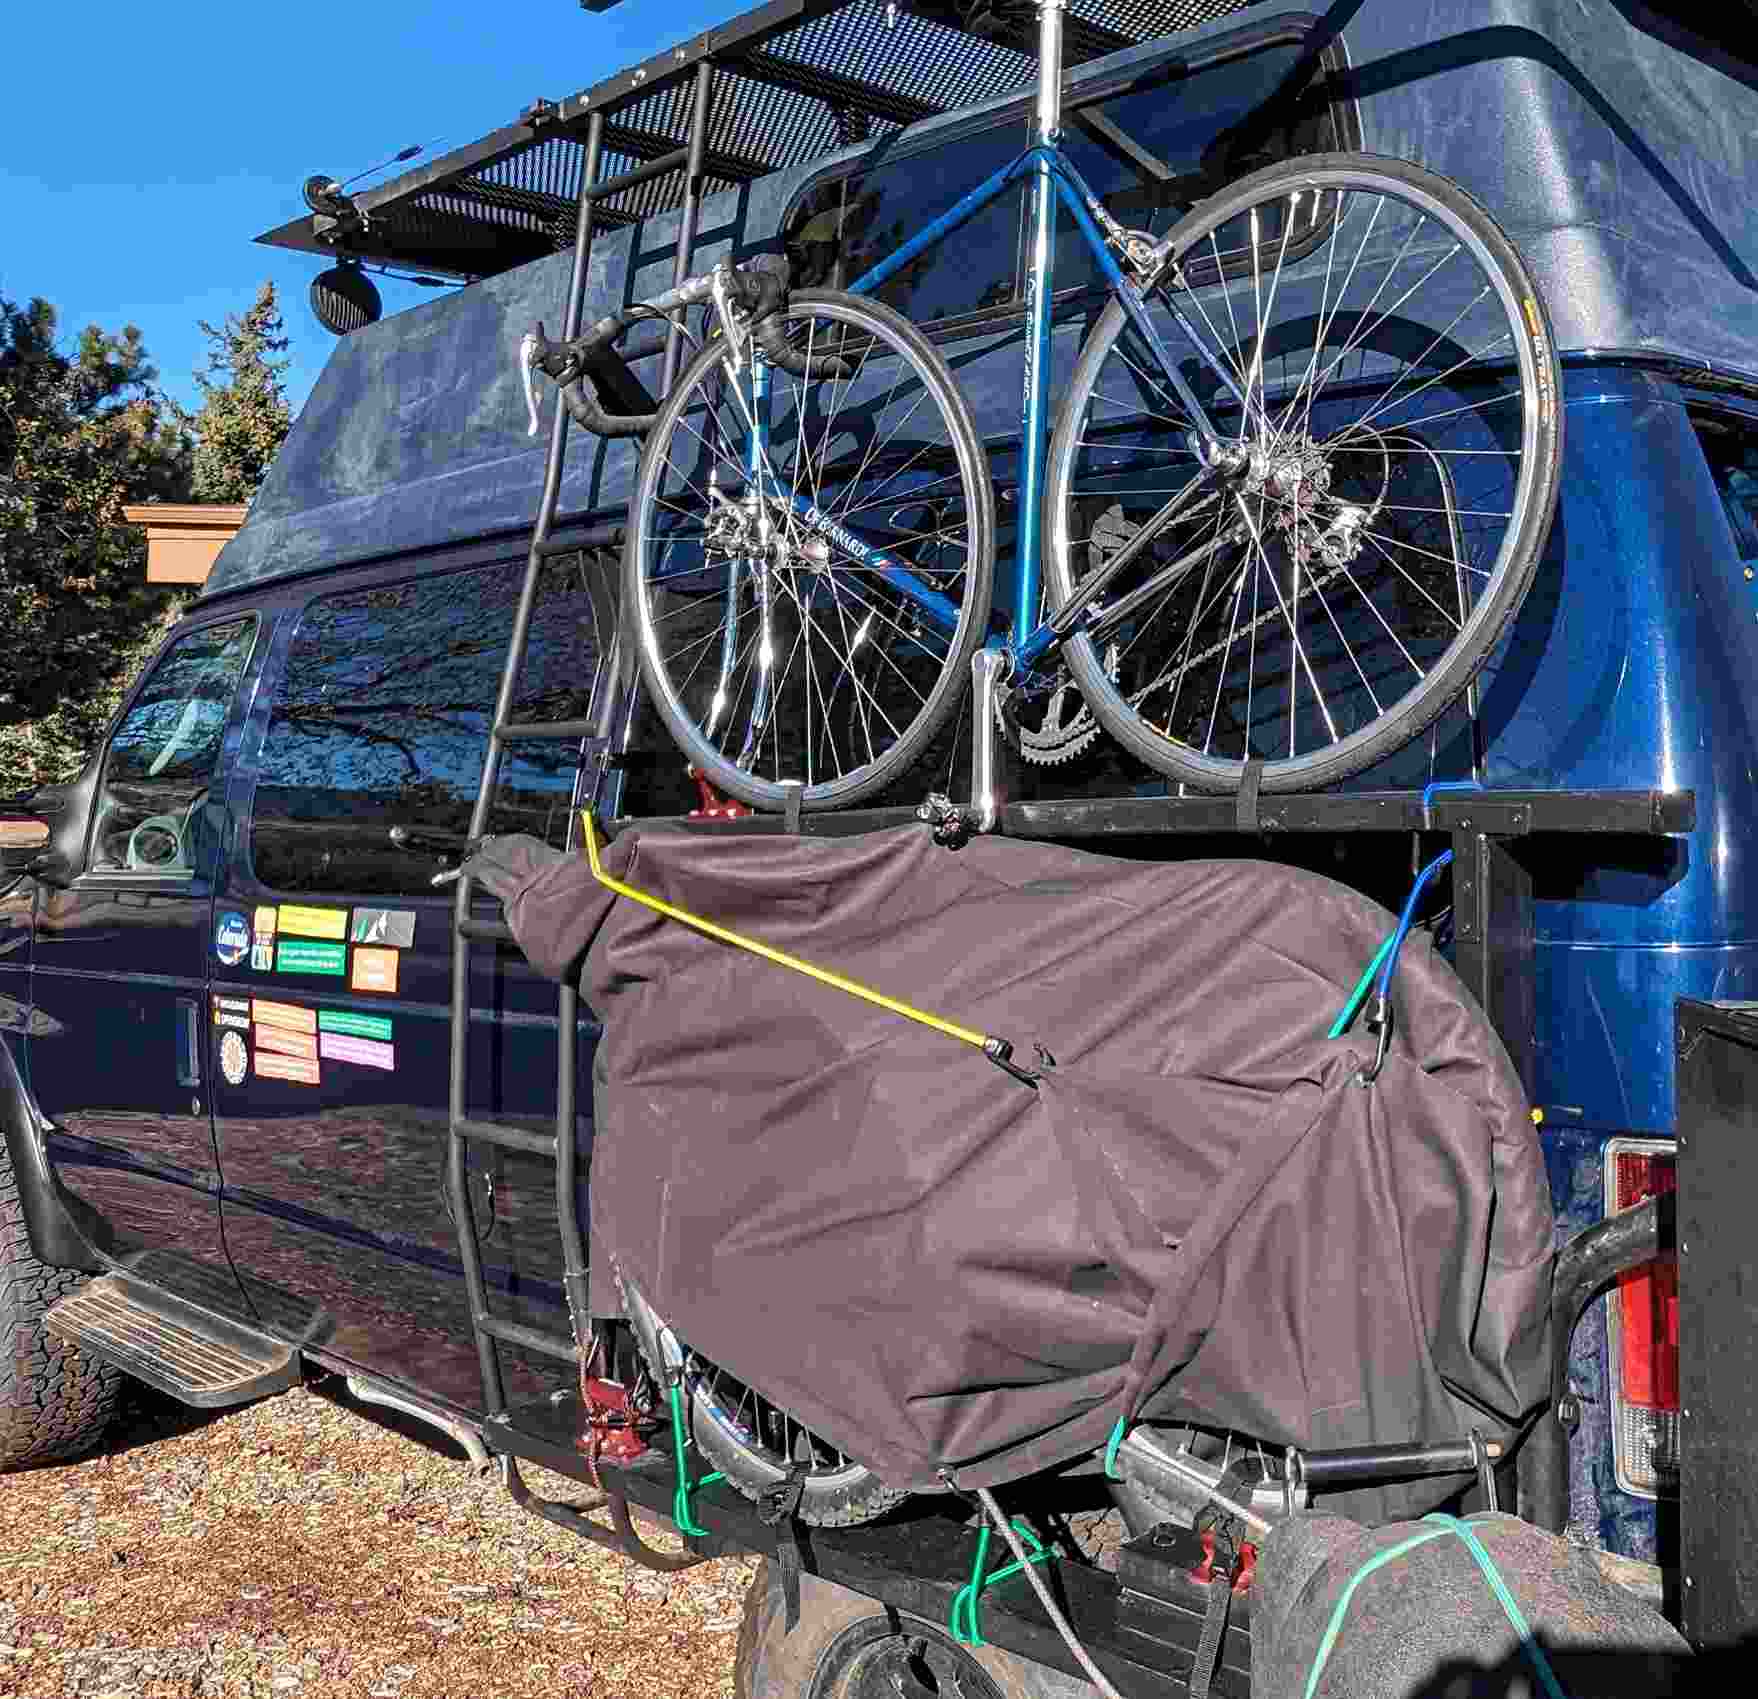
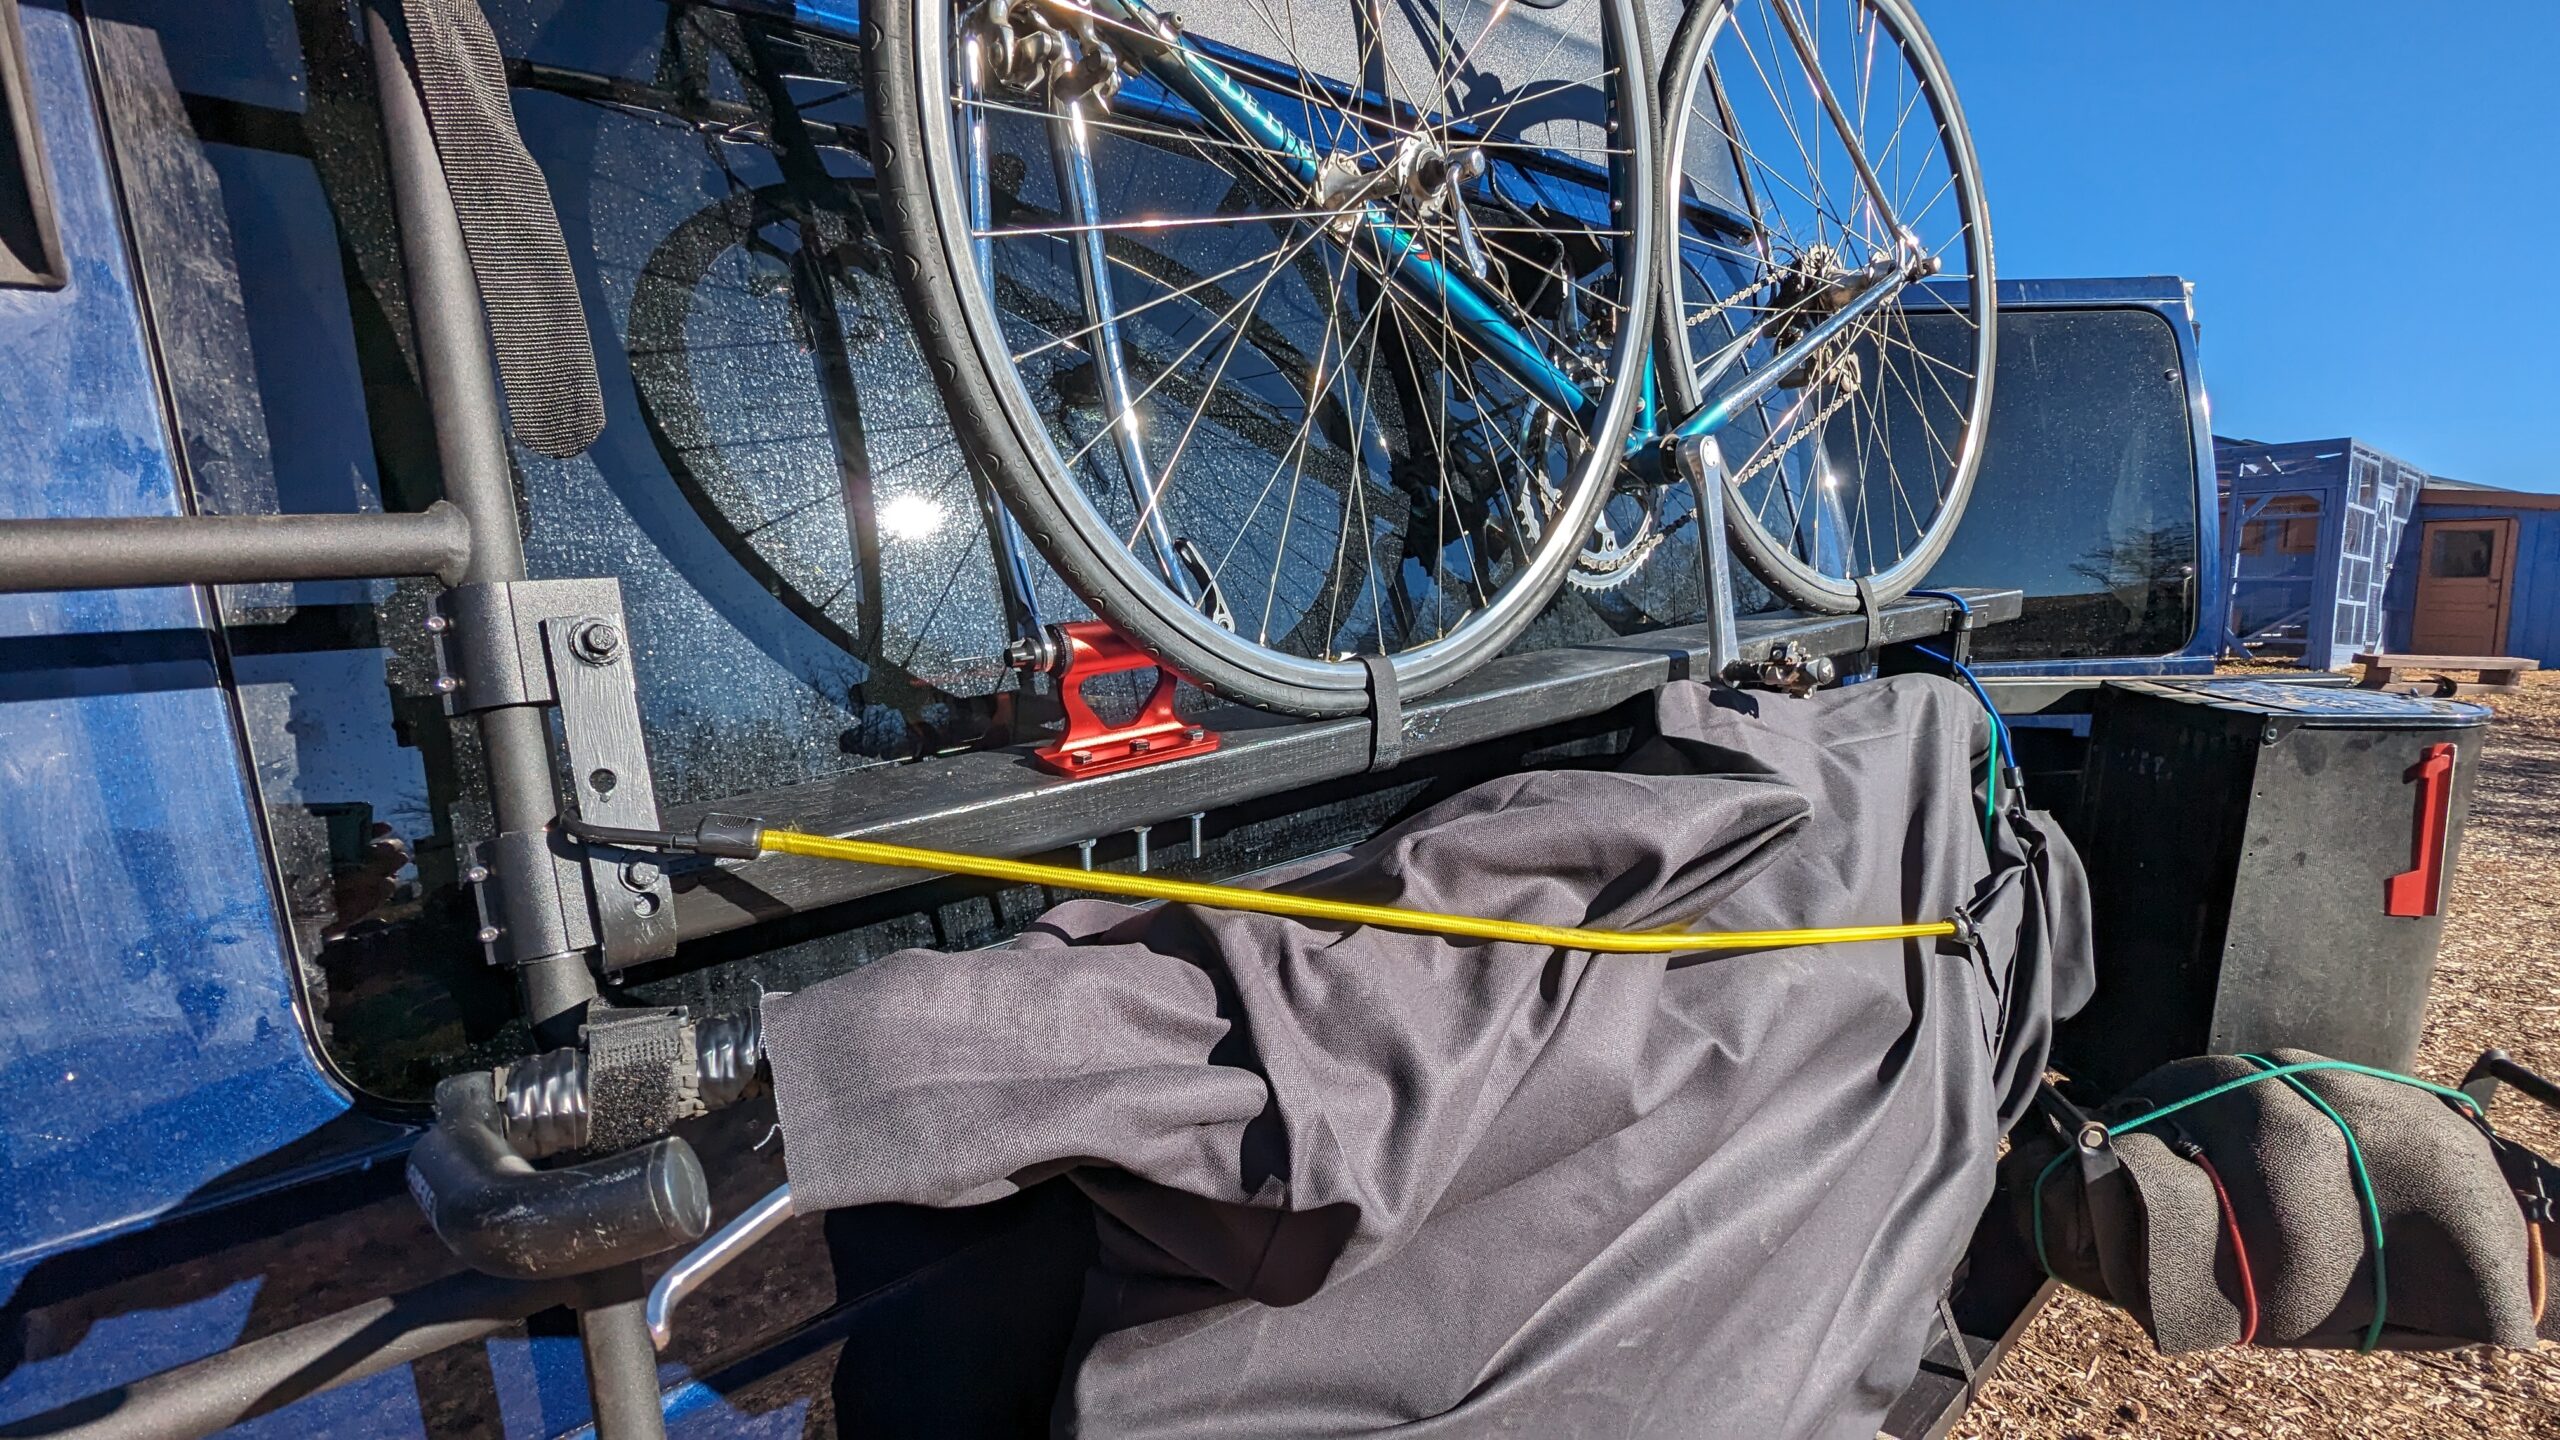
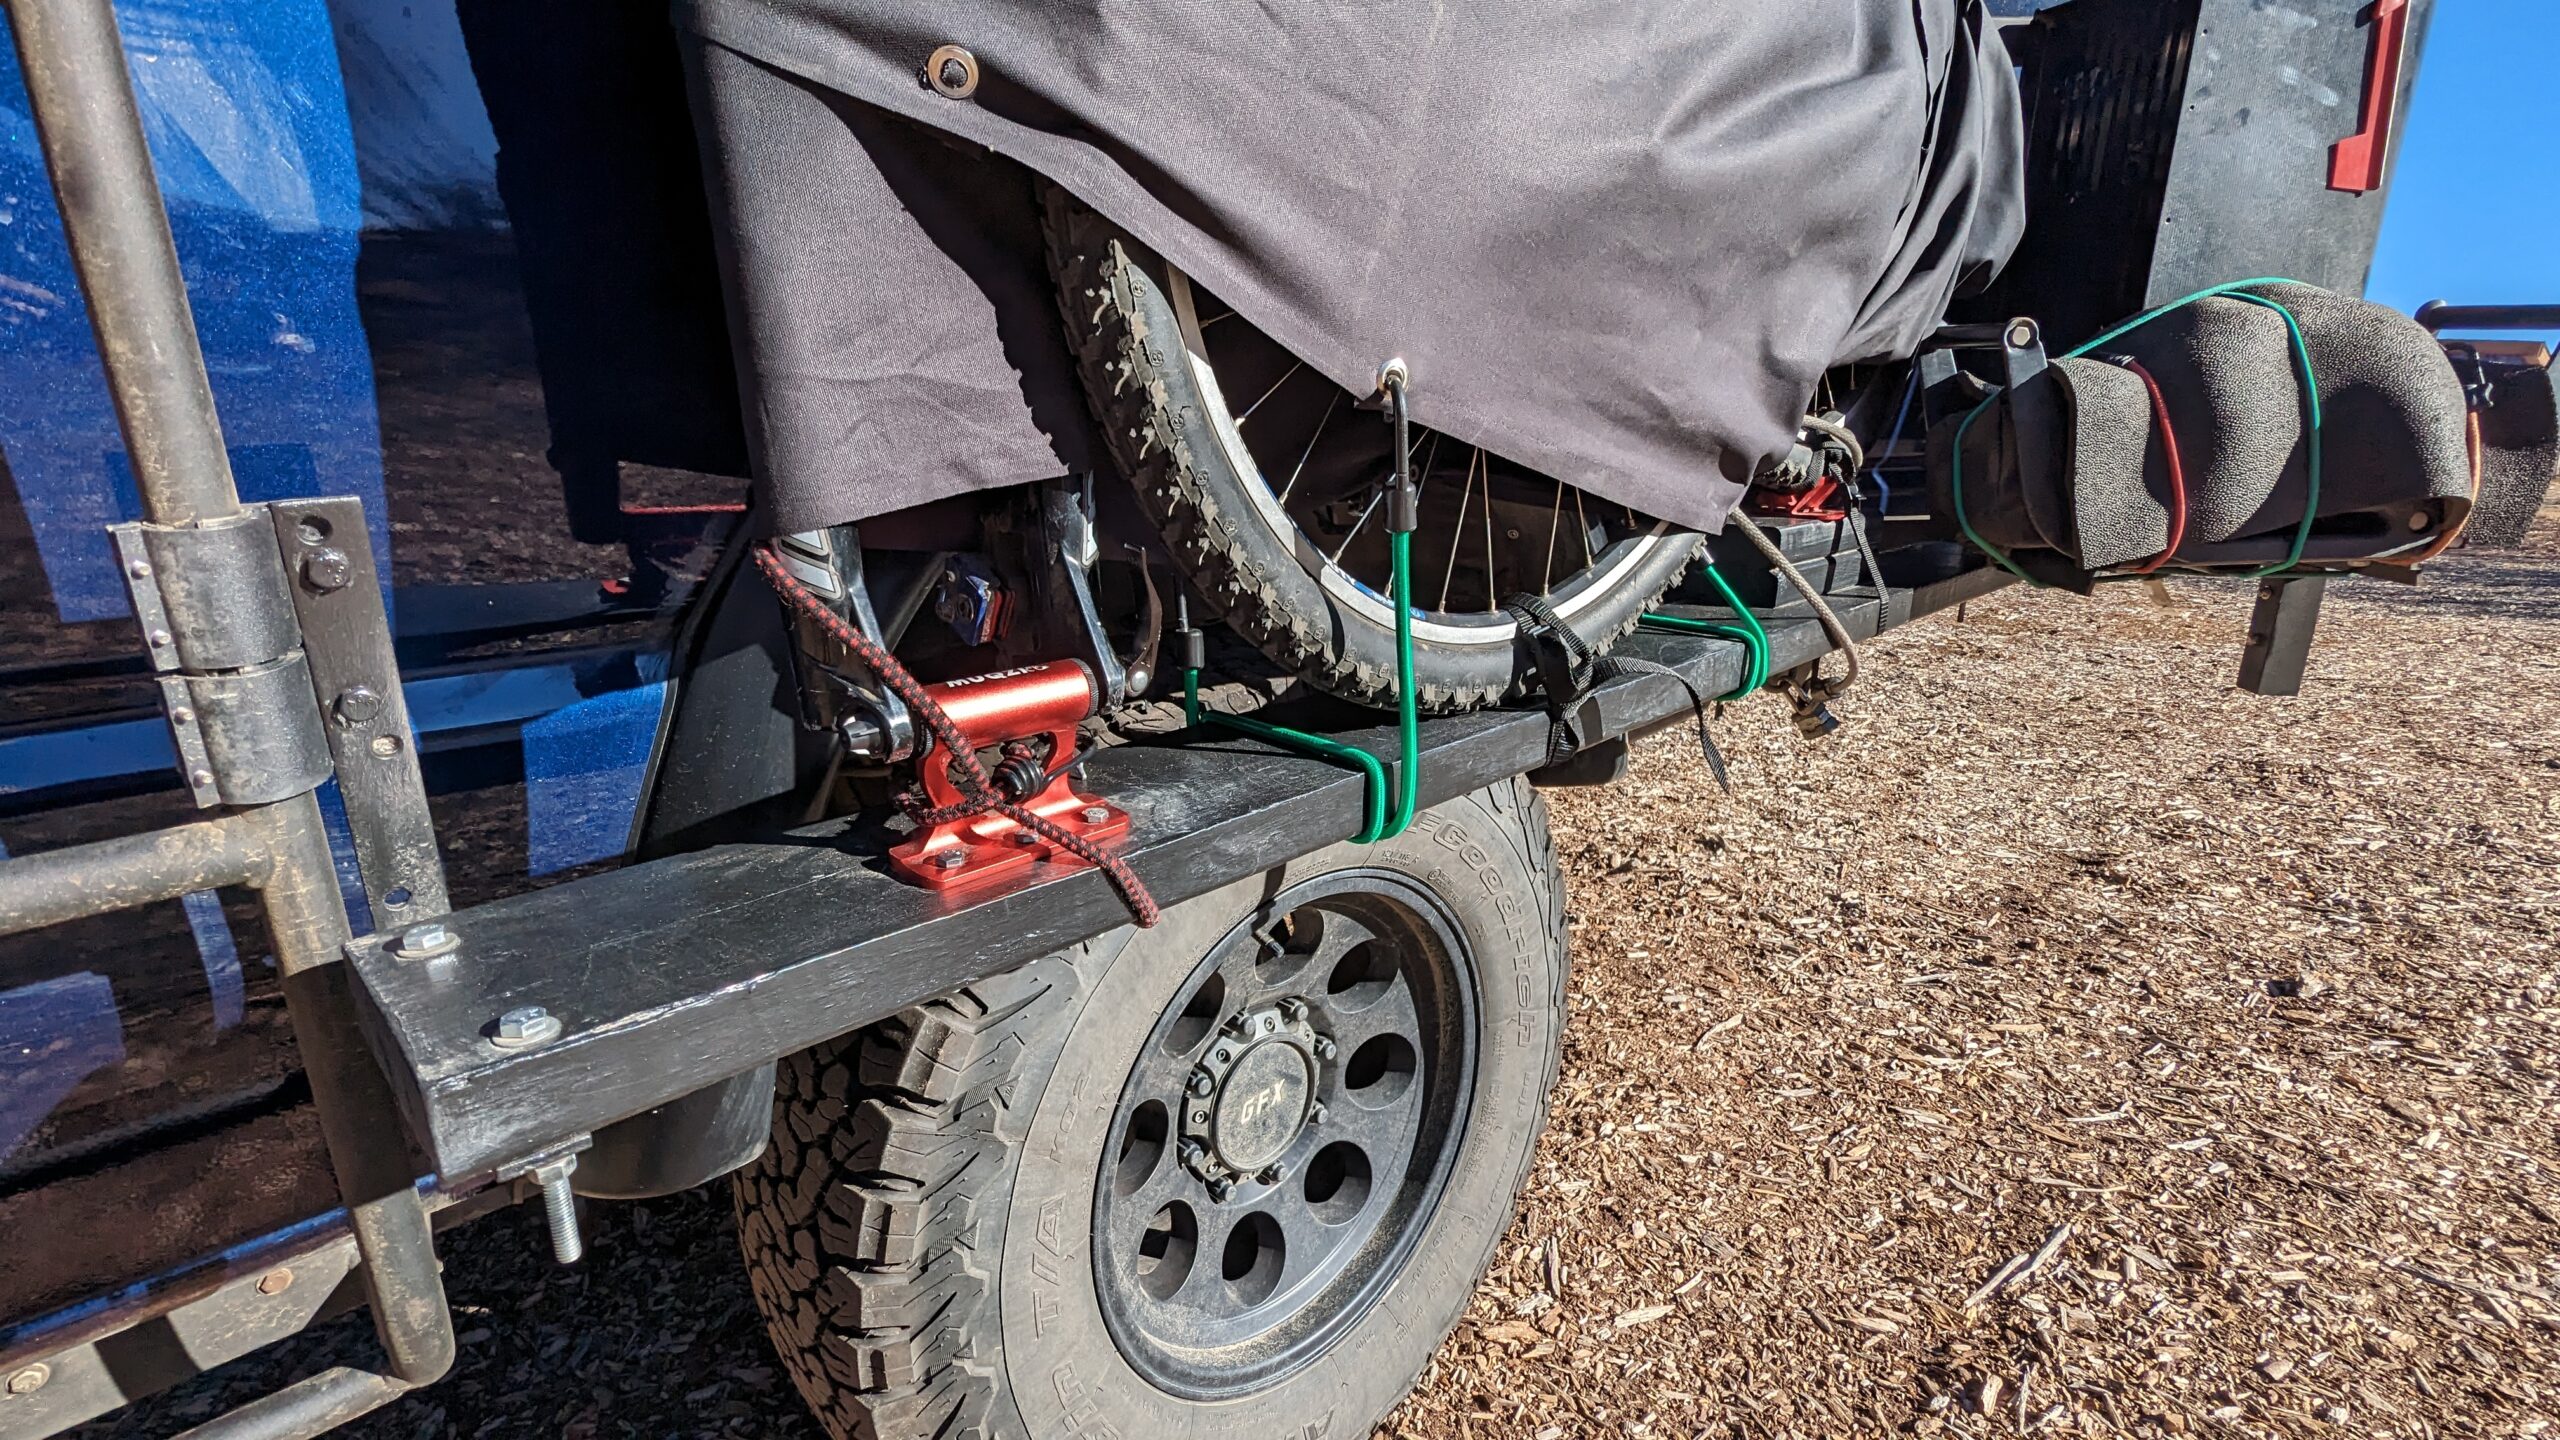
We built from wood bike racks to carry two bikes on the drivers side of the vehicle. For short hops with bikes around town, we will use the rear carrier because it is really easy to throw a bike on and off. For longer drives, we prefer to use this side carrier as it is safer for the bikes if someone rear ends the vehicle. We added some infrastructure to carry a kayak on the side.
Interior
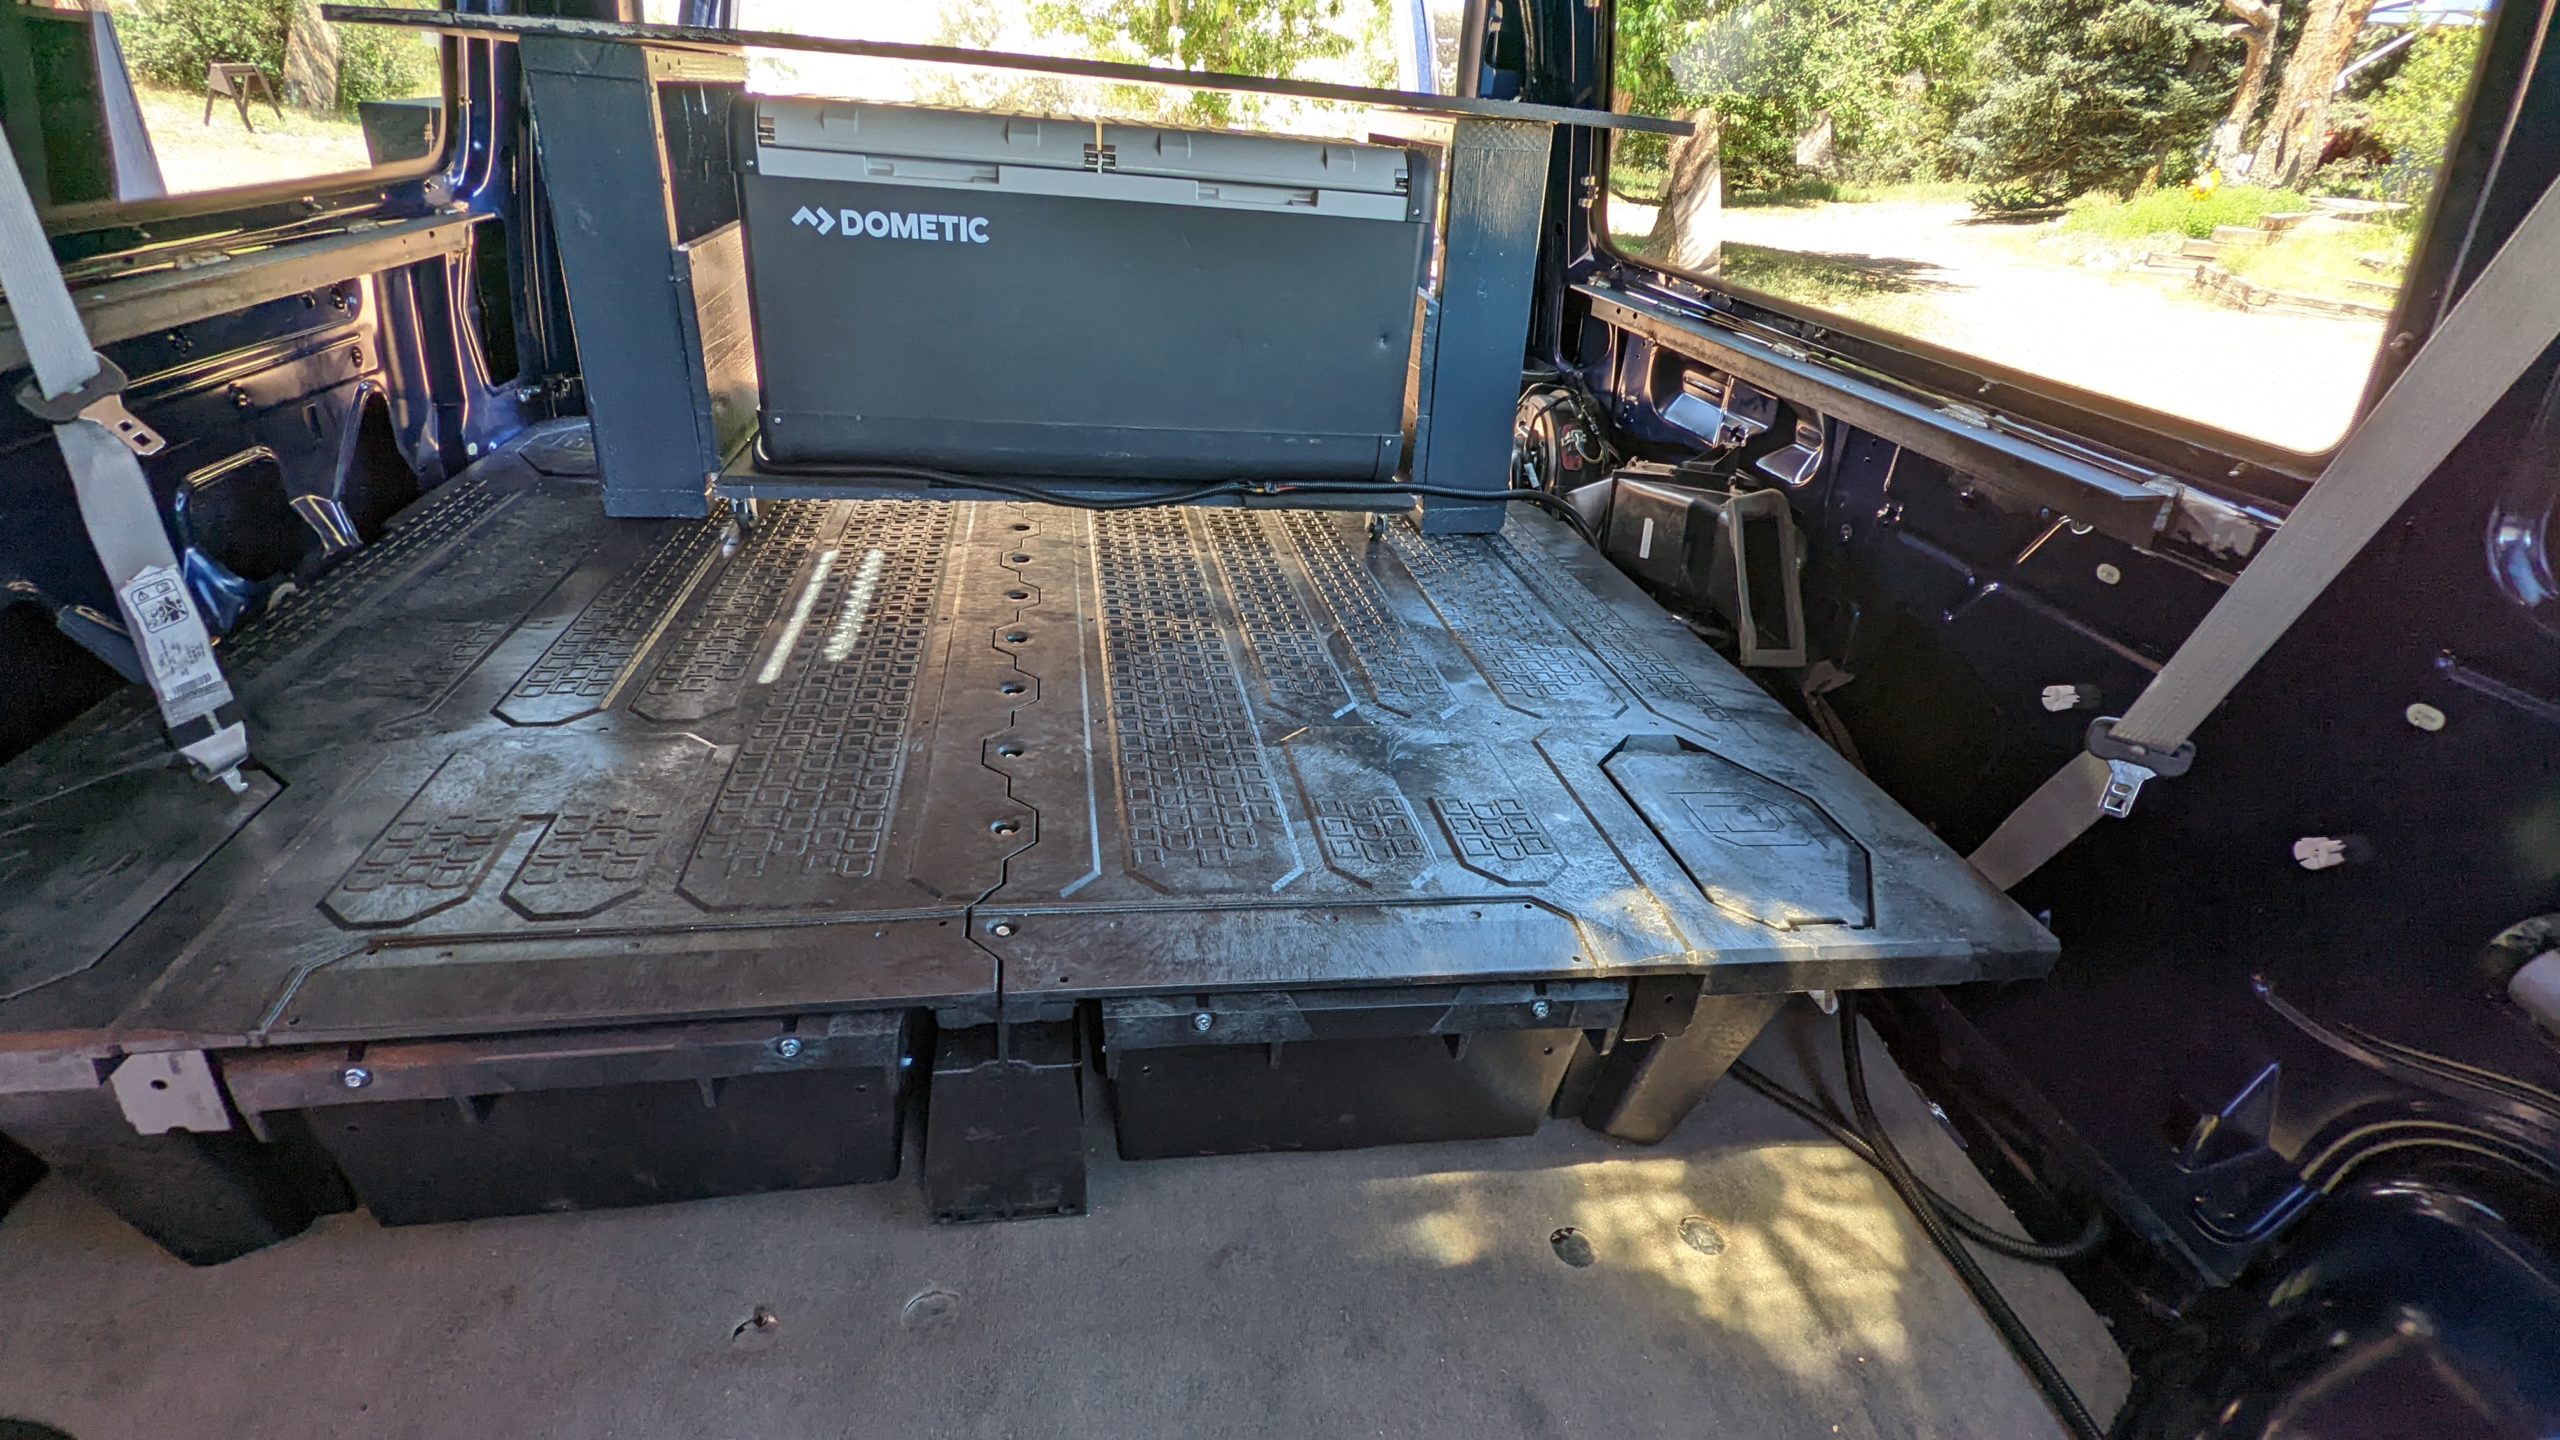
Decked Drawer System
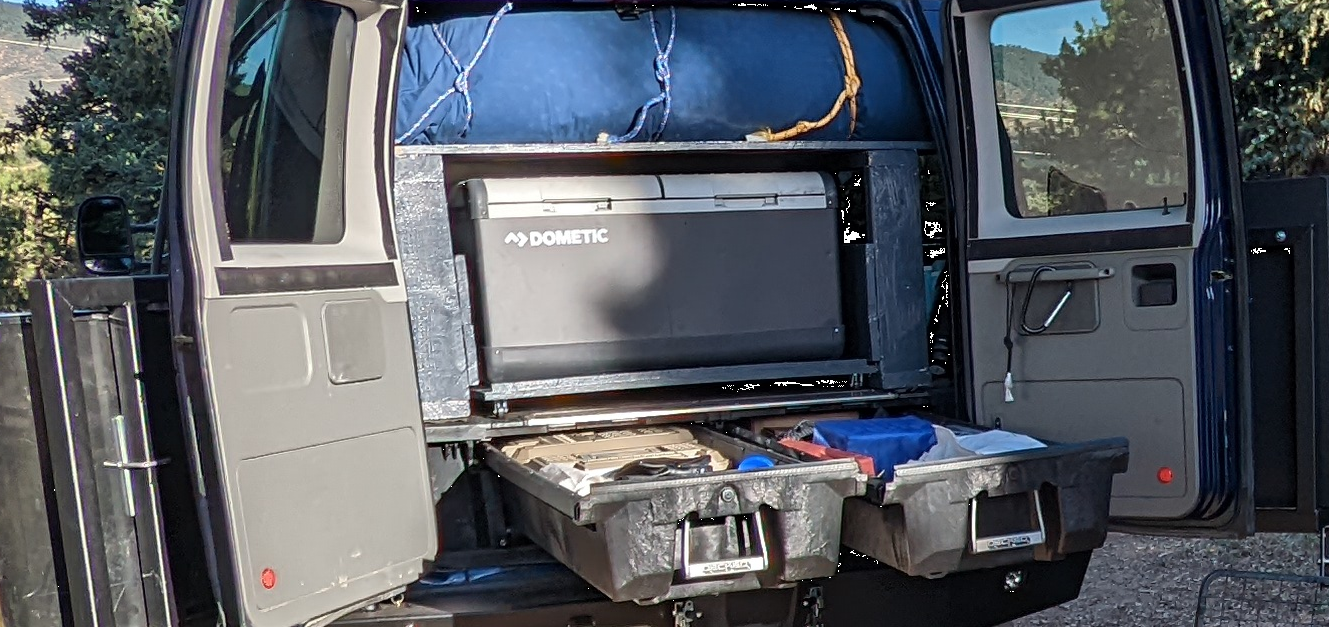
The rear half floor of the vehicle has a Decked drawer system, which contains two drawers that can hold up to 200 lbs. each and open from the rear barn doors.
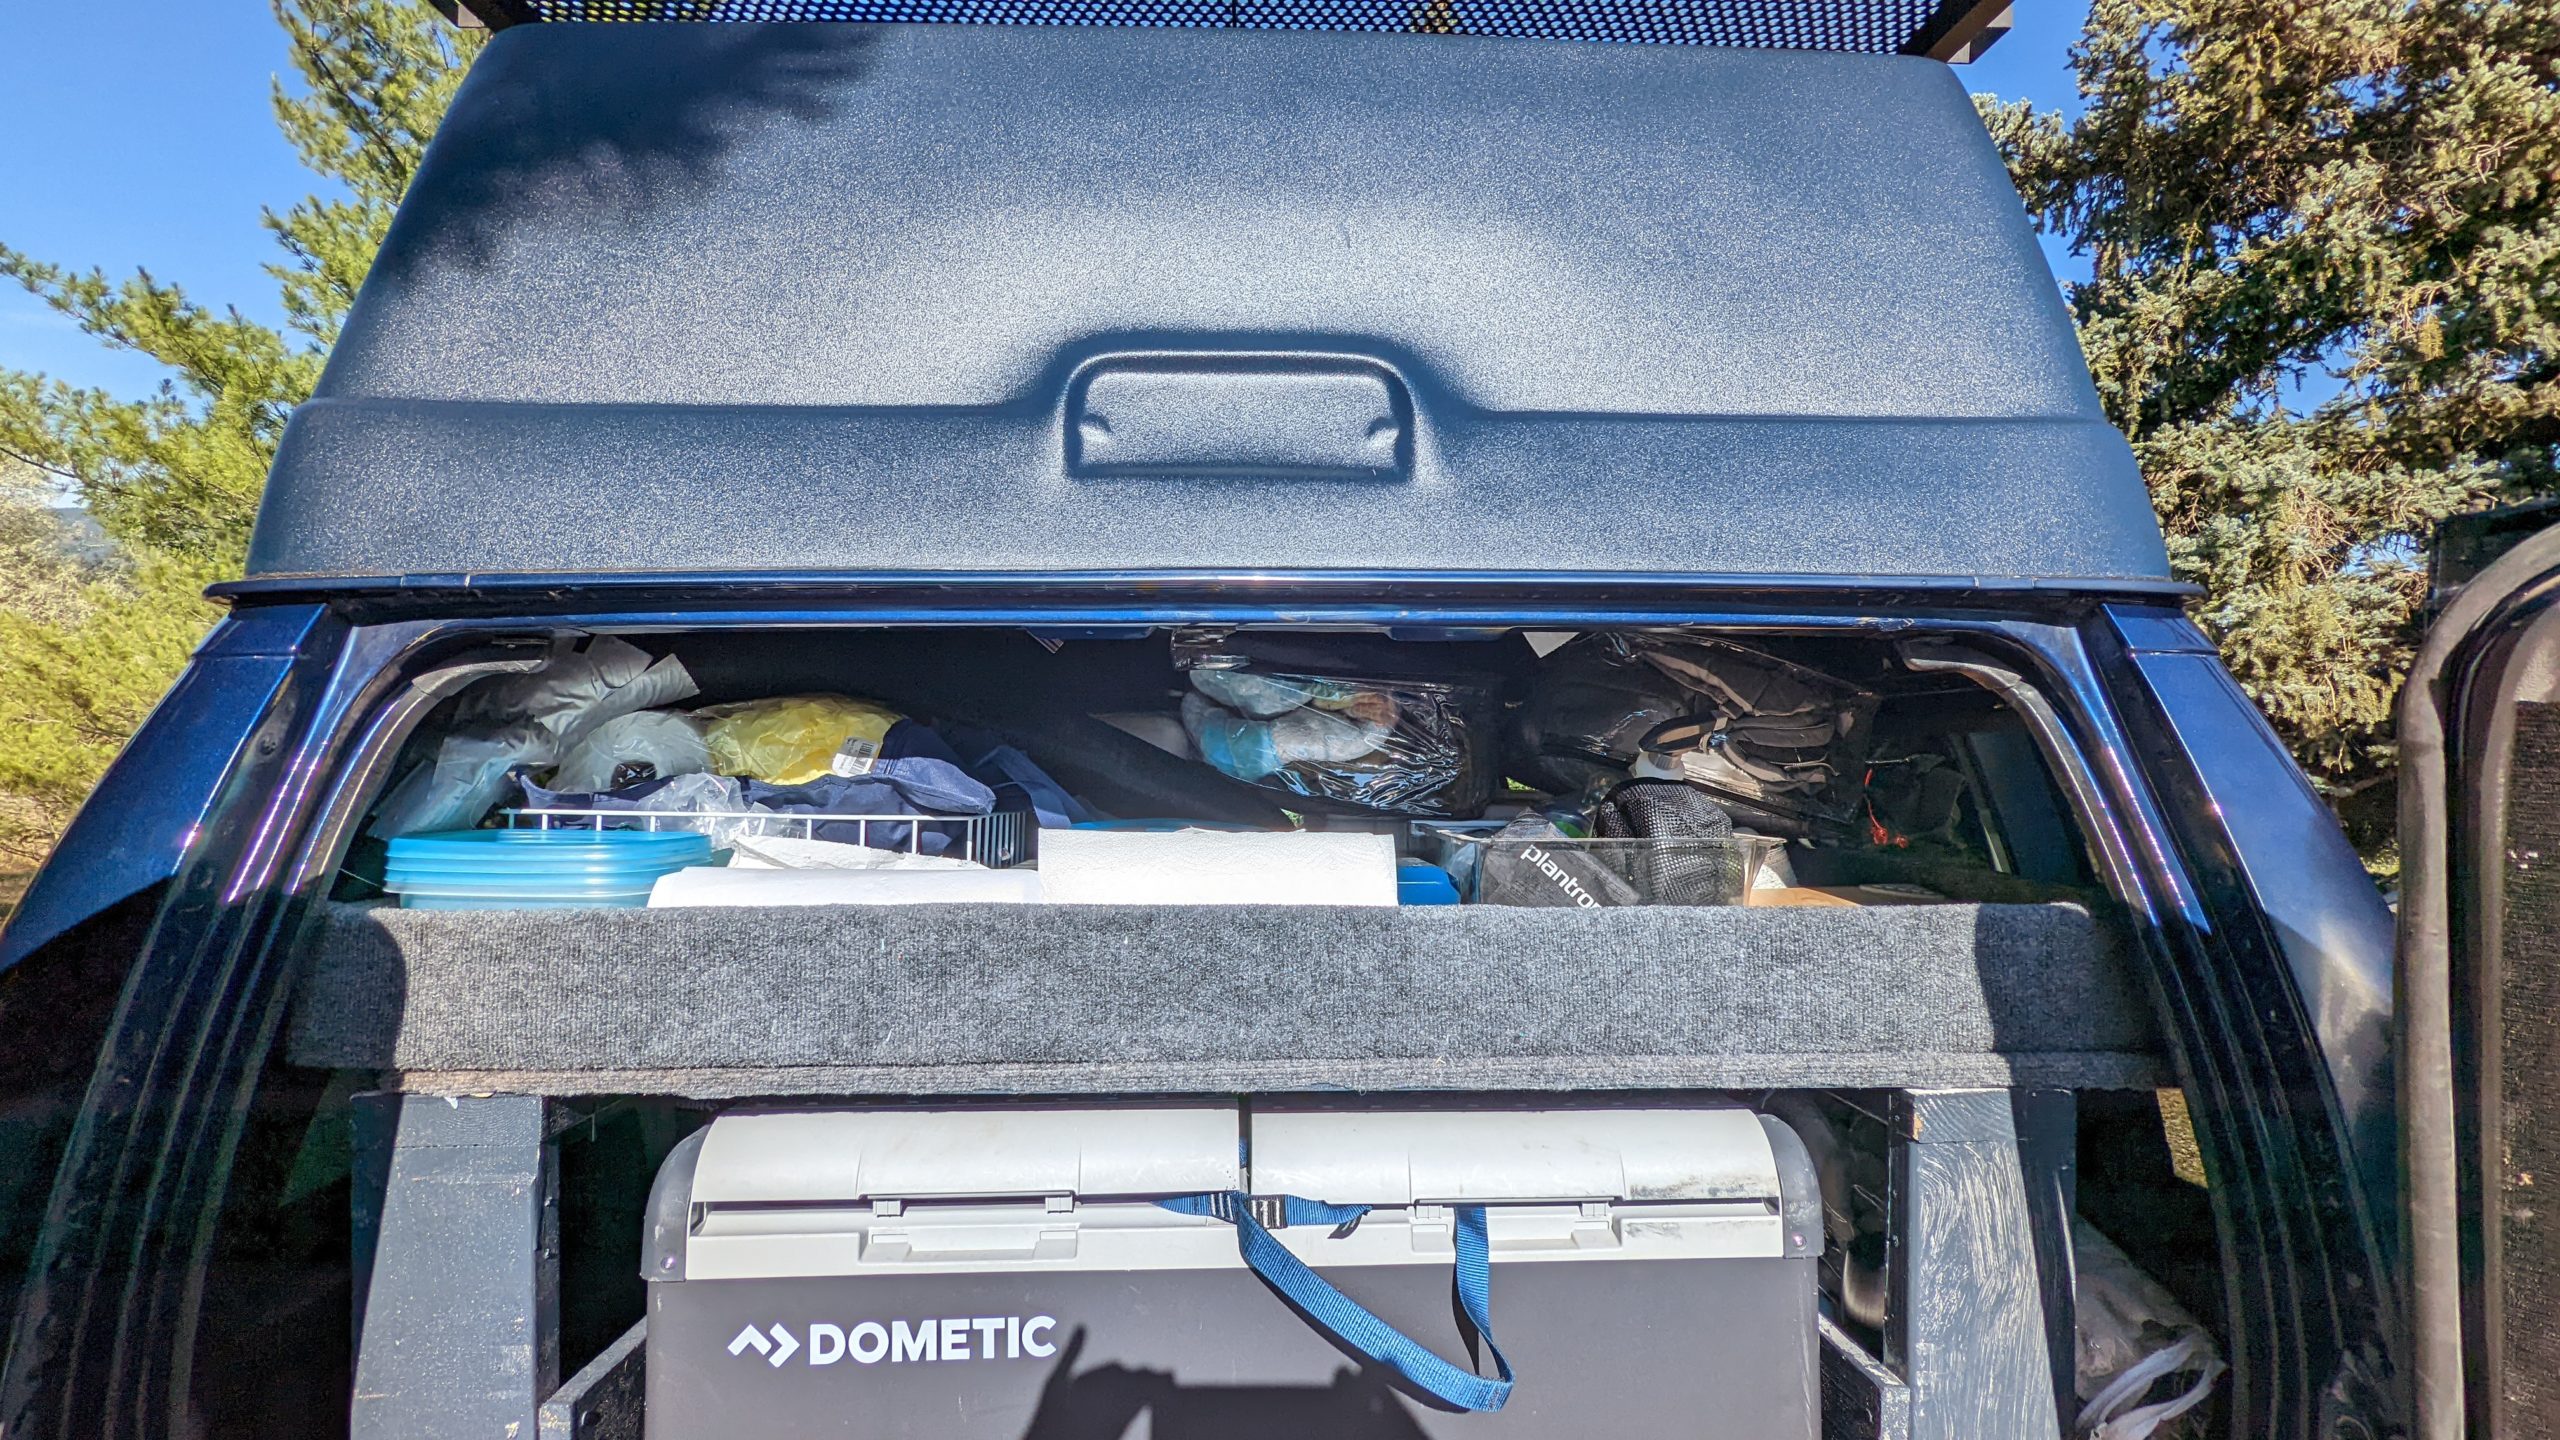
Rear Shelf and Fridge/Freezer Compartment
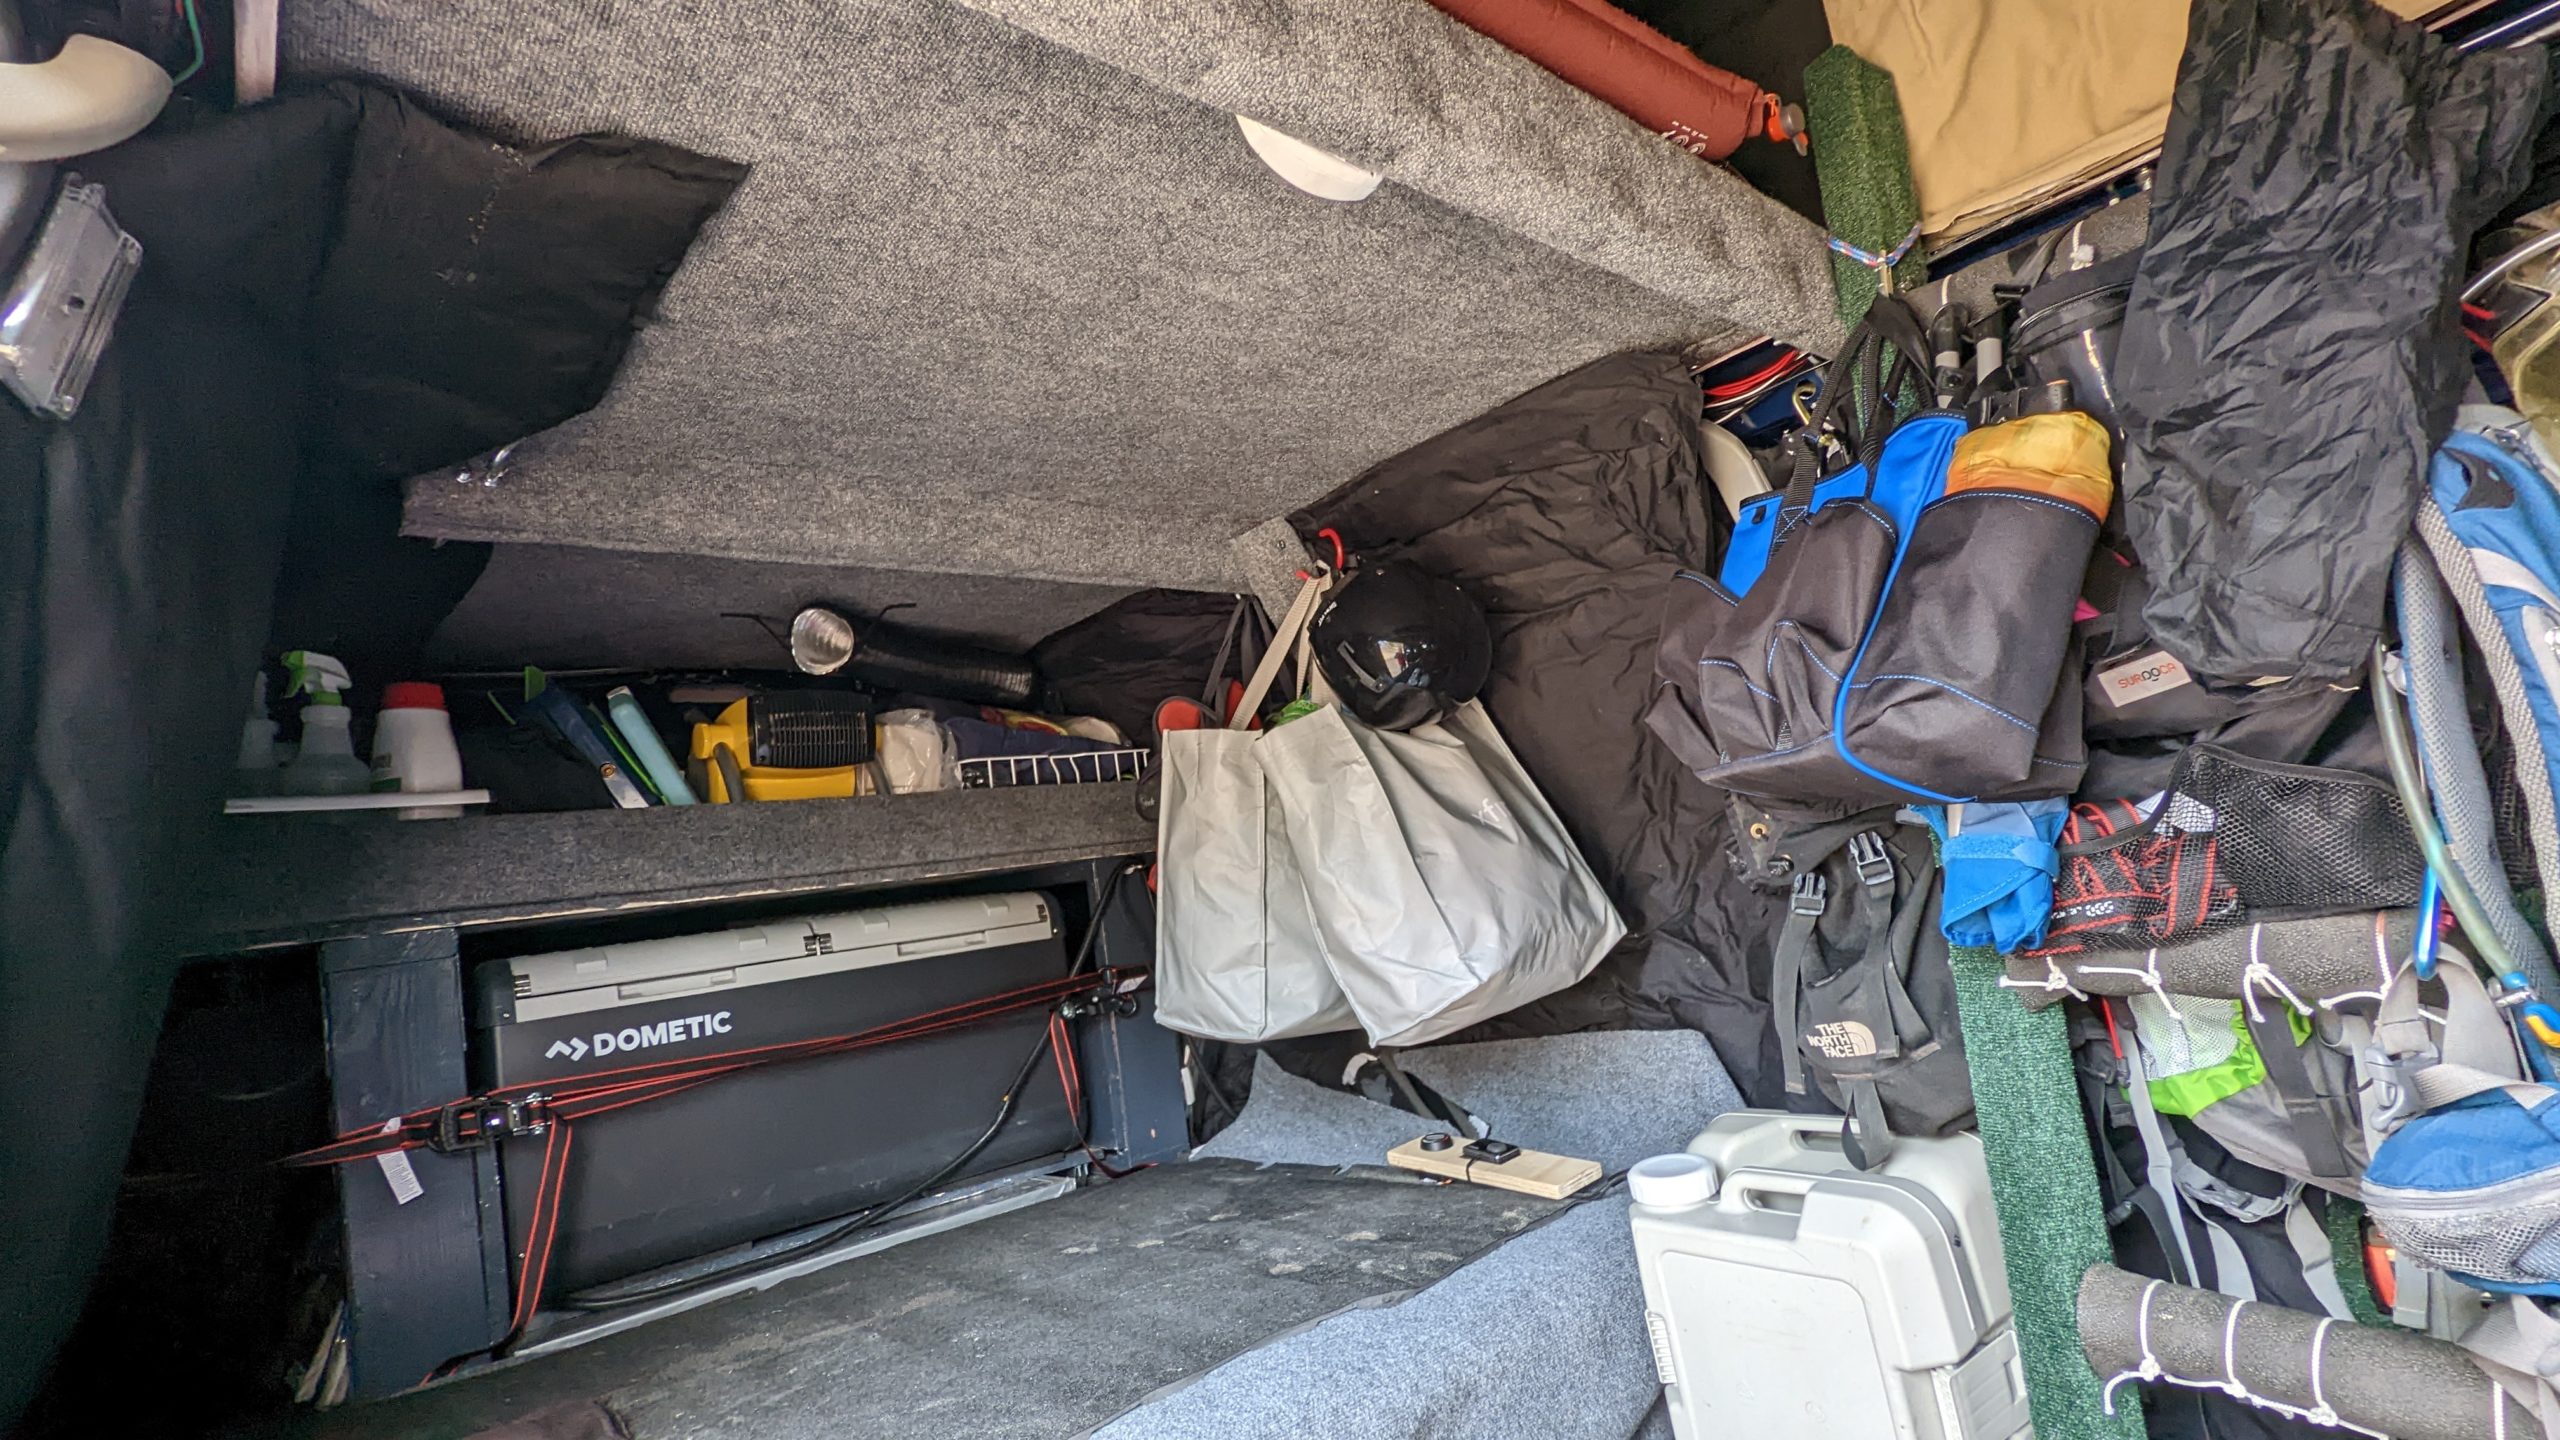
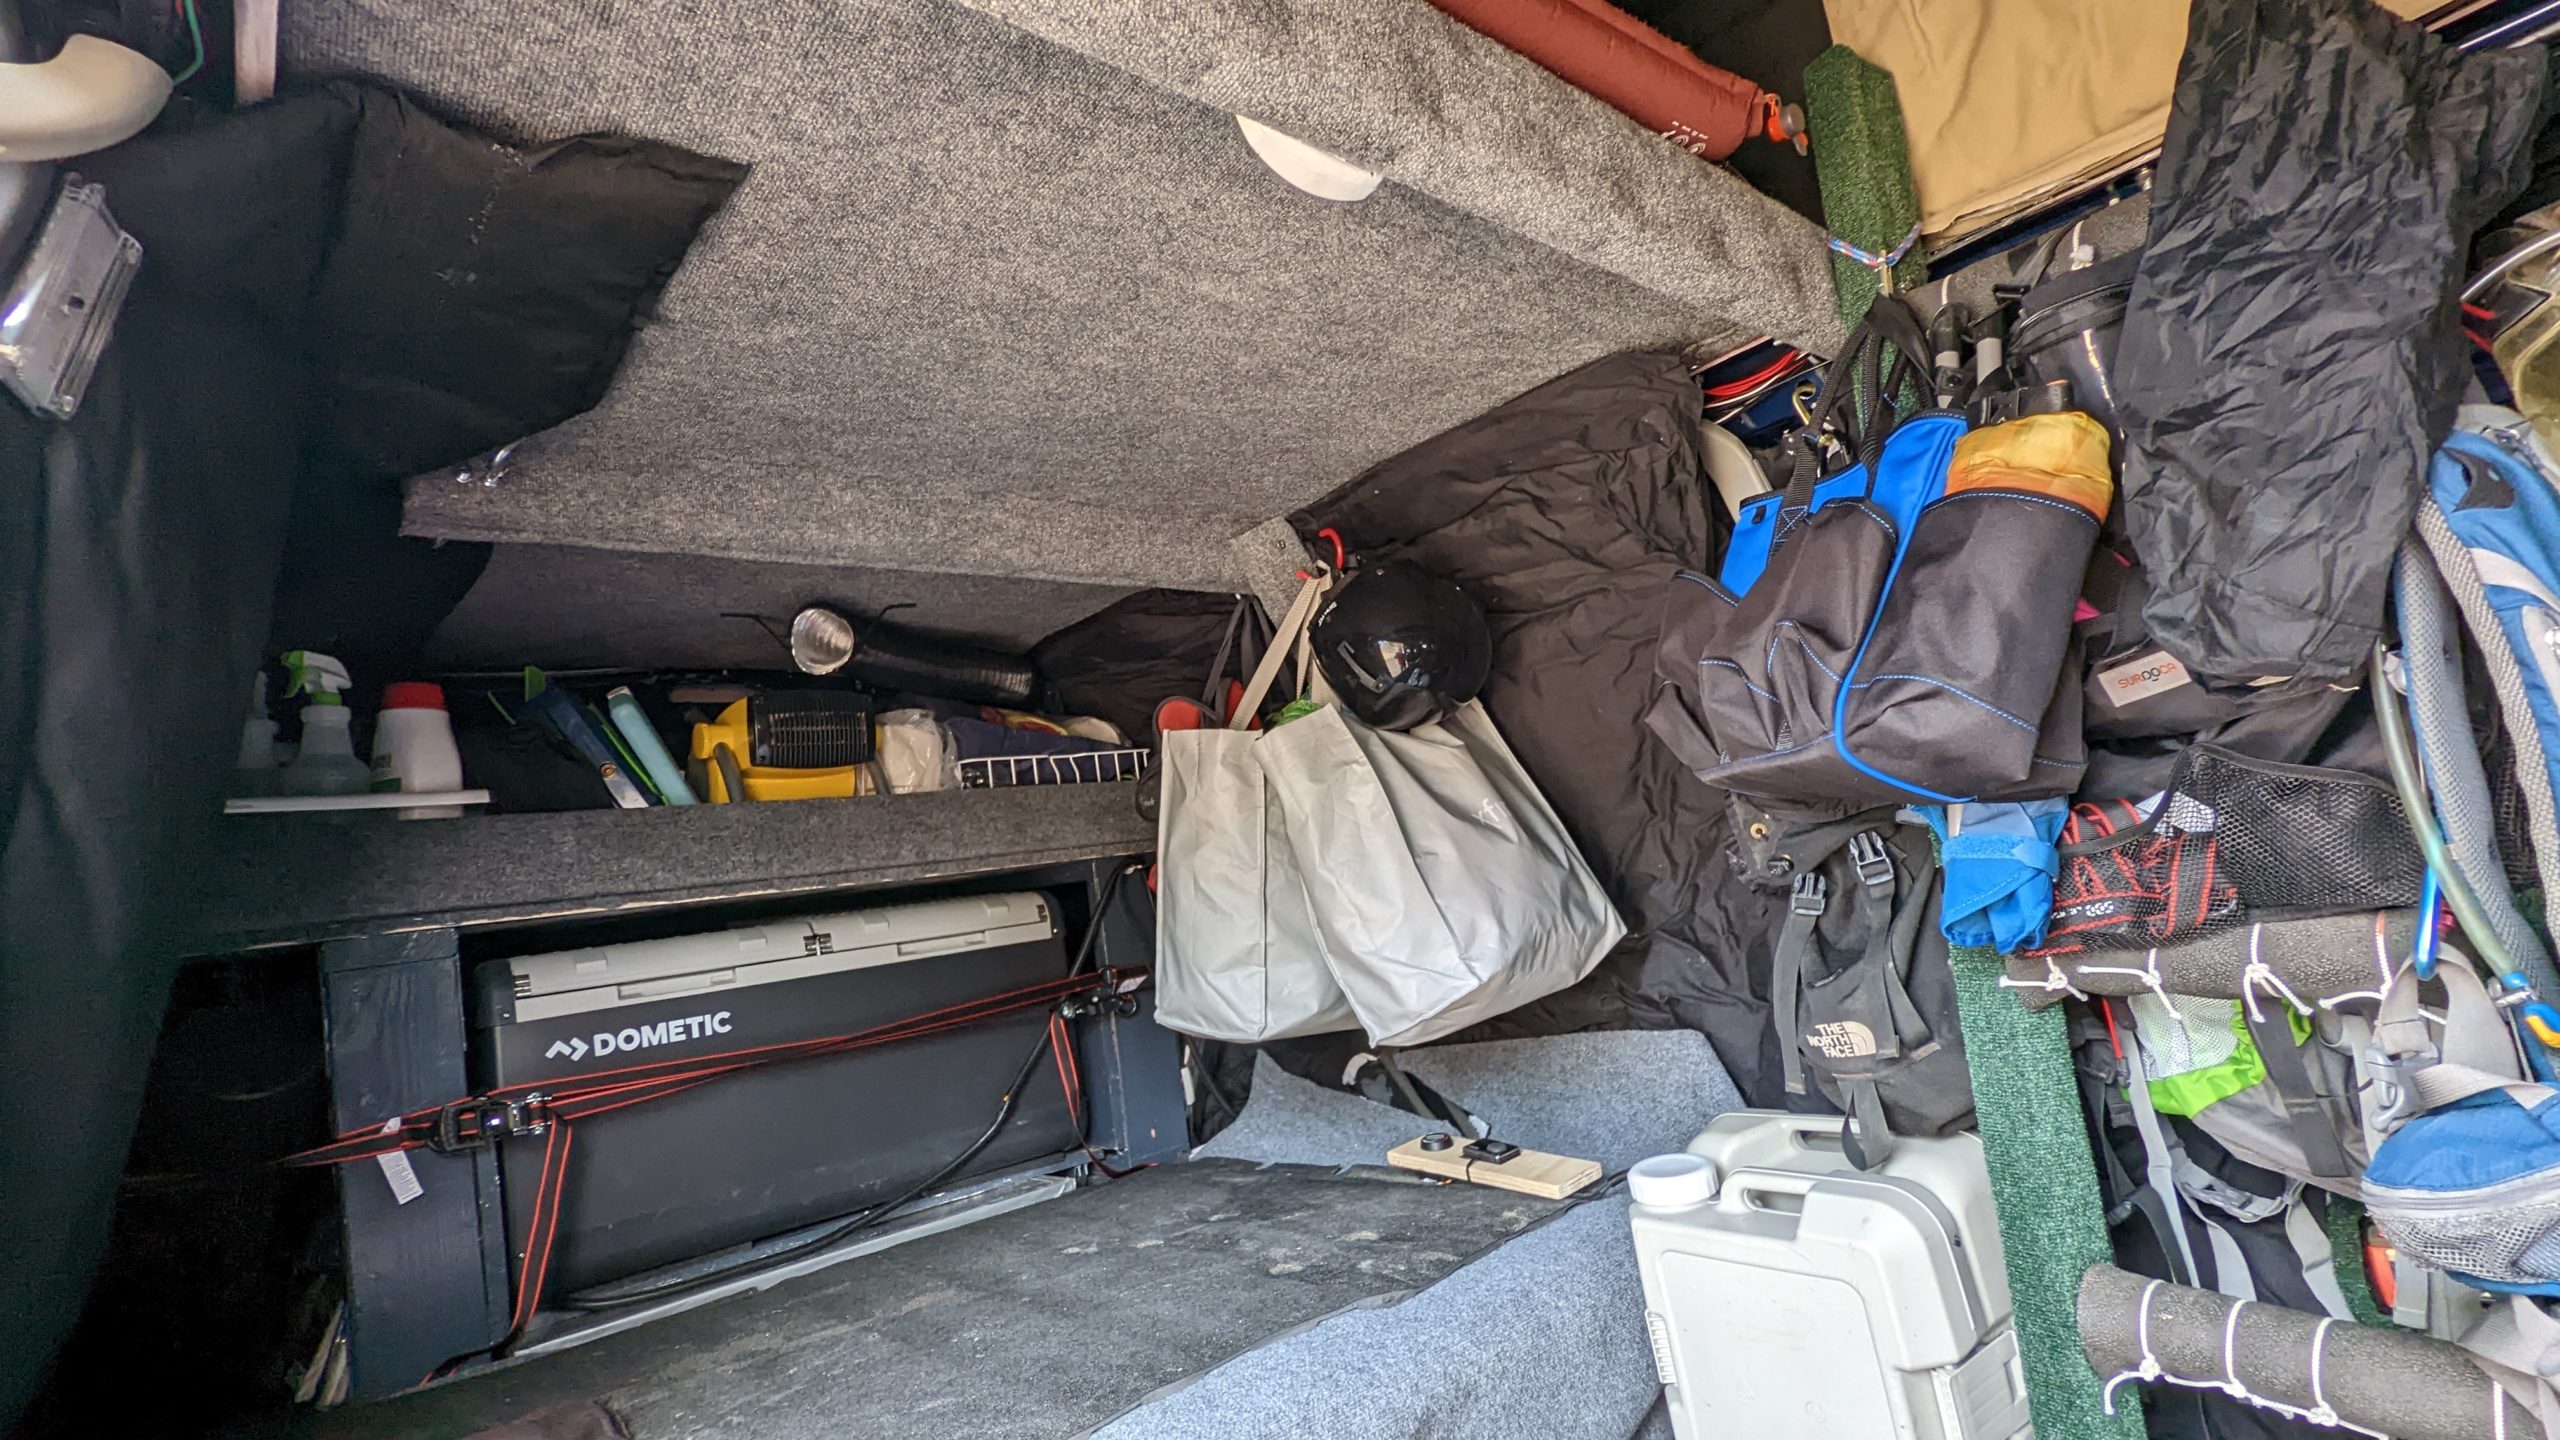
We built out of wood a shelf system in the rear of the vehicle that houses a Dometic Fridge/Freezer which can be pulled in and out like a drawer from the rear barn doors. Kitchen and cooking items are stored above in a shelf unit that sits on top. The entire assembly can easily be unscrewed and removed if we need the space for hauling other items. The unit can sway from side to side in bumpy road conditions, so we secure it down with ratchet straps that connect to a steel lip we had welded on to the inside rear sides of the vehicle.
The top shelf is carpeted.
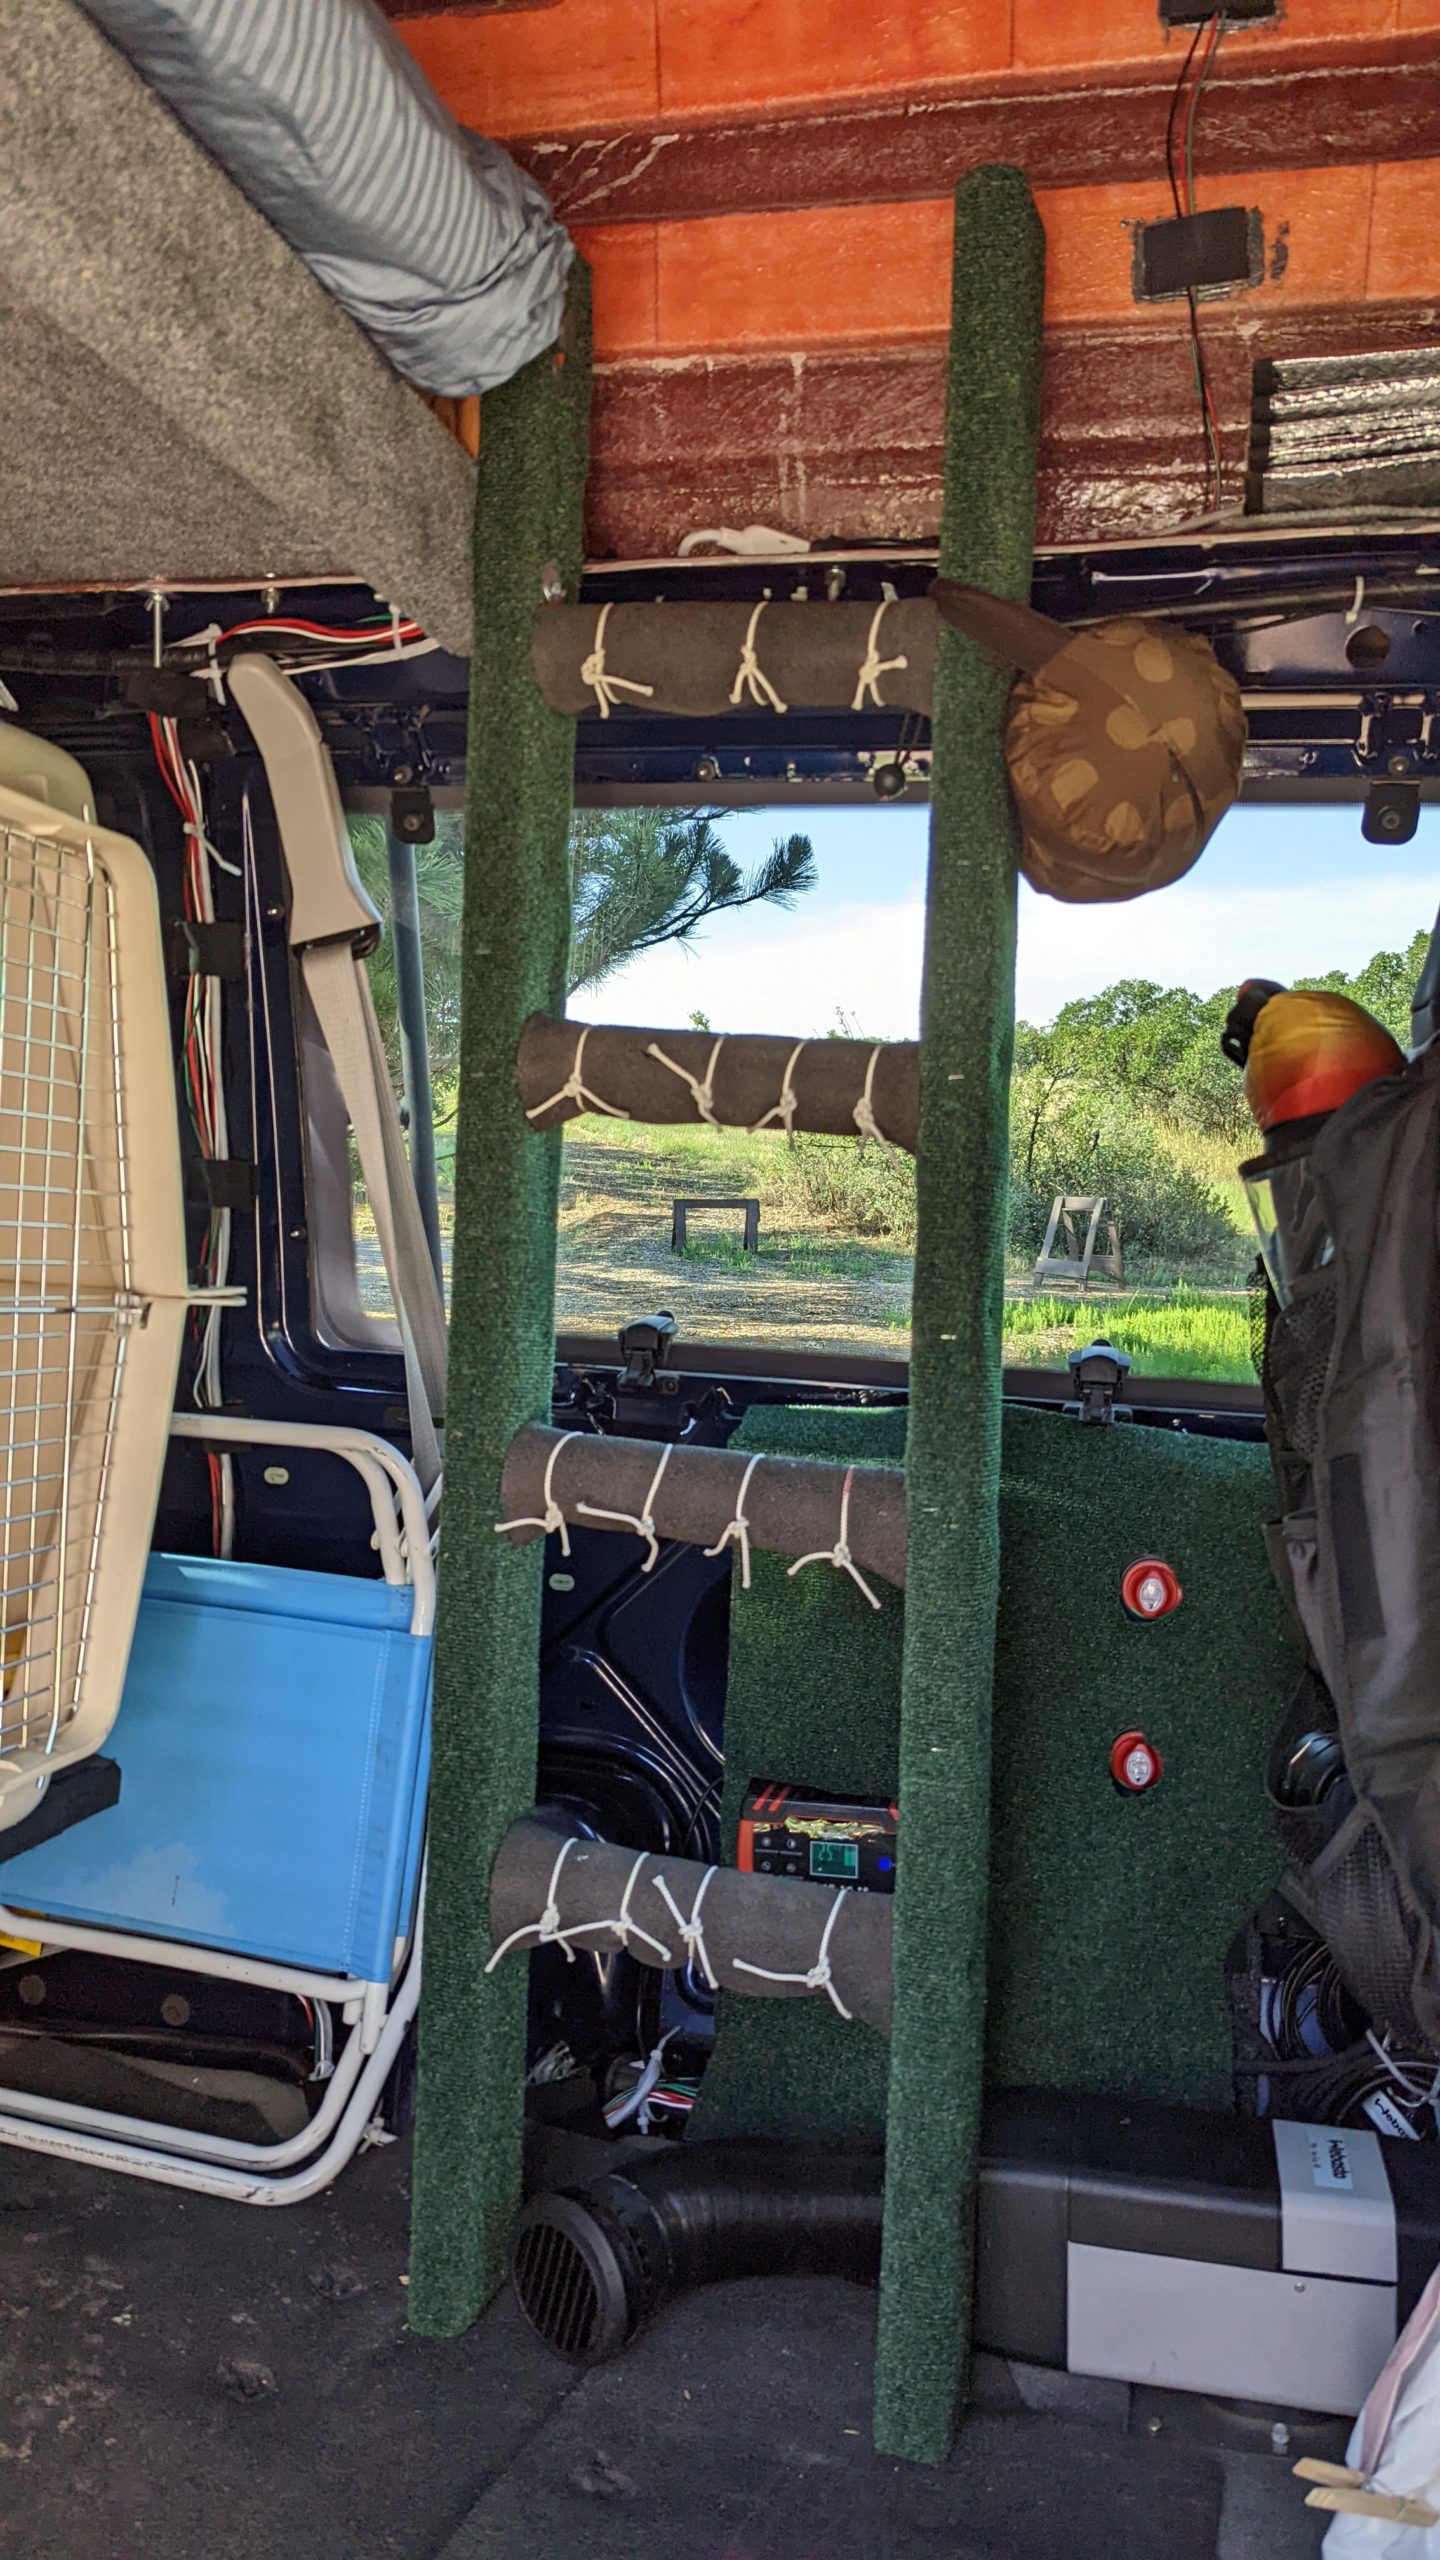
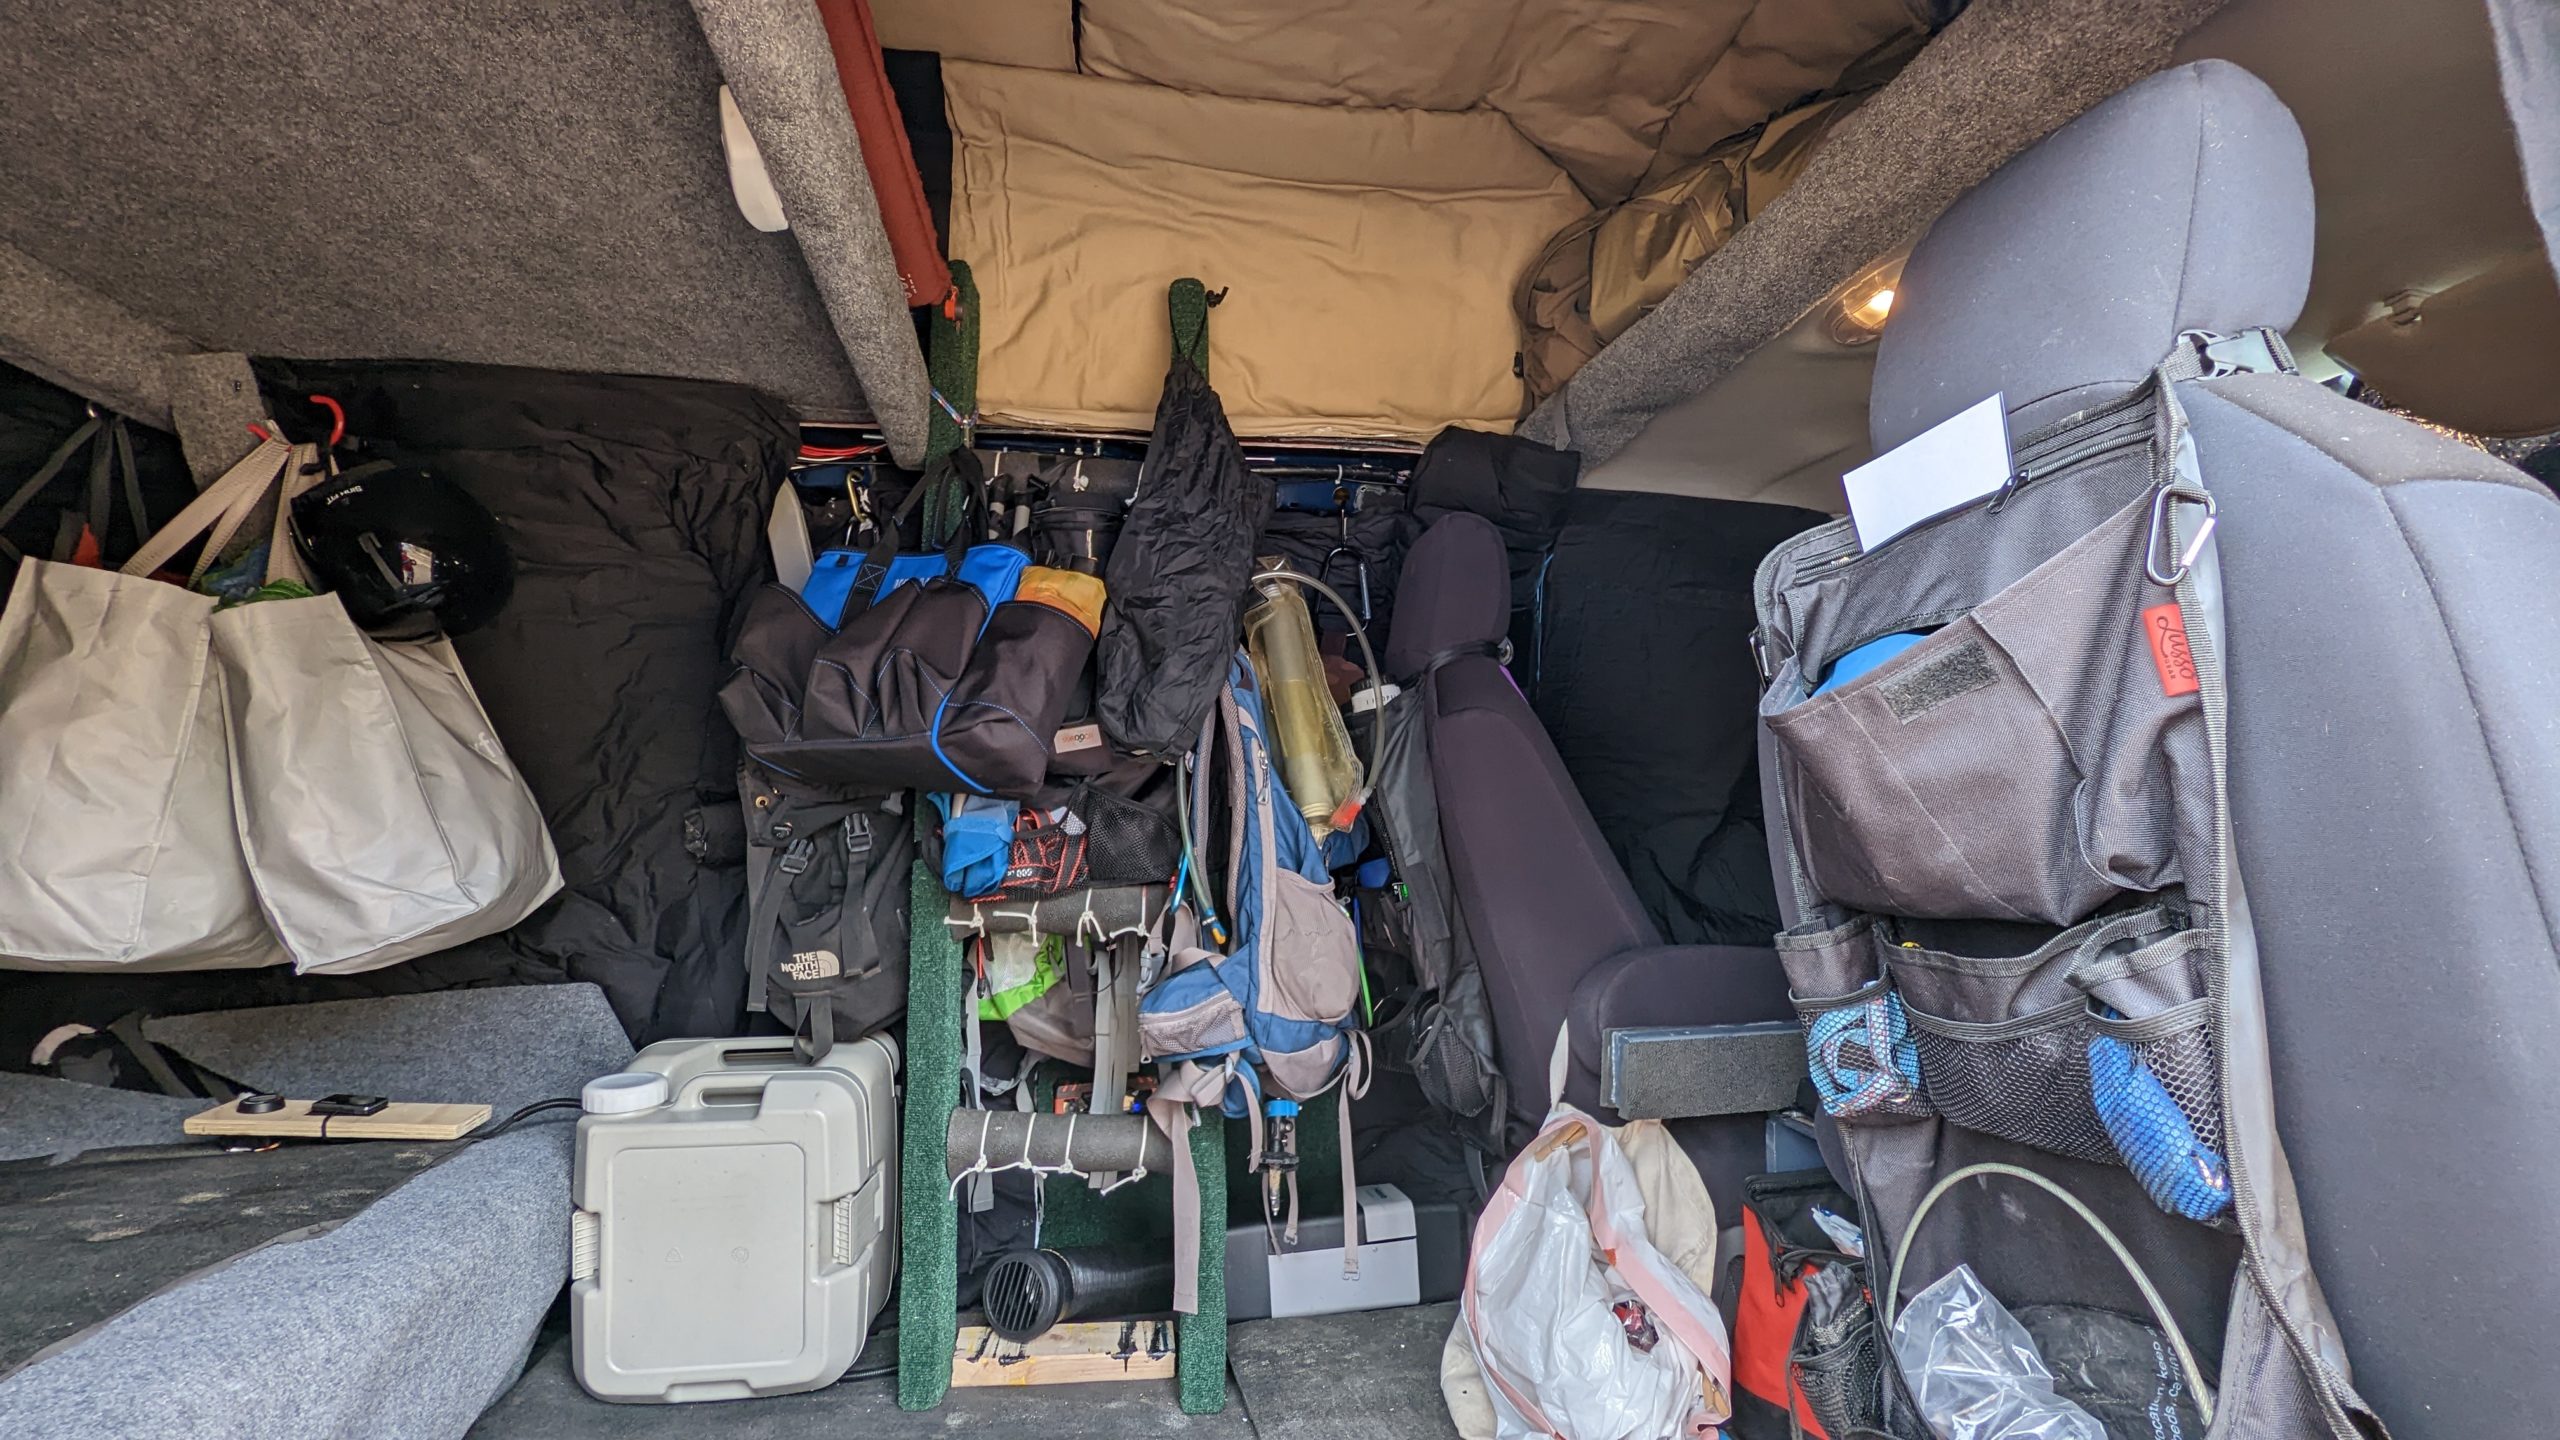
Internal Ladder
We built an internal ladder from 2×4’s and left over fence pipe that is required to get in and out of the too bed. It is carpeted and the steel round steps have padding added to them.
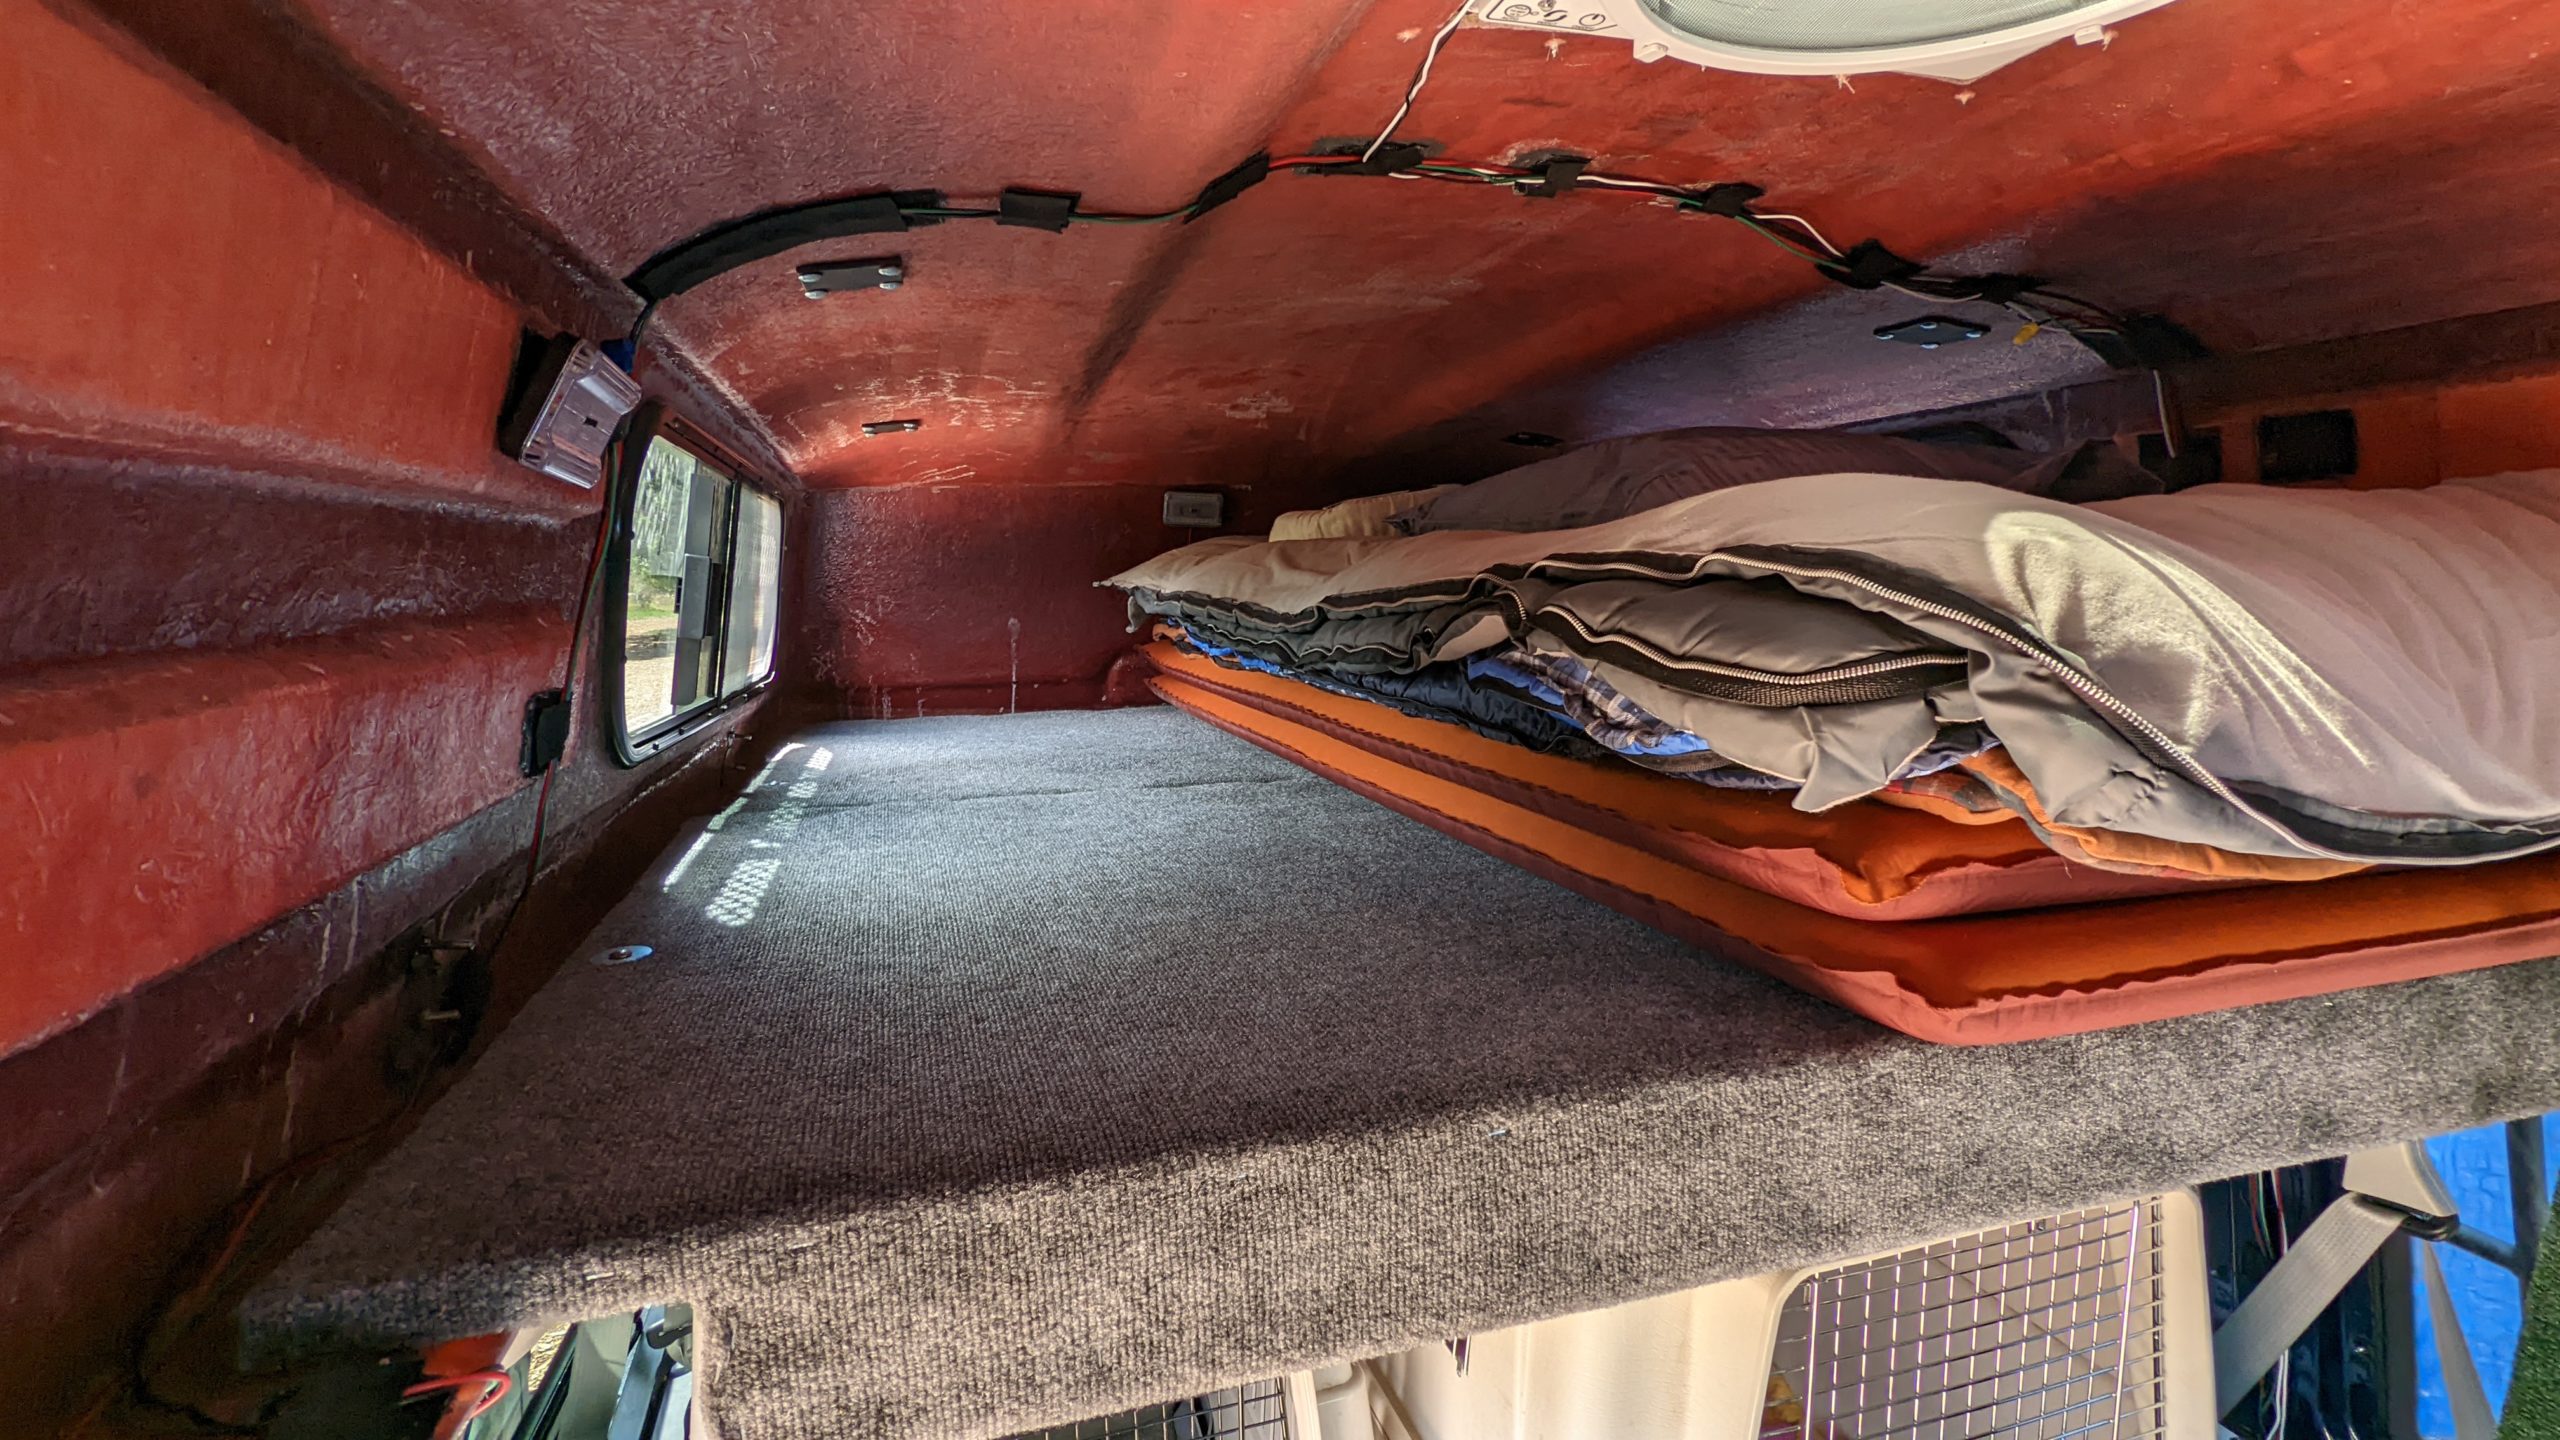
Bed
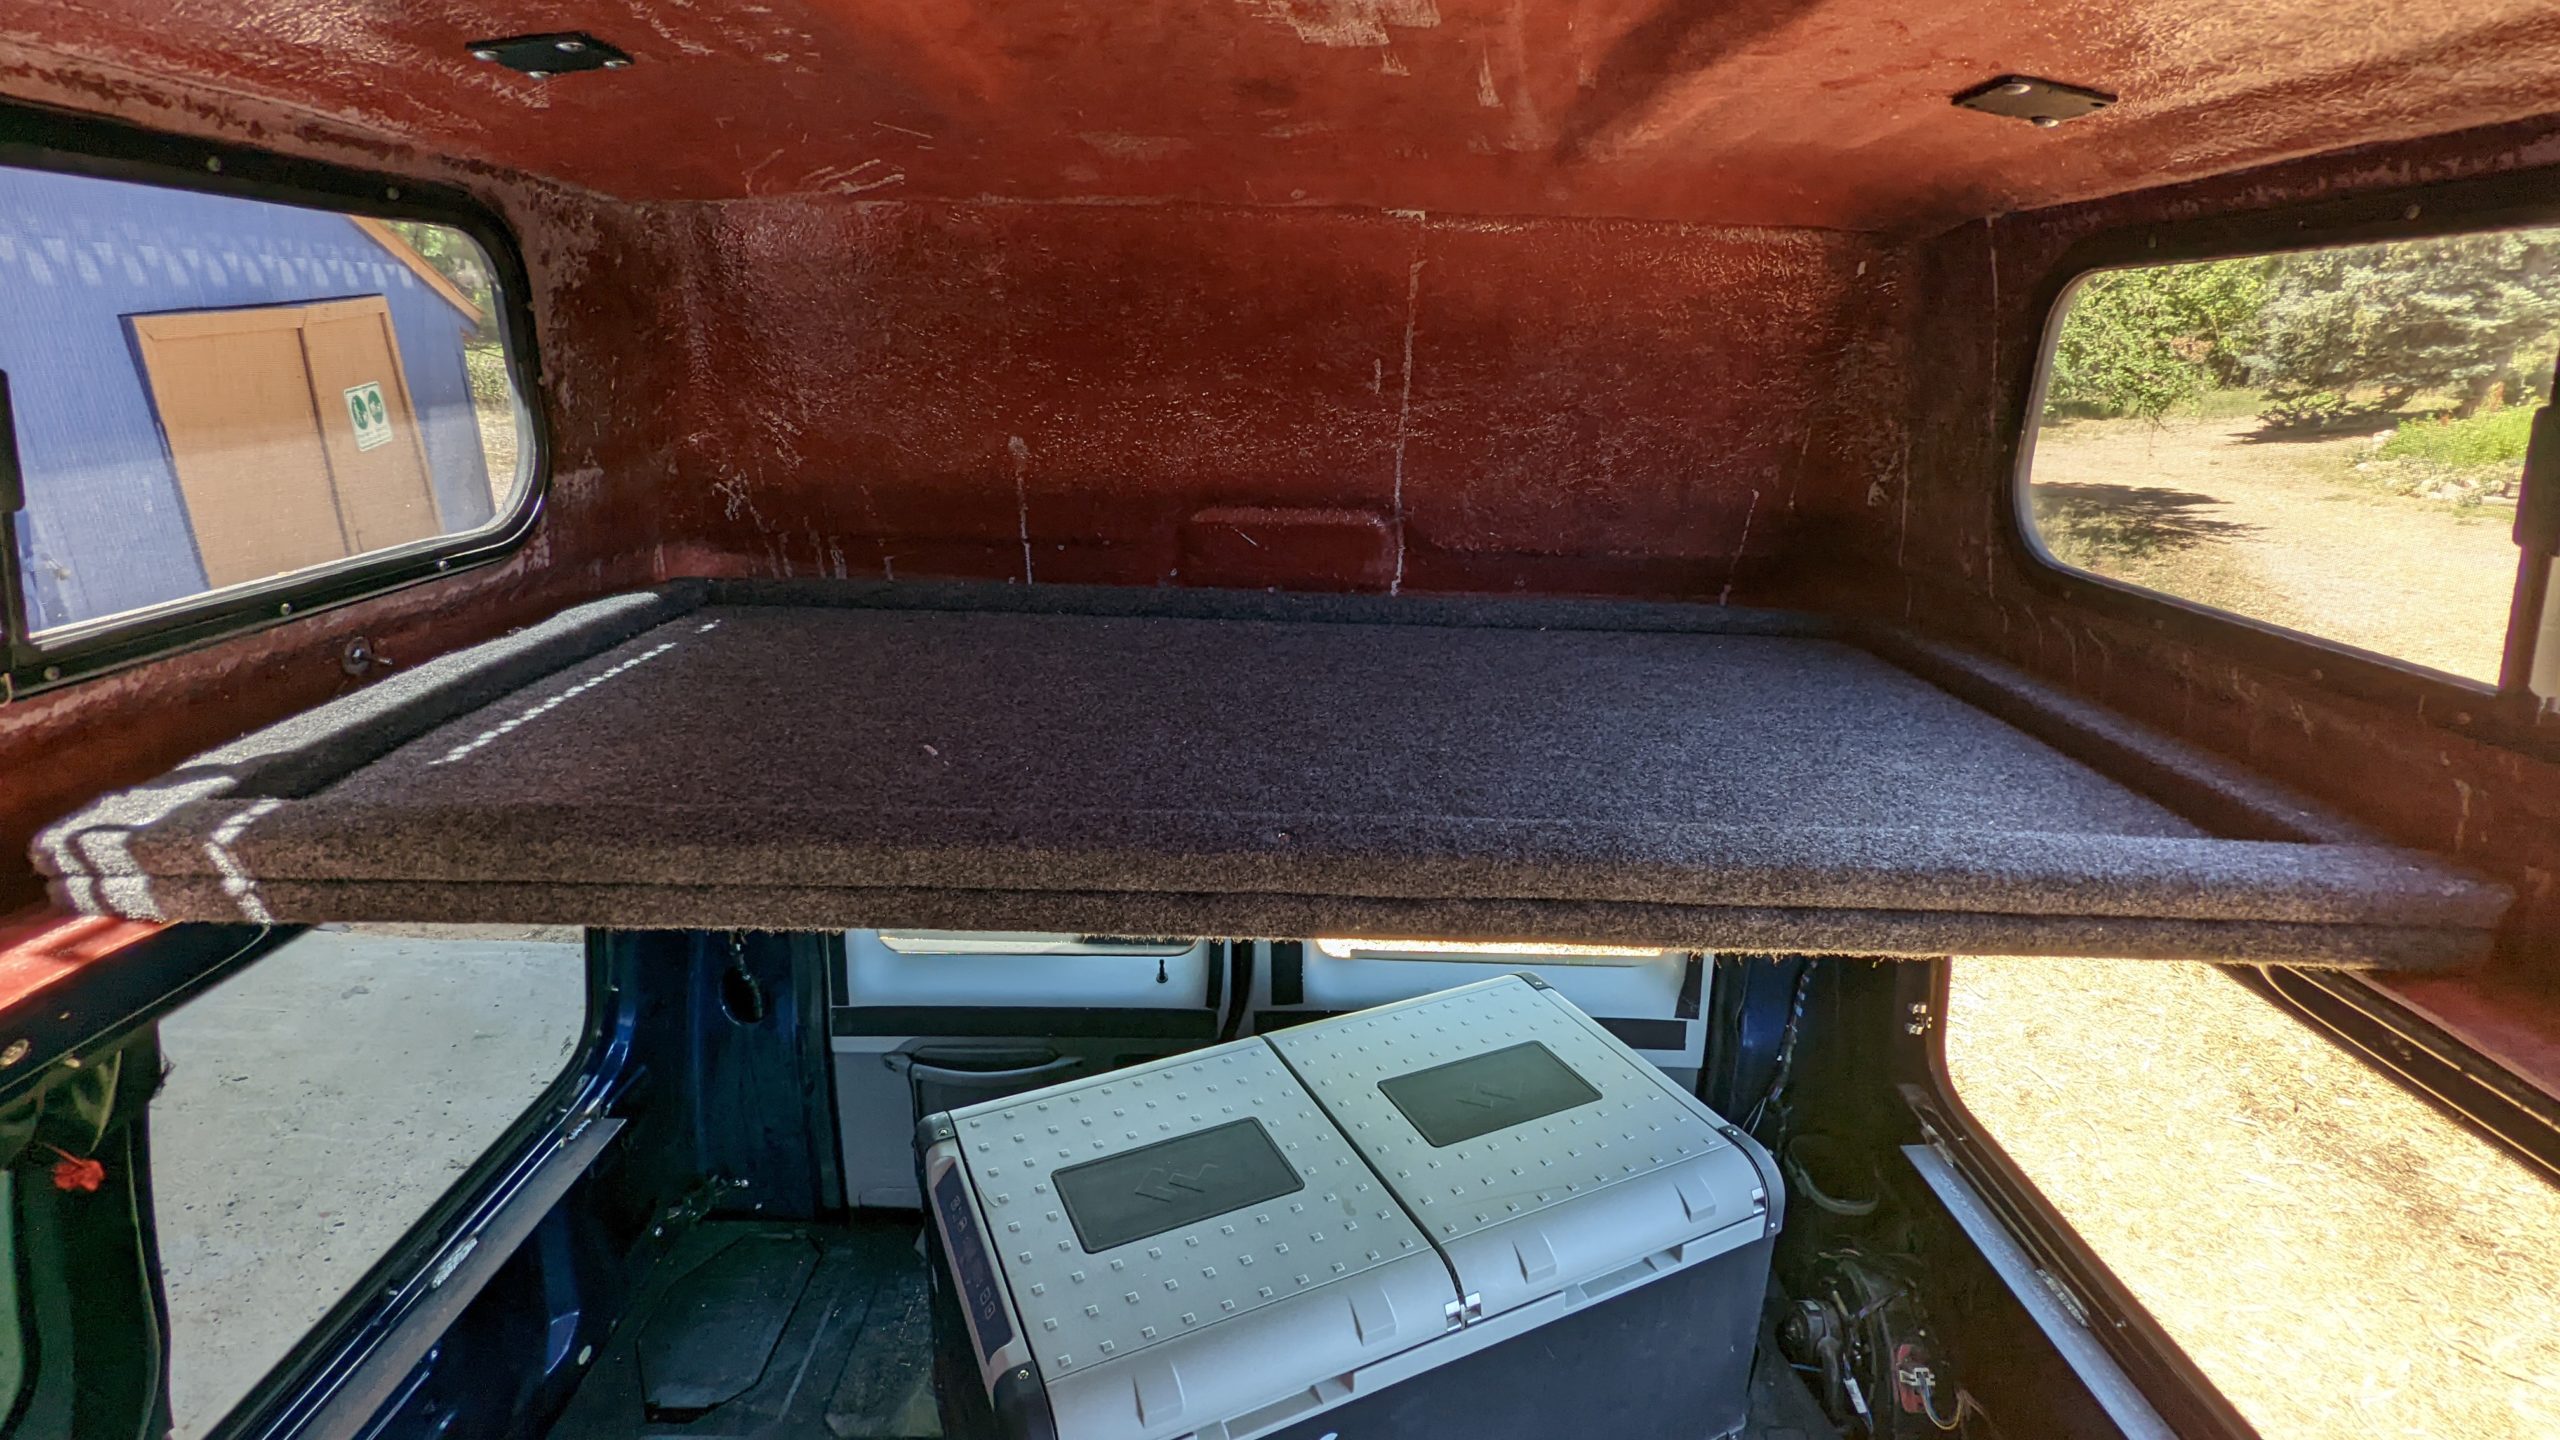
The bed is built out of 3/4 plywood and 2×4 cross braces and rests on top of the steel frame where it is joined to the fiberglass hardtop. It is in two pieces and held in place by 2 screws each with wingnuts so that either part of the bed or in its entirety can be easily removed.
The bed is carpeted.
Dog Crates
The dog crates stay on top of the Decked unit and are strapped down with a ratchet strap that connects to the interior lip we had installed for ratchet straps. They come out really easily by loosening the ratchet strap.
Front Console
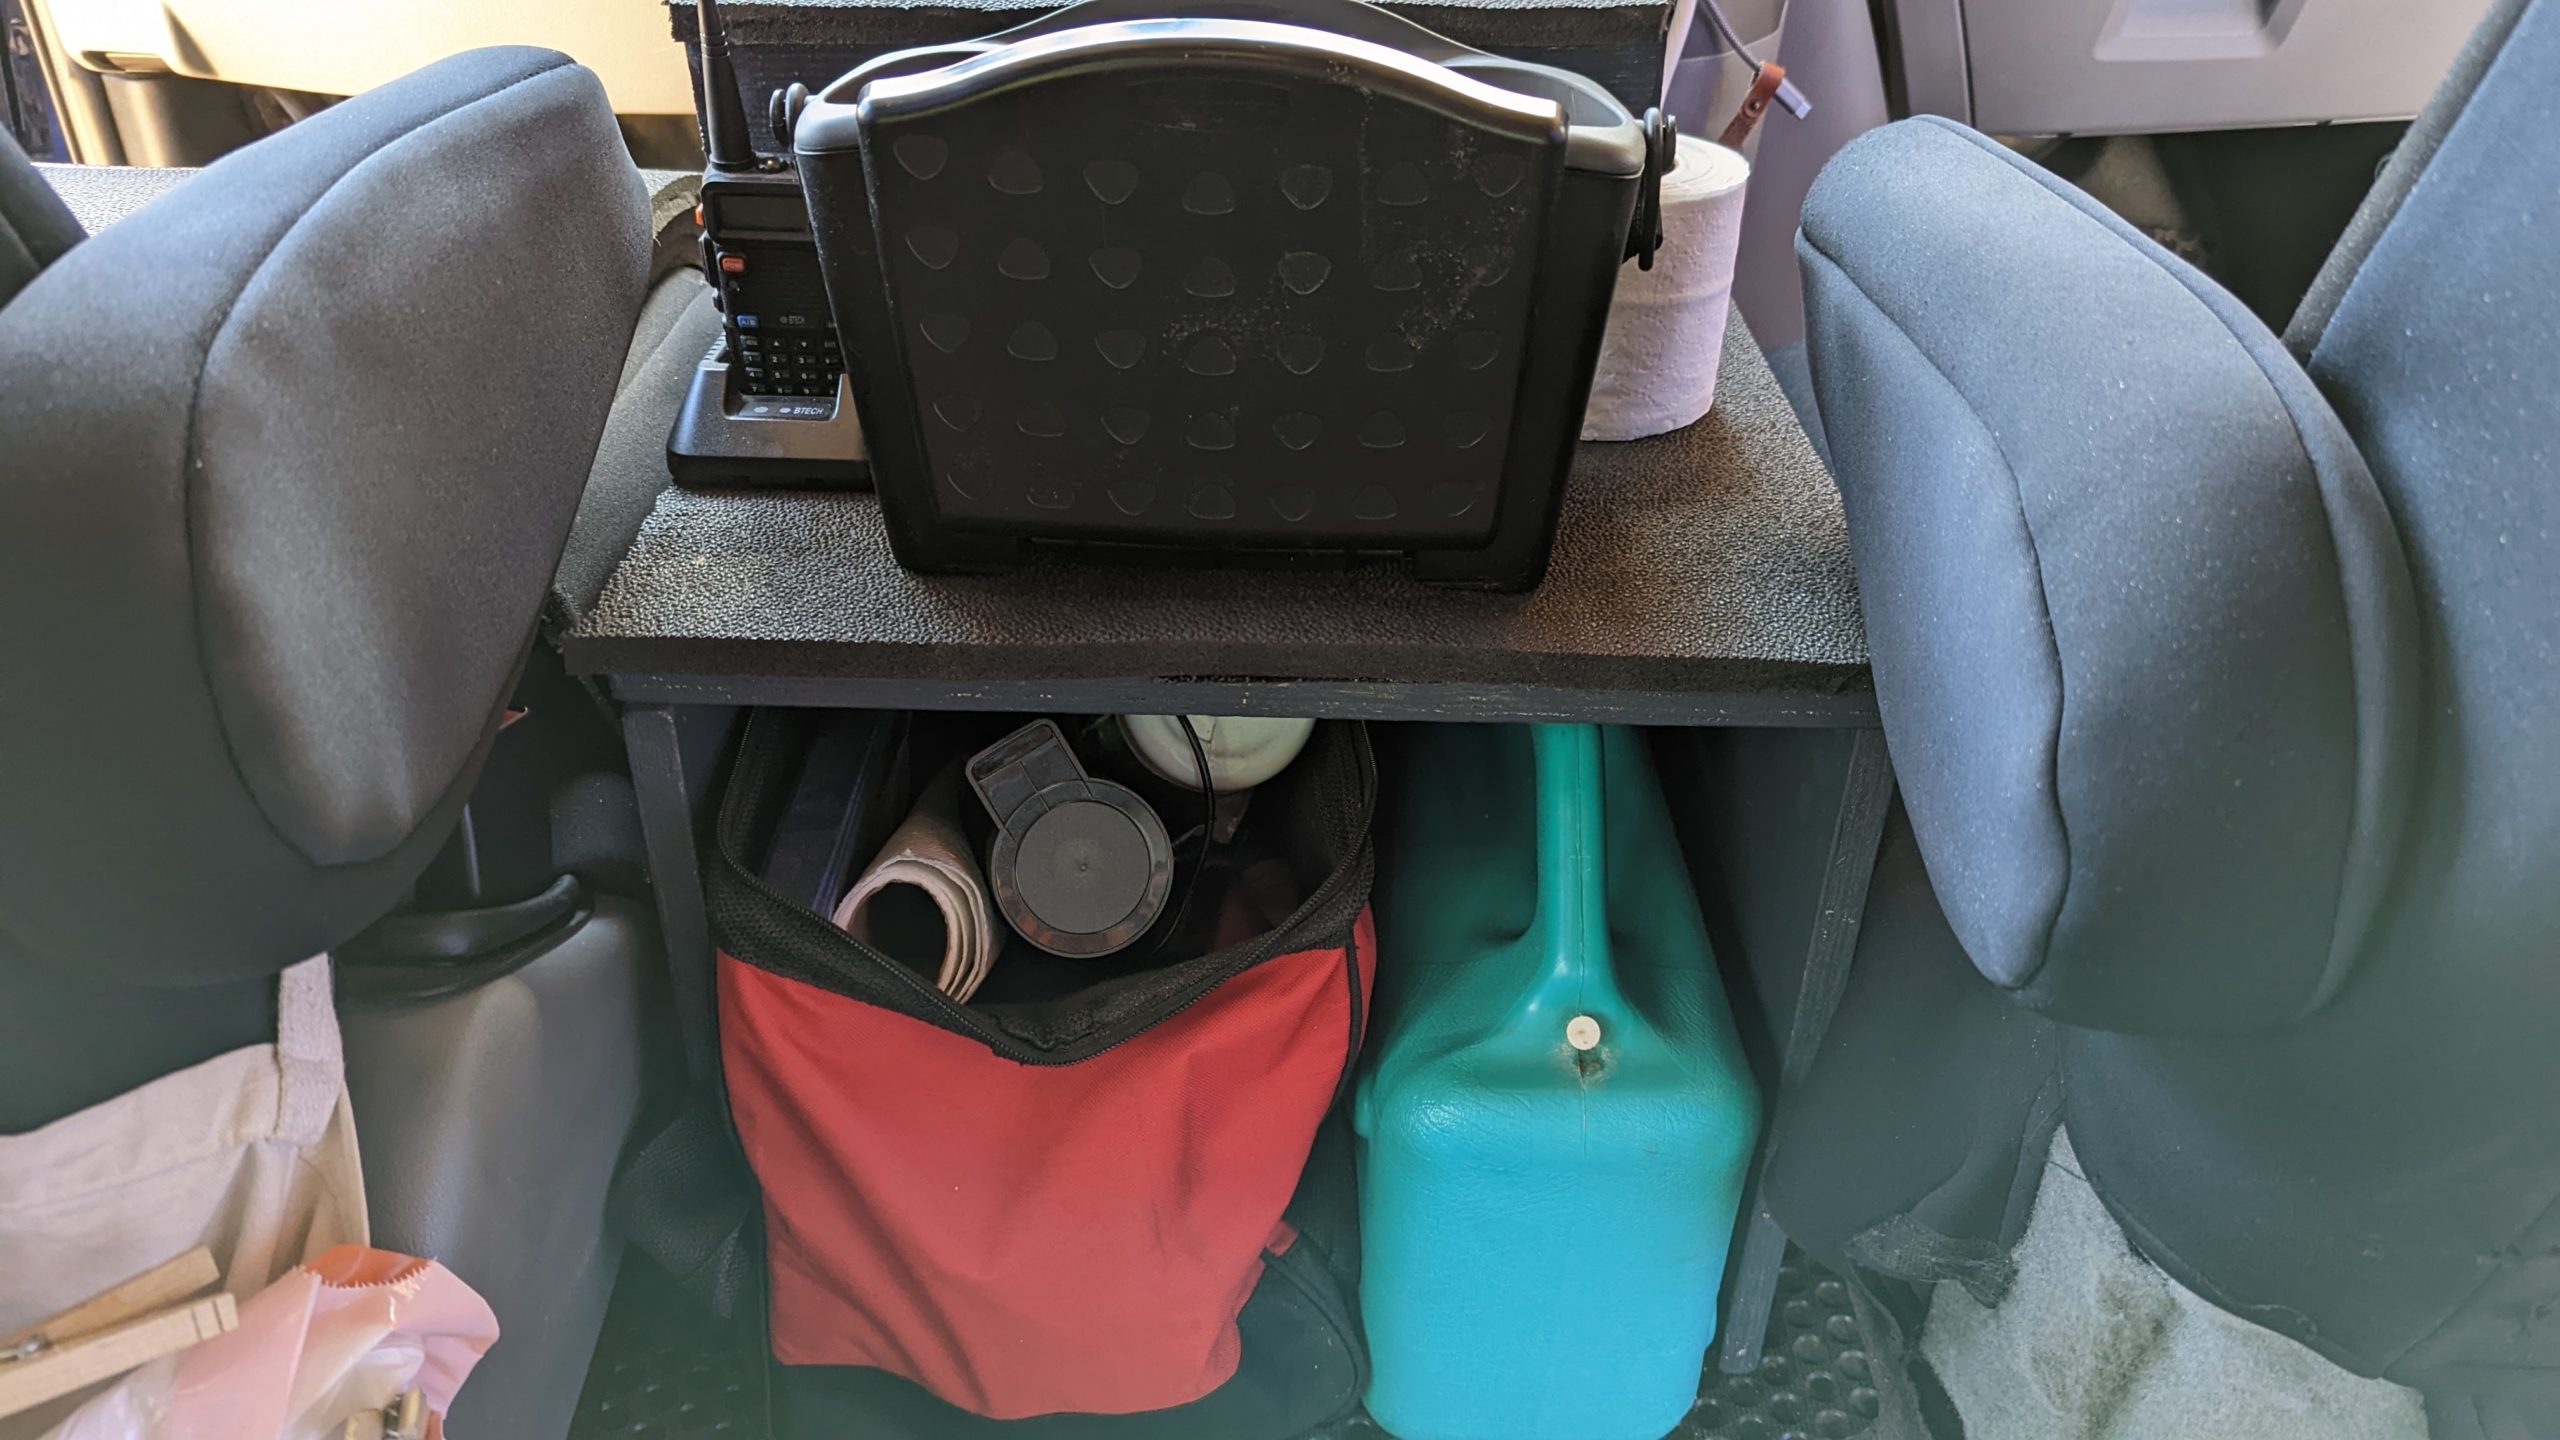
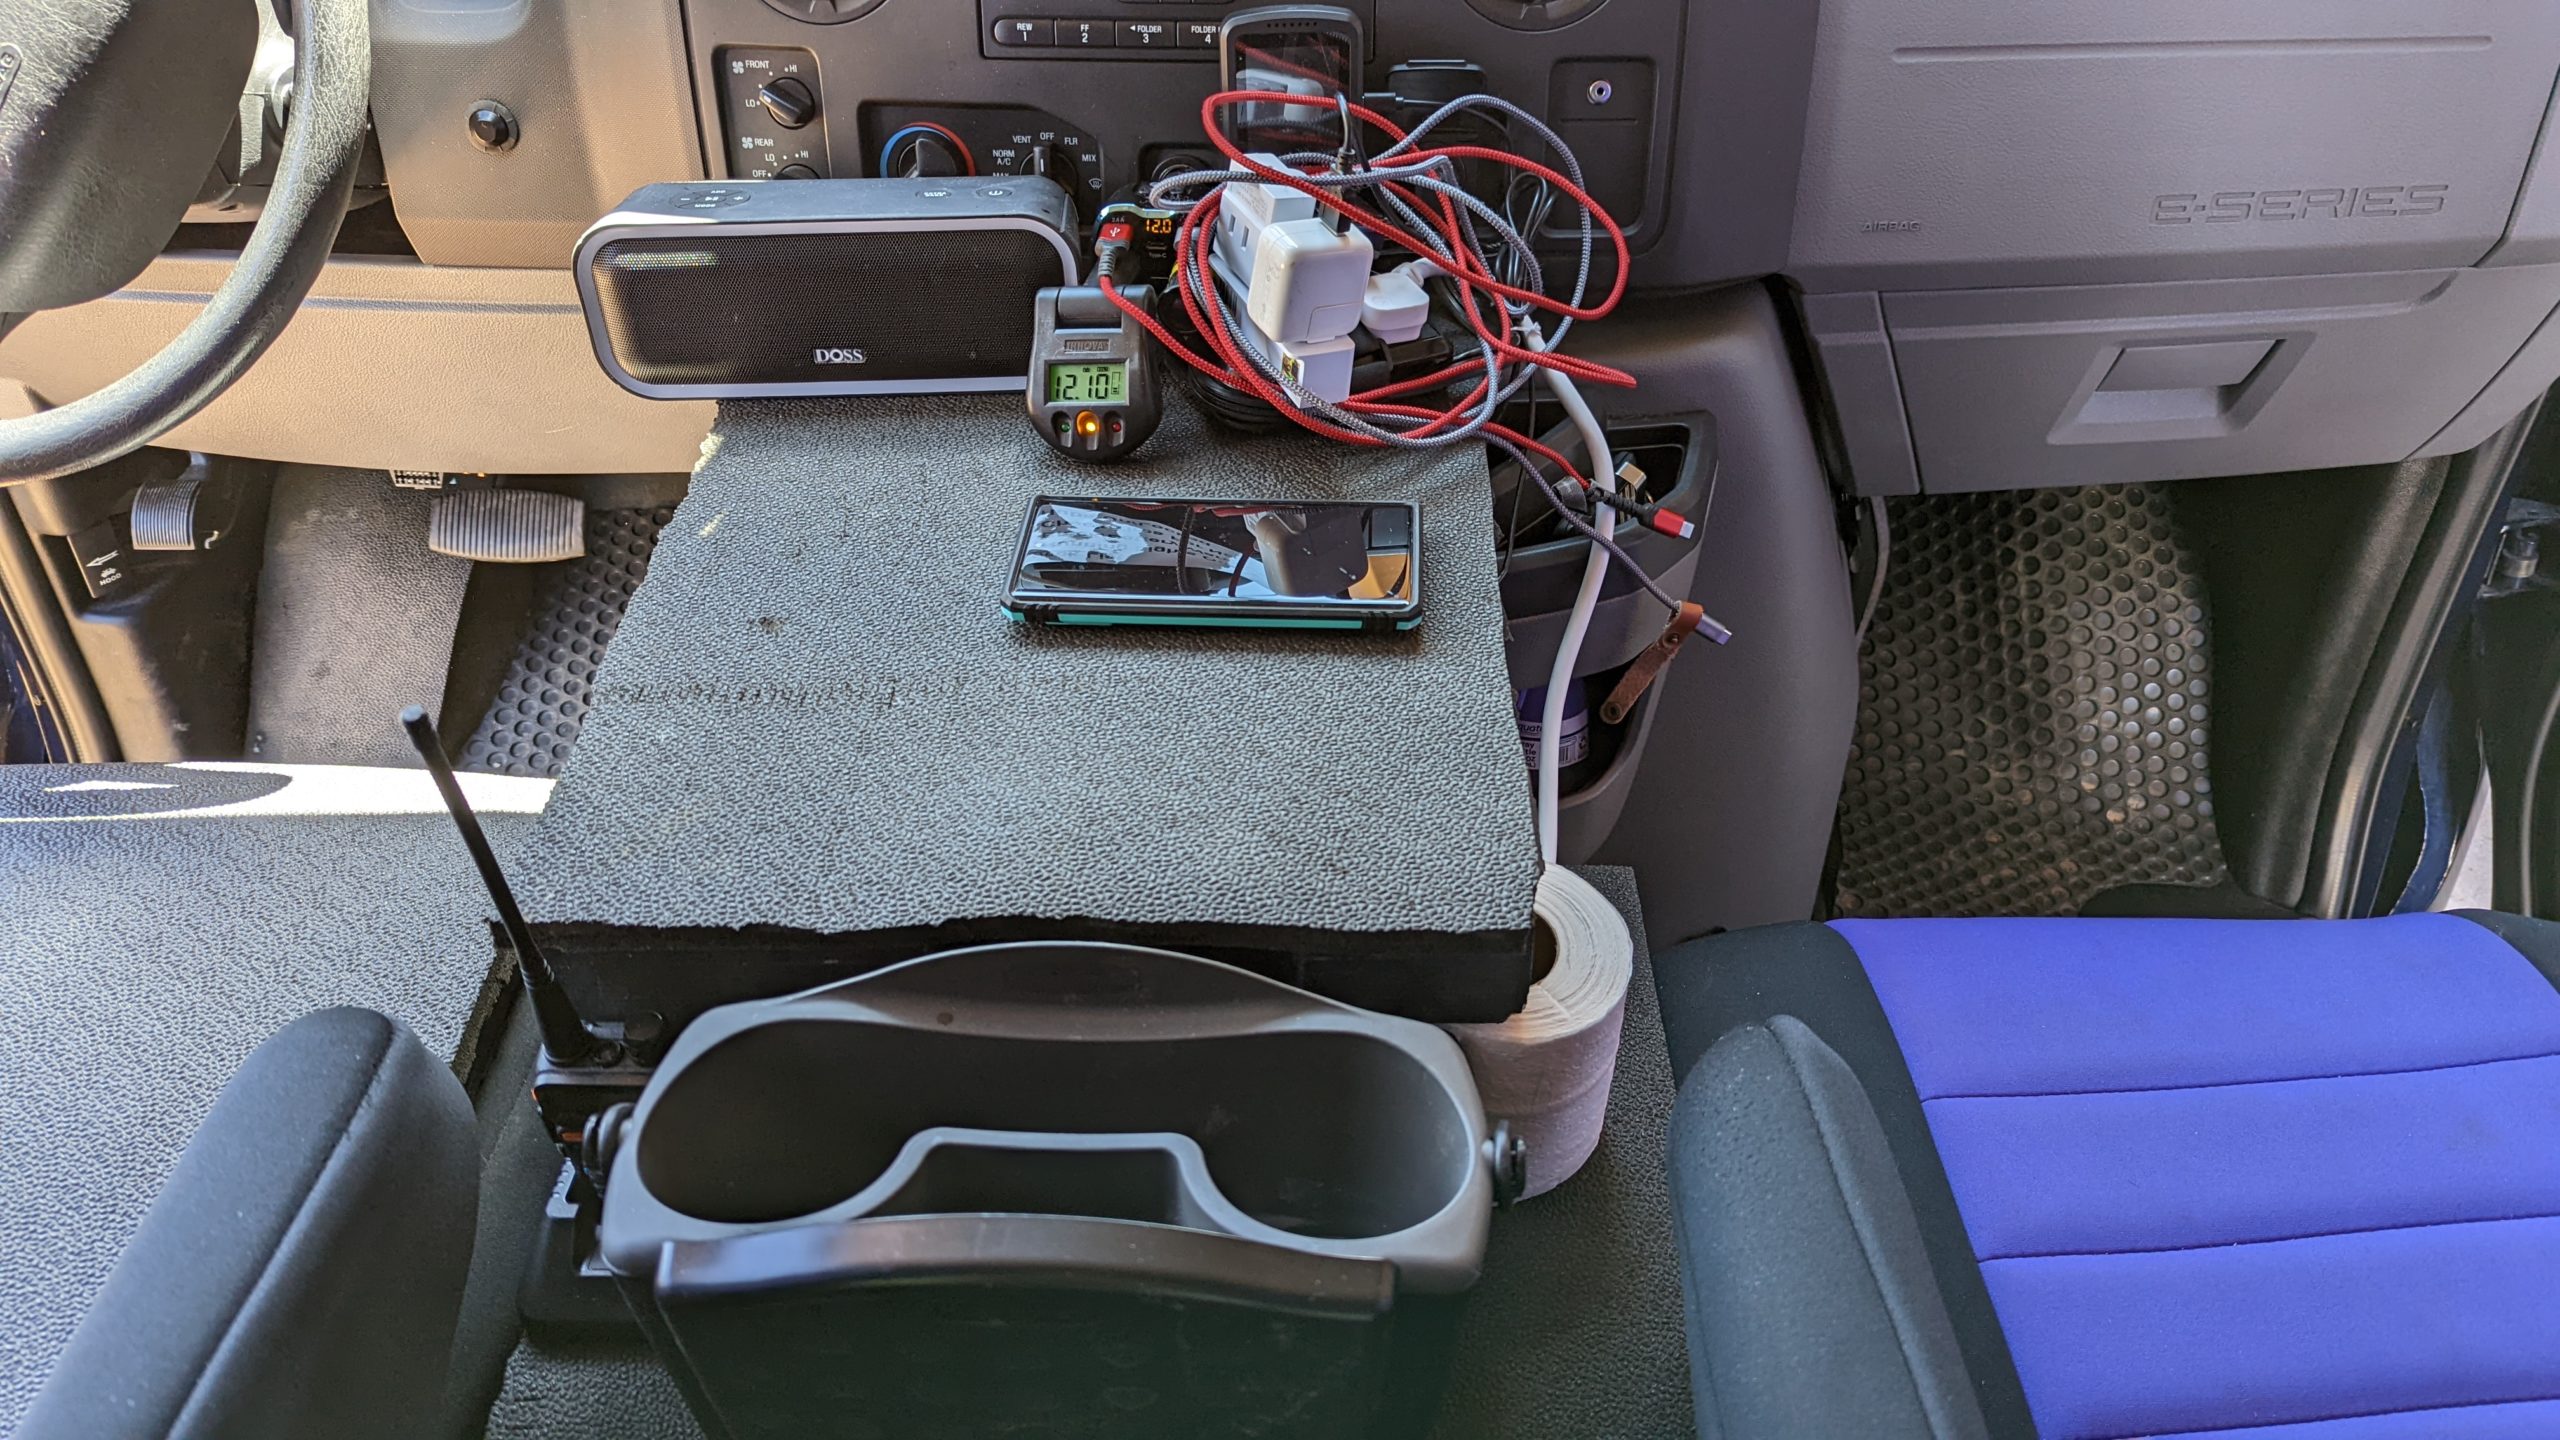
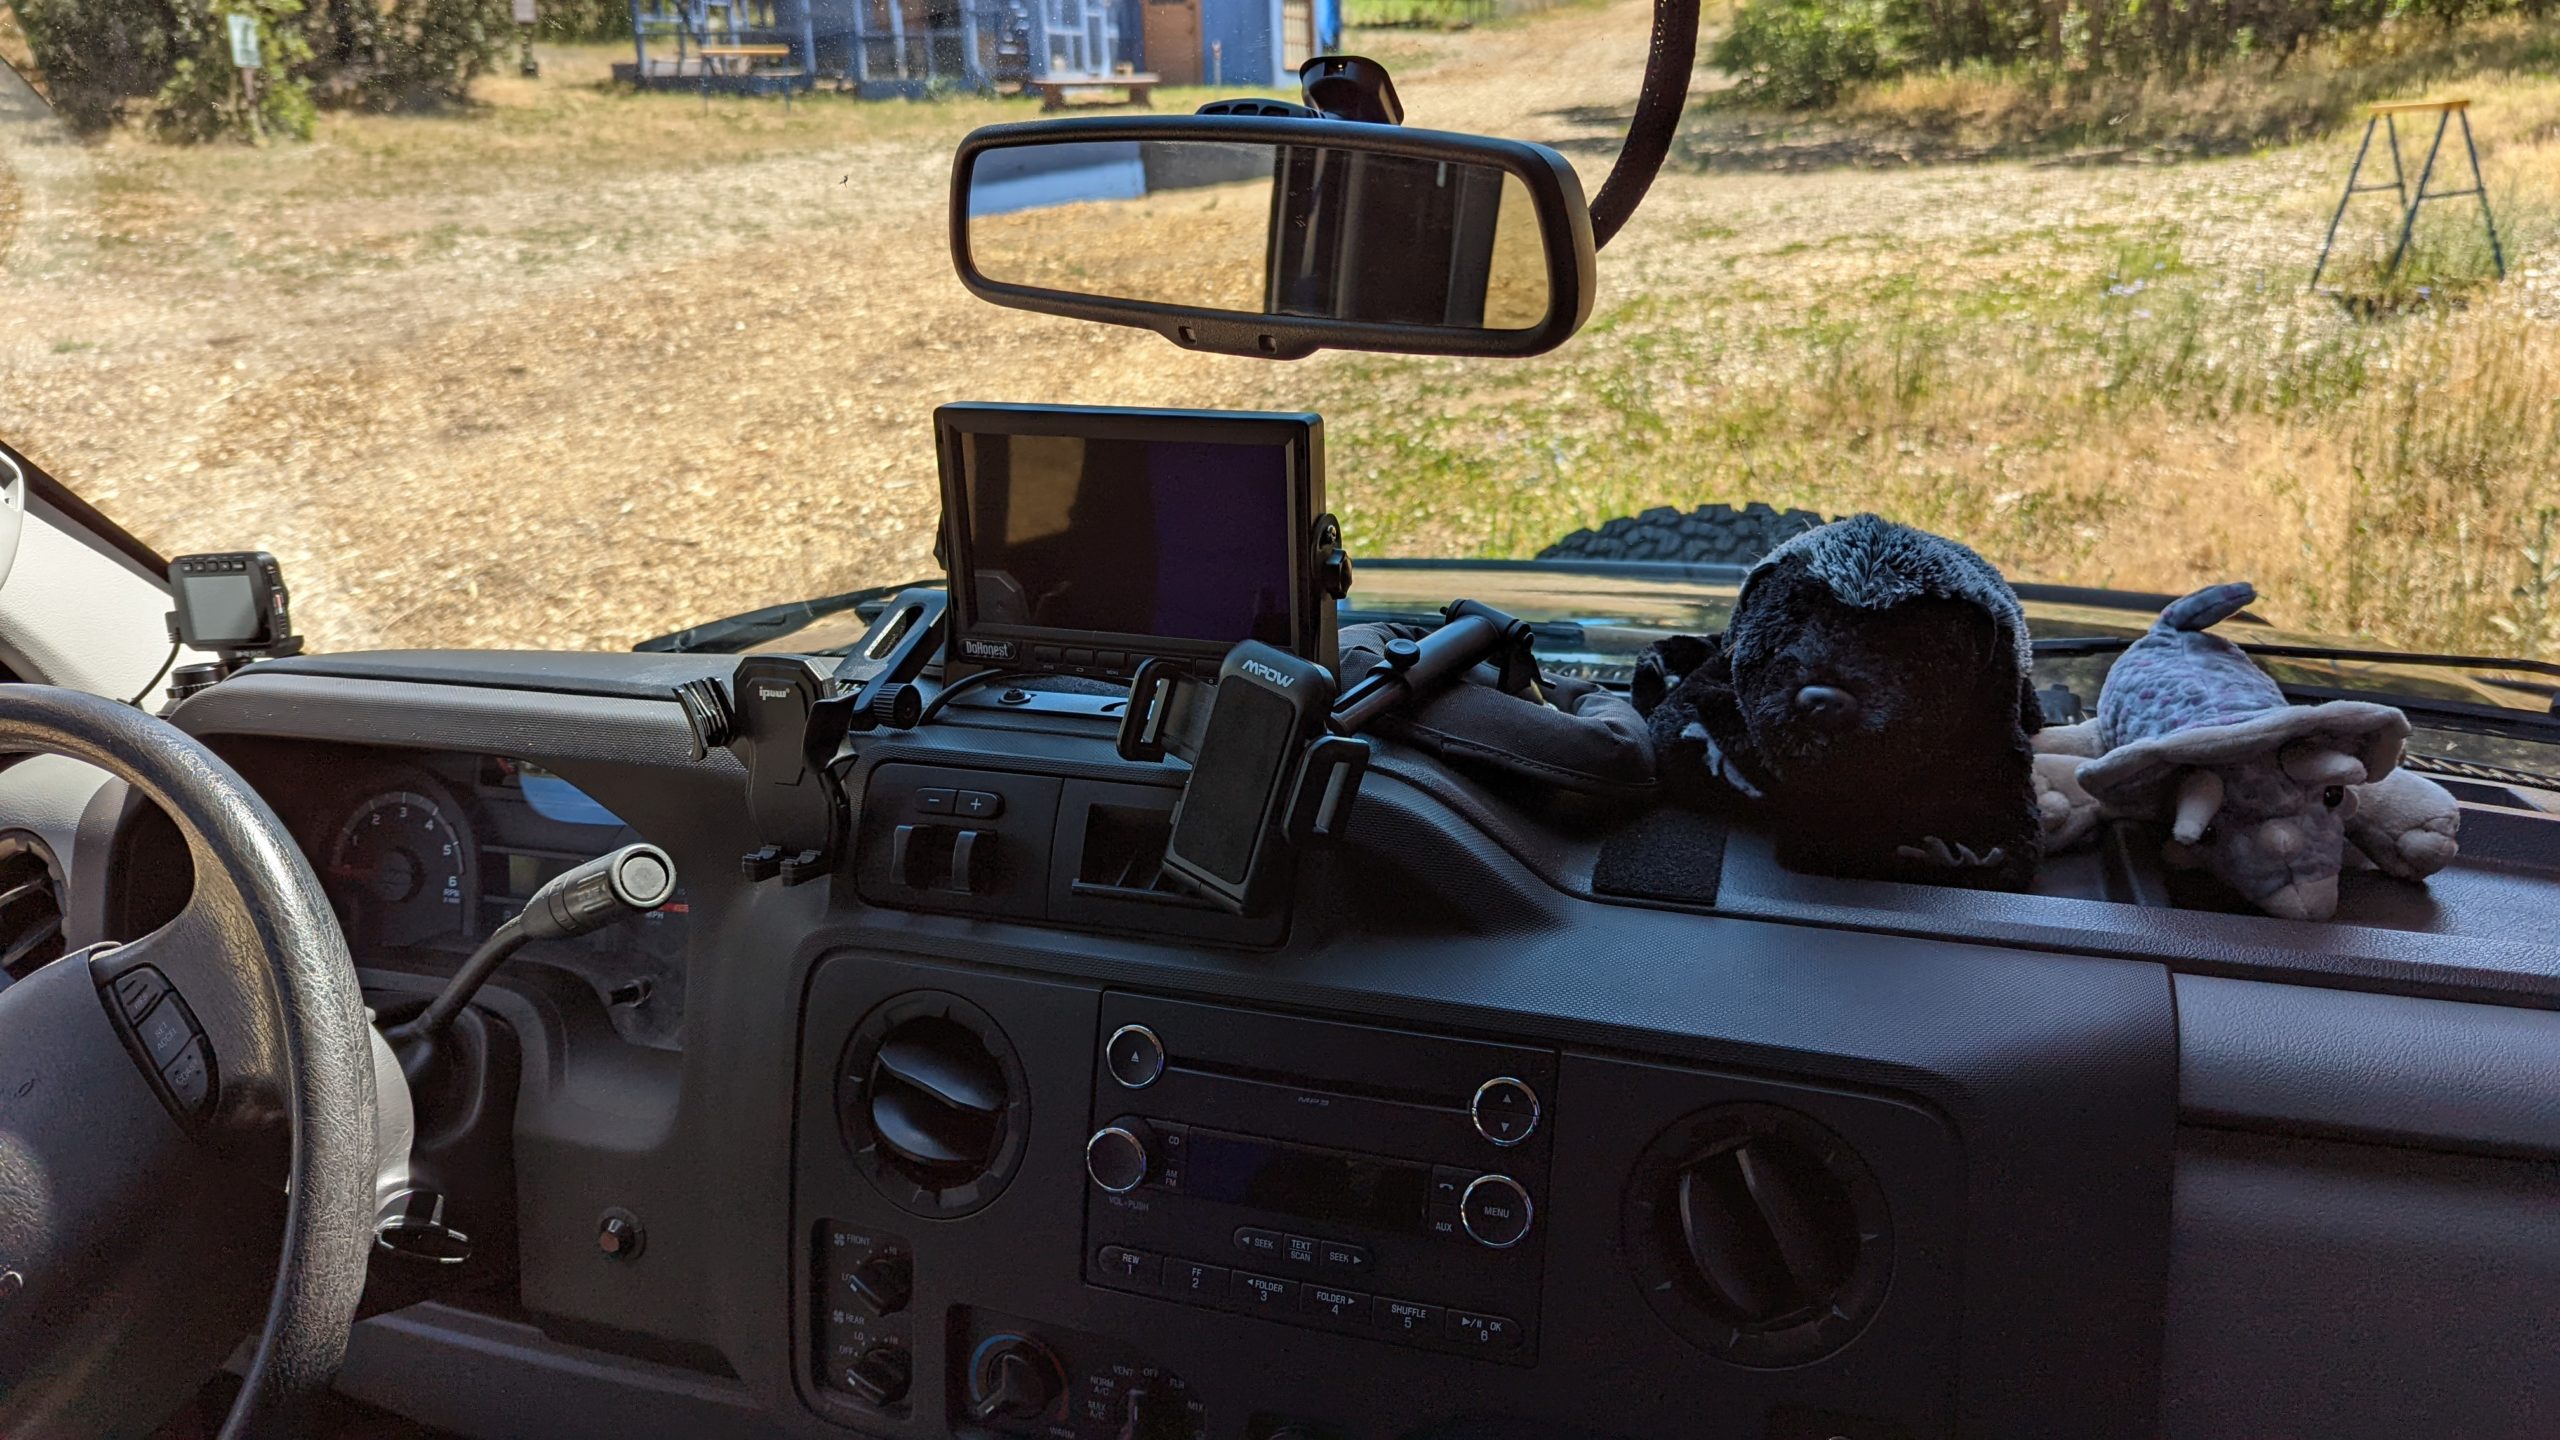
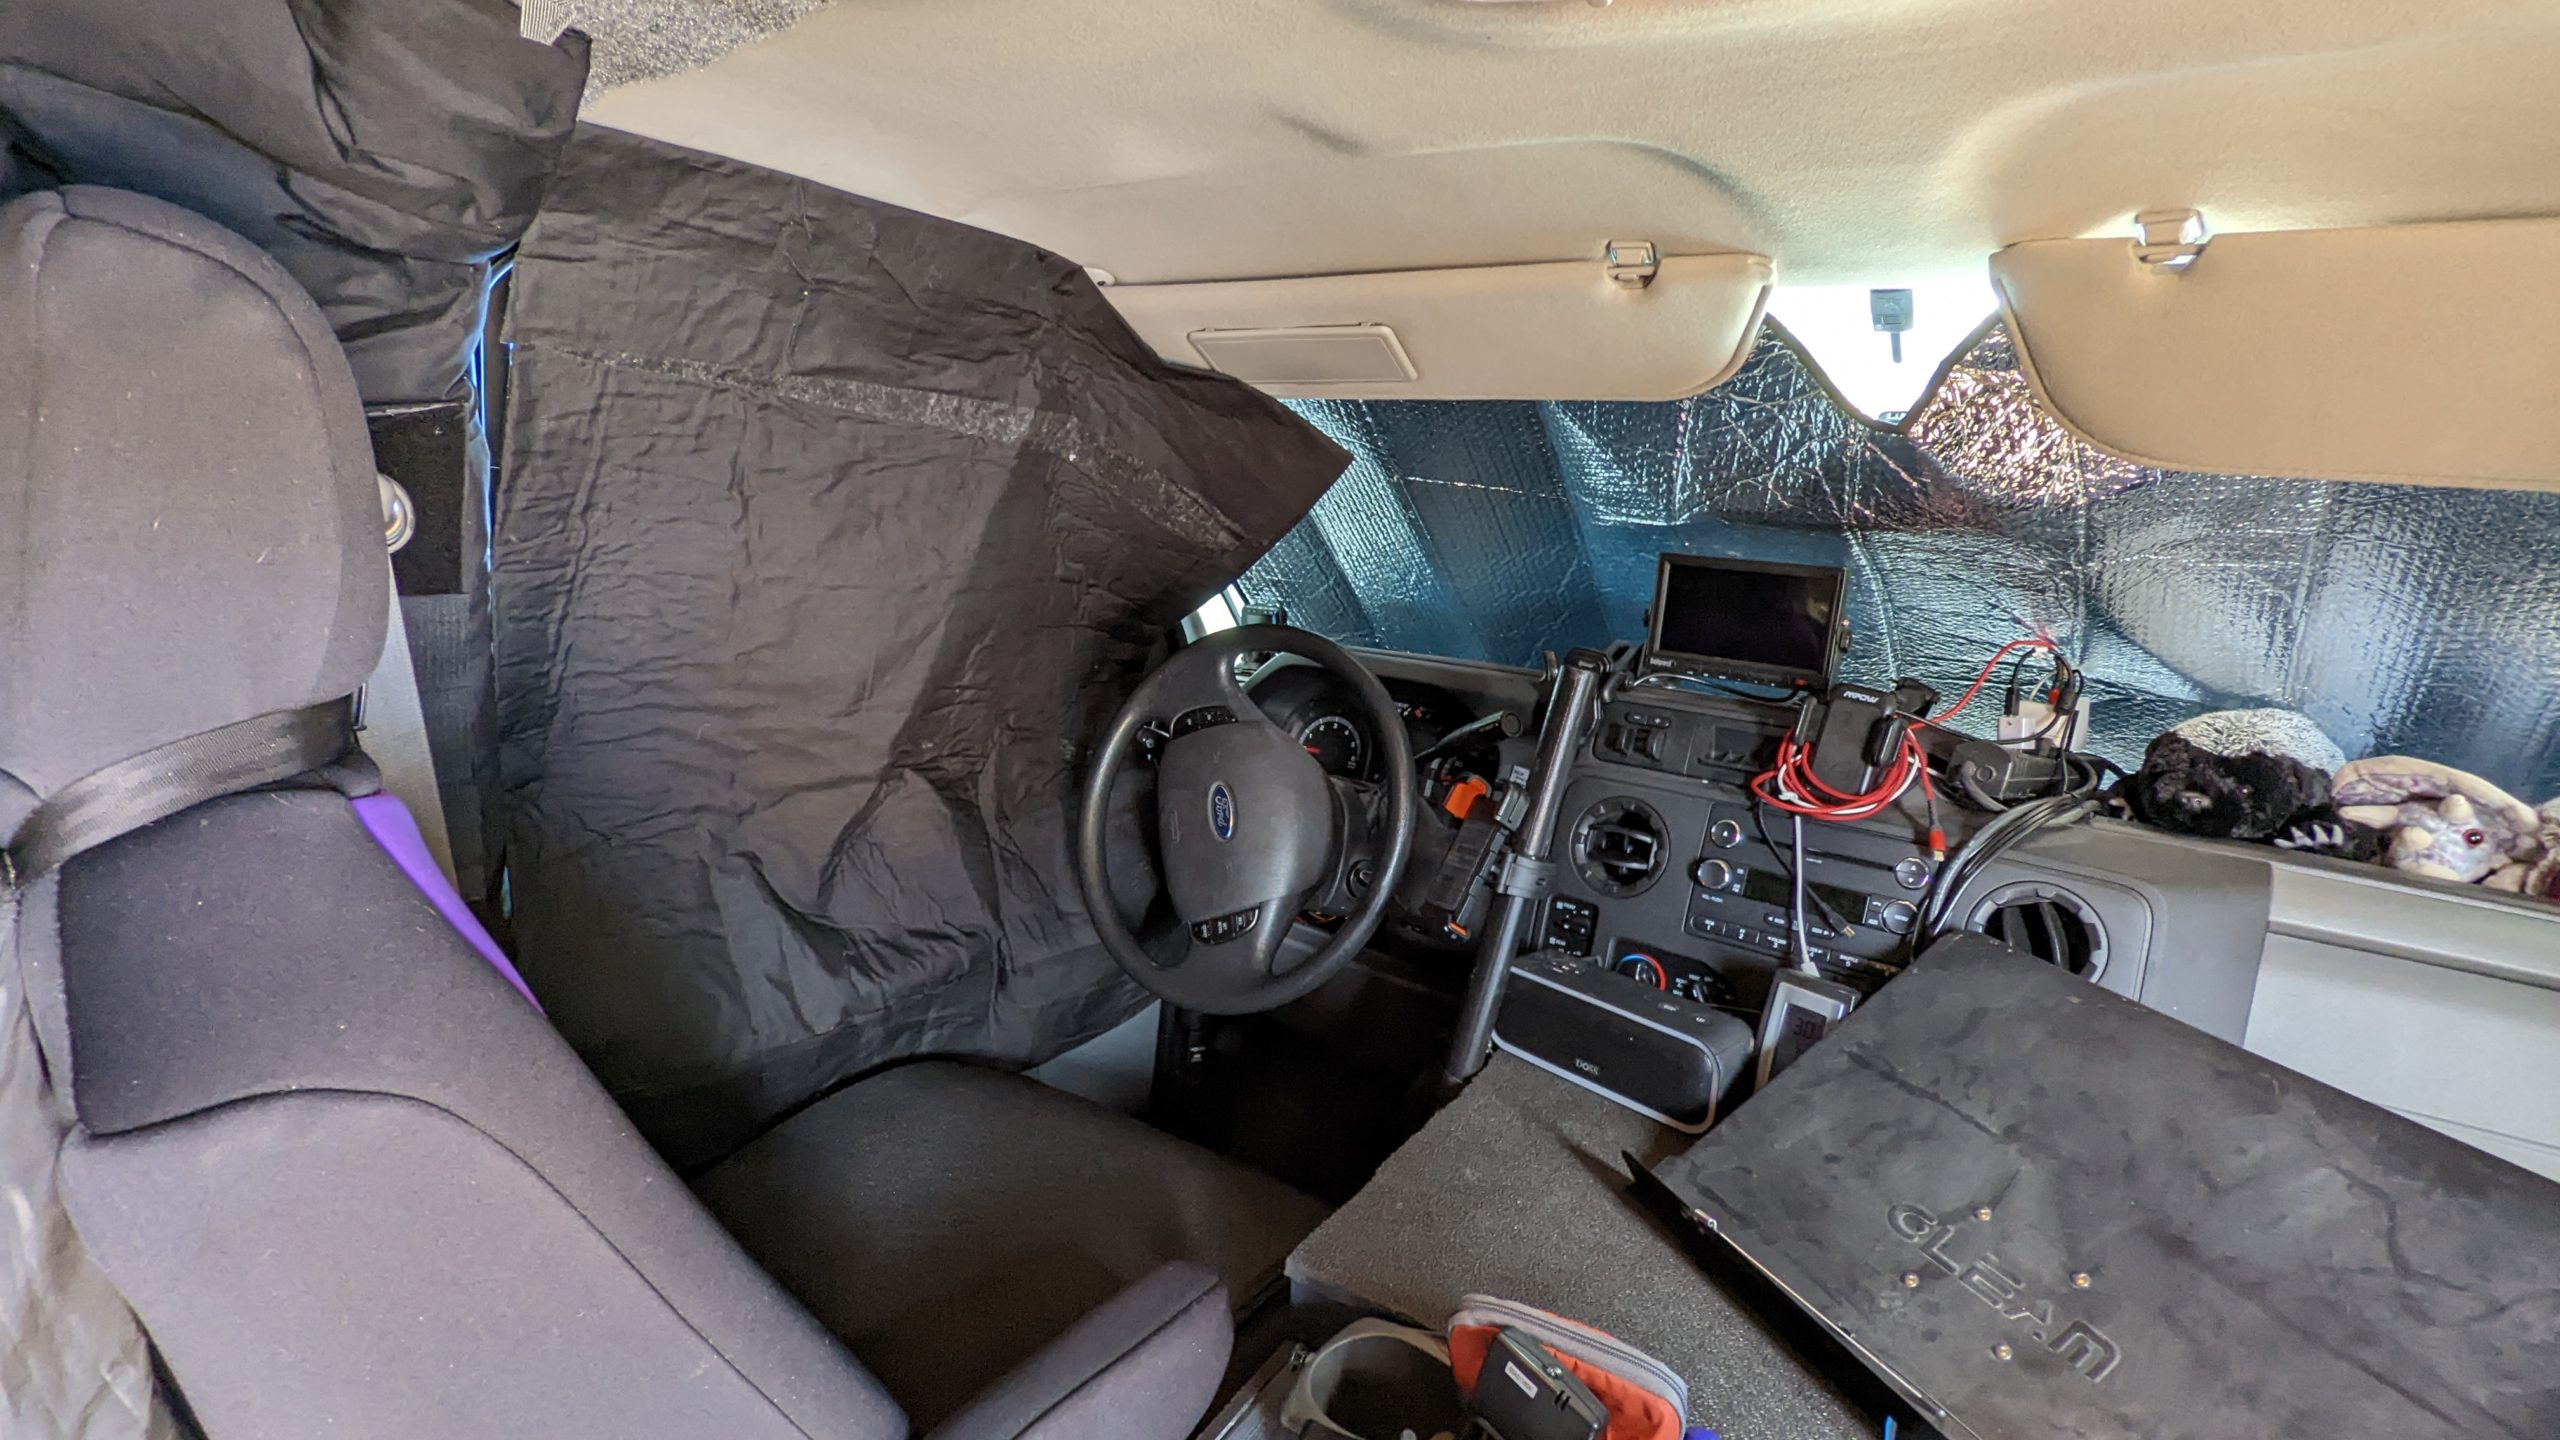
The front center console has a lower shelf and upper shelf built in to make more efficient use of the space for gear placement. The dash has various electrical cords for electronics, a backup screen camera system and device holders.
Groot and Rocket also live on the dash
Front Swivel Seat
The passenger seat swivels to the rear.
HVAC
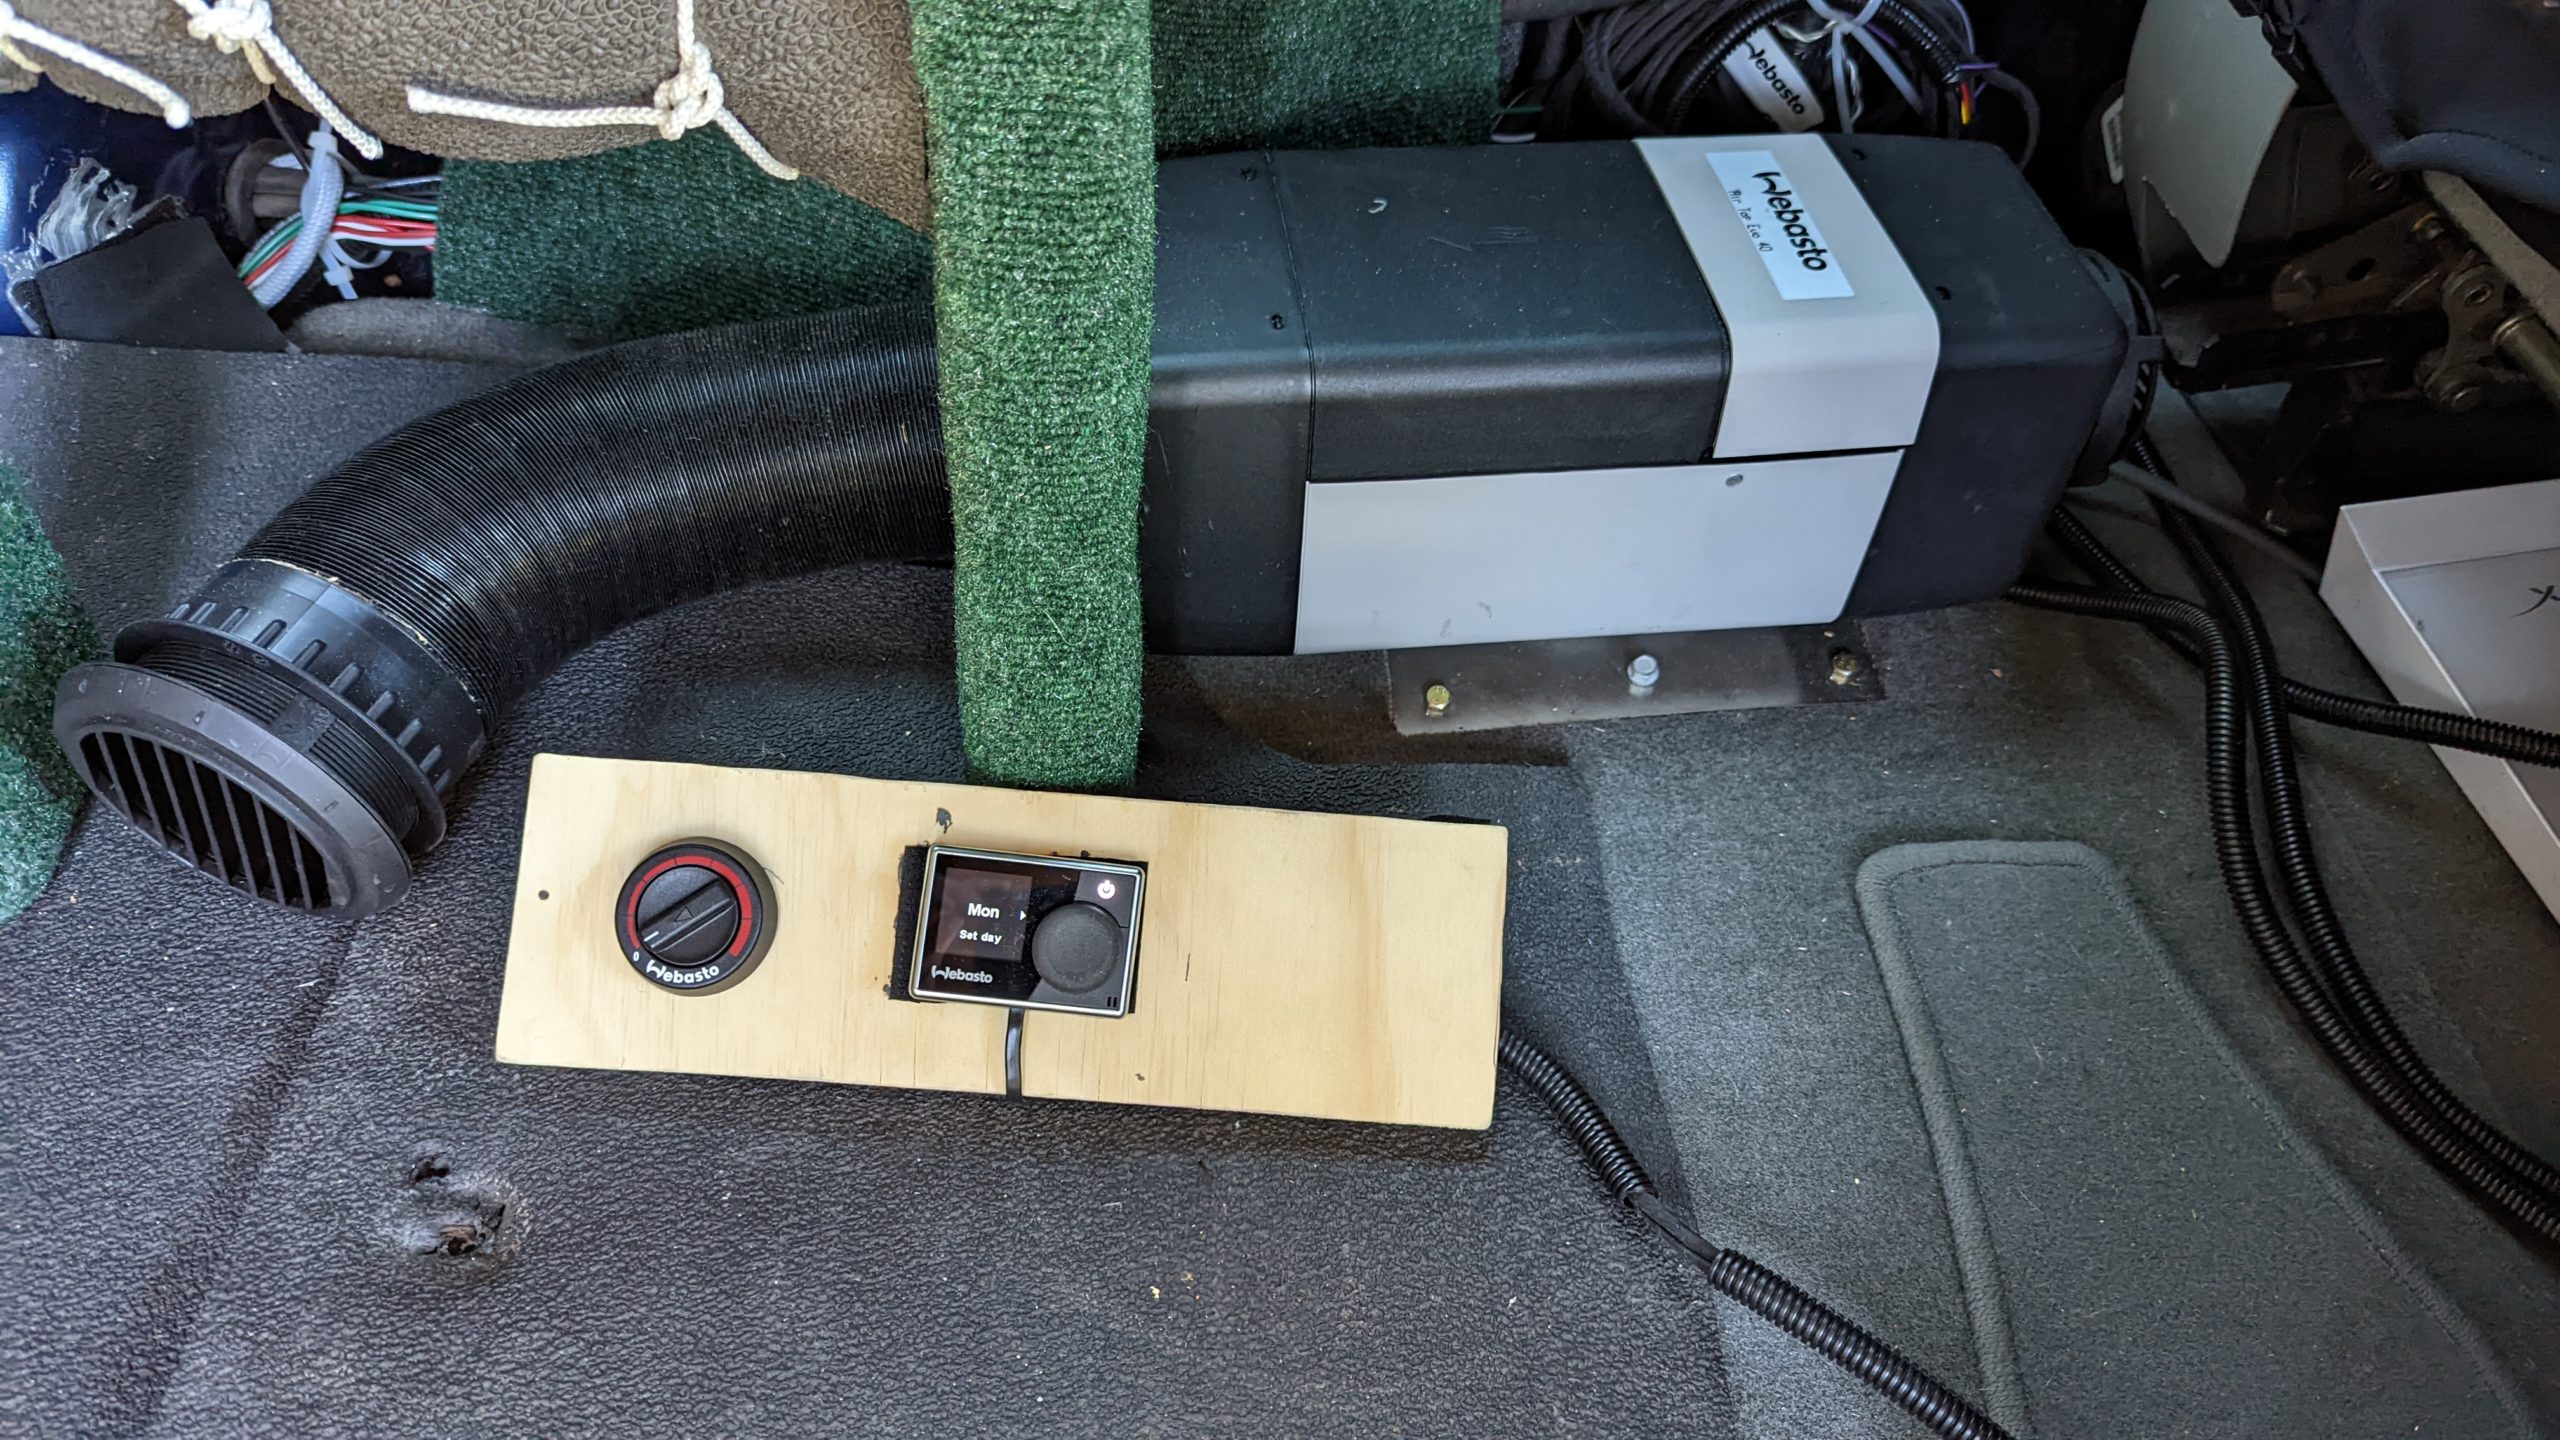
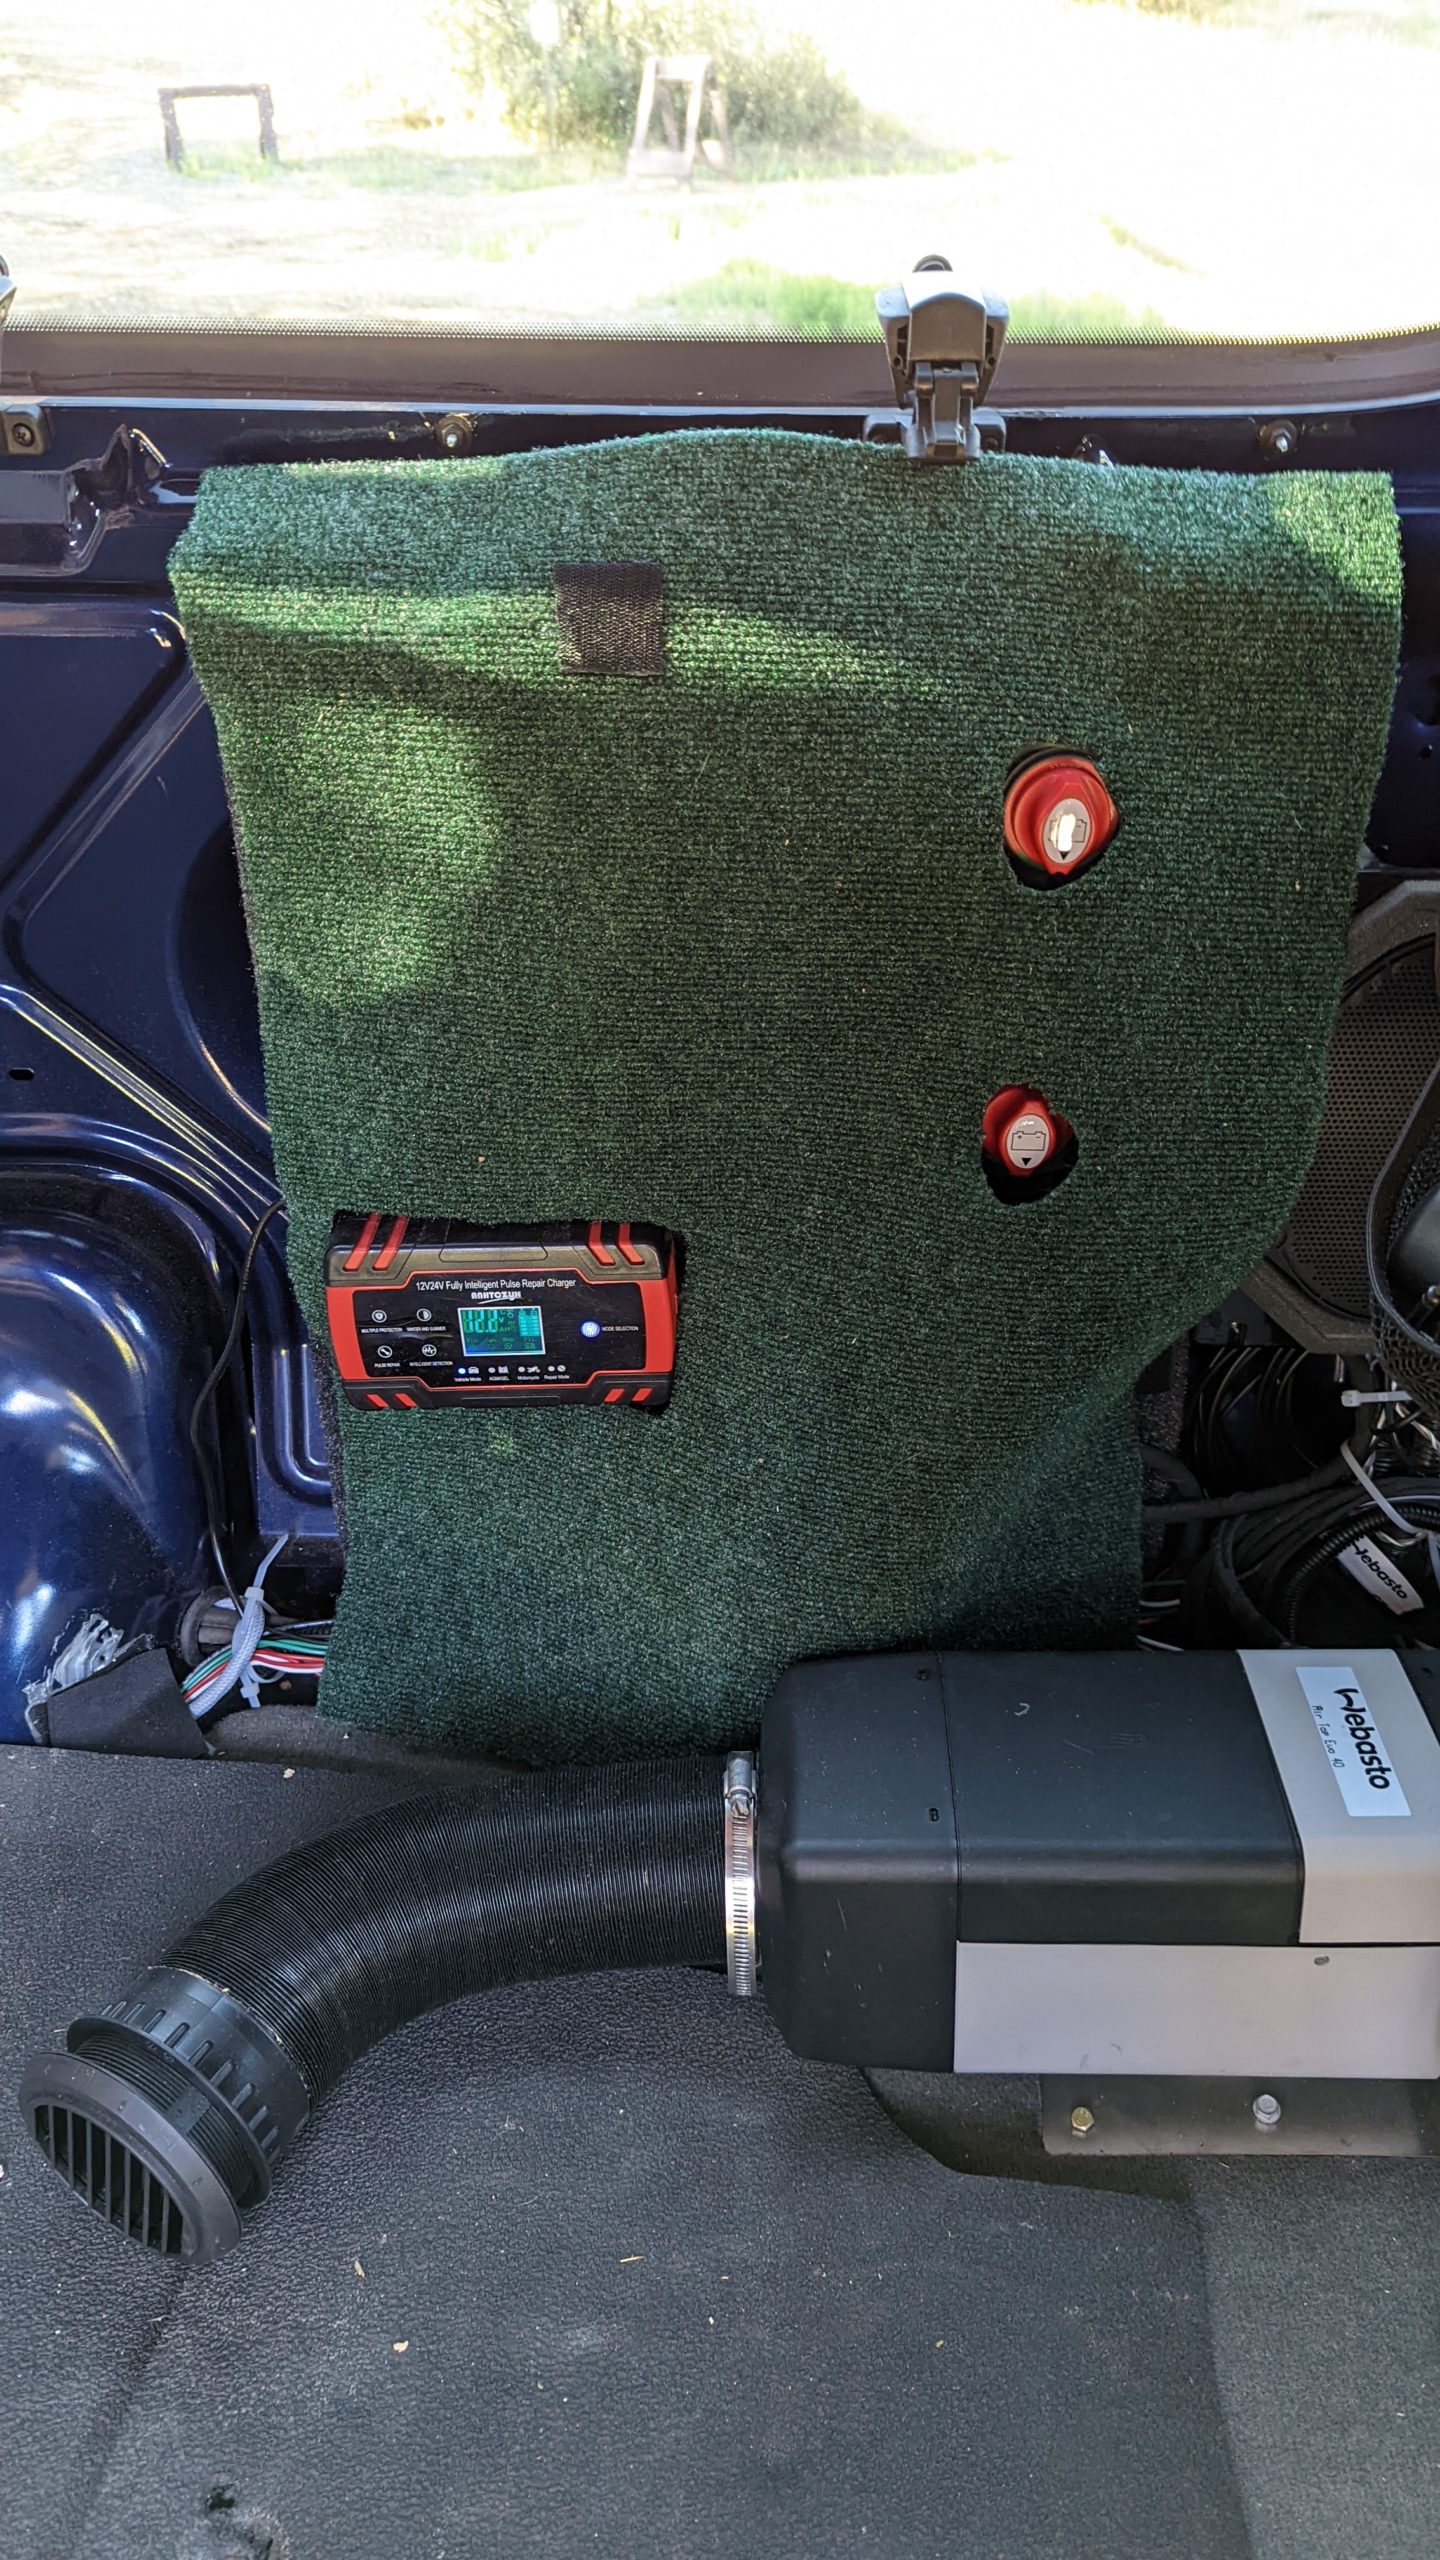
Heat is supplied by a Webasto unit that connects to the fuel tank and secondary battery for operation. There is a manual control and programmable thermostat attached to a small wood plywood piece connected to the heater with wire long enough to move throughout the van. The heater was installed behind the driver’s seat and we attached flexible ducting to direct heat towards the center of the vehicle from the floor.
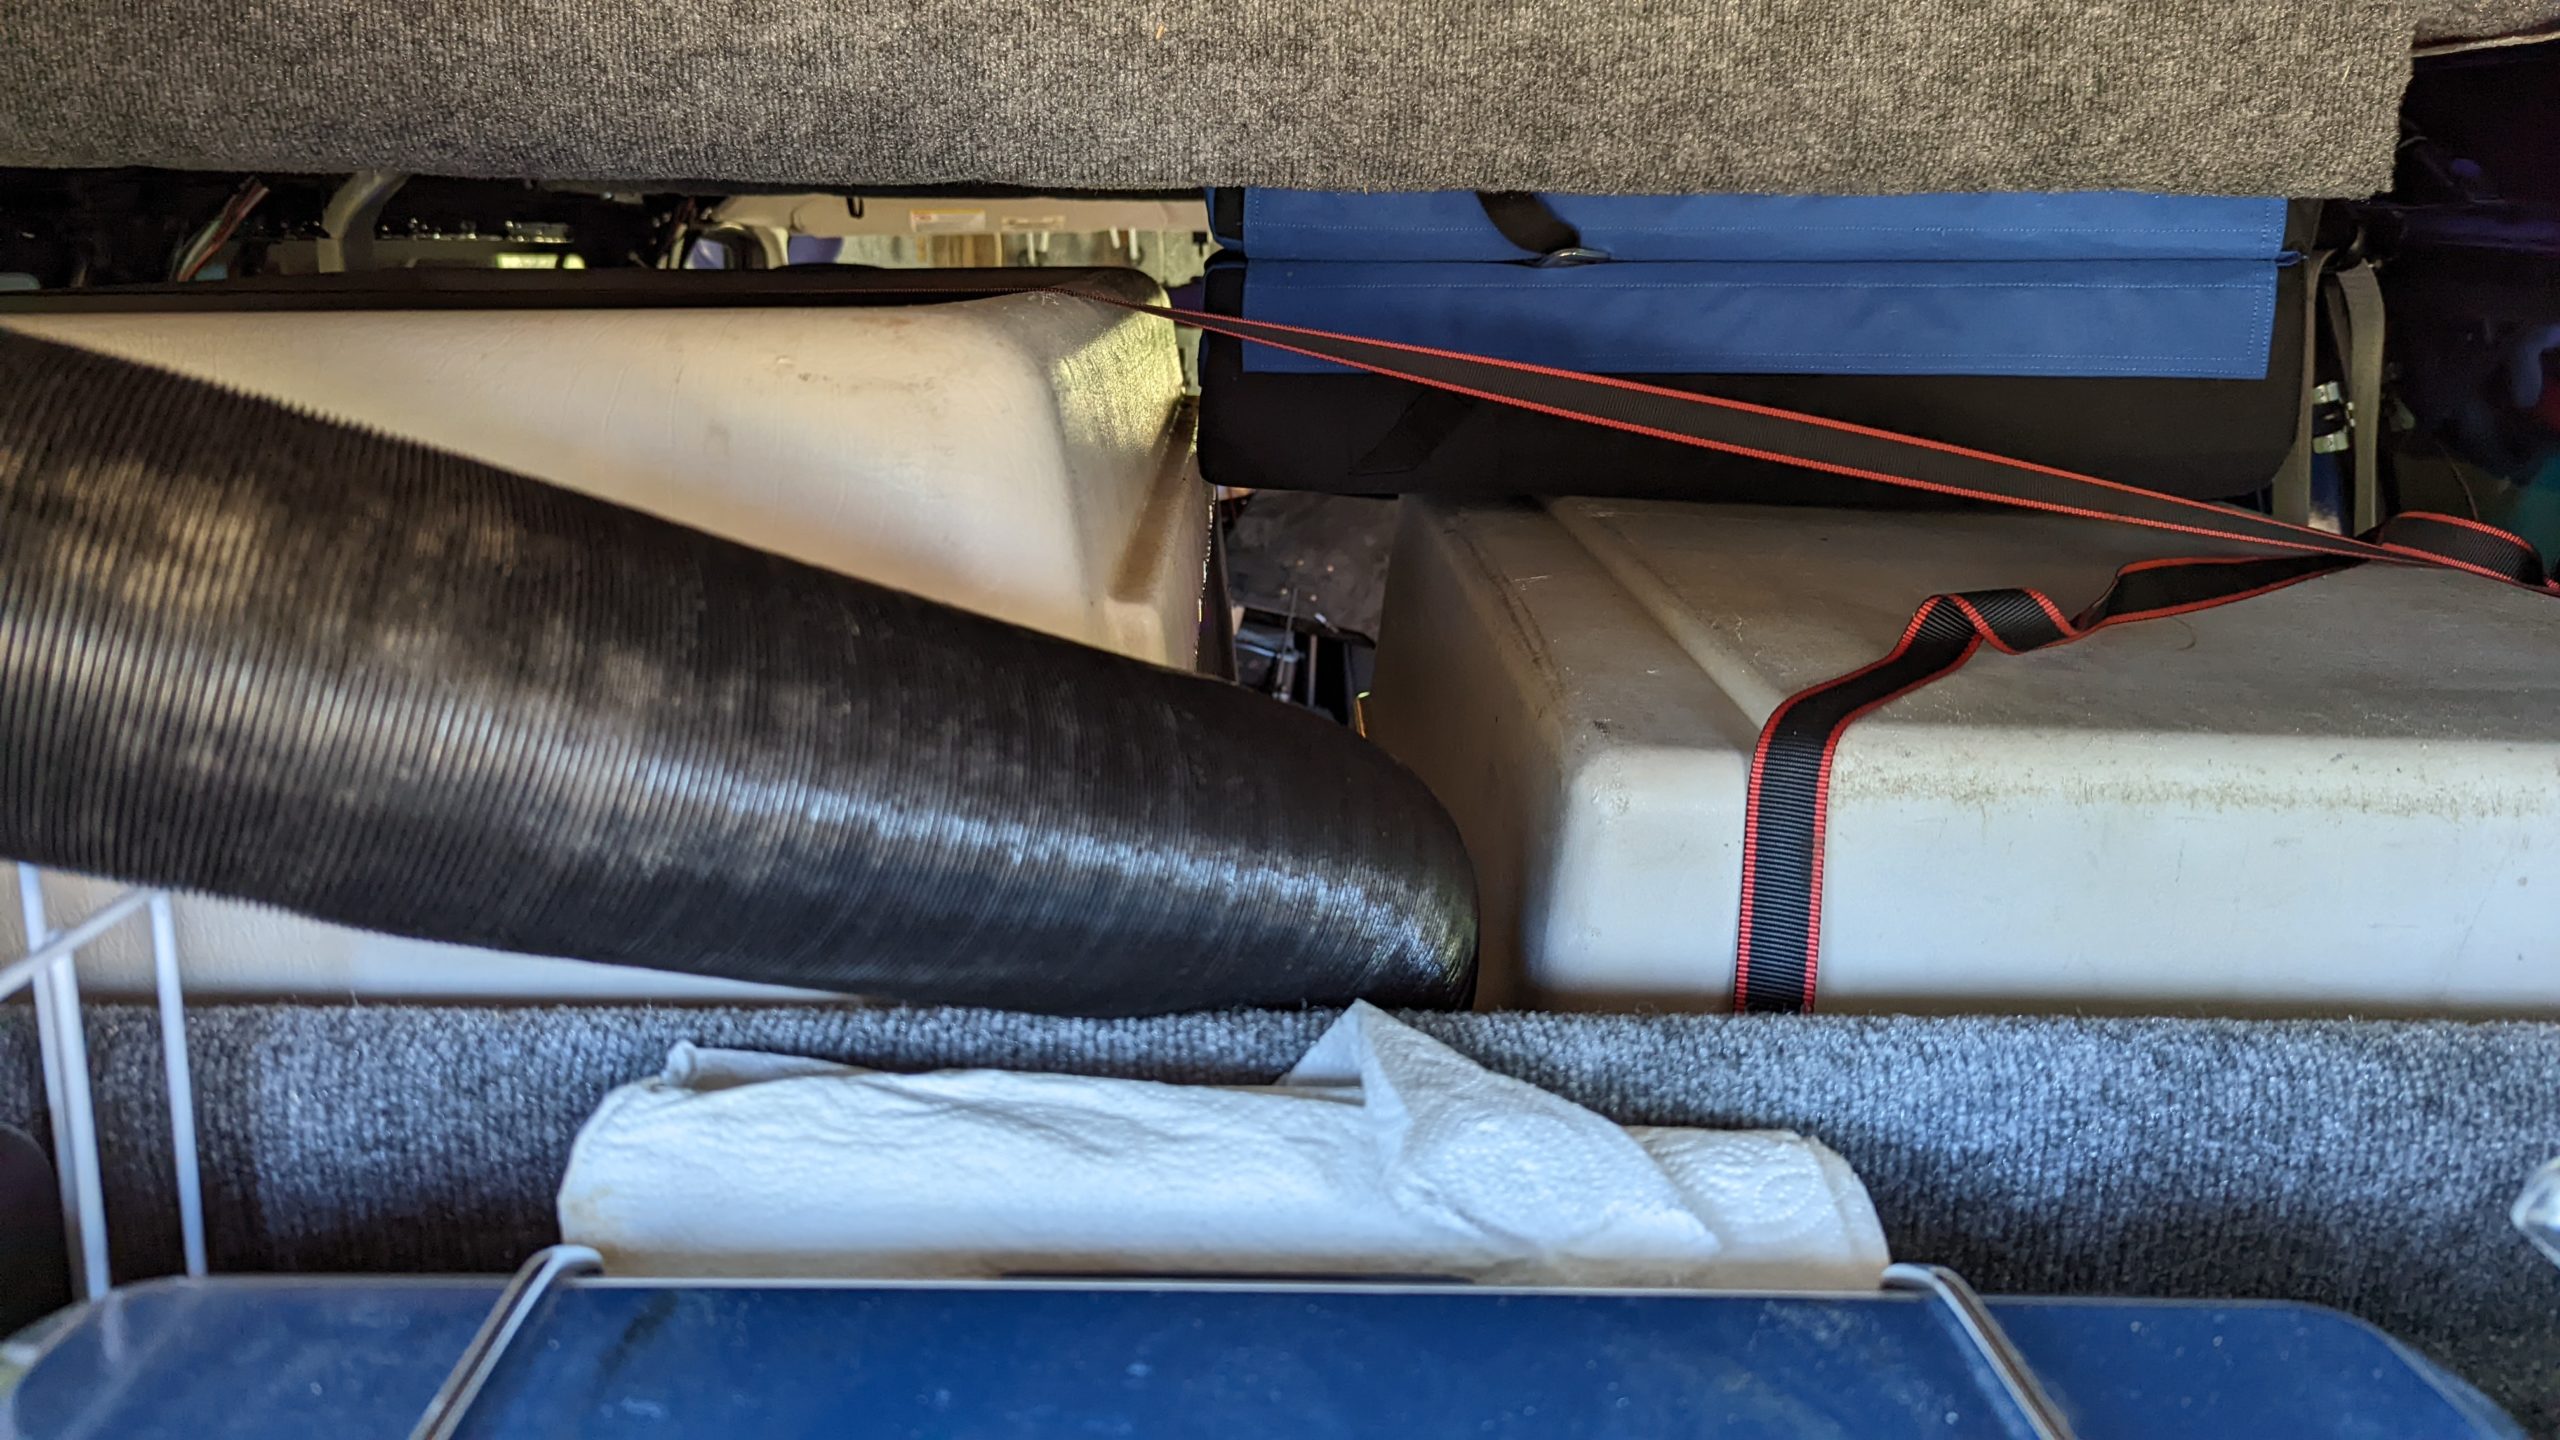
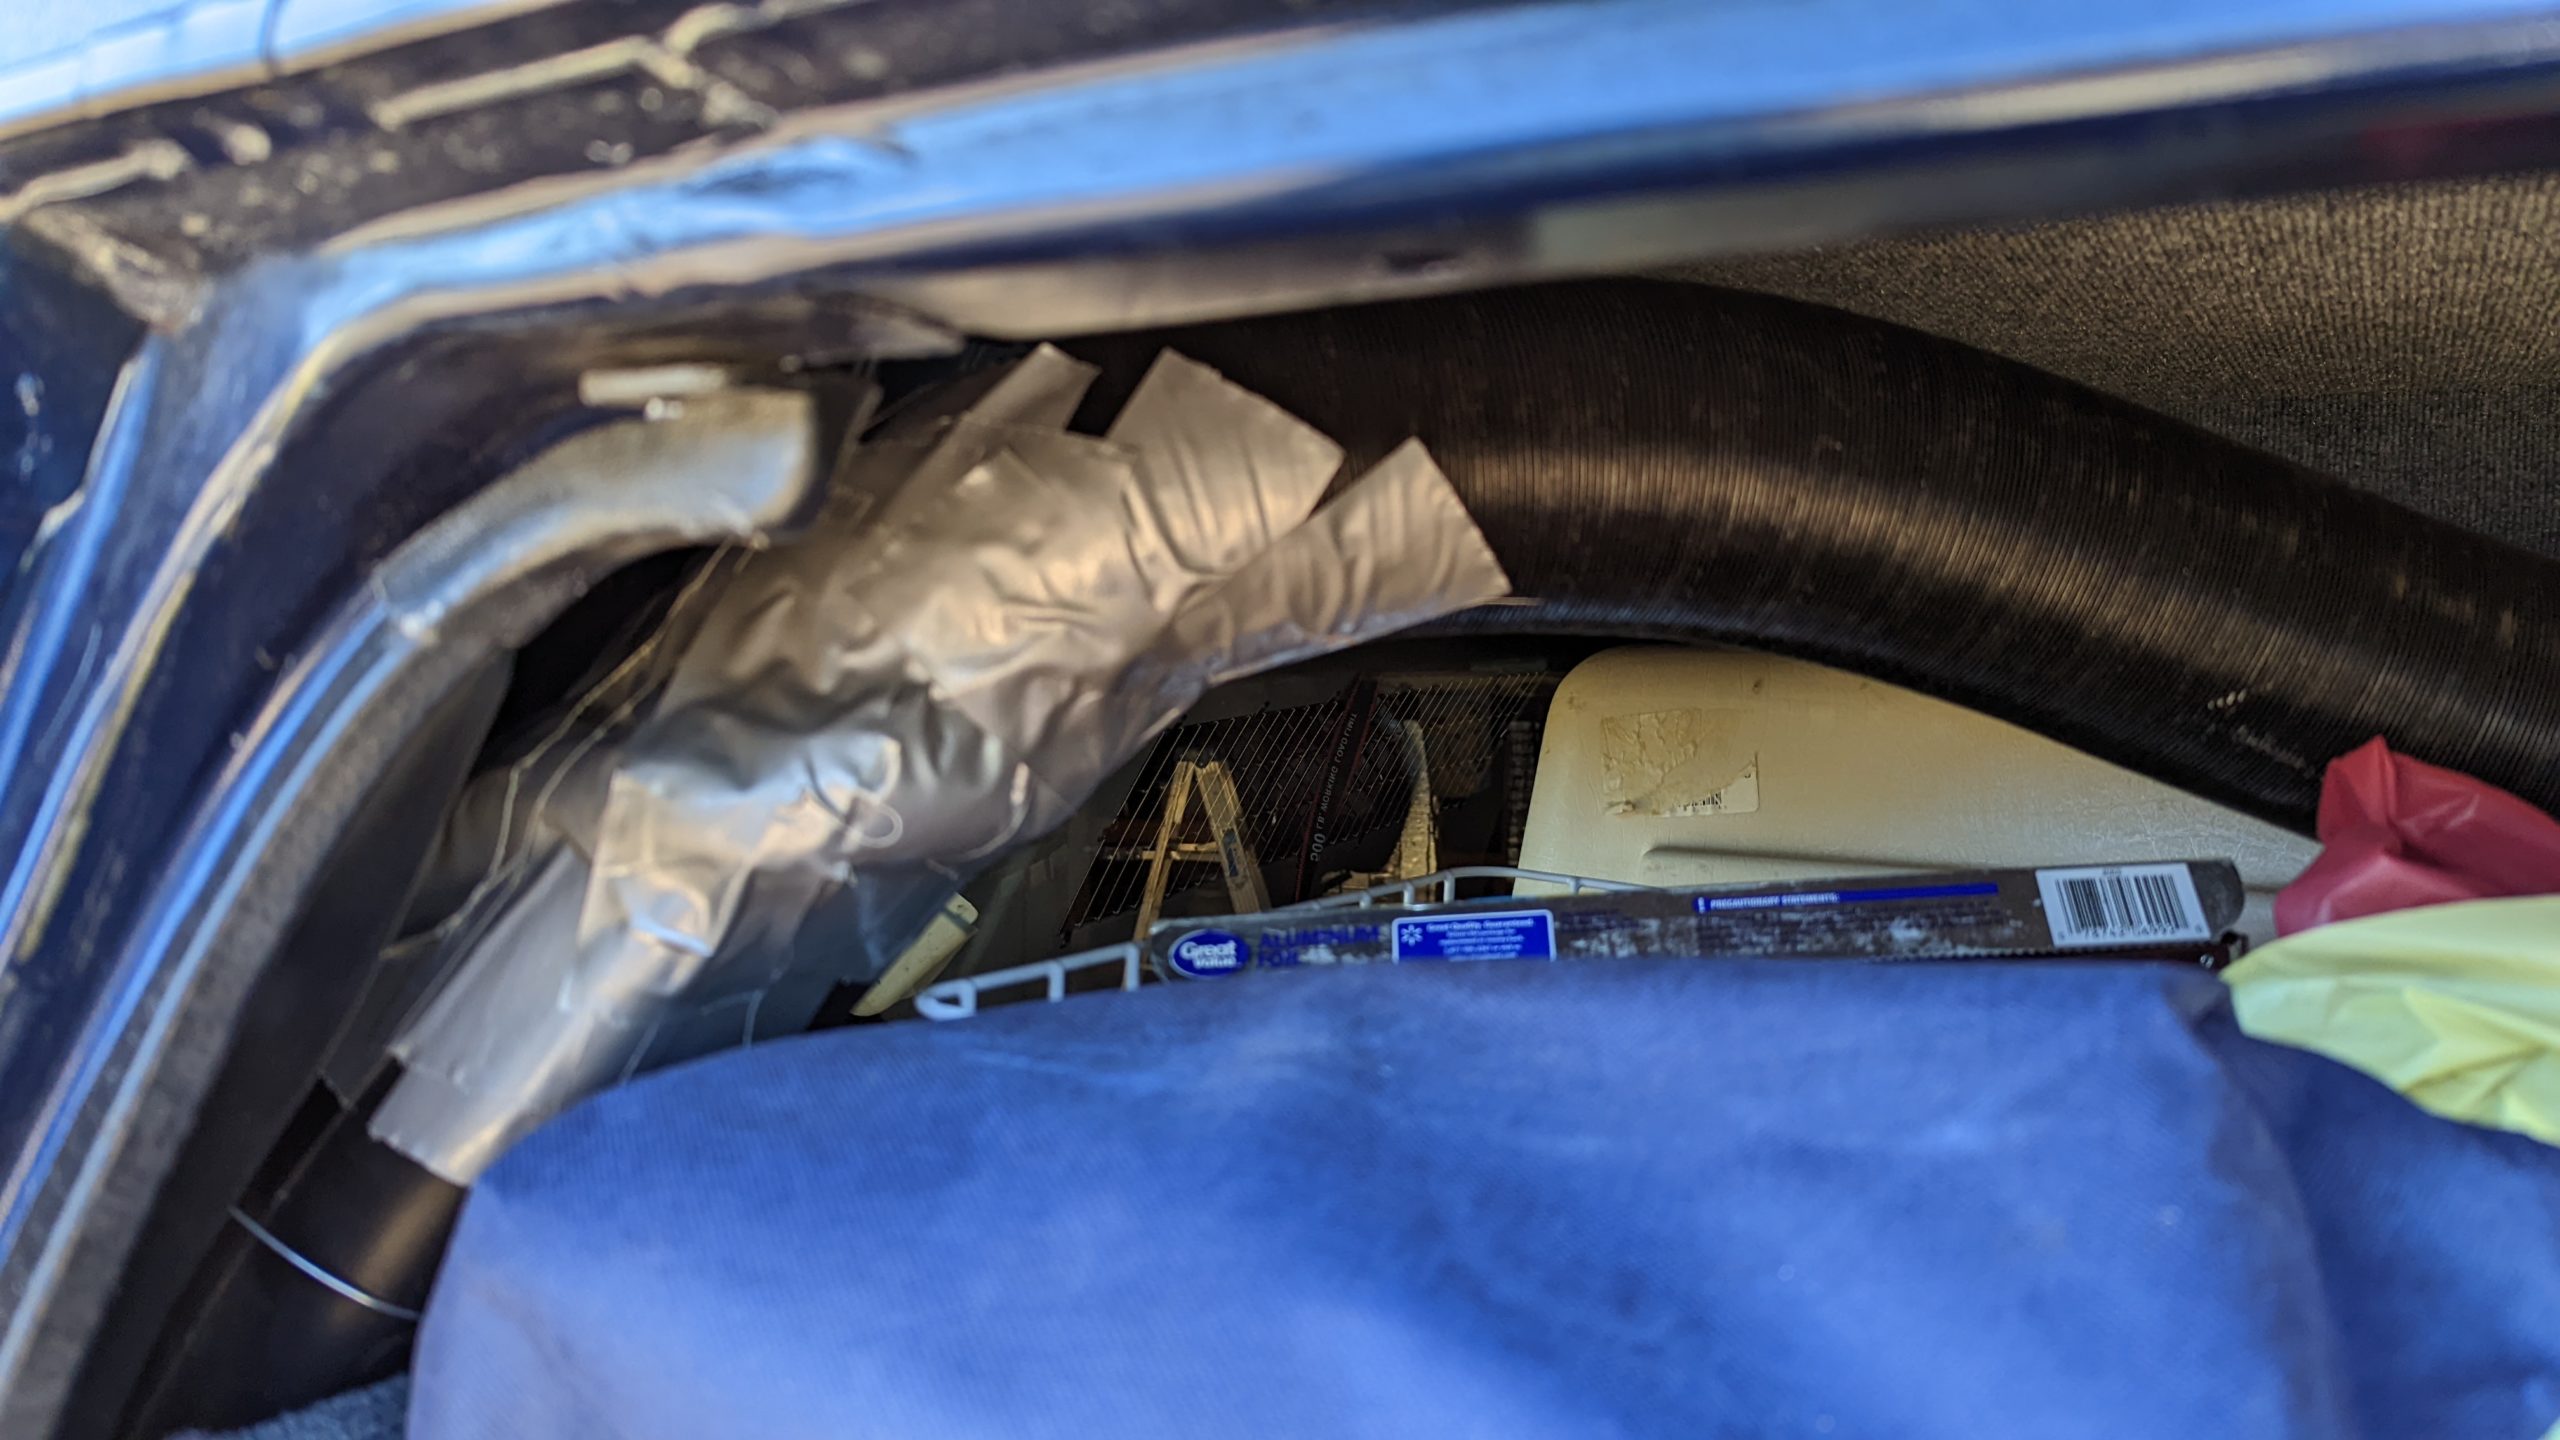
We kept in place the rear heater and air conditioning unit that can be used when the vehicle engine is on. The air conditioner vent is routed via flexible HVAC tubing to supply cool air between both dog crates.
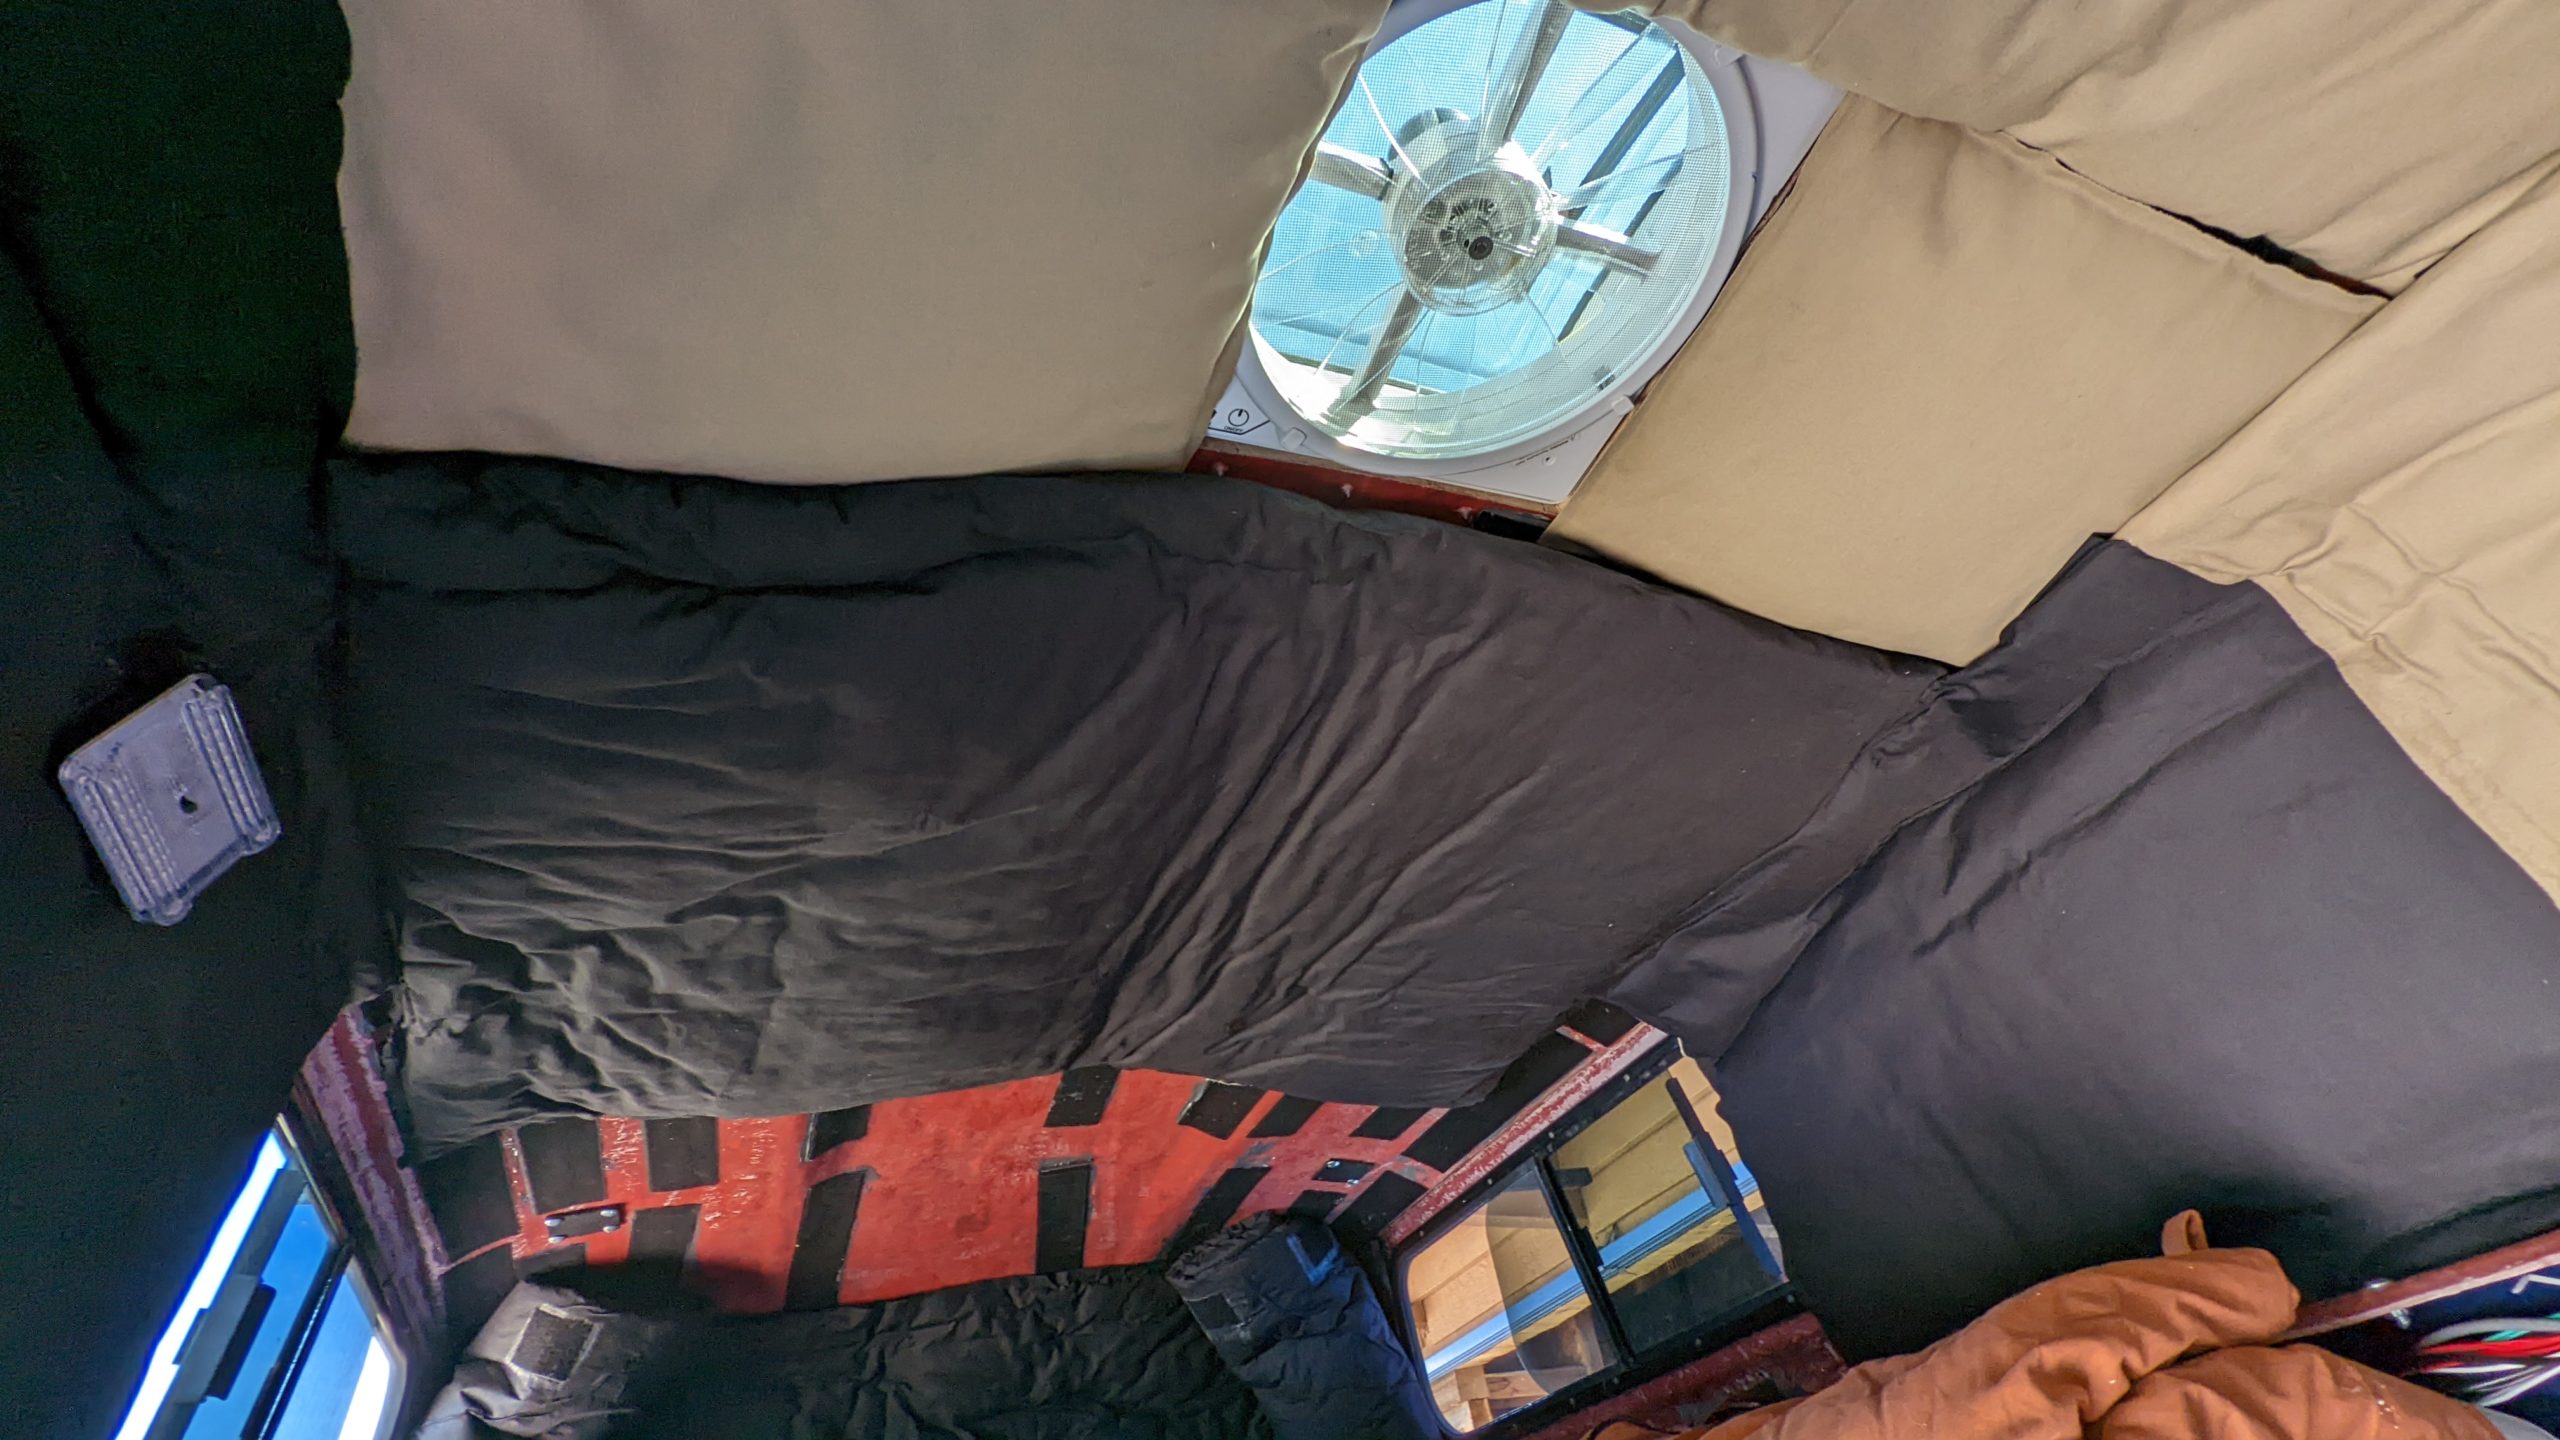
The Maxxfan brand ceiling fan can push air in our out, with variable speed, and an automatic vent that opens and closes when the fan is on or can be left open on its own. It includes a remote device. This fan works great to keep heat from building up on hot days.
Insulation
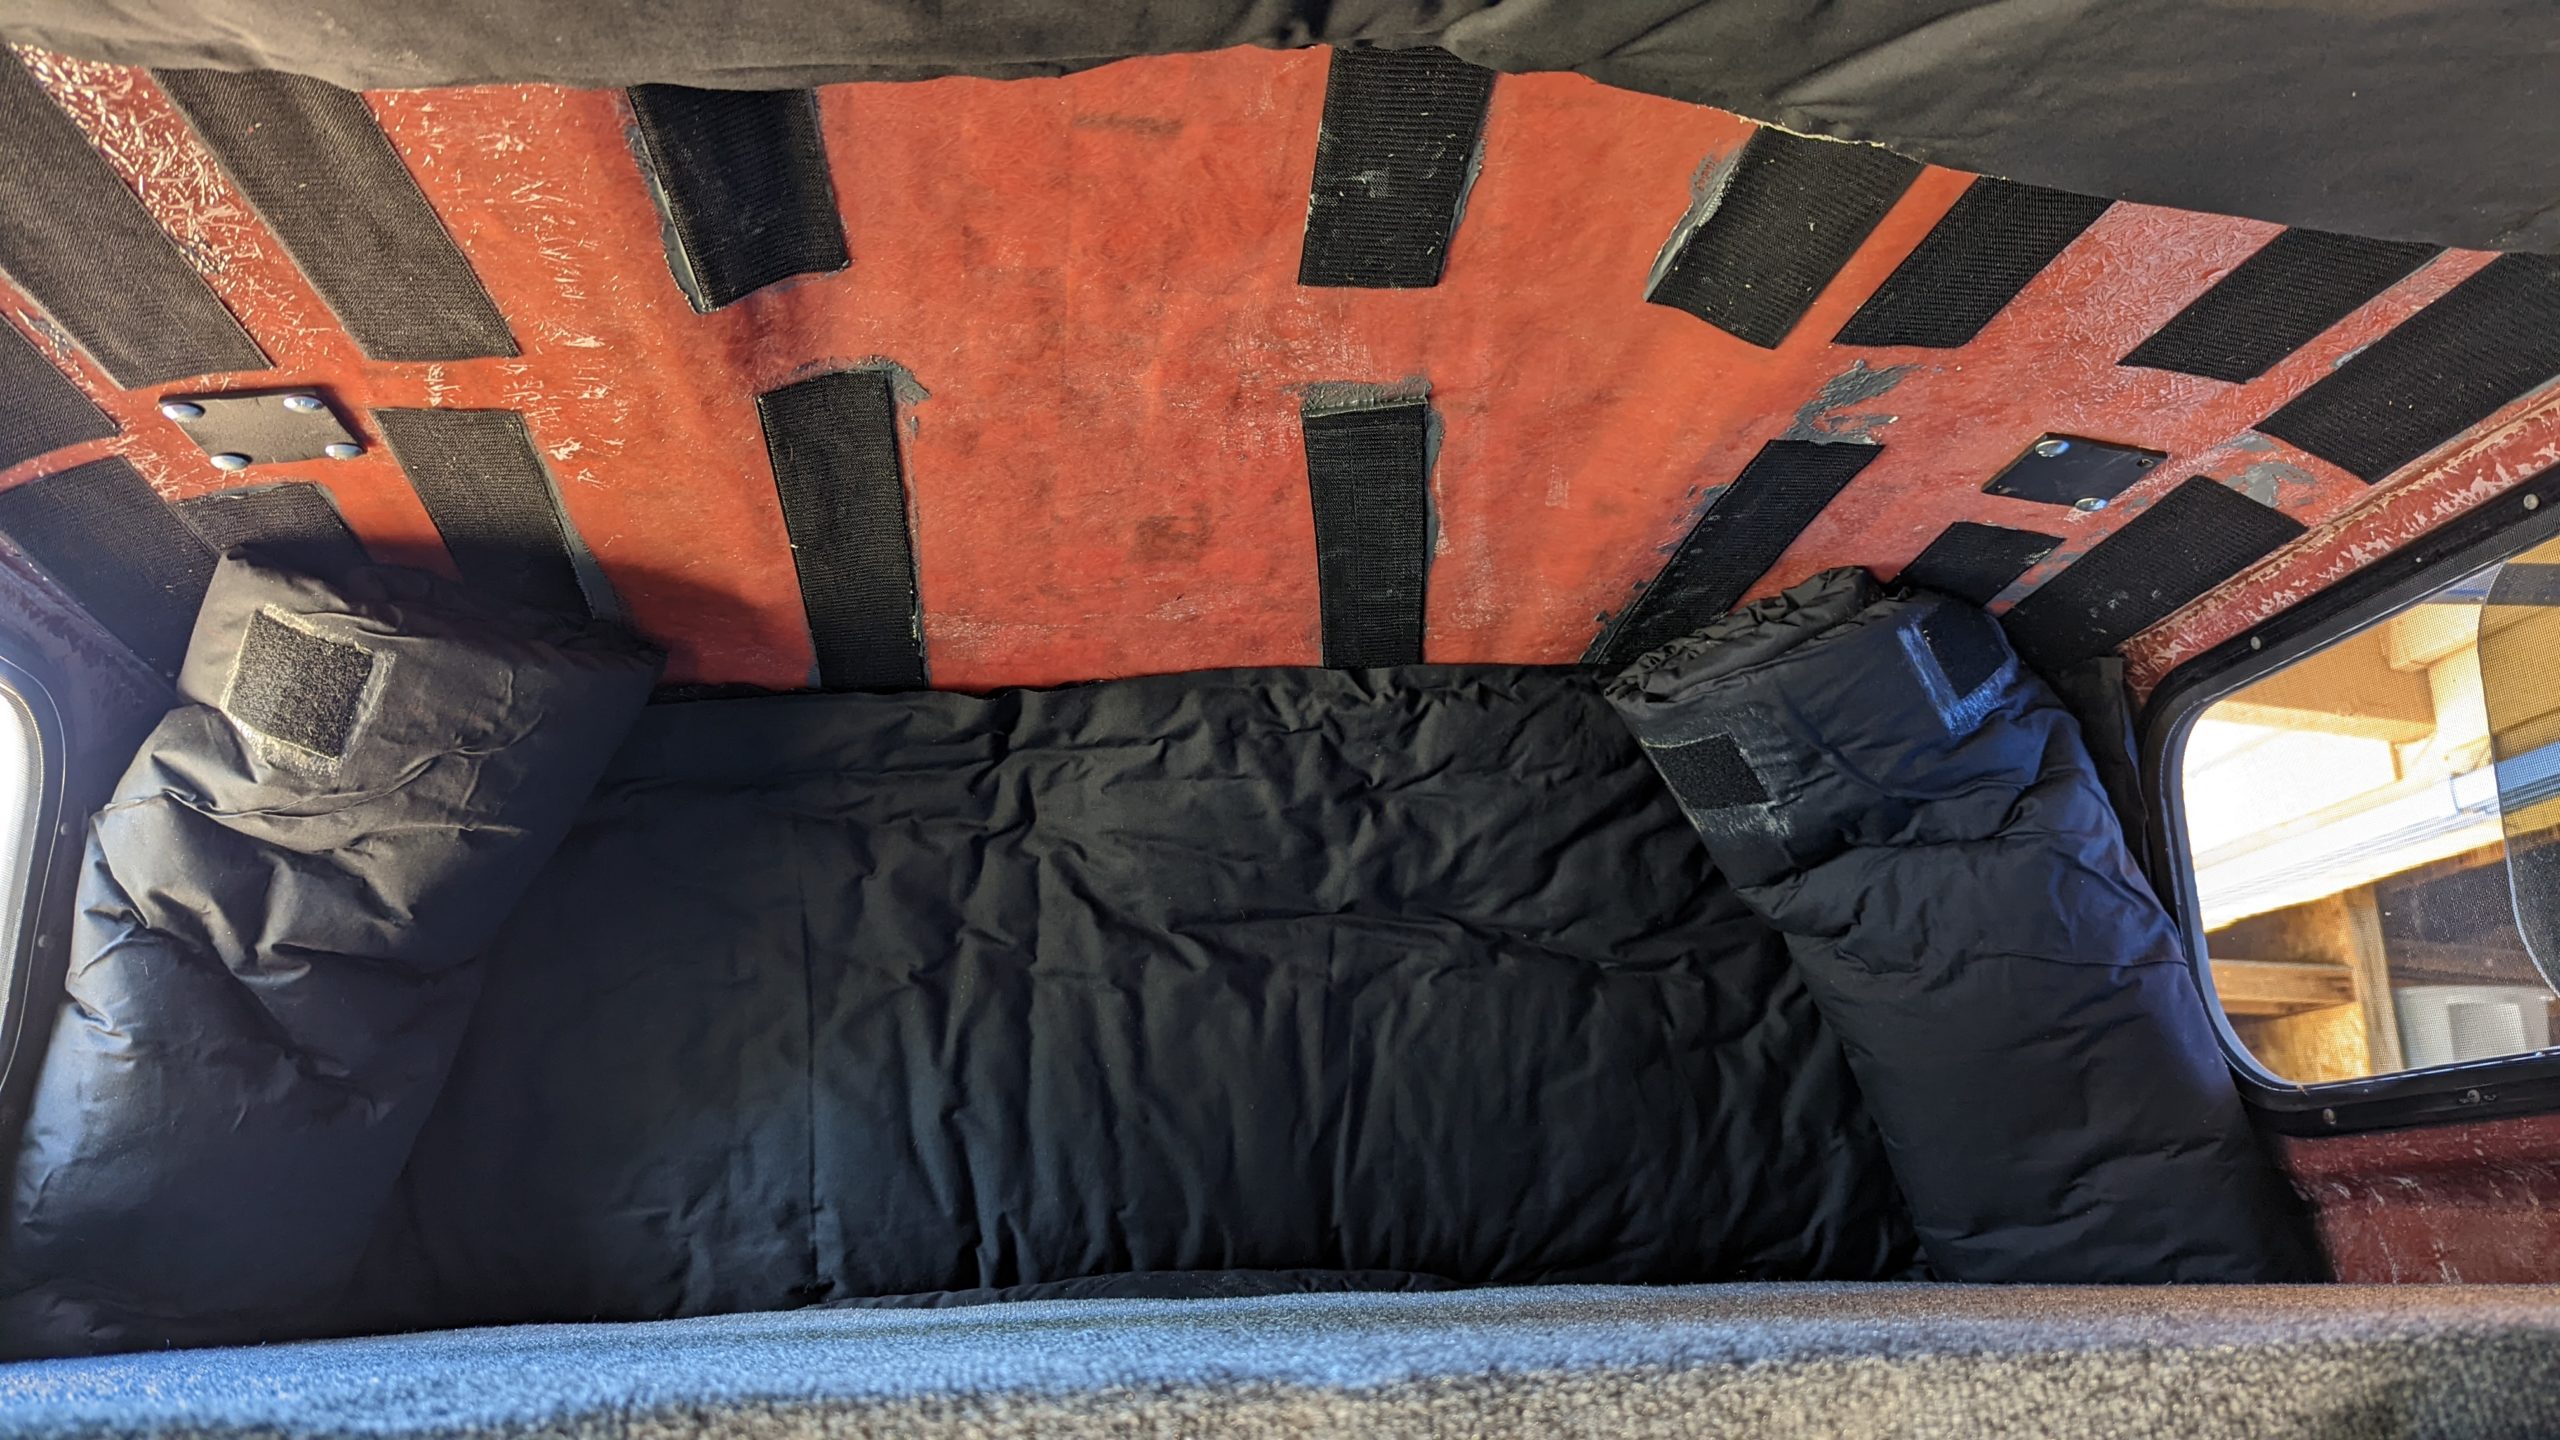
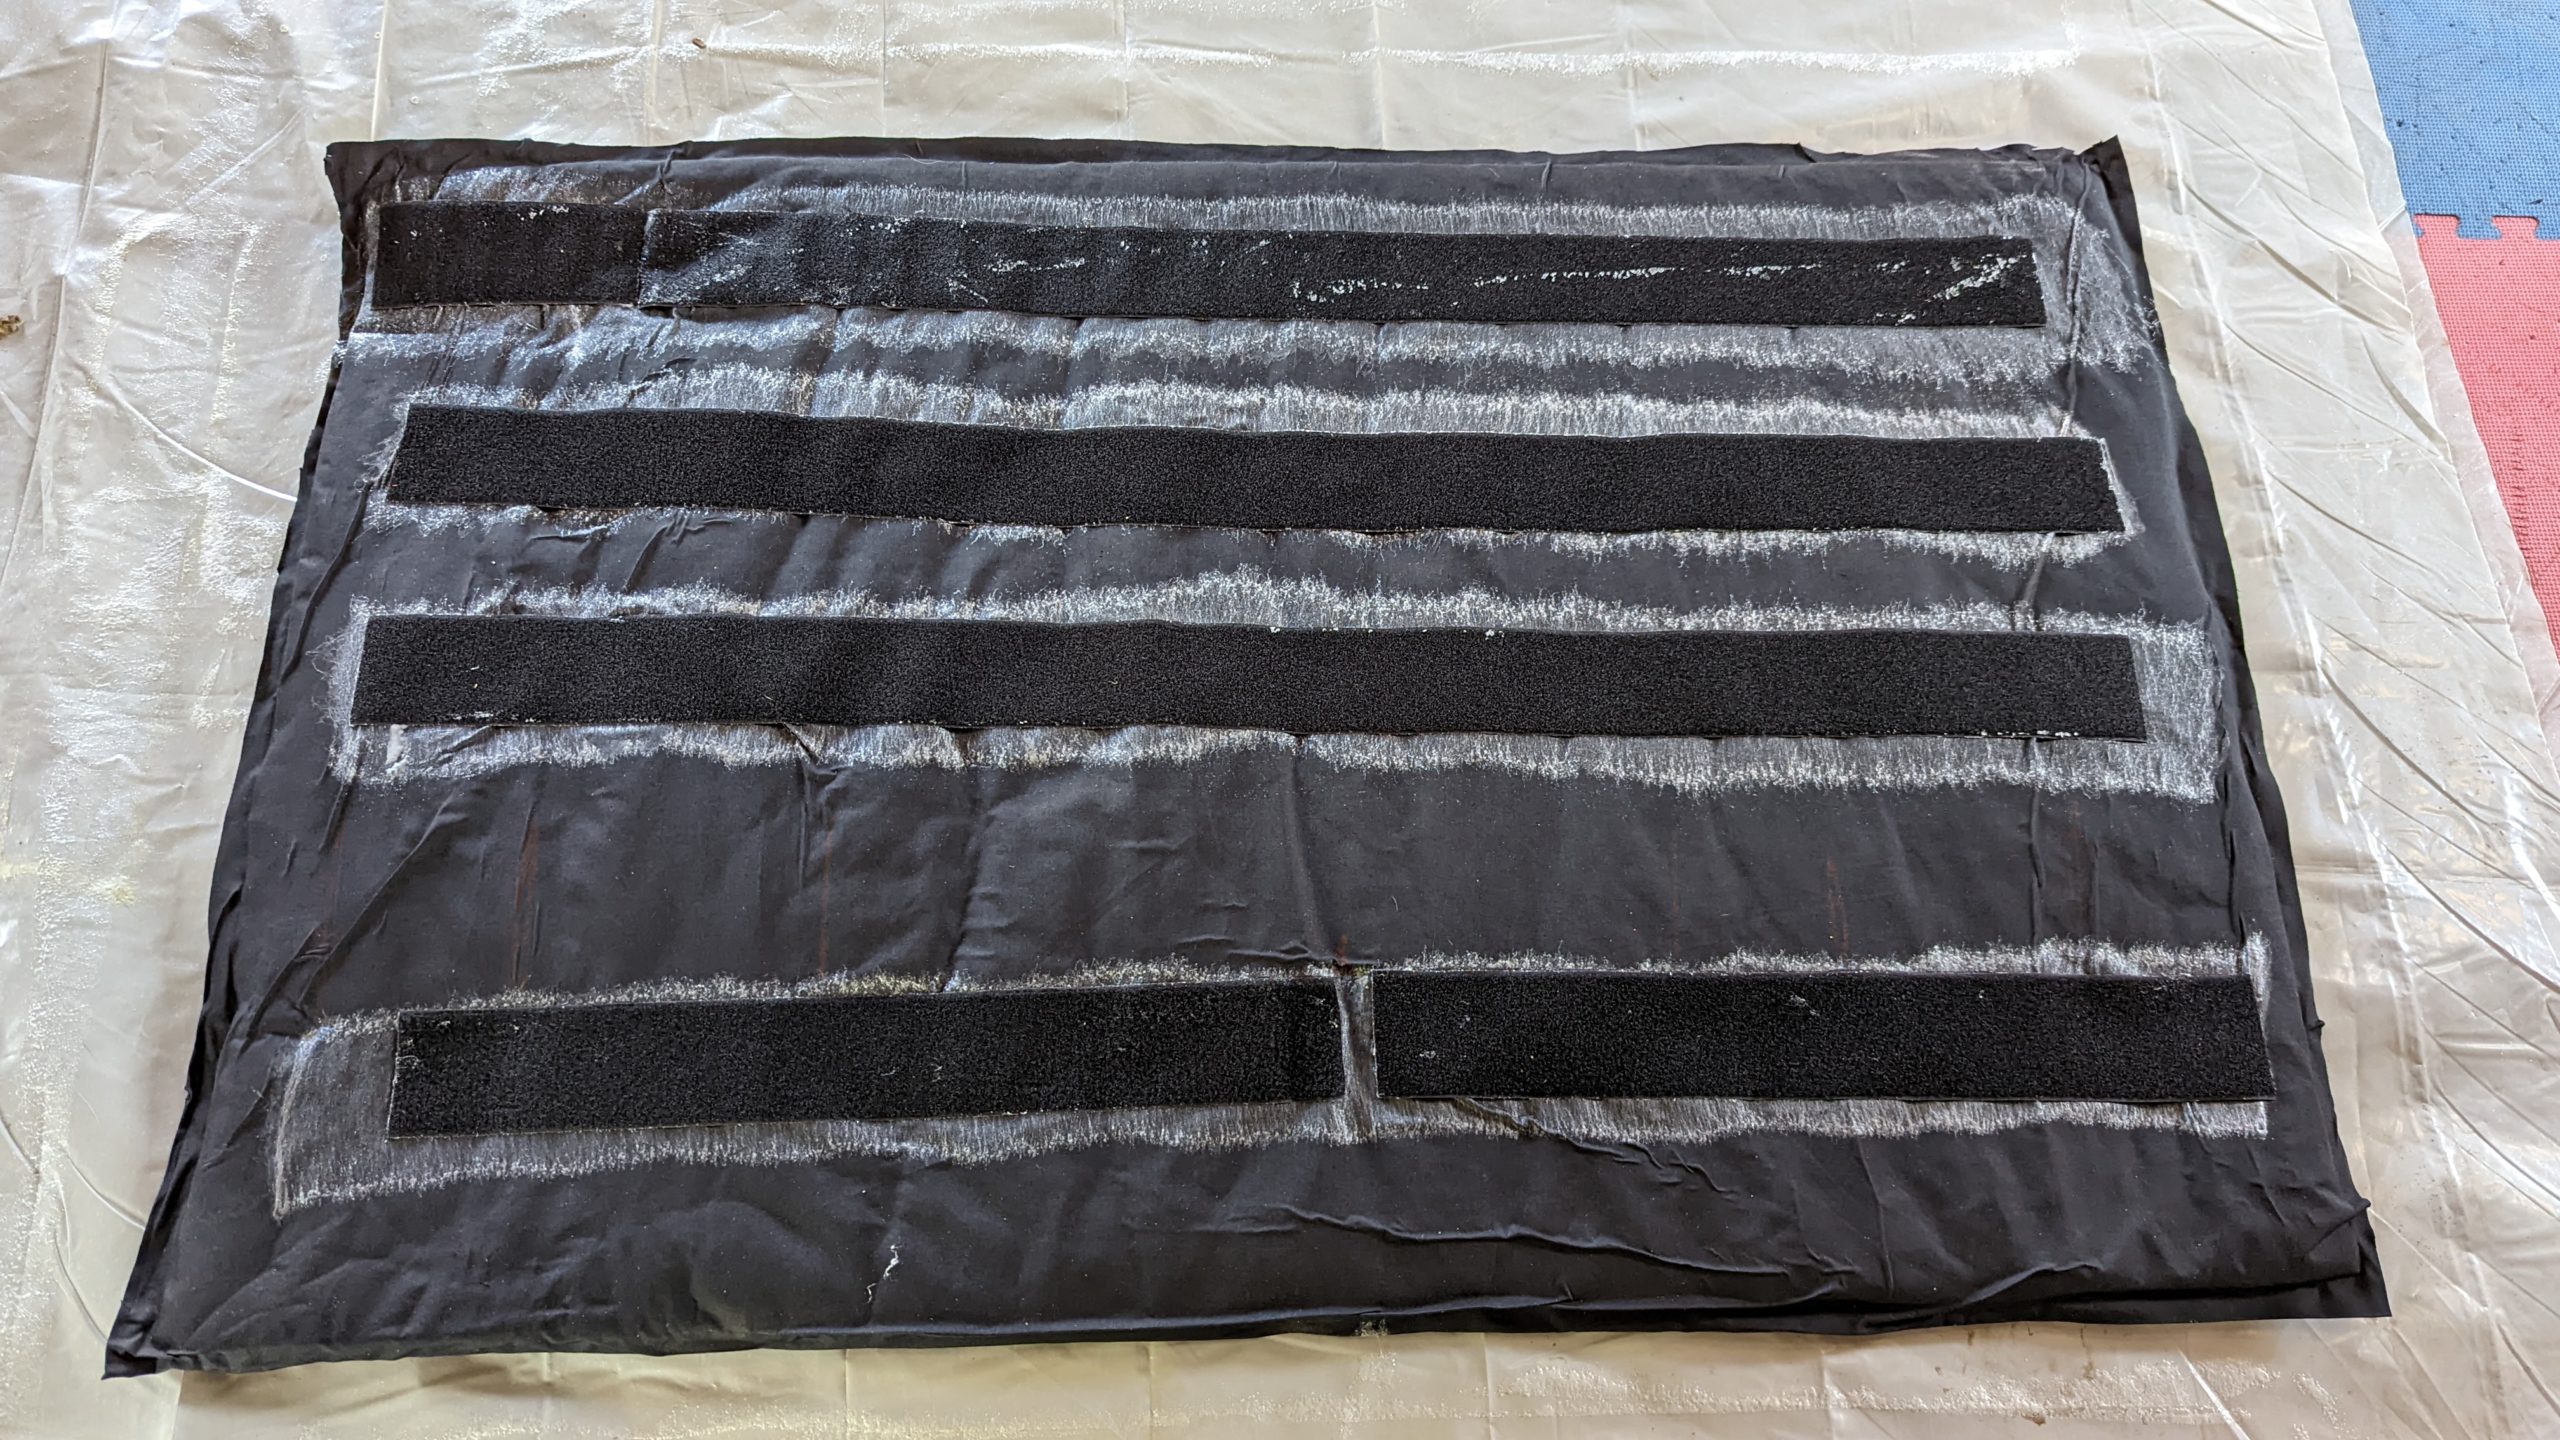
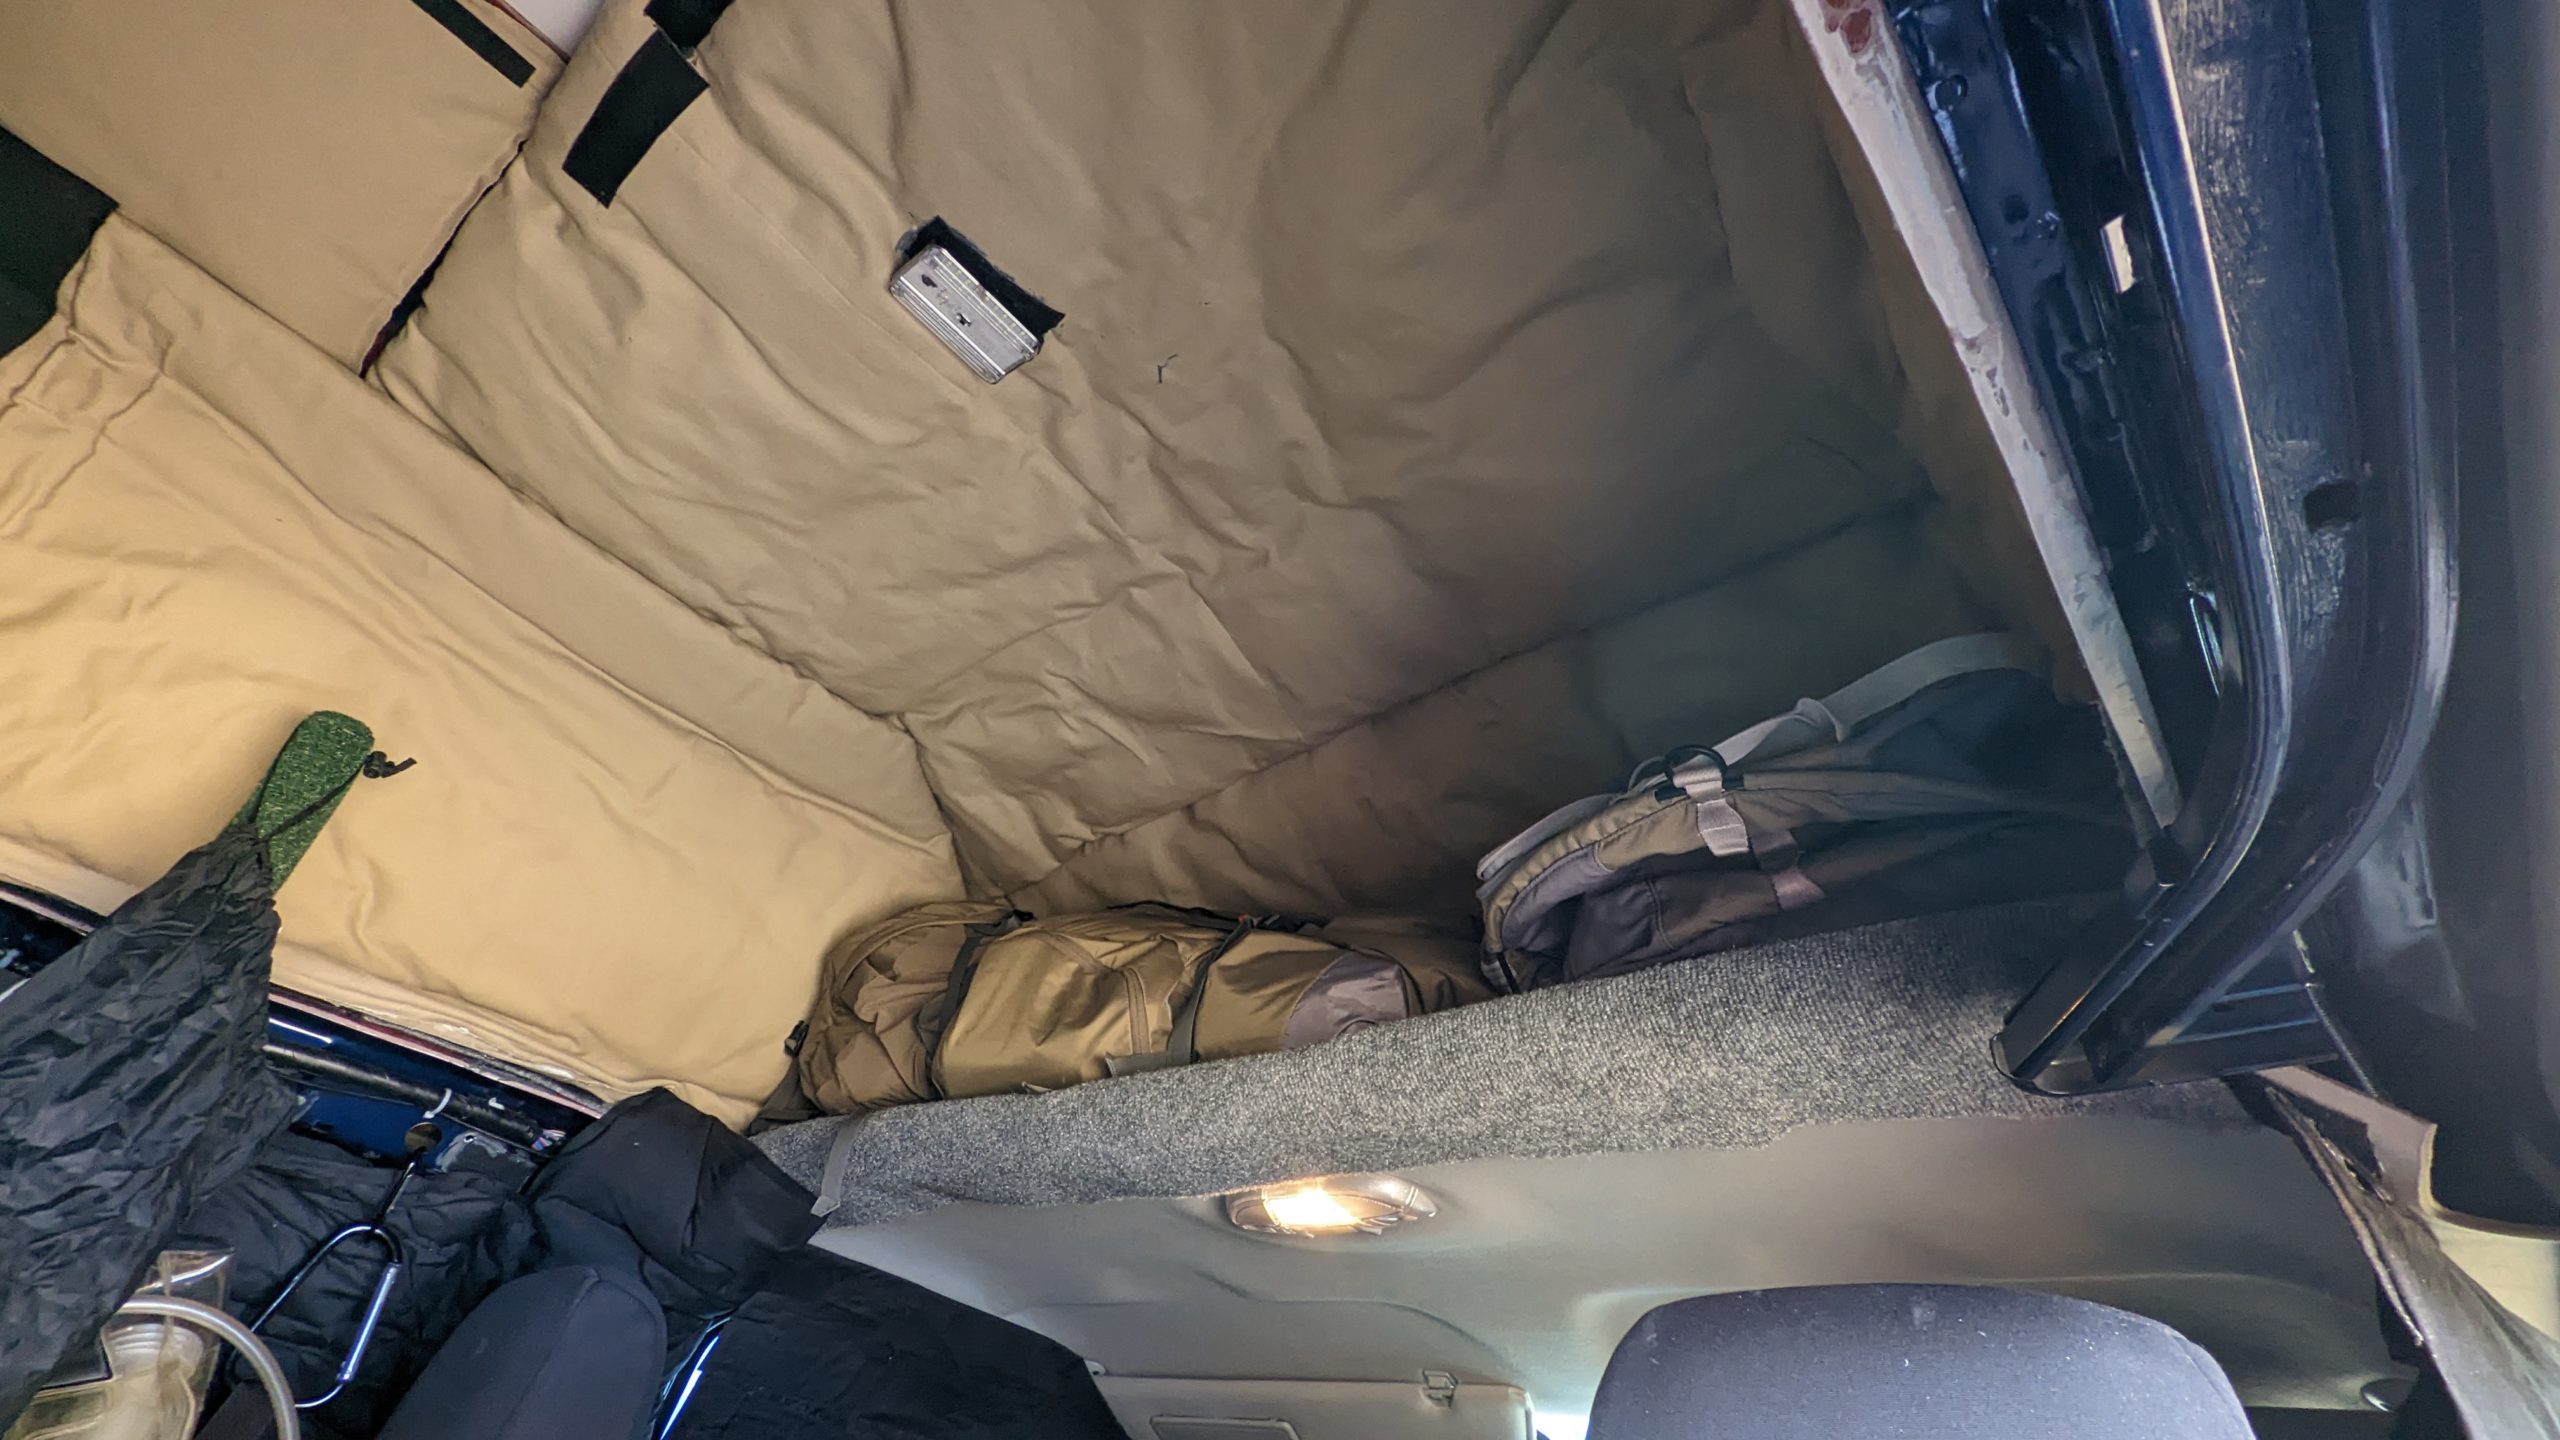
We use thinsulate 1 inch for interior insulation, which is glued on both sides to additional material. Velcro pieces are then glued to one side of the insulation panels and then put in place in the vehicle attached to the velcro pieces already glued to the walls. Rather than affixing the insulation via spray glue to the sidewalls of the van, the velcro allows us to pull back the insulation if we ever want to add additional electrical or do other internal modifications. We started with left-over heavy upholstery material we had from a previous house project, which is a lighter color, then switched to black standard cotton/polyester material for the rest of the job.
Electrical
Engine and Battery Warmers
We had an engine block warmer installed and a battery warmer which is a silicone pad that is placed under the batter. Both are 120 volt plugin.
Winch Front and Rear
Added to the front and rear bumpers are electrical conduit to power a winch that is used as needed via the trailer receiver hitch either on the front or the rear bumpers. The winch is stored inside the vehicle.
Additional Batteries
Two 12-volt standard auto AGM batteries run all the electrical add-ons (heater, lighting, other electronics). Both are stored inside in the rear of the vehicle and accessible. Storing the batteries inside keeps them protected from the outside cold that would reduce battery effectiveness. We went with AGM batteries rather than a lithium because while the fire danger on a lithium battery is low, there is still increased risk. The drawback to using auto batteries is that they cannot be discharged below 50% otherwise they may incur permanent damage, and as they discharge, their voltage goes down. The heater and the refrigerator require around 10.5 volts minimum to run, and we have noticed that when the auto battery’s charge gets down into the 70% range, their voltage drops below levels needed to run these appliances. A lithium, on the other hand, can be discharged to 0 without damage and the voltage holds throughout the discharge. We just have to manage the use of appliances and be careful that they do not discharge the batteries too low.
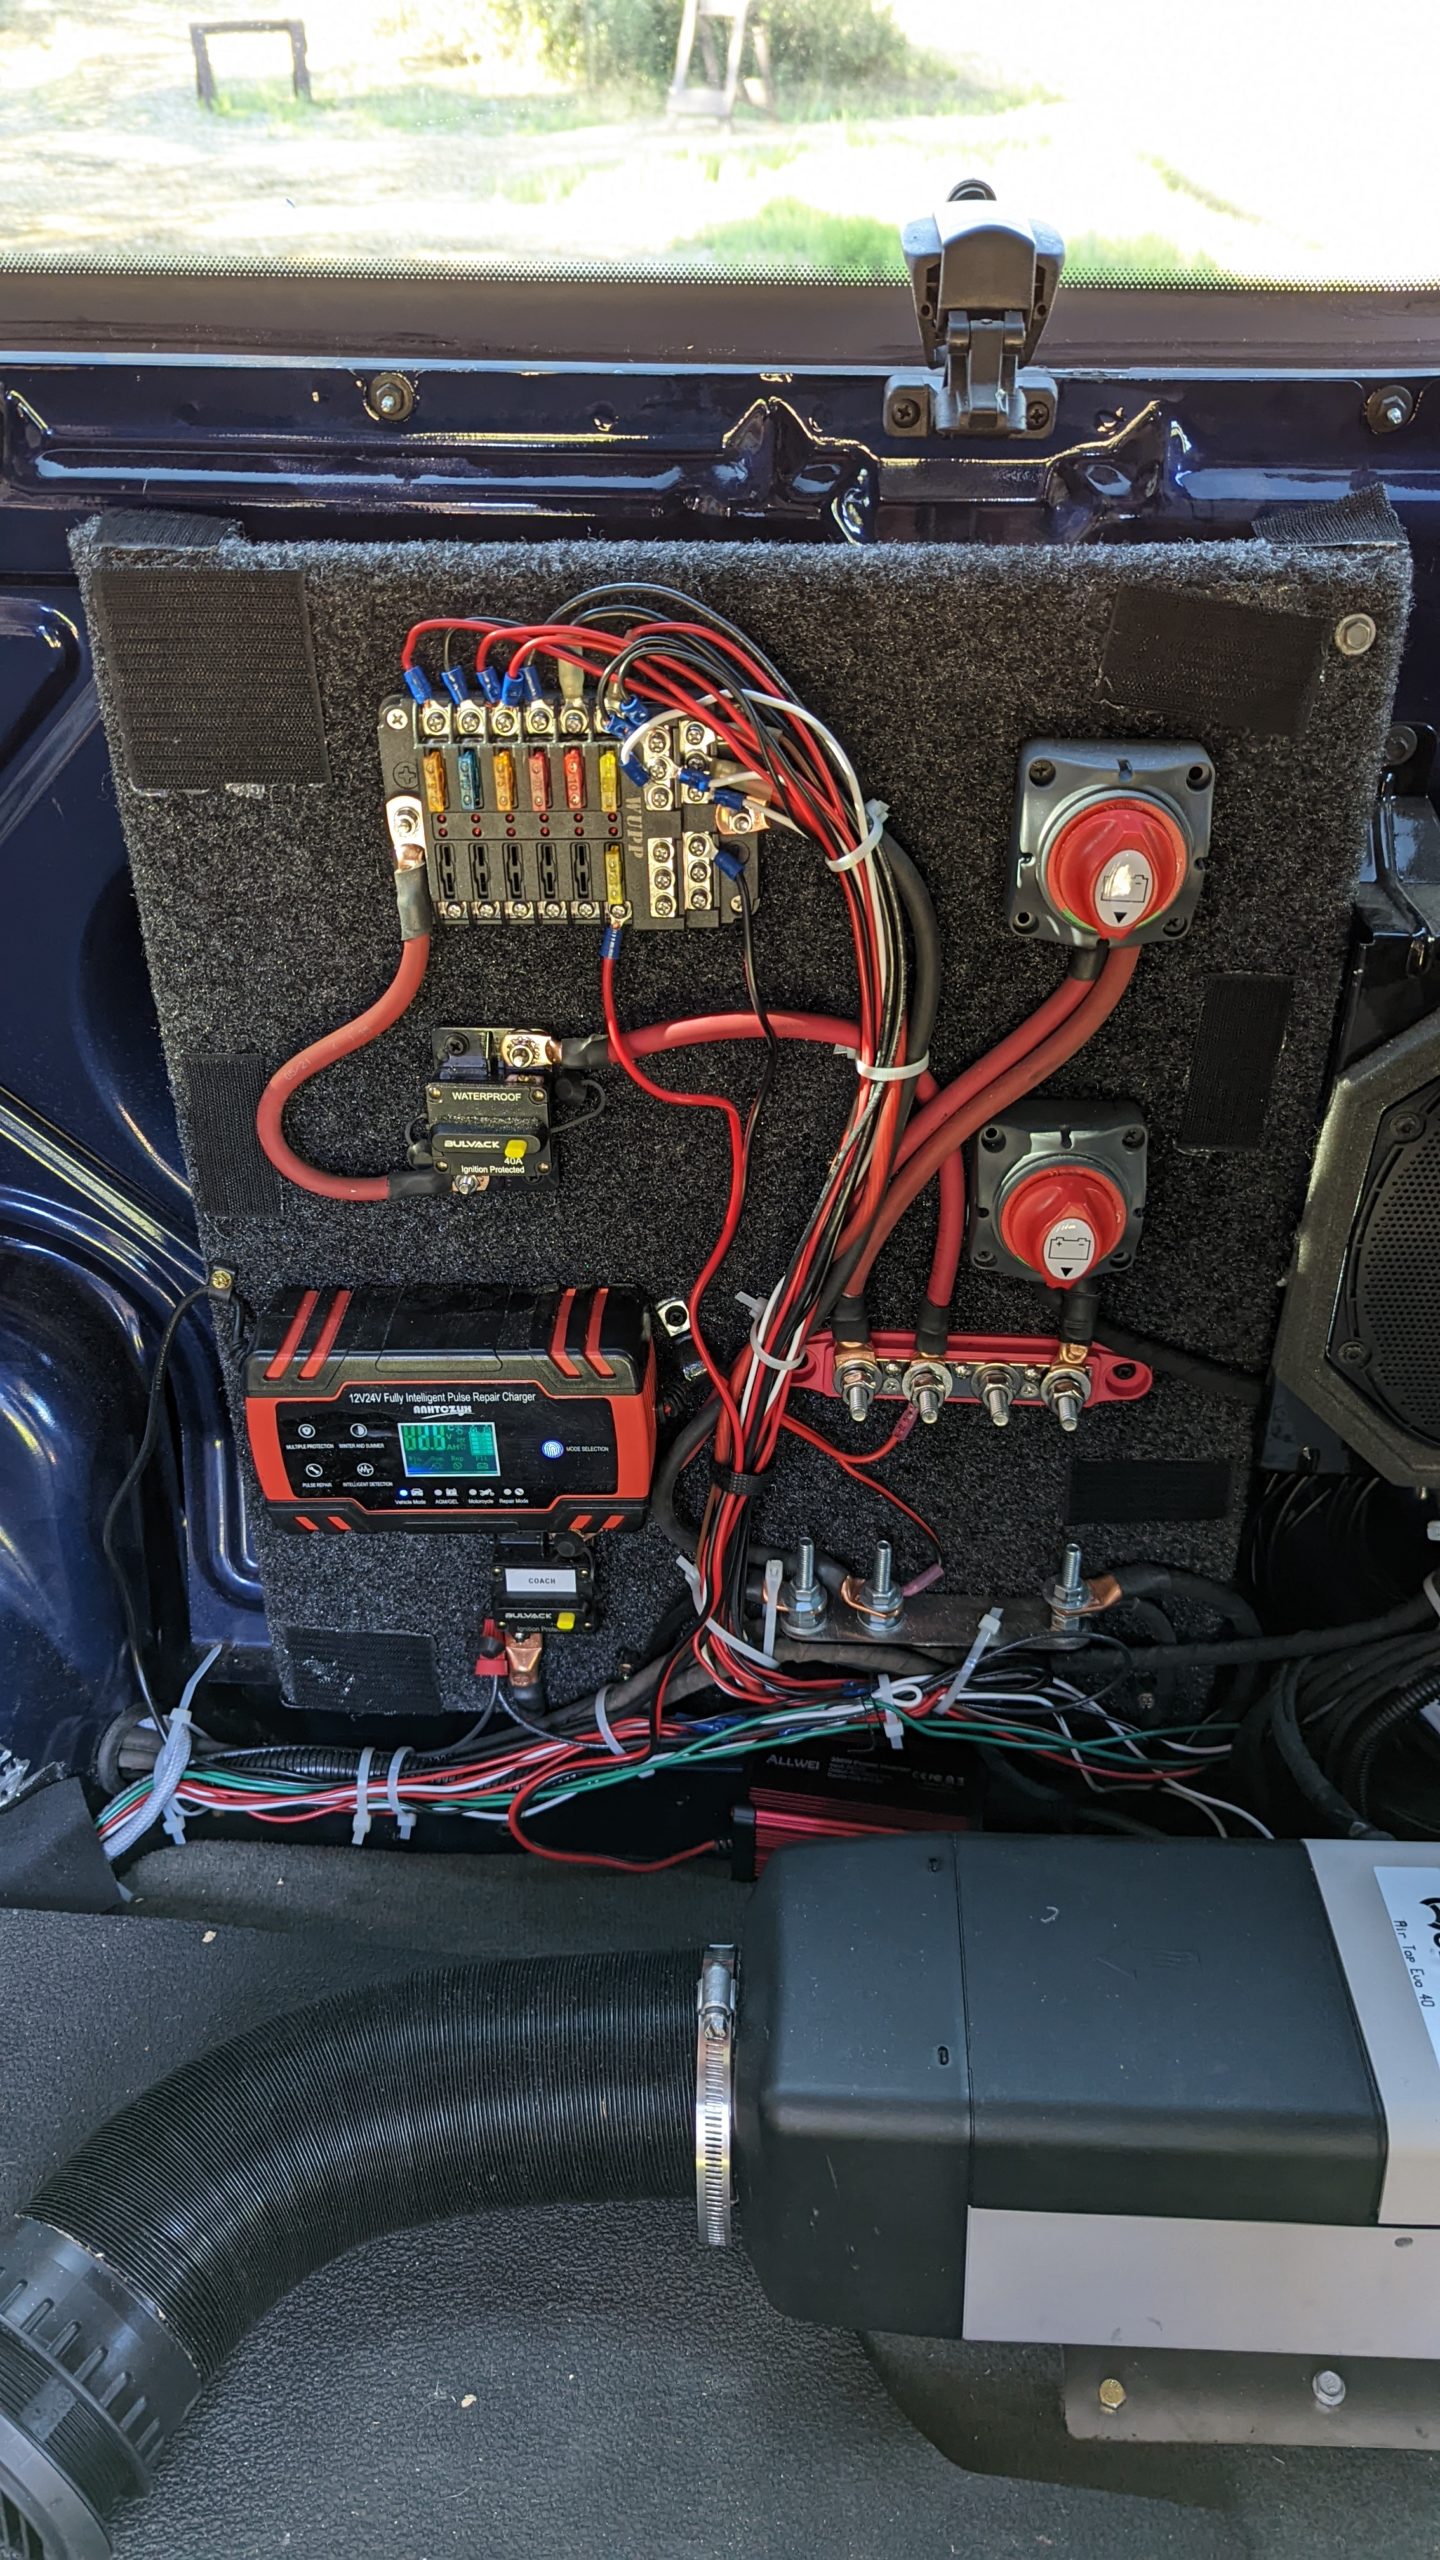
Internal Power Panel
There is a power panel behind the driver’s seat along the wall where all the internal power connections are centralized and mounted.
There are two main switches, one is the master power on/off for the internal and the other is a master power on/off between the engine battery and the secondary battery.
When powered on, the second switch allows for the secondary battery to charge via the alternator, but can be switched off so as not to drain the engine battery when internal electrical appliances are in use.
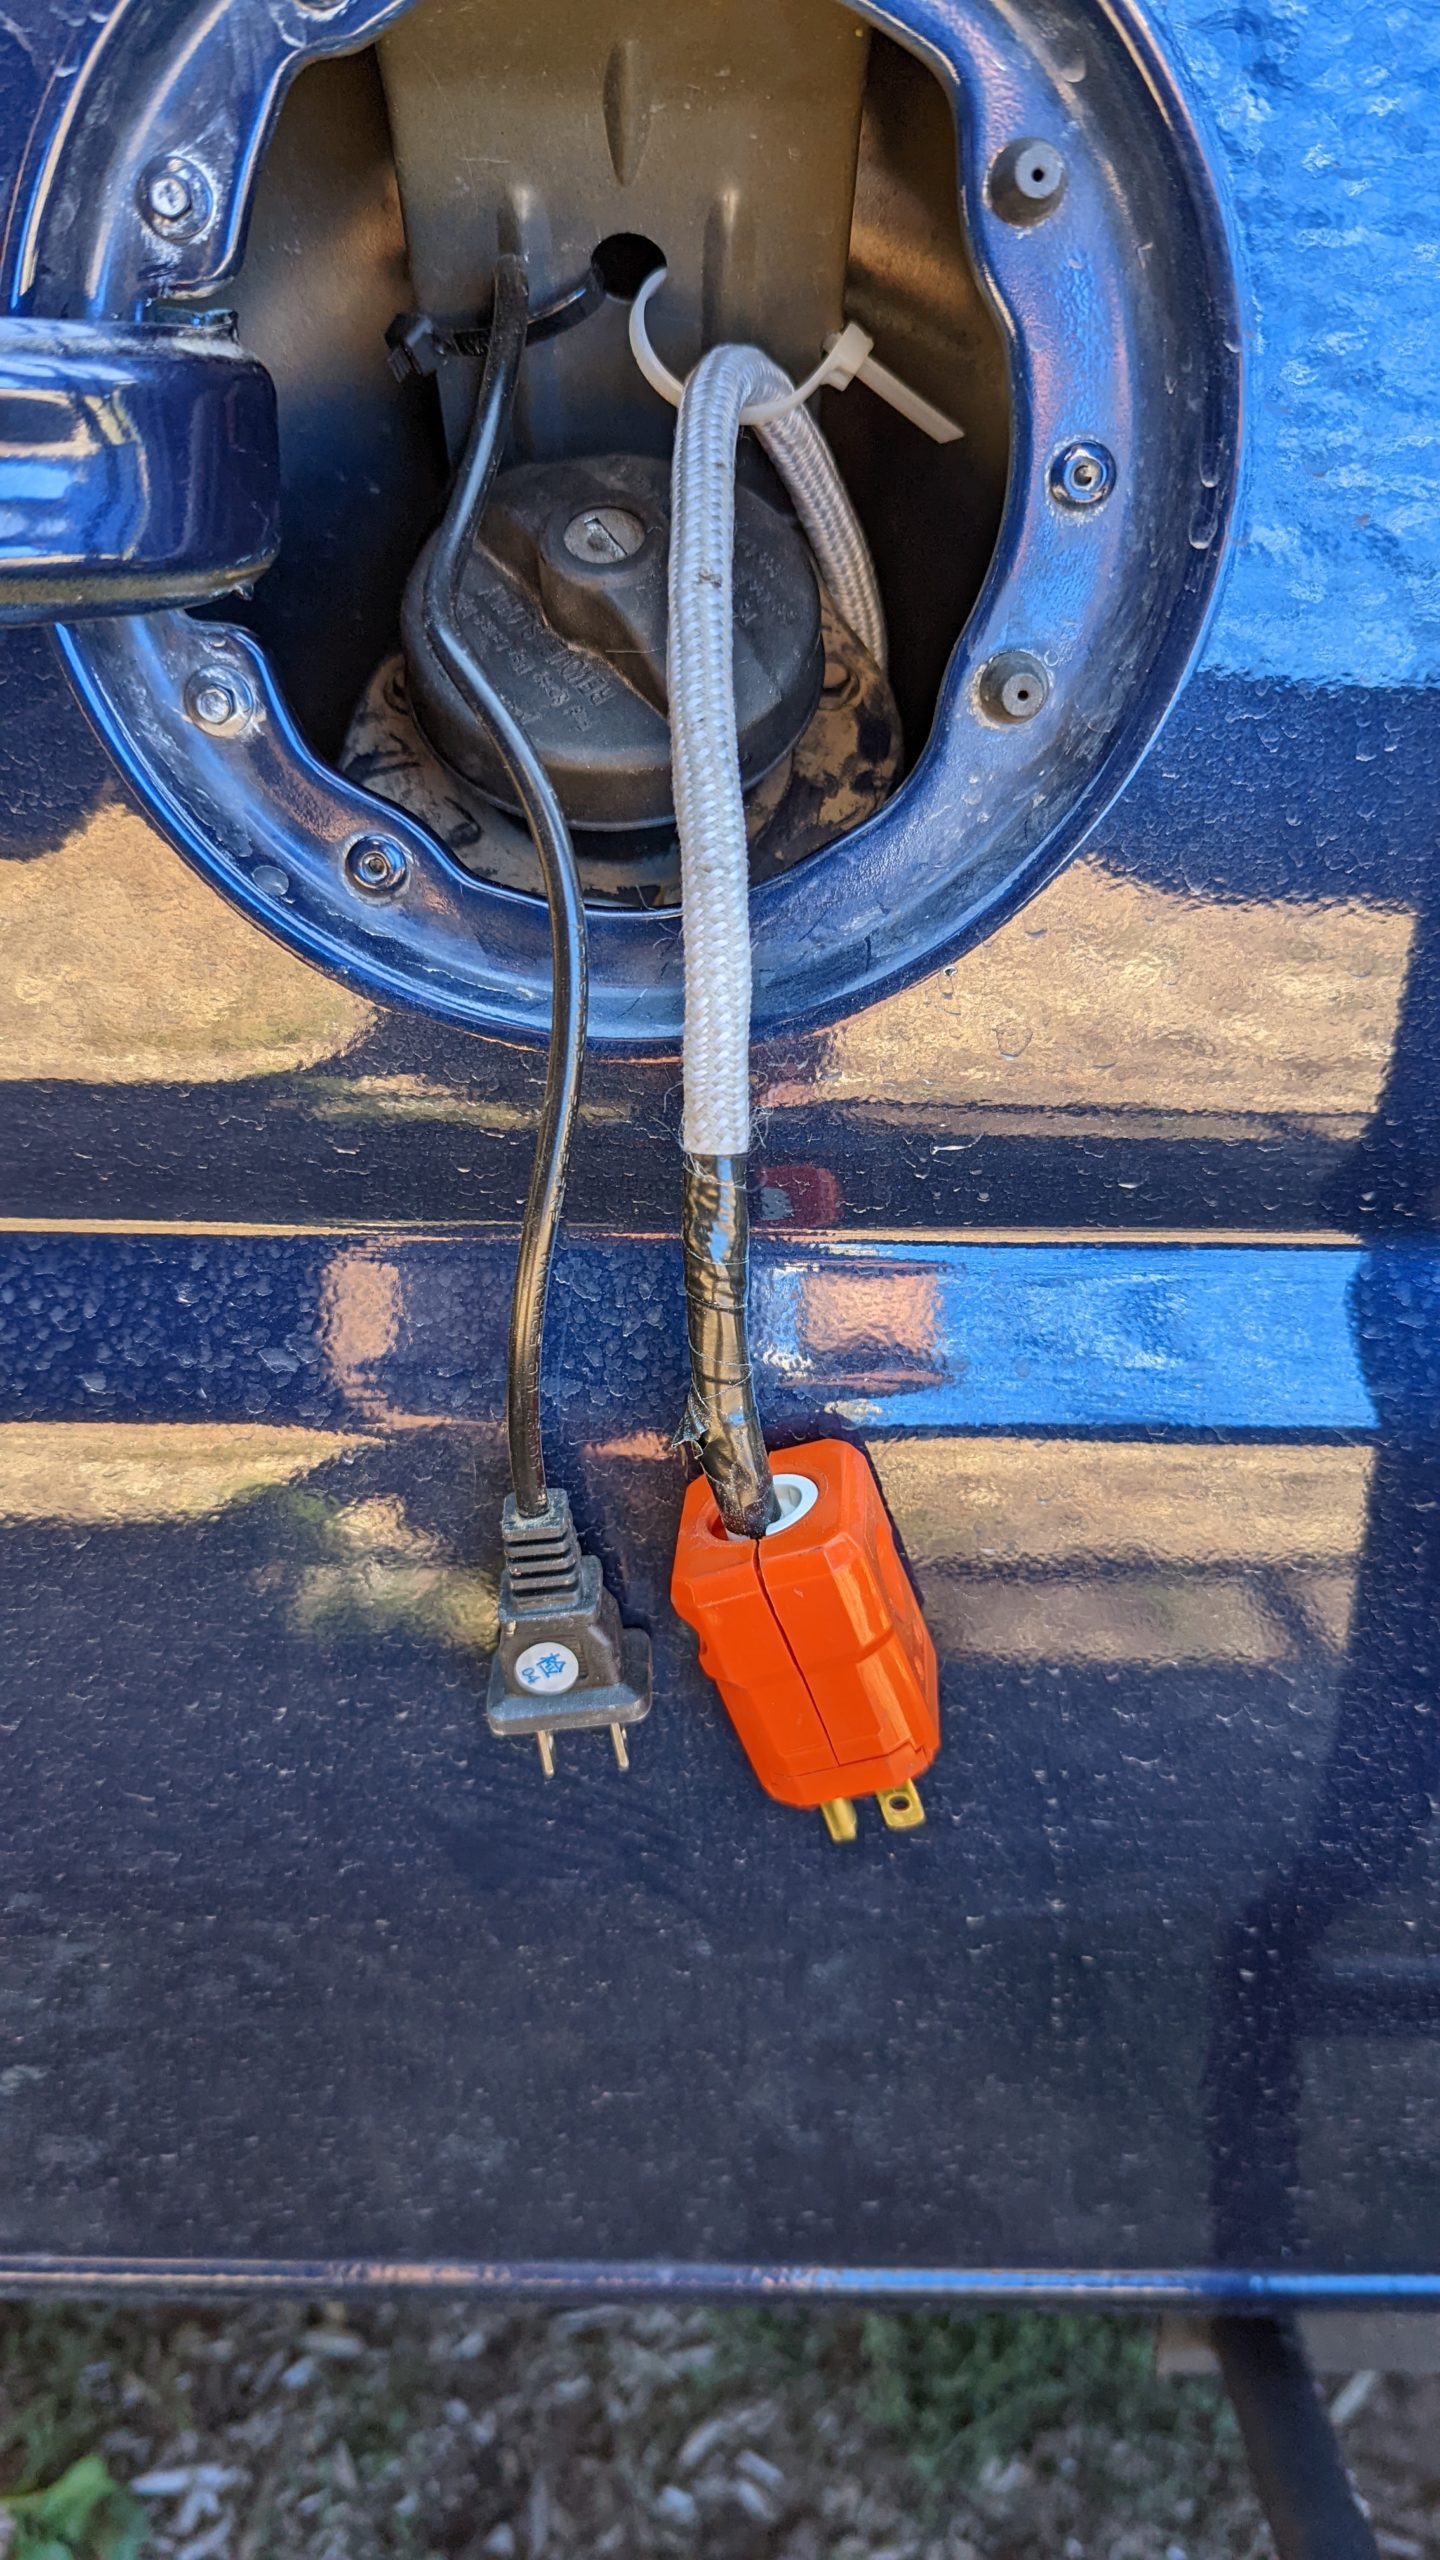
There is a trickle charger connected to the secondary battery, which would also charge the primary engine battery if the mains are switched on. It connects via 120 volt from an outlet located in the gas inlet compartment.
There is a second 120 volt extension cord in the gas inlet compartment that is installed inside the vehicle to power any 120 volt appliances when the vehicle is parked and plugged in.
DC to AC Inverters
We keep one inverter connected and next to the the power panel and which runs the satellite modem/router and all other plugin electrical devices, like phones. We ran an extension cord to the front dashboard to plugin in devices from there. A second inverter is connected and next to the rear 12-volt battery, which can run 120 volt appliances from the rear of the vehicle out the back doors. It supplies 1000 watts to power a ski waxing iron or other tools or appliances.
Internal Lighting
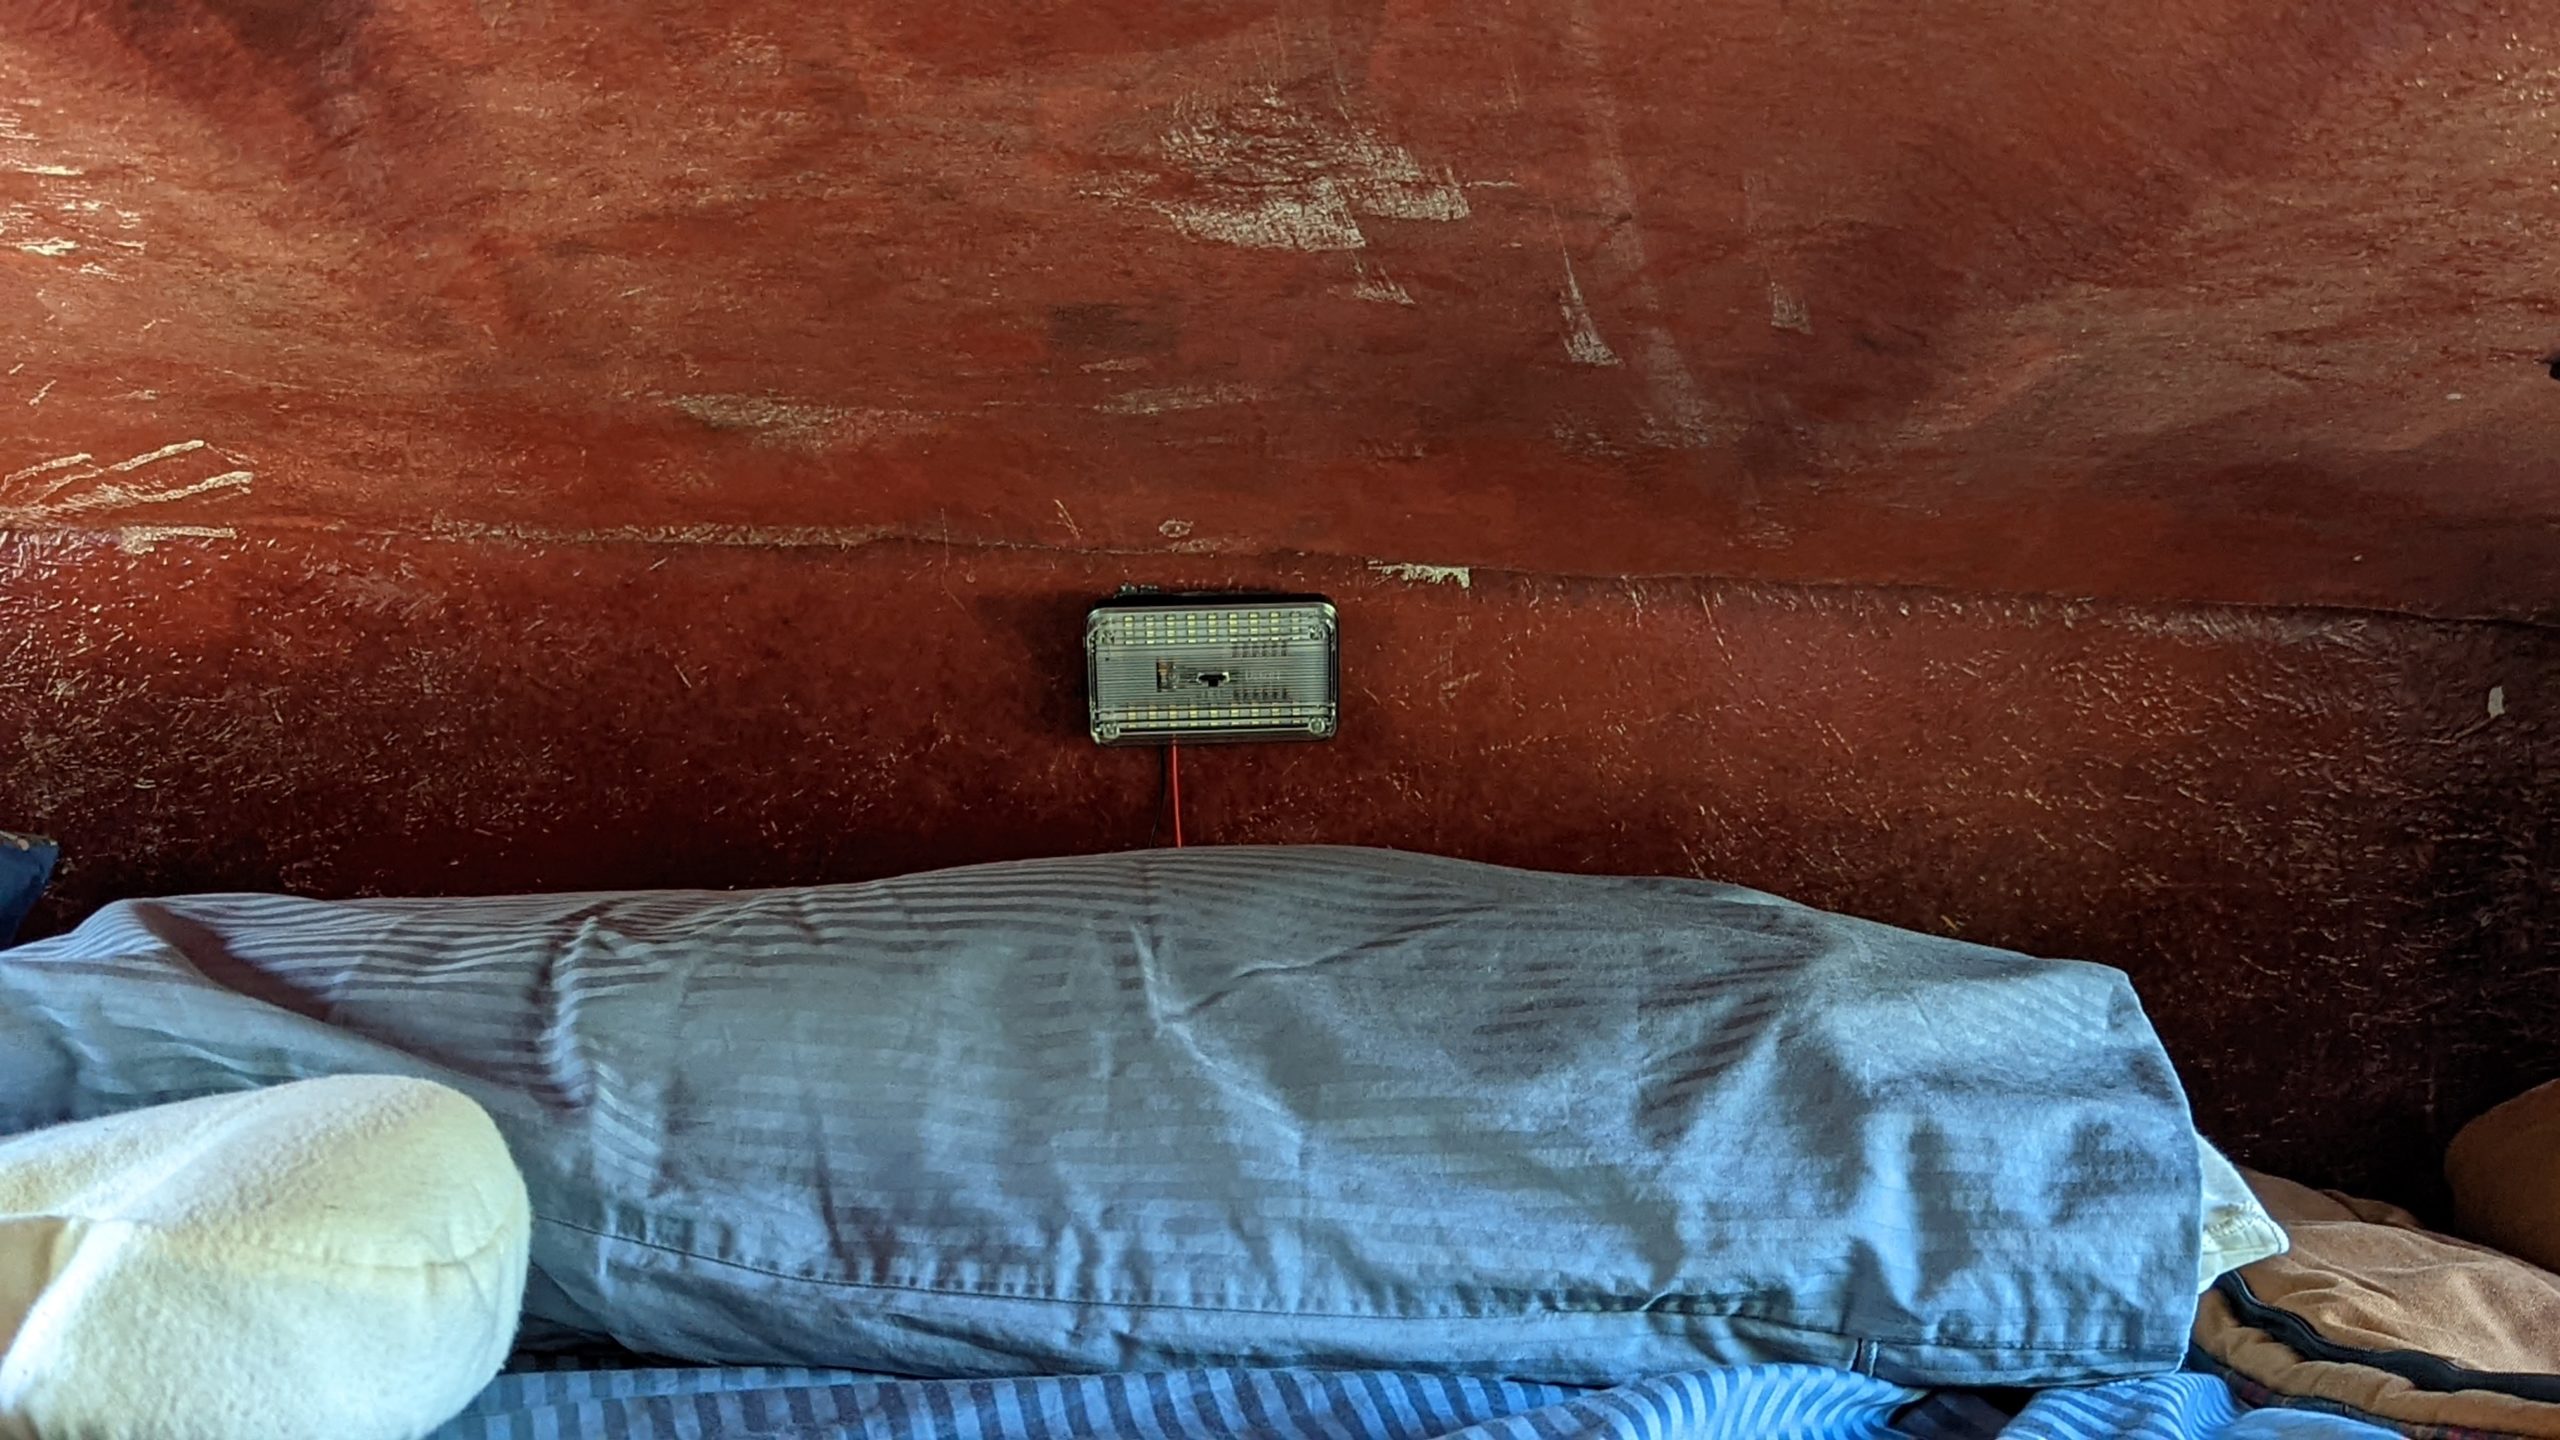
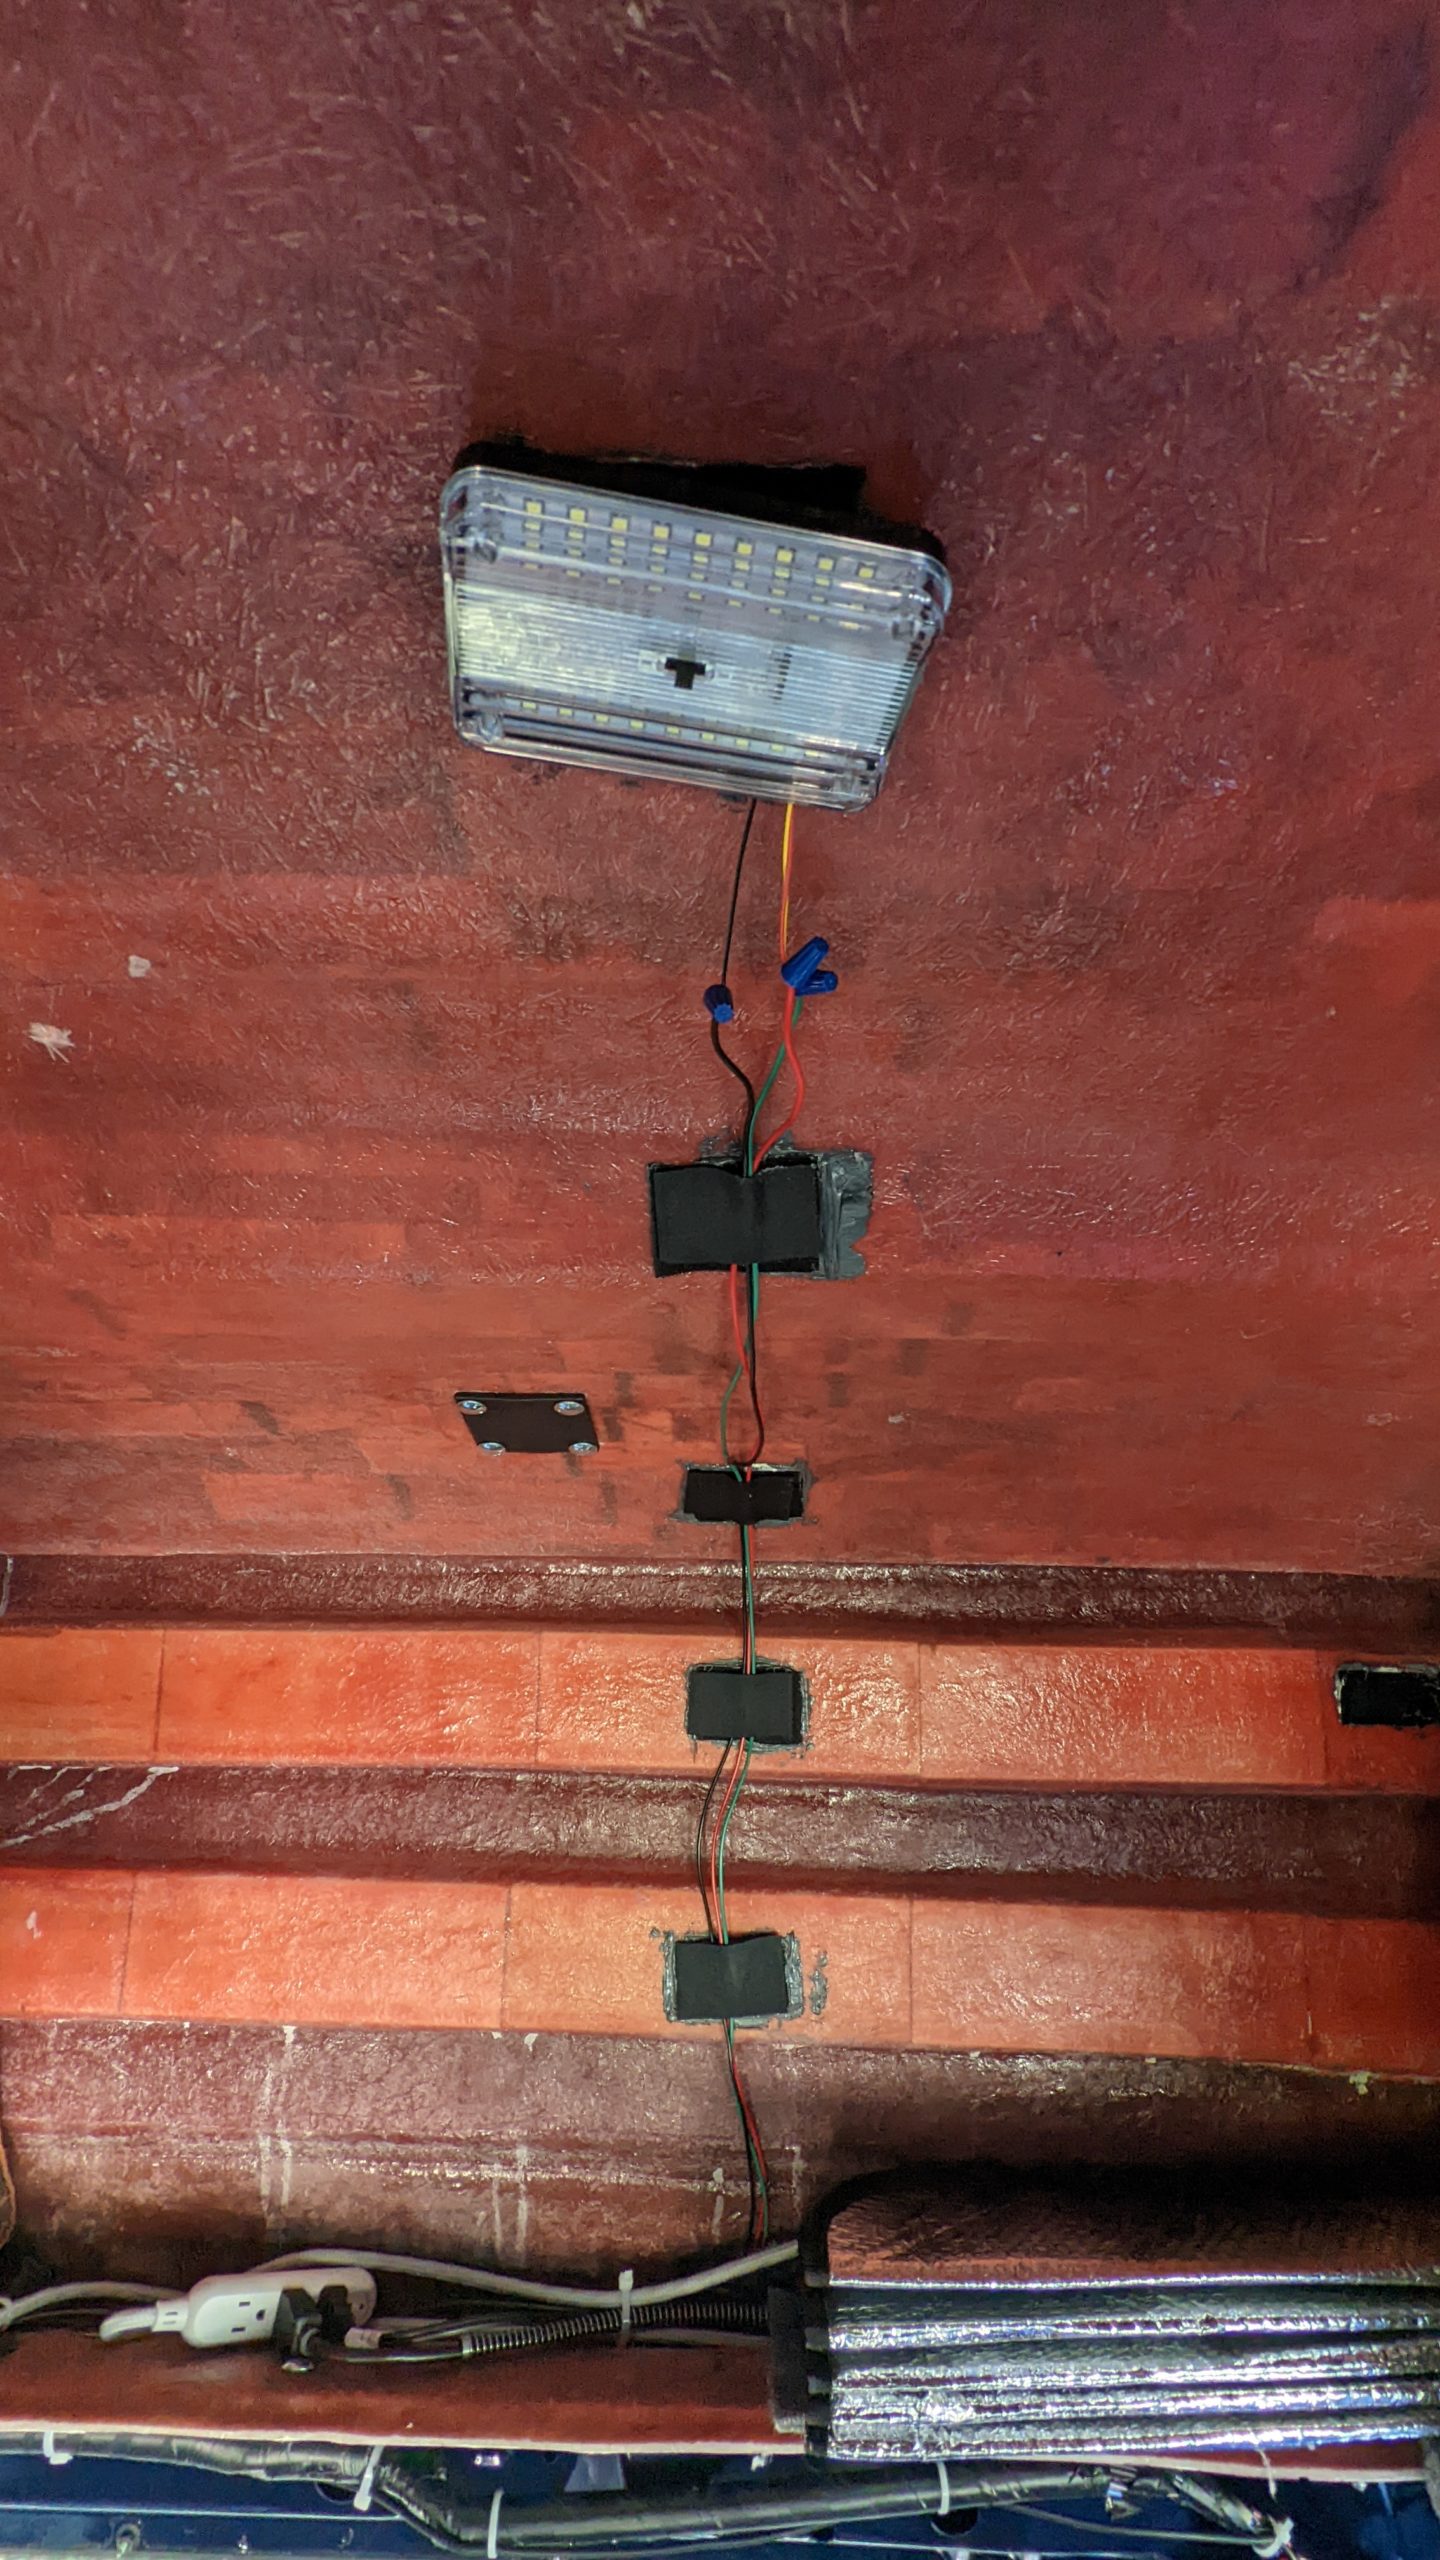
Internal lighting and any other electrical conduit is held in place via velcro that is glued to the sidewalls. Should we ever want to relocate electrical, the velcro makes it easy to do so.
WIFI
WIFI is integrated into the satellite modem.
Exterior Electrical: CB Antenna, Lightning Rod, Satellite Dish, Solar
Exterior electrical includes a rear camera, CB antenna, and a 30 inch lightning rod.
The CB antenna and lightning rod are stored horizontal for travel and can swivel up for use.
Since the top metal roof rack is attached to the metal frame of the vehicle via the ladder, the entire structure acts like a faraday cage to protect the vehicle from lightning strikes. The ground rod is attached to the front bumper via conduit and stored inside the front bumper storage area and can be taken out and placed on the ground when needed to help reduce static electricity buildup, which could cause a ground-to-cloud connection and initiate a lightning strike.
The Starlink satellite dish provides internet connectivity and is stored in the rear roof box. To use, we just pull it out, slide it into the mount and turn on the modem.
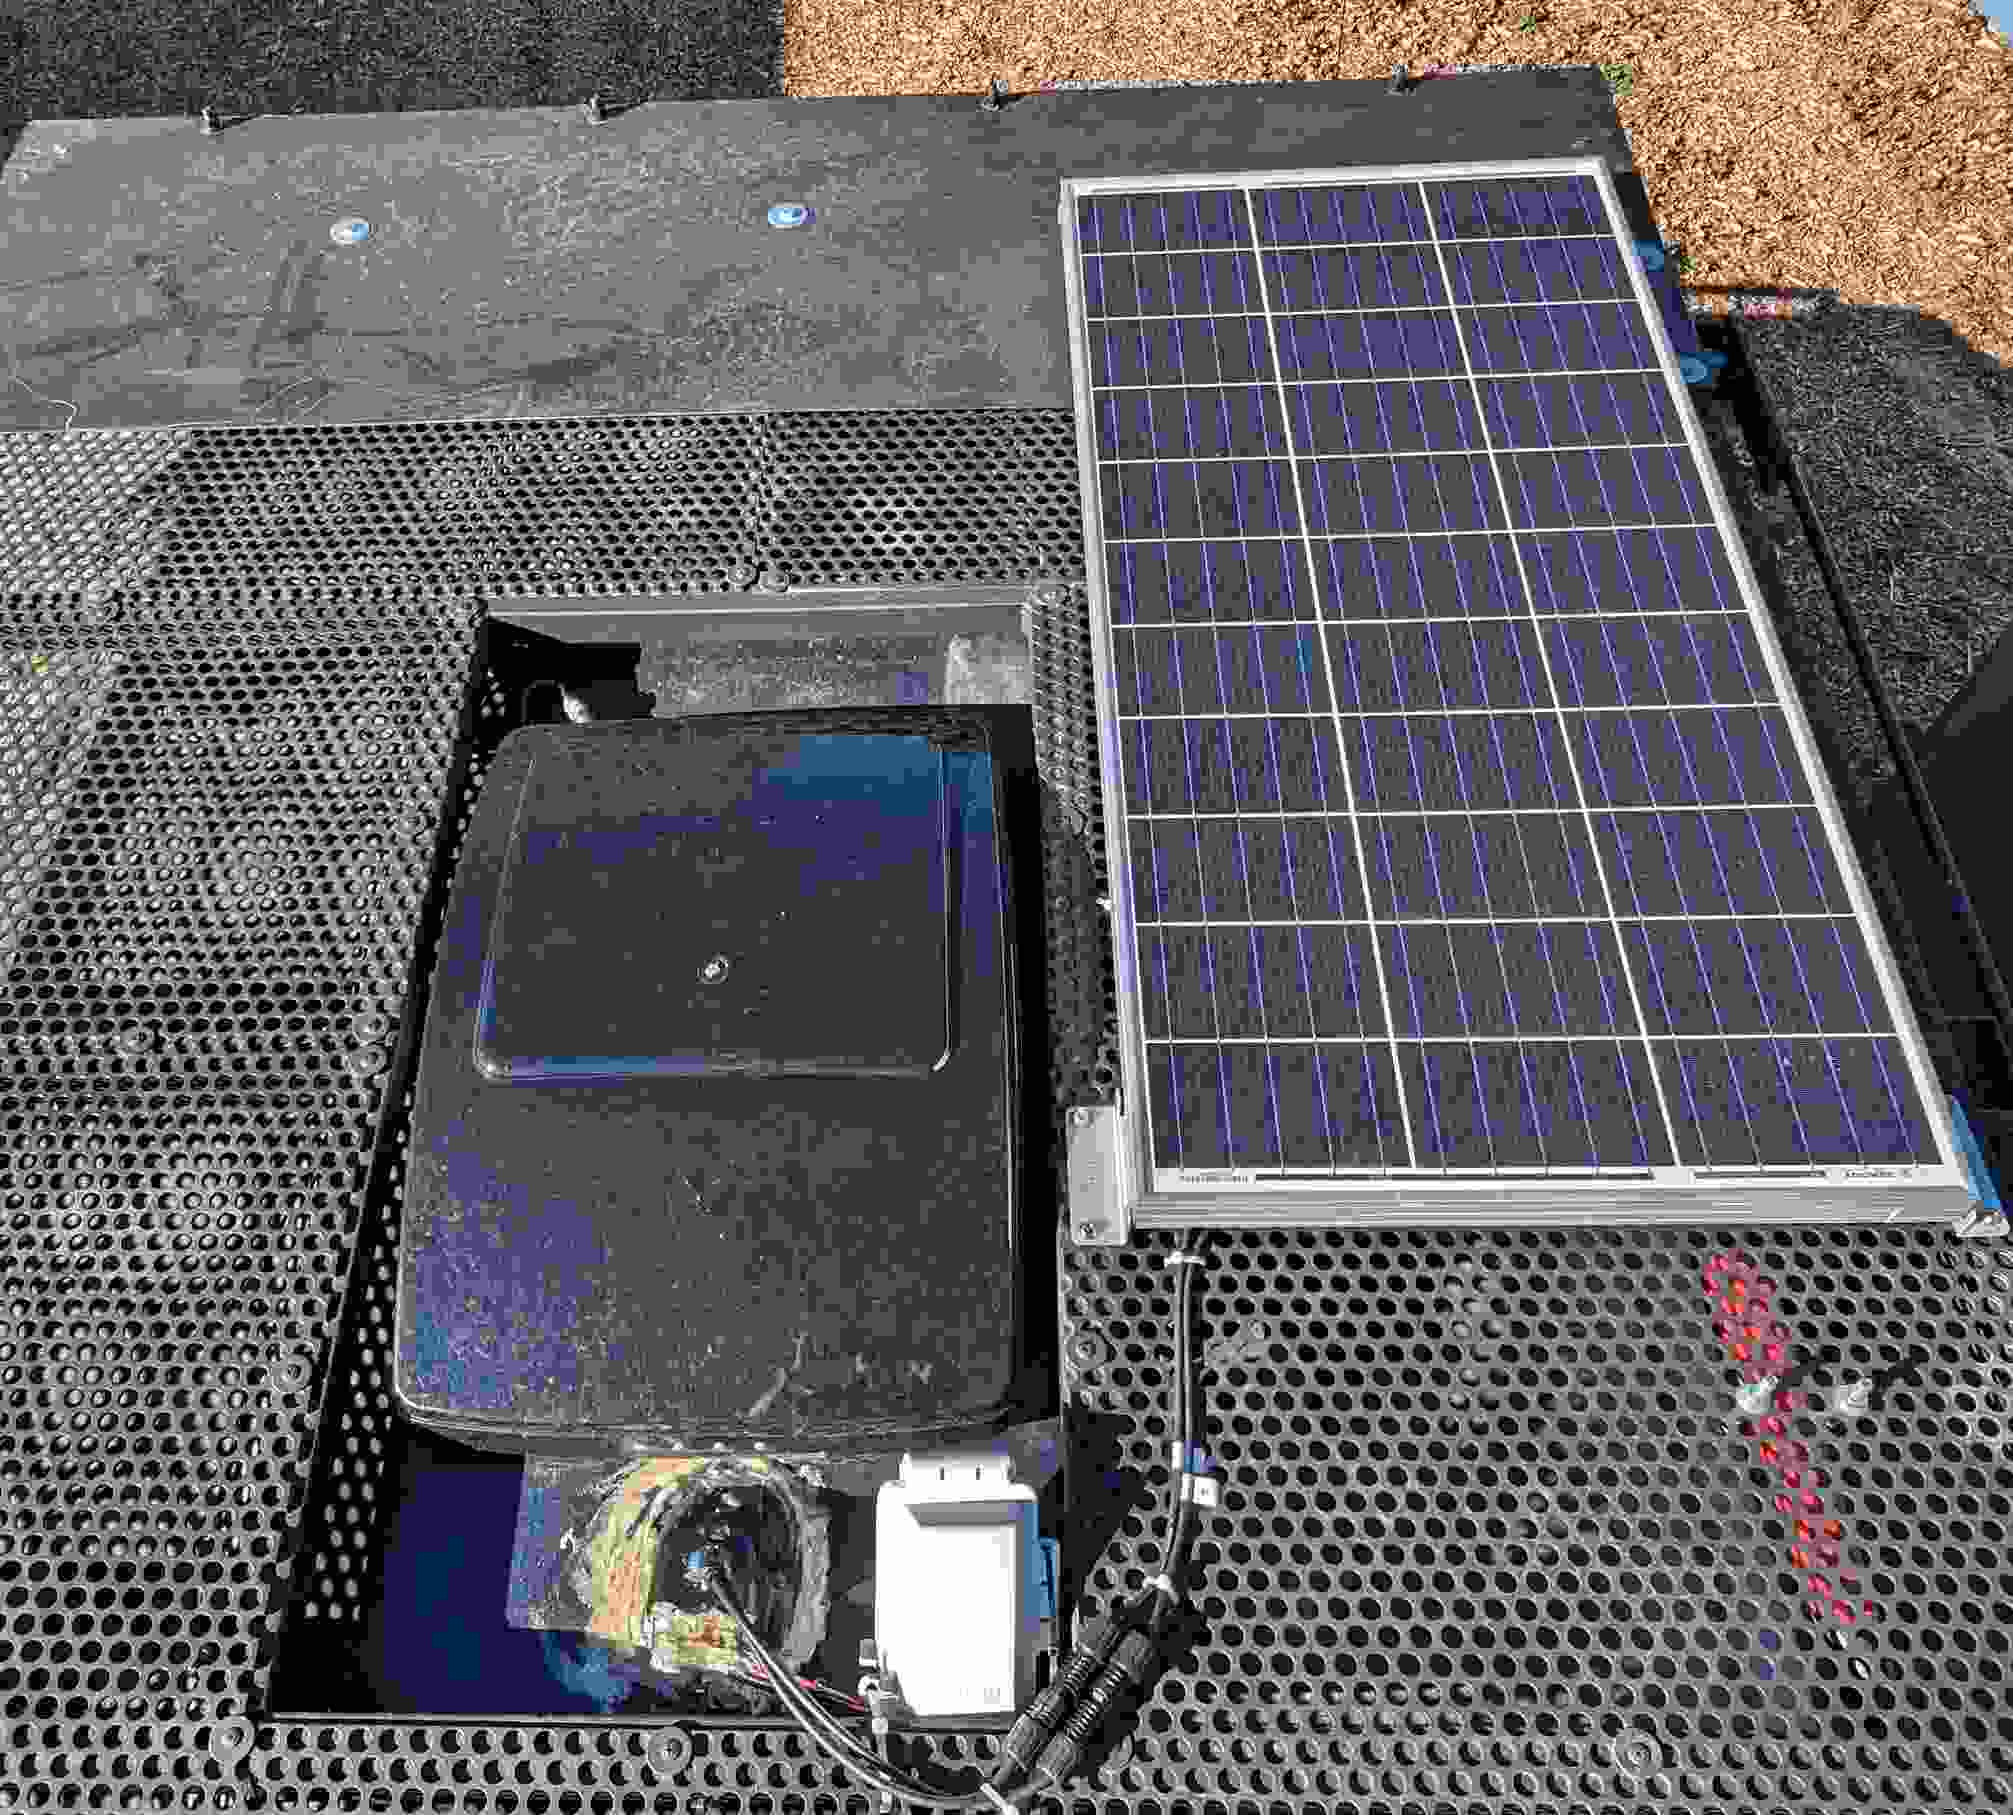
Housing covers the hole through the ceiling where the electrical runs from inside to outside. We use standard exterior silicon to seal it in place. Using the silicon makes it easy to break it back apart if needed (like adding more electrical fixtures to the outside of the vehicle) and reseal it with more silicon.
We have a single 100 watt solar panel that charges the batteries. We don’t think we need more than this, but we could add up to 3 panels based on the maximum continuous charging allowed for our battery setup.
Auto Alarm
We have a vehicle auto alarm with mobile connectivity and GPS tracking that notifies us if it sets off.
Mobile Base Station
The end result is flexible platform to do a whole variety of things.
Local Use
The interior is pretty flexible for us to do things like pick up lumber and supplies, add a seat to carry more people and load in the dog creates. The rear hitch carrier can accommodate gas cannisters or other exterior items and does not have to be removed when using our trailer. Sometimes one of us may be out for a full day with work meetings and the van setup is ideal to work, eat, nap, or whatever between meetings.
Gear
We use to keep a lot of gear in the vehicle to minimize having to pack and unpack for day or overnight trips (hike and bike equipment, rock climbing gear, ski equipment in winter, etc.). But now we gear-up the vehicle based on season and add as needed for specific day or overnight trips.
We have a large first aid kit for human and dog use, which also contains other items that we have found over the years to be helpful. The kit stays in the vehicle at all times. It is kept in a 100 liter pack so we can grab it and carry on our back if needed. But it is much too big and overkill for general activities, so we have divided it up into smaller pieces: when skiing or biking there is a small kit; for hiking with the dogs, we take the small kit + a second bag with other items. Other items that stay in the main kit include extra liquids, meds and salves, and full gas masks with cartridges that are important to have if we ever get caught in a wildifre situation or even just happen to be in an area where heavy smoke has drifted in from a wildfire.
Tools and Parts
We keep a big array of basic tools to make repairs to the van or trailer or our equipment when on the road. We also keep spare van parts for items that could fail without warning, rendering the van undriveable, and include an alternator, starter, belts and hoses, water pump, radiator thermostat, and other items small items. The difficulty is not getting items replaced or repaired, but getting parts in a timely manner. If something fails on a trip, as long as we have the parts, we might be able to do it ourselves or get the vehicle to a mechanic who can do it same day.
Kitchen
We have a full kitchen setup in its own box, but we don’t use it much as we prefer to precook and throw in the fridge/freezer. As a result, the kitchen box mostly stays in storage and not in the vehicle.
Bath
We use a porta pottie and in place of showering, we have a fold-up kiddie pool that can be used along with a camel back hung overhead to provide gravity-fed water. But honestly, we have never used it and rarely take it along. If we need to shower, we can stop at RV parks, which are numerous.
Other Items and Notes
Glues
We tested several glues and resins over the years and found that the only one that reliably works is JB Weld Original Formula. It does not soften or degrade from interior heat buildup or exterior sun exposure. It is great for gluing to metal and fiberglass surfaces. For glue together insulation materials, we use 3M 90 Spray Adhesive.
Gas Mileage and Engine Power Changes
Pre-upfitting mileage averaged 15 per gallon. Now it is 11.5. With the extra weight, bigger tires and more friction from the additional moving parts in the drivetrain, we have noticed a small reduction in power driving on highways with longer and steeper grades. Not a lot, but some, but which was partially offset by changing the muffler that gave us back some power.
Hazards
We keep a basic carbon monoxide alarm in the vehicle to protect against any buildup. It ordinarily would not from operation of the Webasto heater but if the exhaust from the heater happens to blow back into the vehicle via an open window while sleeping, that could be a problem.
We always track weather conditions, road conditions and other potential hazards along our routes and plan accordingly. And it is not just localized risk; being in the western states where we live and predominantly travel, wildfire smoke can drift across states to create poor air quality.
